
After purchasing your domain, the next step is to get a cloud server and deploy a WordPress website. Many beginners often get confused about the relationship between WordPress, cloud servers, and websites. Simply put, WordPress is a website-building tool (also known as a Content Management System), and your cloud server is the platform that hosts your website. It’s like building a house: your website is the house, WordPress is your construction tool, and the cloud server is the foundation.
Choosing a Cloud Server
Now that you understand these relationships, the next step is to choose a cloud server to deploy a WordPress website. With so many servers on the market, how do you choose?
For Cross-border Business Needs: If your website is for cross-border business, choose an overseas server to deploy a WordPress website, which can ensure access speed and user experience.
Choose Established Server Companies: Opt for server companies with a long history because stability is crucial. Even a ten-minute server downtime can cause unpredictable damage to your website if you have traffic.
Ease of Use: If you’re not familiar with backend computer operations, choose servers designed for WordPress. These typically support one-click WordPress installations, saving time and avoiding the need to hire technicians, to easily deploy a WordPress website.
Customer Support: Choose a server company with 24-hour customer support. Having professional help available when your website encounters server-related issues is essential.
We recommend Hostinger, a cost-effective and user-friendly server company. You can purchase it through this link: bdwebtek.com/hostinger, with a monthly fee of $3.9.
How to Purchase a Server and Deploy a WordPress Website
1. Visit the Hostinger Homepage
Use the following link: bdwebtek.com/hostinger
Enter the homepage and select Web Hosting to deploy a WordPress website.

2. Choose a Plan
We recommend the Business plan, which is the most popular choice. This plan allows you to create up to 100 websites with 200GB SSD storage and a monthly traffic limit of 100,000, which is more than sufficient for most B2B and B2C websites.

3. Choose the Purchase Duration
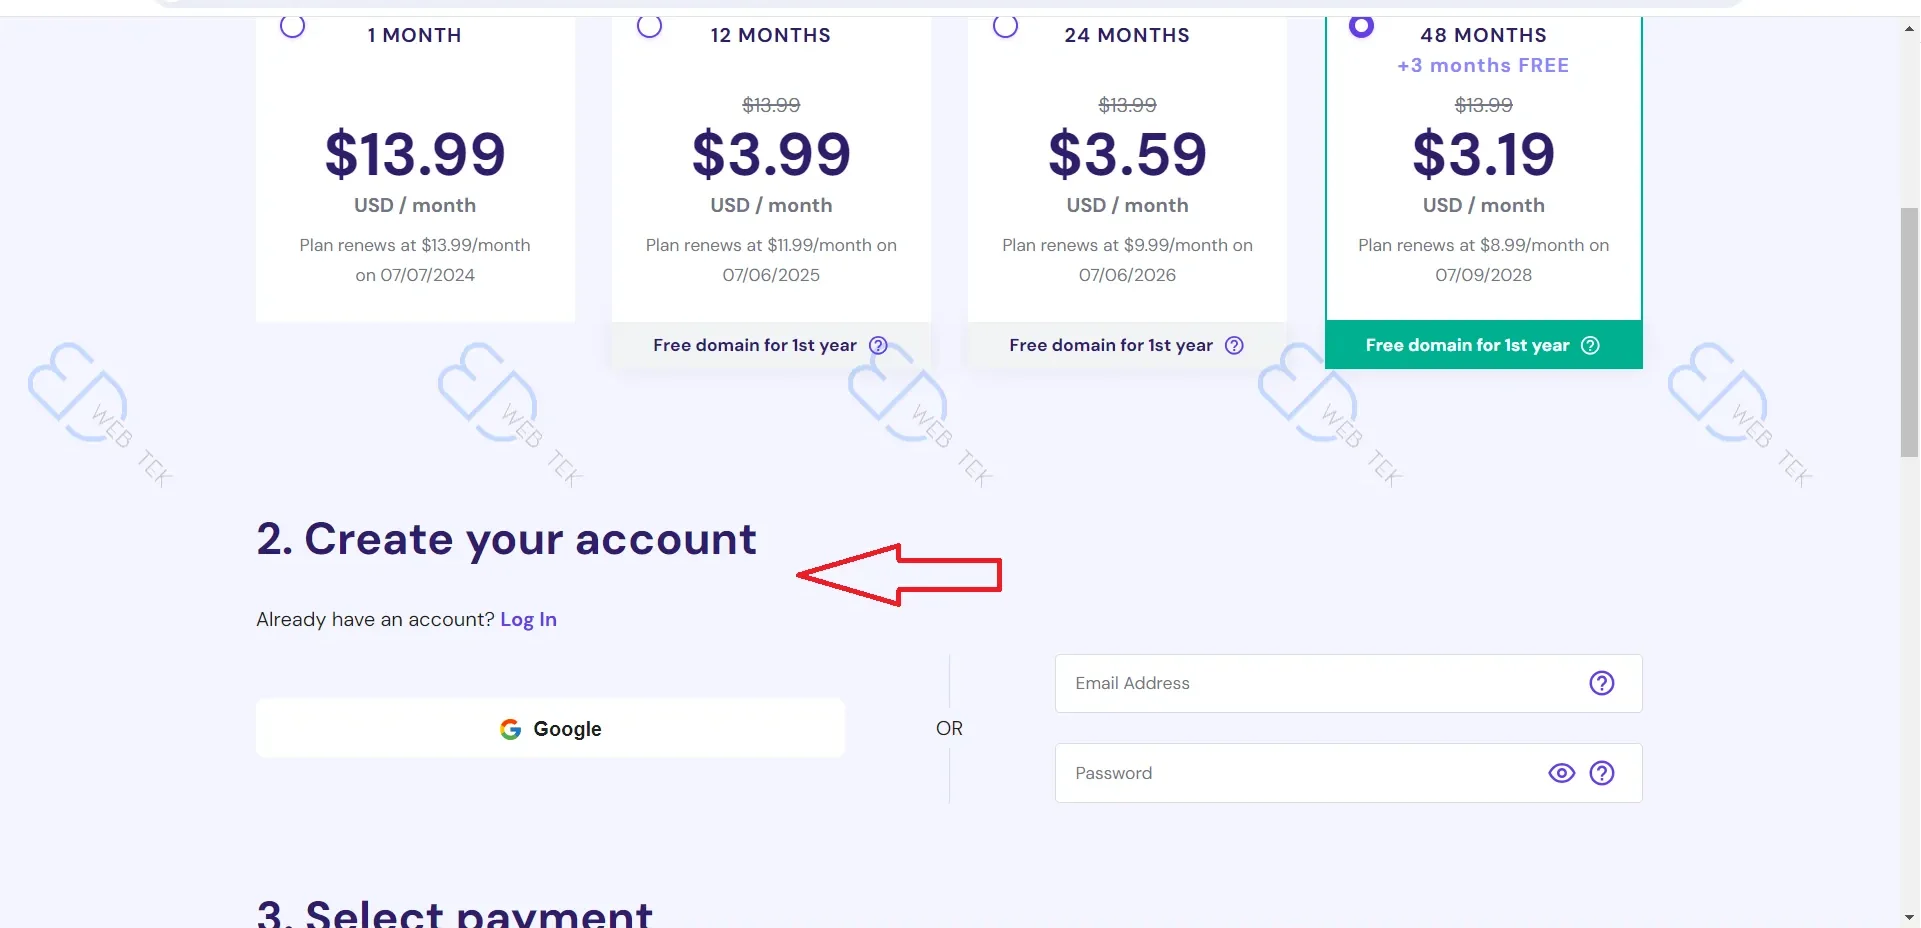
It is recommended to purchase for 48 months, as this offers the lowest monthly fee, less than $4 per month.

4. Create an Account
Ensure your IP is overseas, such as in the United States. Hostinger may redirect you to Hostinger China based on your IP location, which may have different prices.
5. Choose a Payment Method
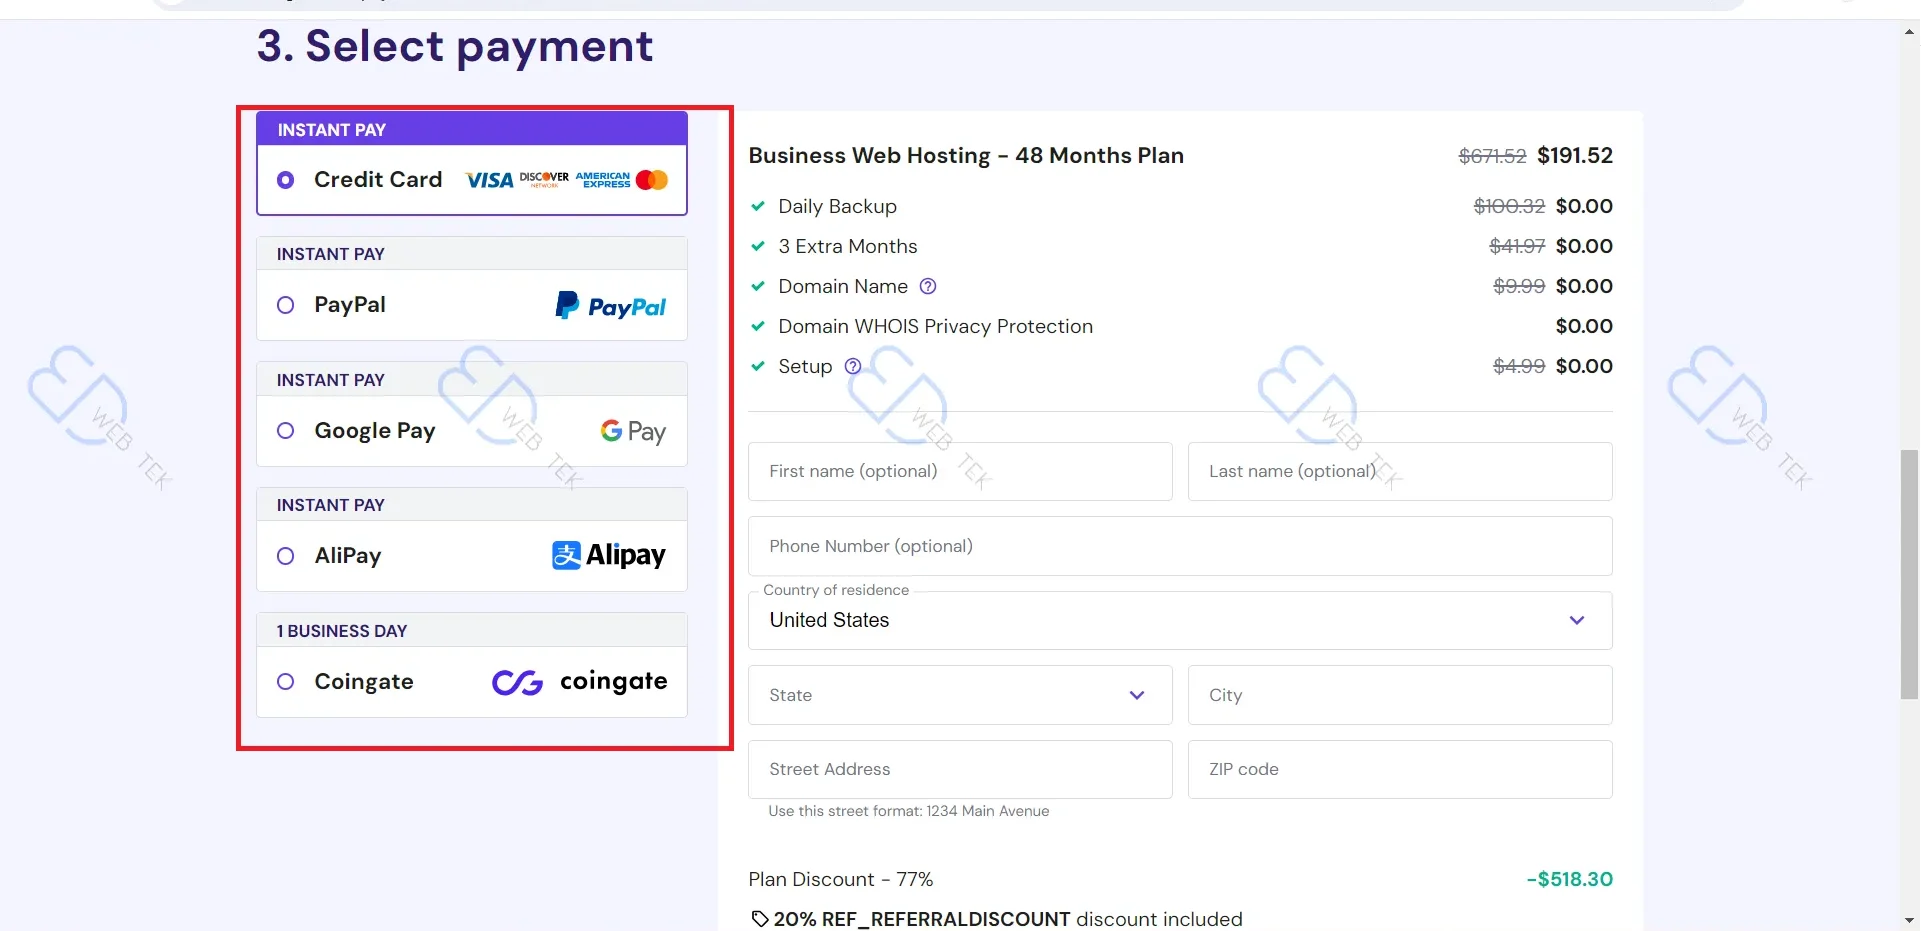
They offer various payment methods: credit card, PayPal, Google Pay, Alipay, and Coingate, making it convenient for people worldwide to purchase.
6. Payment
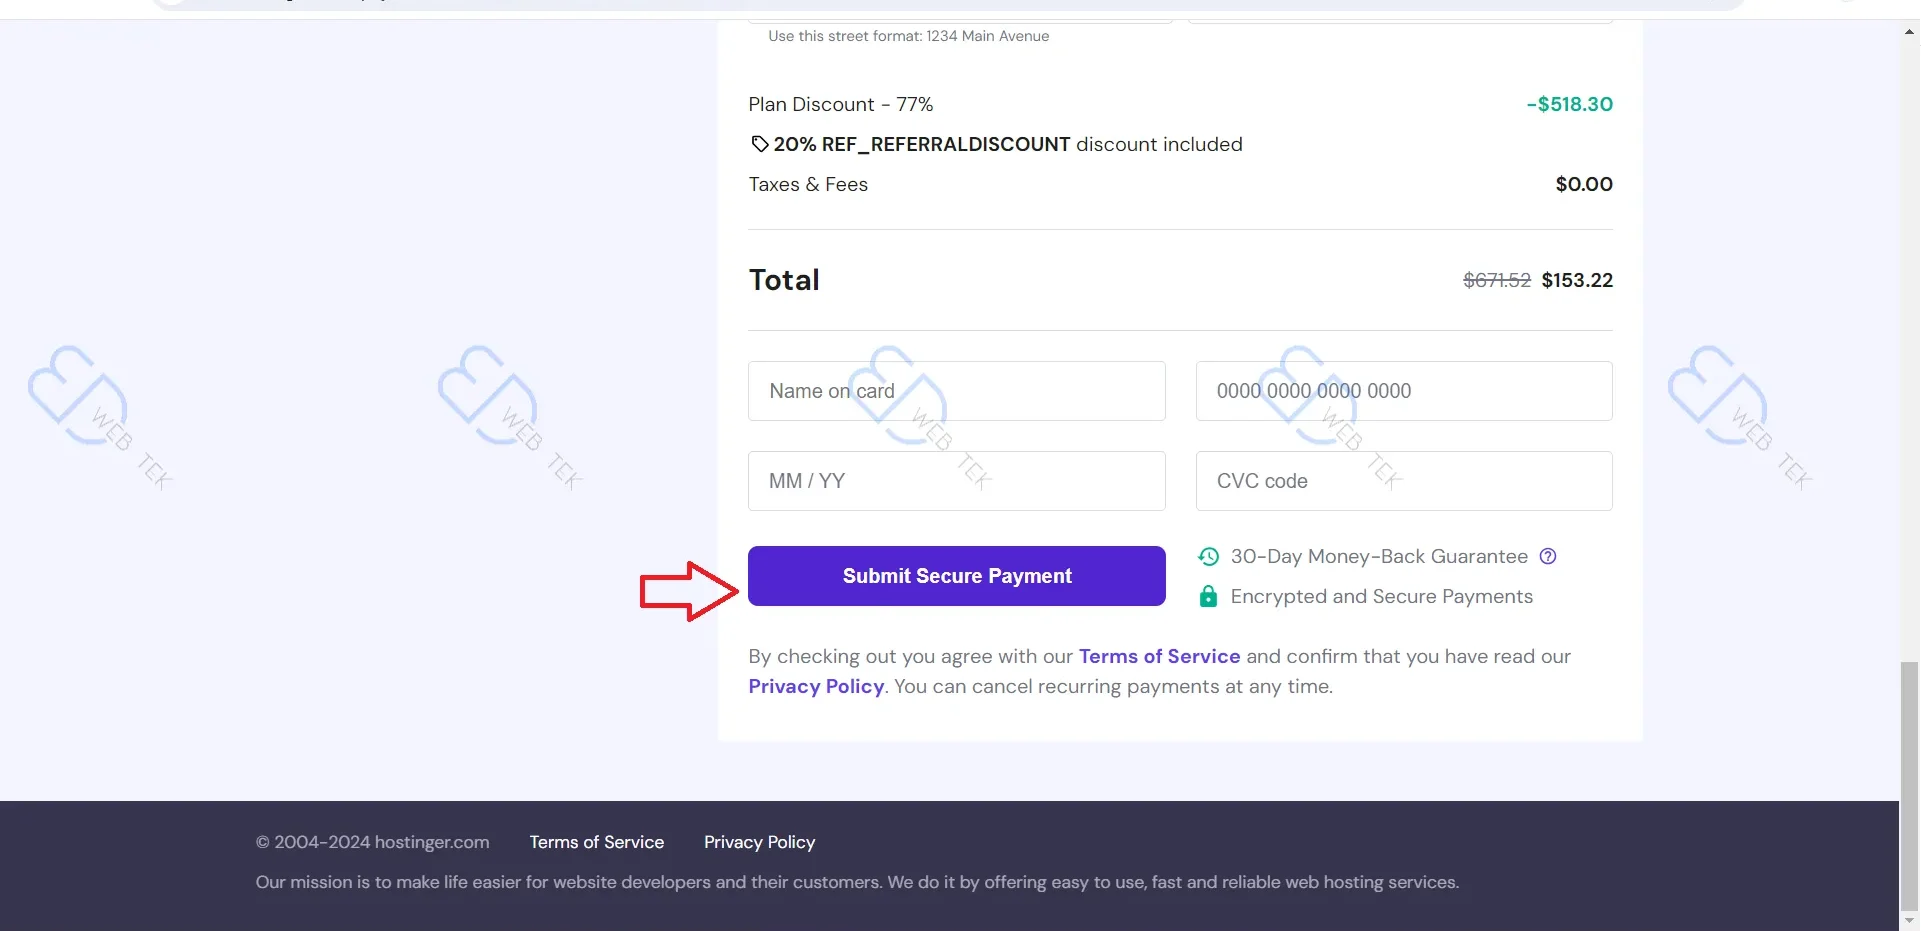
Fill in the information and submit the payment.
7. Log in to Hostinger
You will see that there are no websites in your server yet. Click Setup to start creating a website.

8. Create a Website
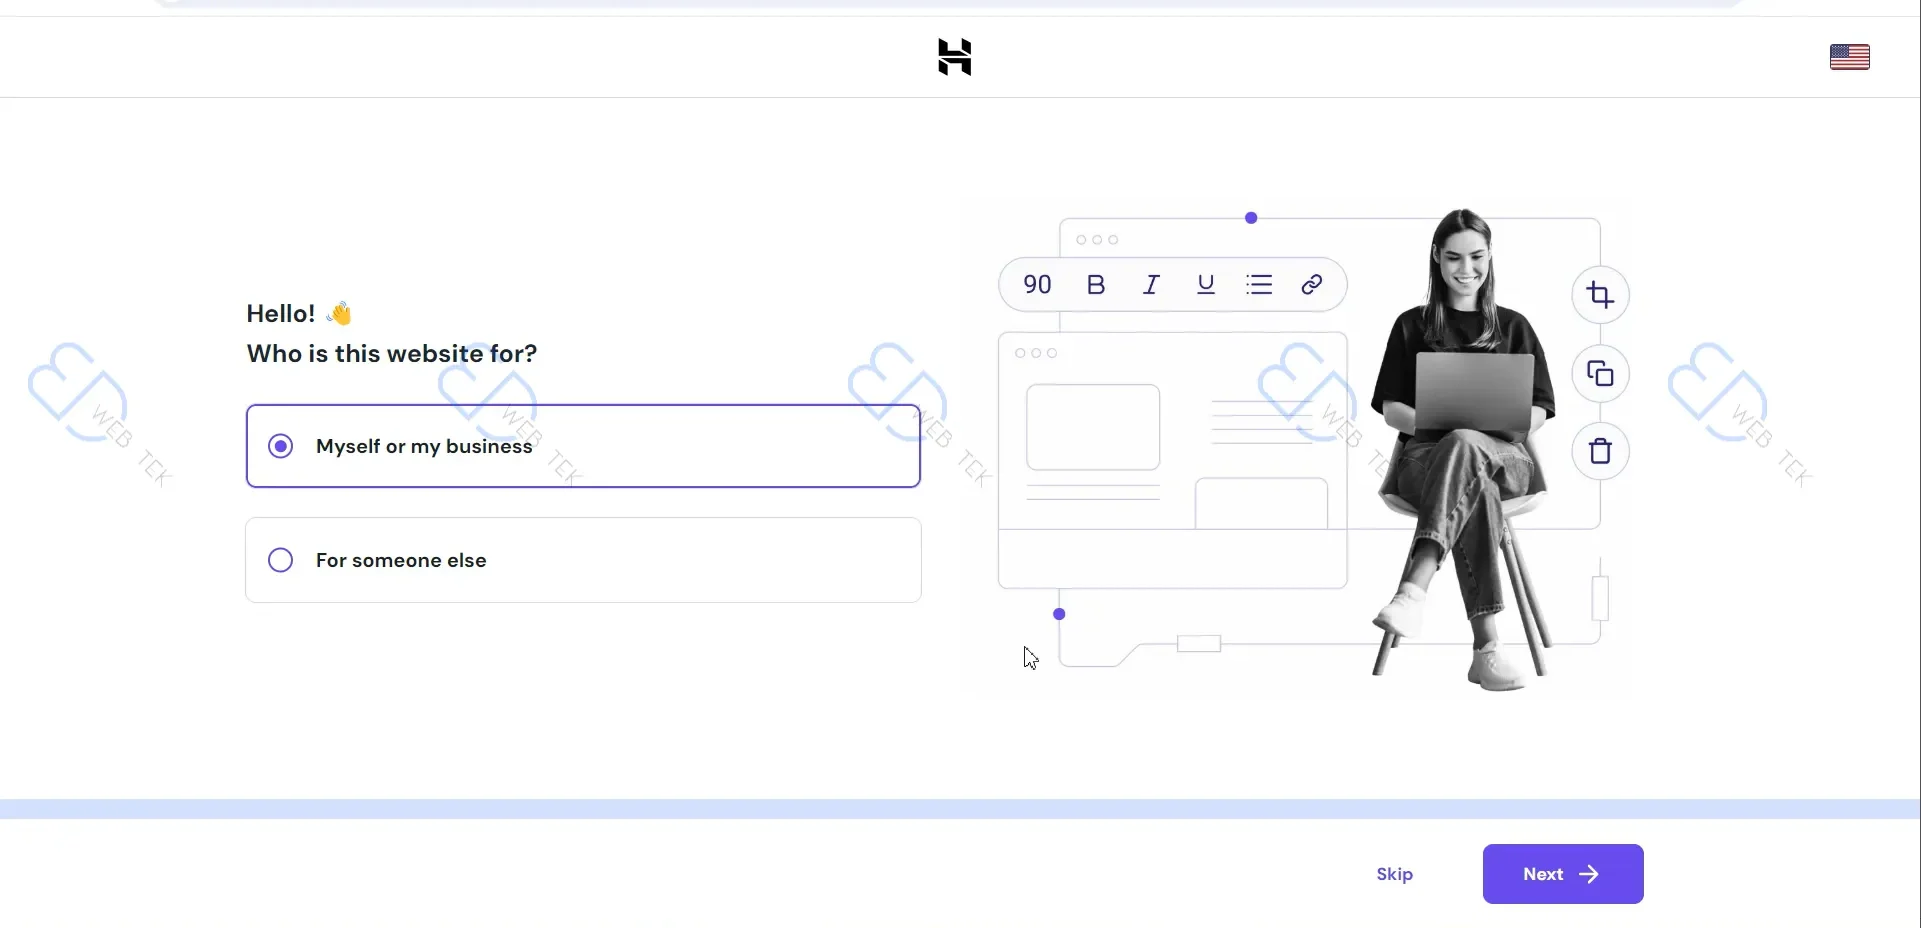
Select the first option to create a website for yourself and click Next.
9. Choose to Create a New Website
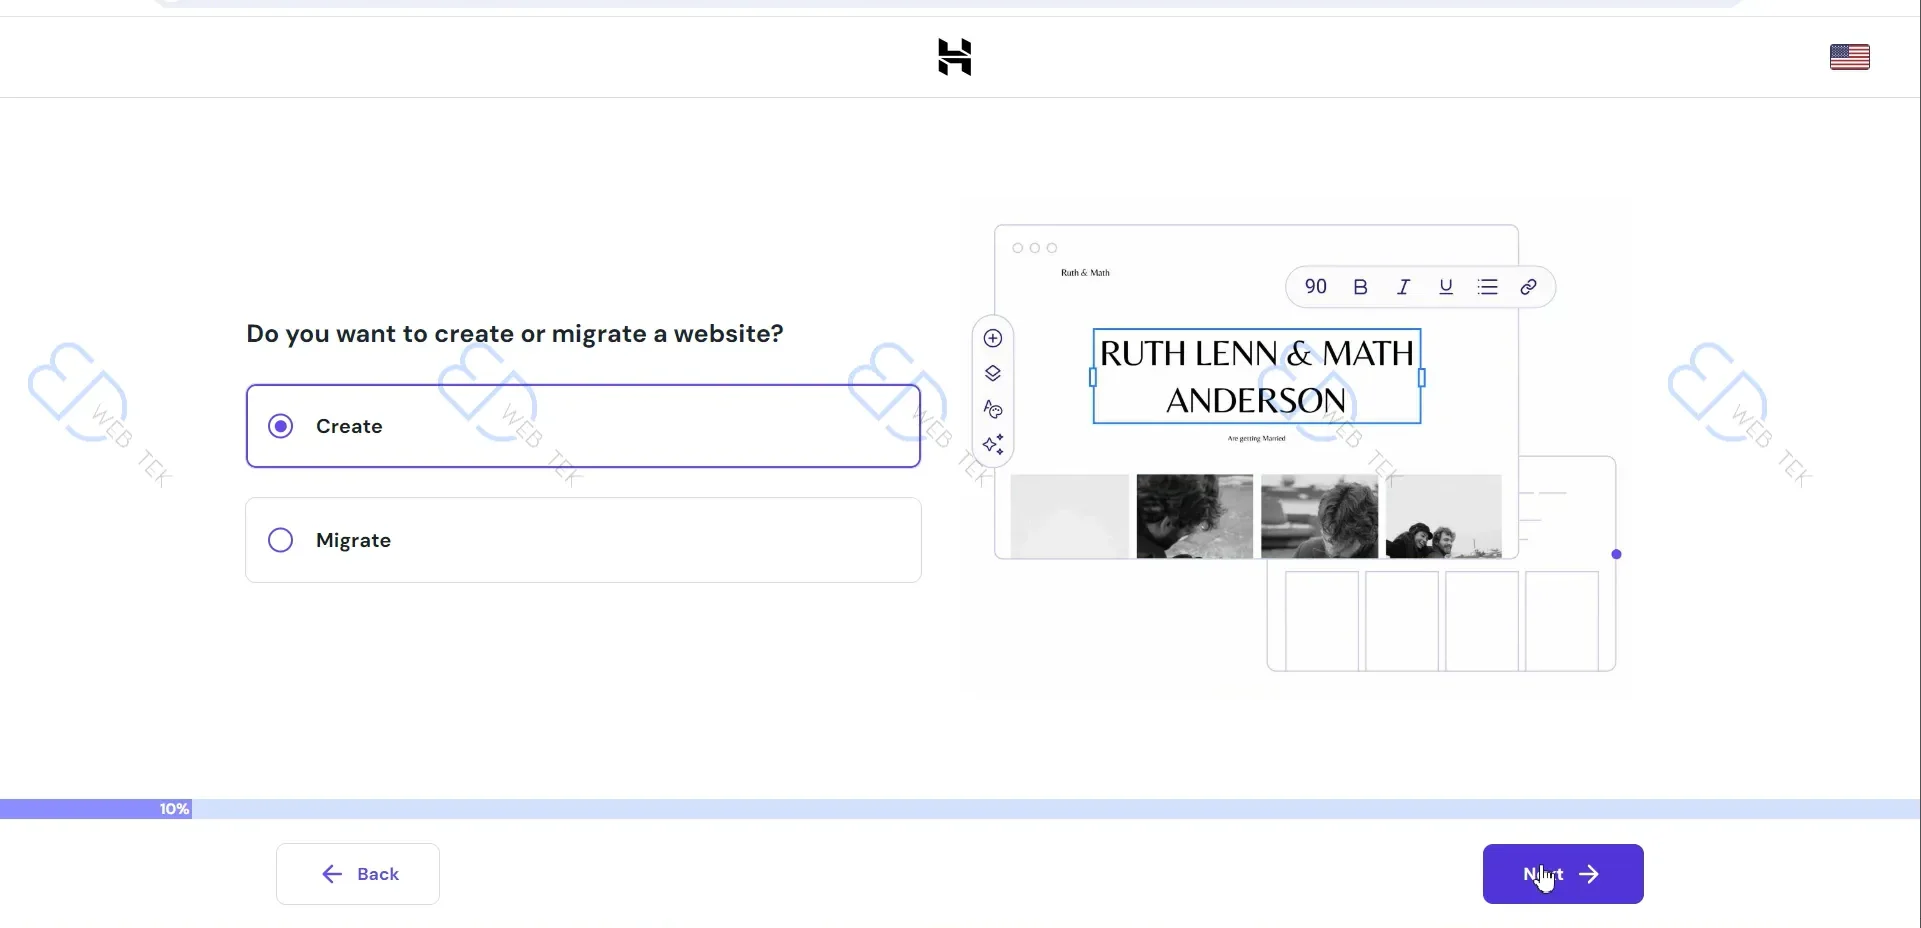
Choose whether to create a new website or migrate one from elsewhere. If it’s a new website, select Create and click Next.
10. Select WordPress
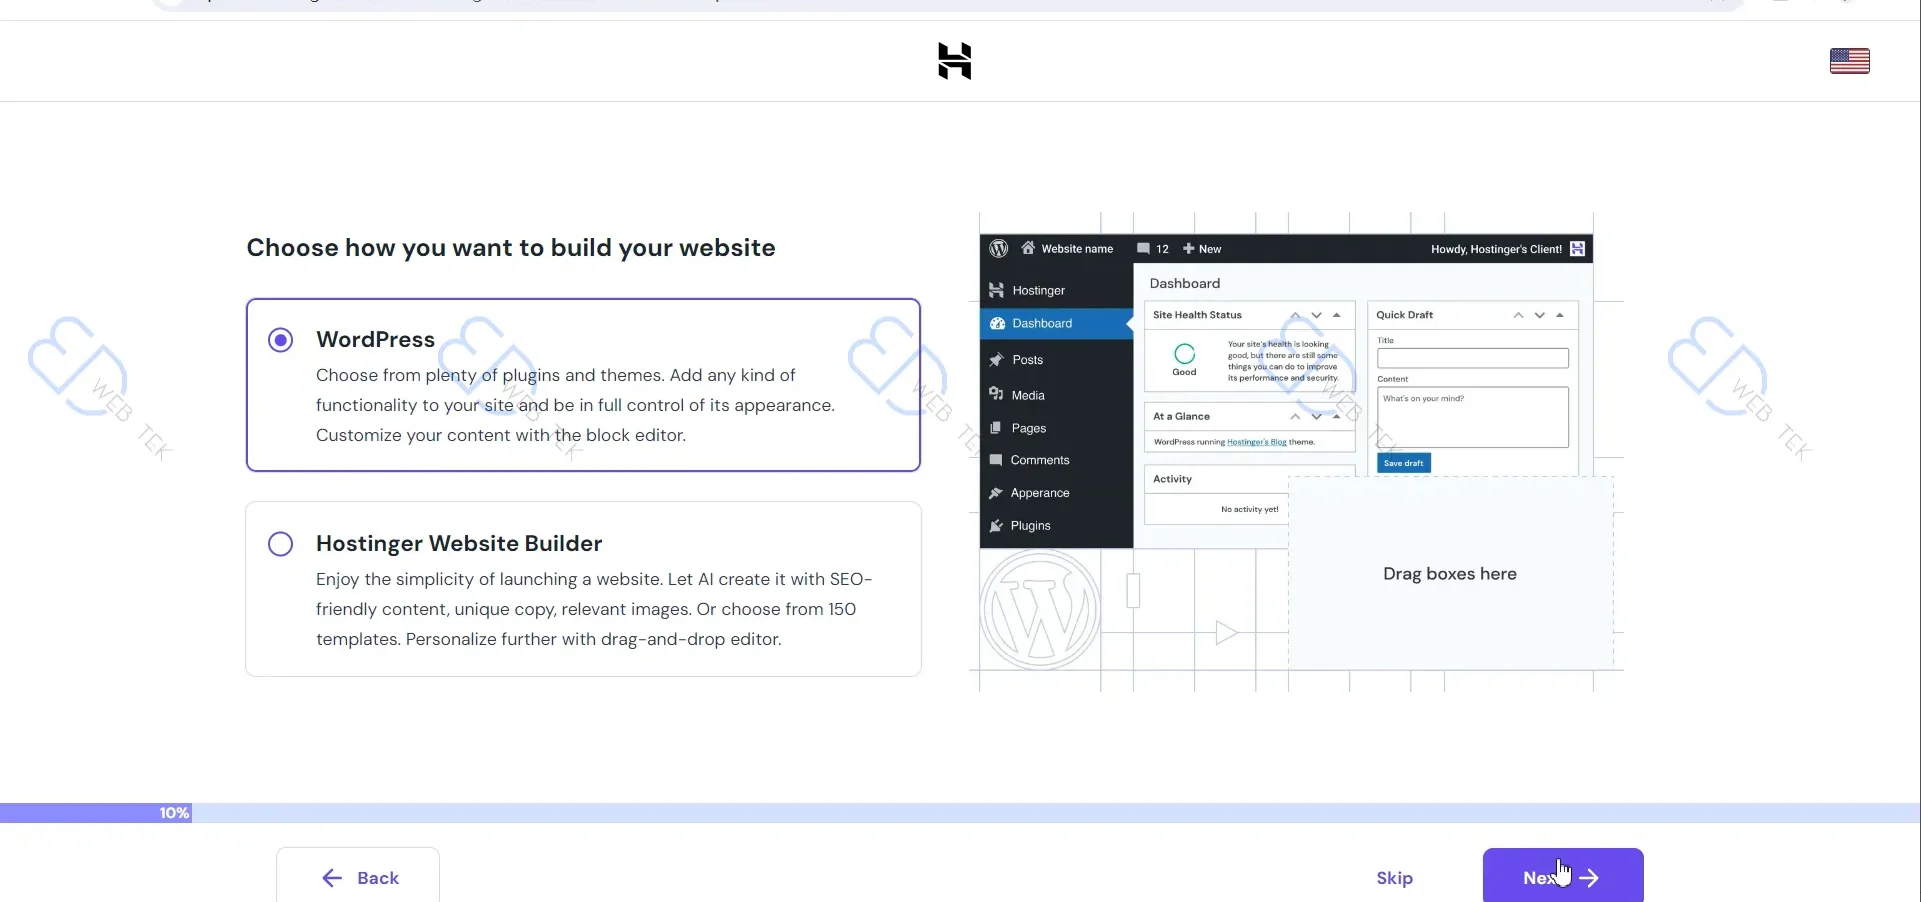
Select WordPress and click Next.
11. Create WordPress
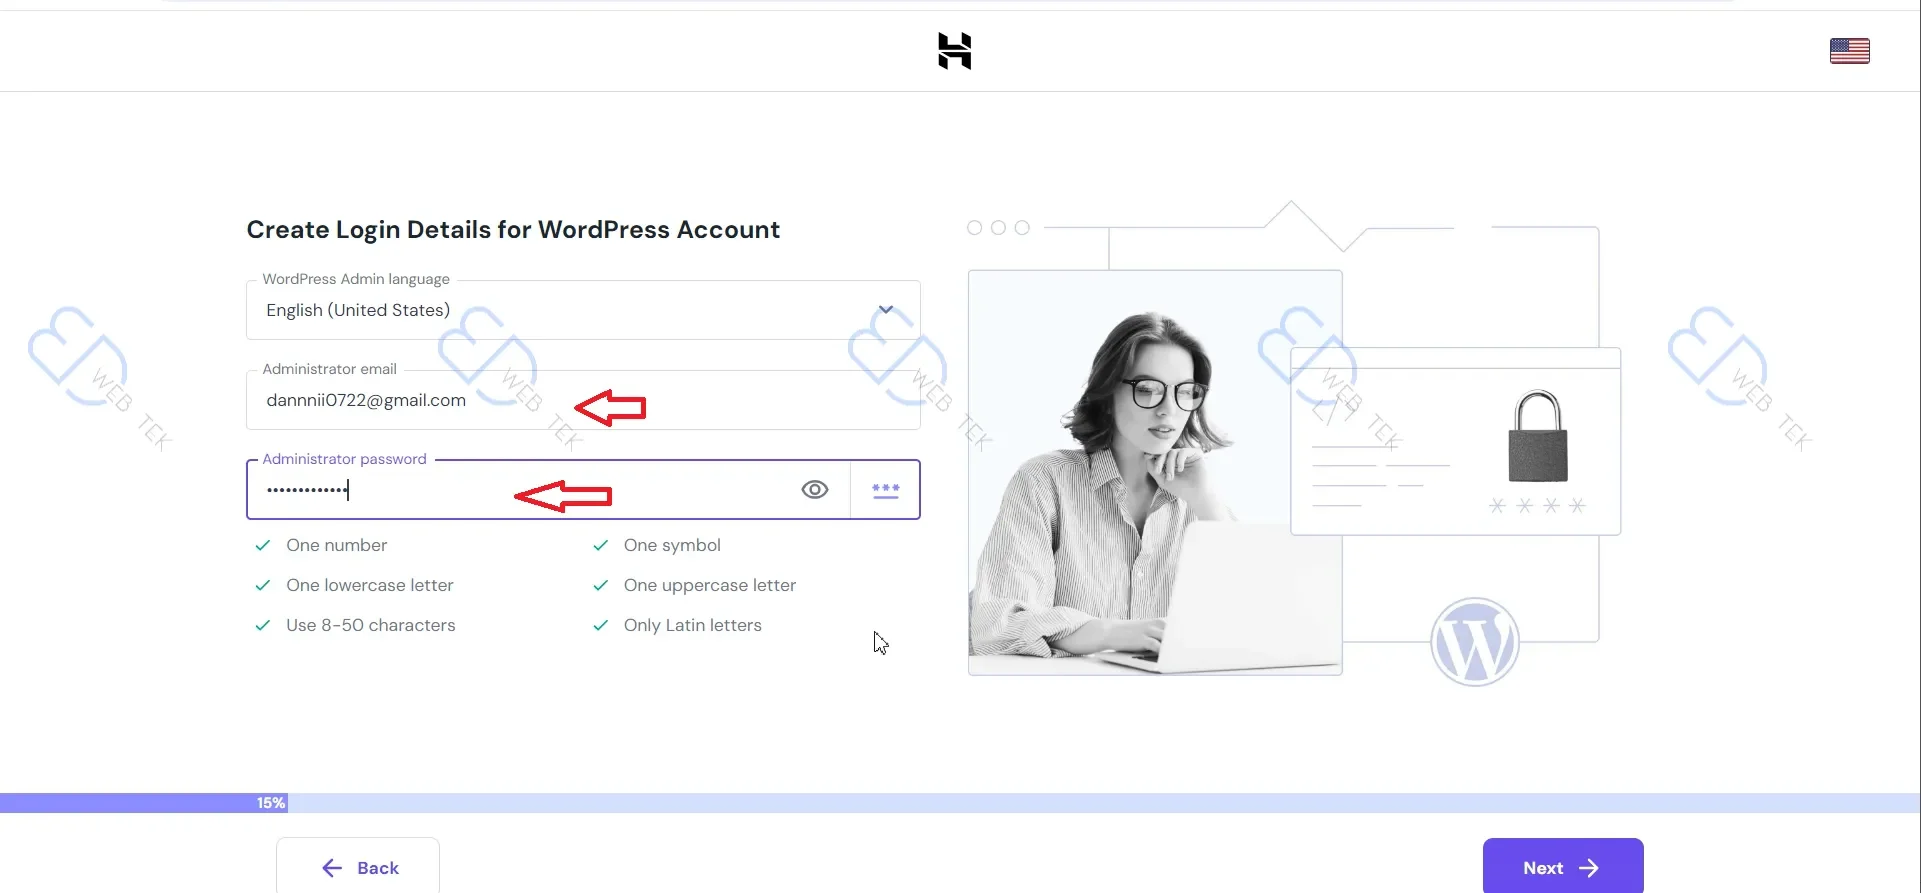
Create a WordPress username and password. The password must be at least 8 characters long and include uppercase letters, lowercase letters, numbers, and symbols. Then click Next.
12. Choose the Website Type
Select the website type and click Next.

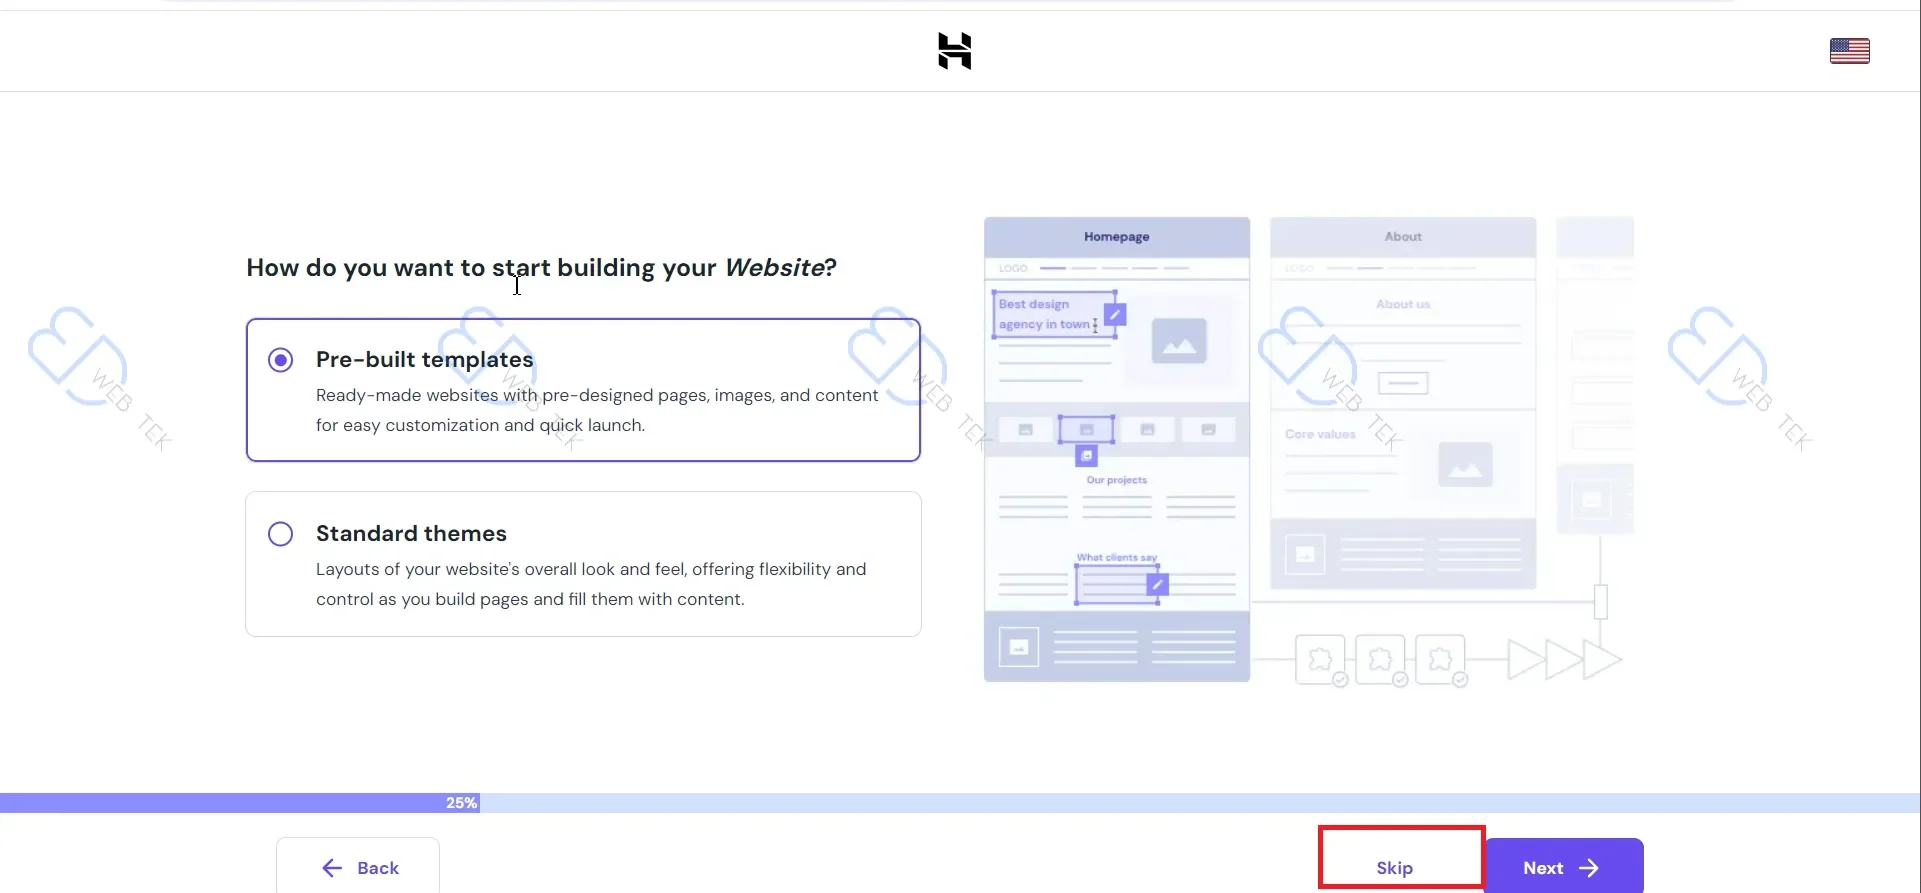
13. Choose Whether to Pre-install a Template
Choose Skip to start customizing the website from scratch.
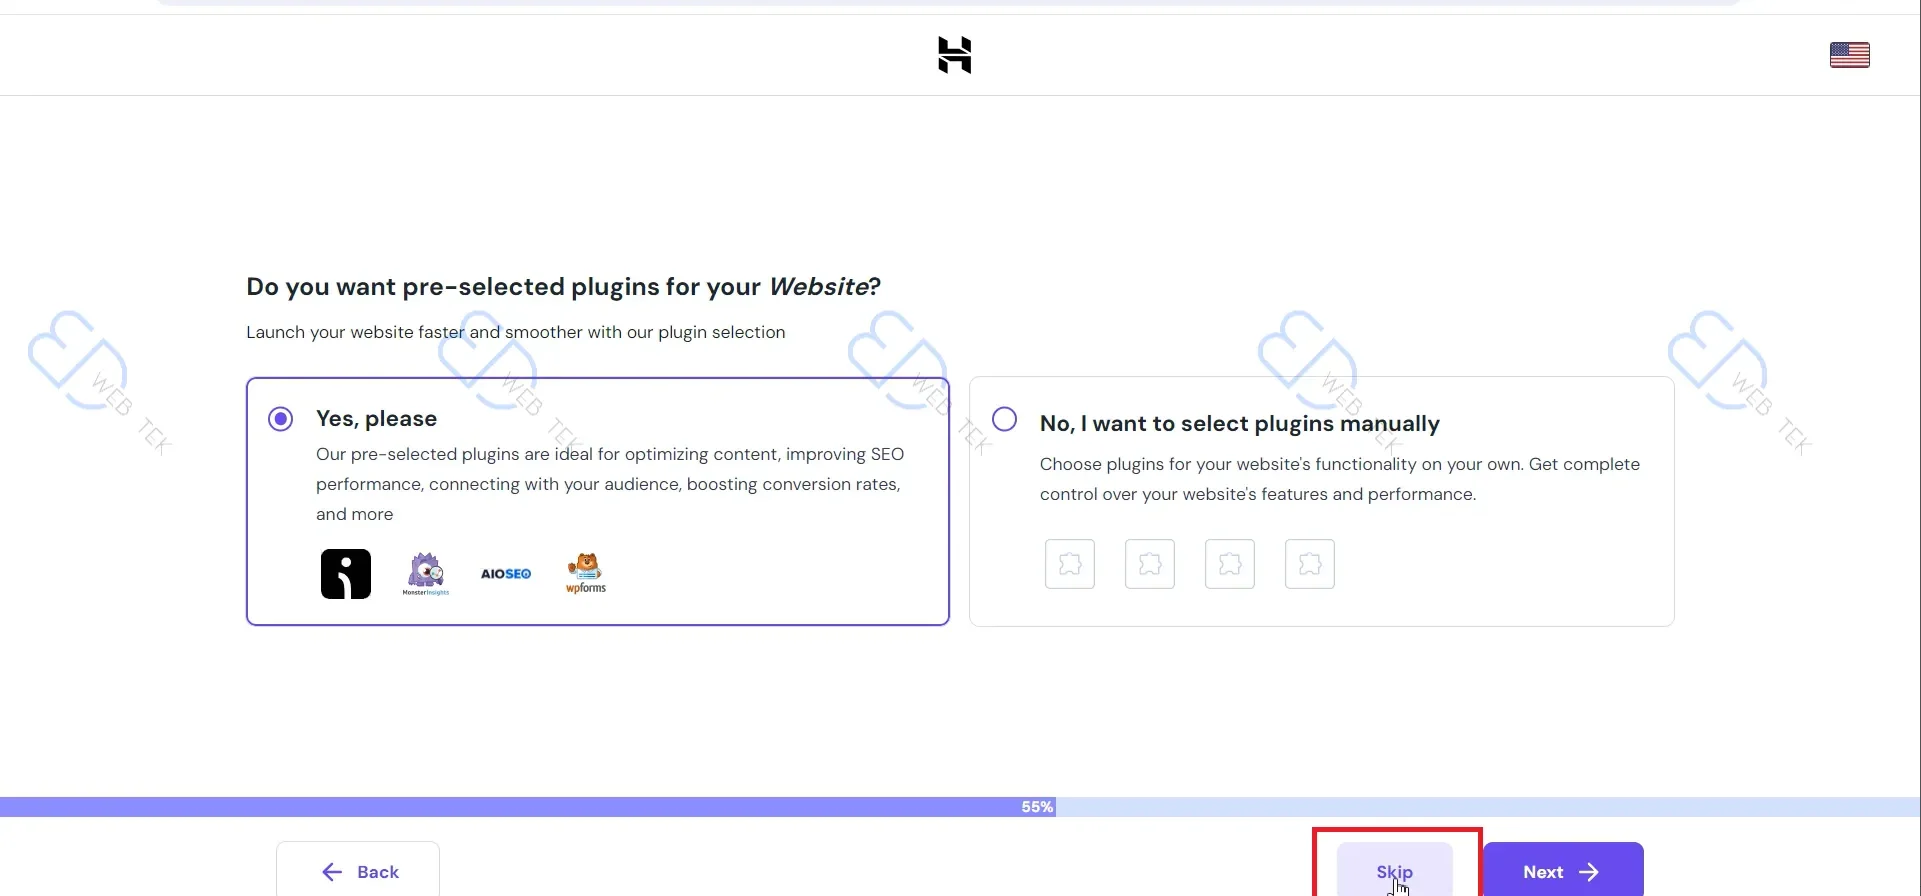
14. Choose Whether to Pre-install Plugins
Also choose Skip to decide which plugins are needed yourself, as unnecessary plugins can affect website performance.
15. Domain Search
If the domain you entered shows REGISTERED, it means it has been registered (as we registered it through Alibaba Cloud). Confirm the ownership, and choose other suffixes if available. Click Next.

16. Choose a Data Center
Options include: US East, US West, Brazil, Lithuania, UK, France, India, Indonesia. Choose a data center closest to your target market to deploy a WordPress website. If targeting globally, choose the US. Click Next.

17. Wait for WordPress Installation
It takes 1-2 minutes for the WordPress site to install.

18. Hostinger Website Control Panel
In the Hostinger Website panel, you will see your domain, indicating that WordPress has been successfully installed. If there’s no red prompt indicating the domain DNS hasn’t pointed to the server, it means it’s already set. For DNS pointing, see the next step.

19. Modify DNS in Domain Console
Go to the Alibaba Cloud domain console, and in the domain management section, modify the DNS servers to ‘ns1.dns-parking.com‘ and ‘ns2.dns-parking.com‘ provided by Hostinger. If you registered the domain elsewhere, the modification method is similar.

20. Access WordPress Backend through Hostinger
In the Hostinger backend, click Admin Panel to directly enter the WordPress website backend.

21. Enter WordPress Backend
This is the WordPress backend interface, which means that you have finished all the steps of deploying a wordpress.

22. WordPress Backend Login URL
Instead of logging in through Hostinger each time, you can directly log in by entering your domain followed by “/wp-admin.”

23. WordPress Login
This is the WordPress login dialogue box.

Block Searcn Engines Before Your Site Is Finished
24. Block Search Engines
To prevent search engines from indexing your unfinished site, log in to Hostinger and add a txt document to temporarily block search engines.

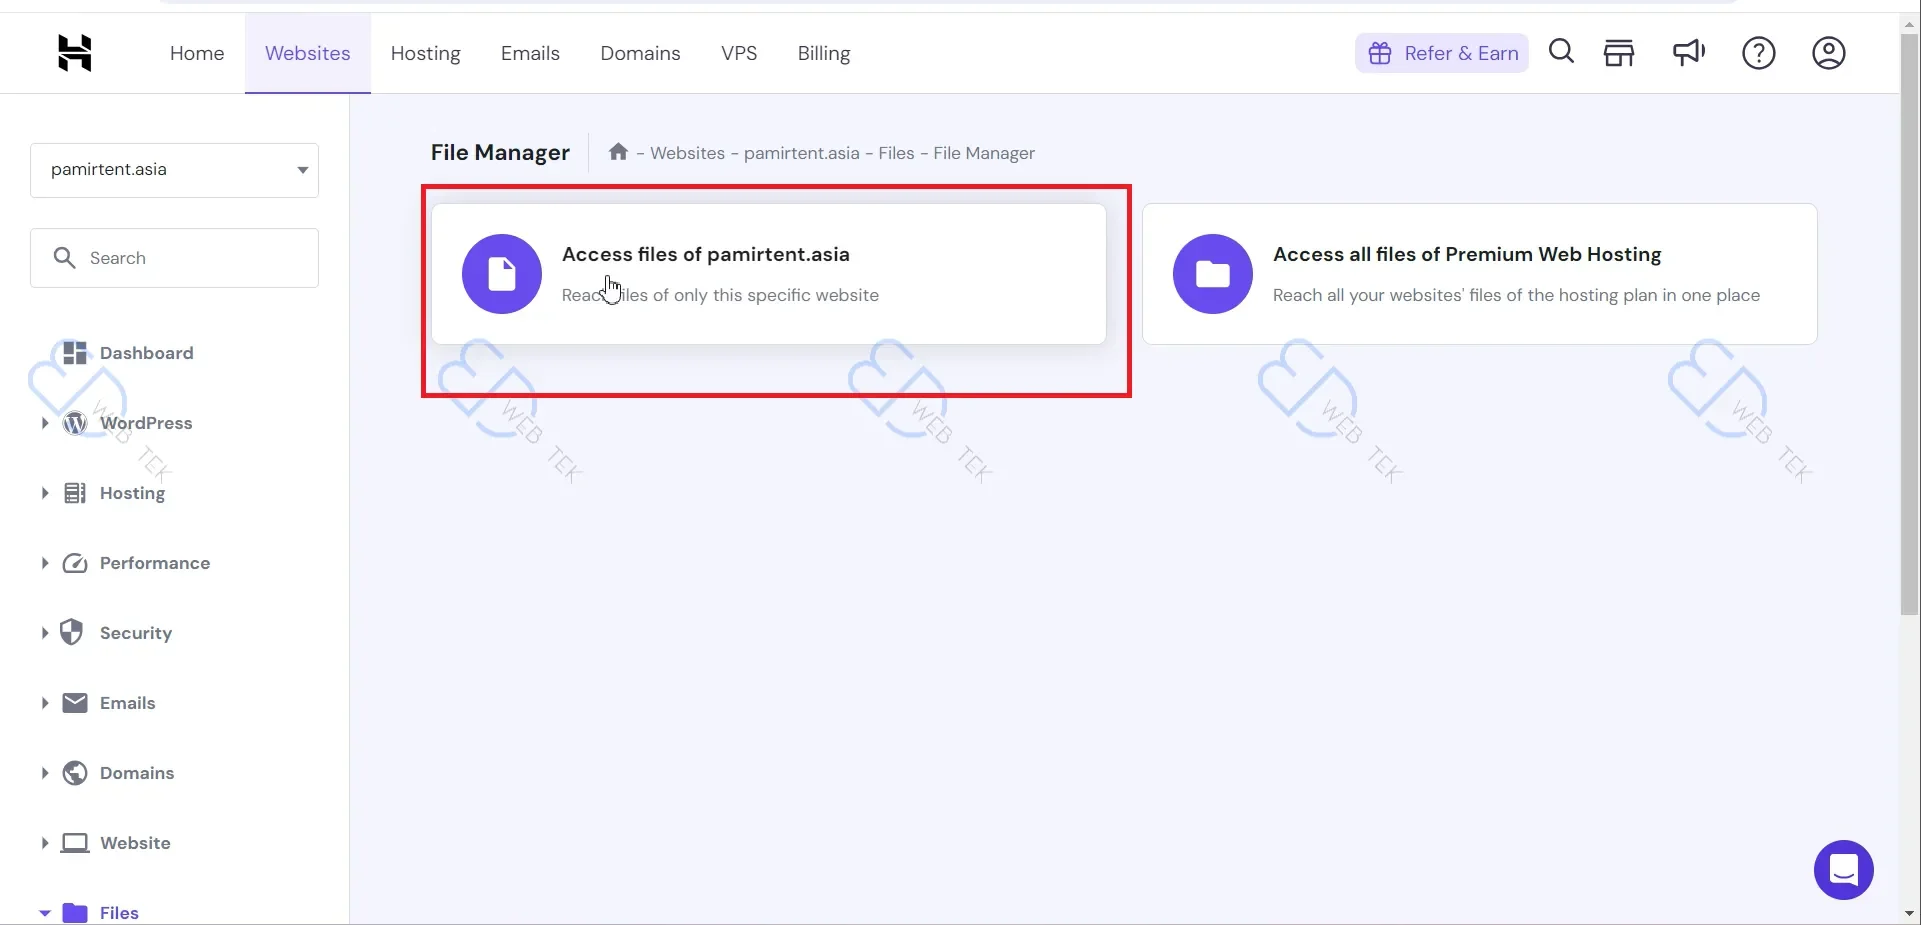
25. Enter File Directory
Click Access files.
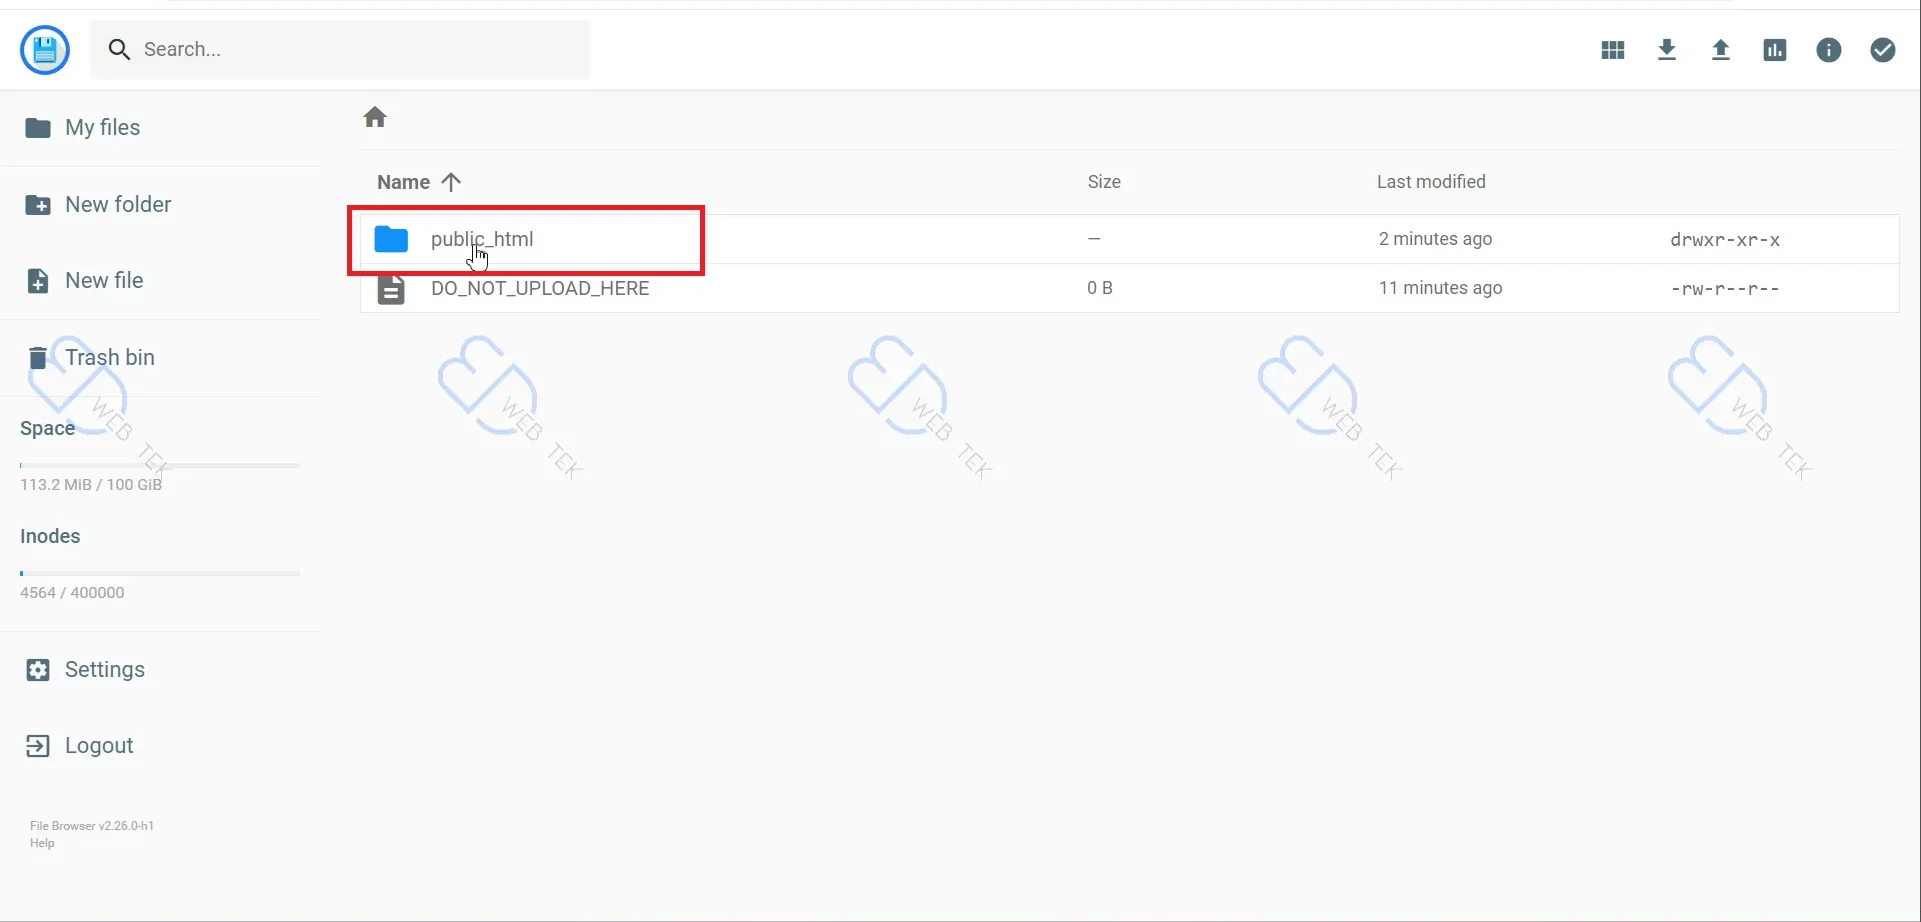
26. Enter Website File Directory
Double-click the public_html folder.
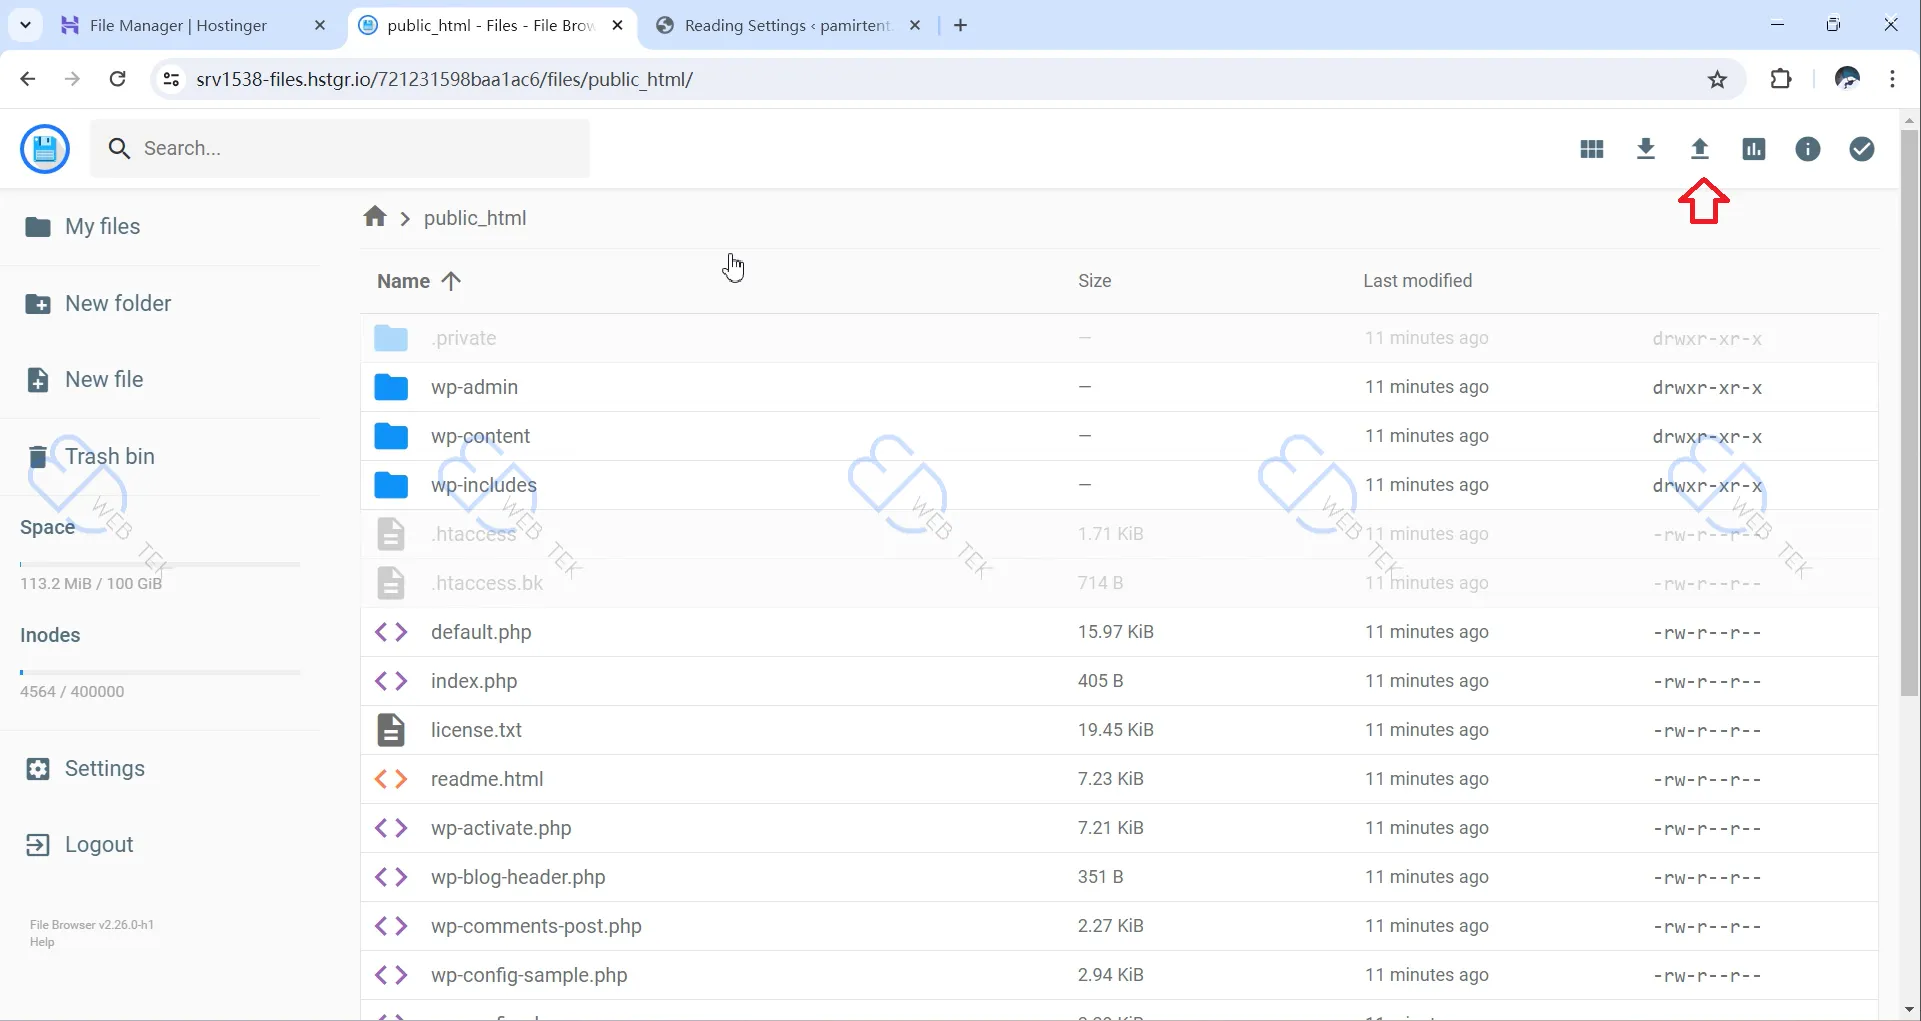
27. Upload File
Click the upload arrow to upload the file.
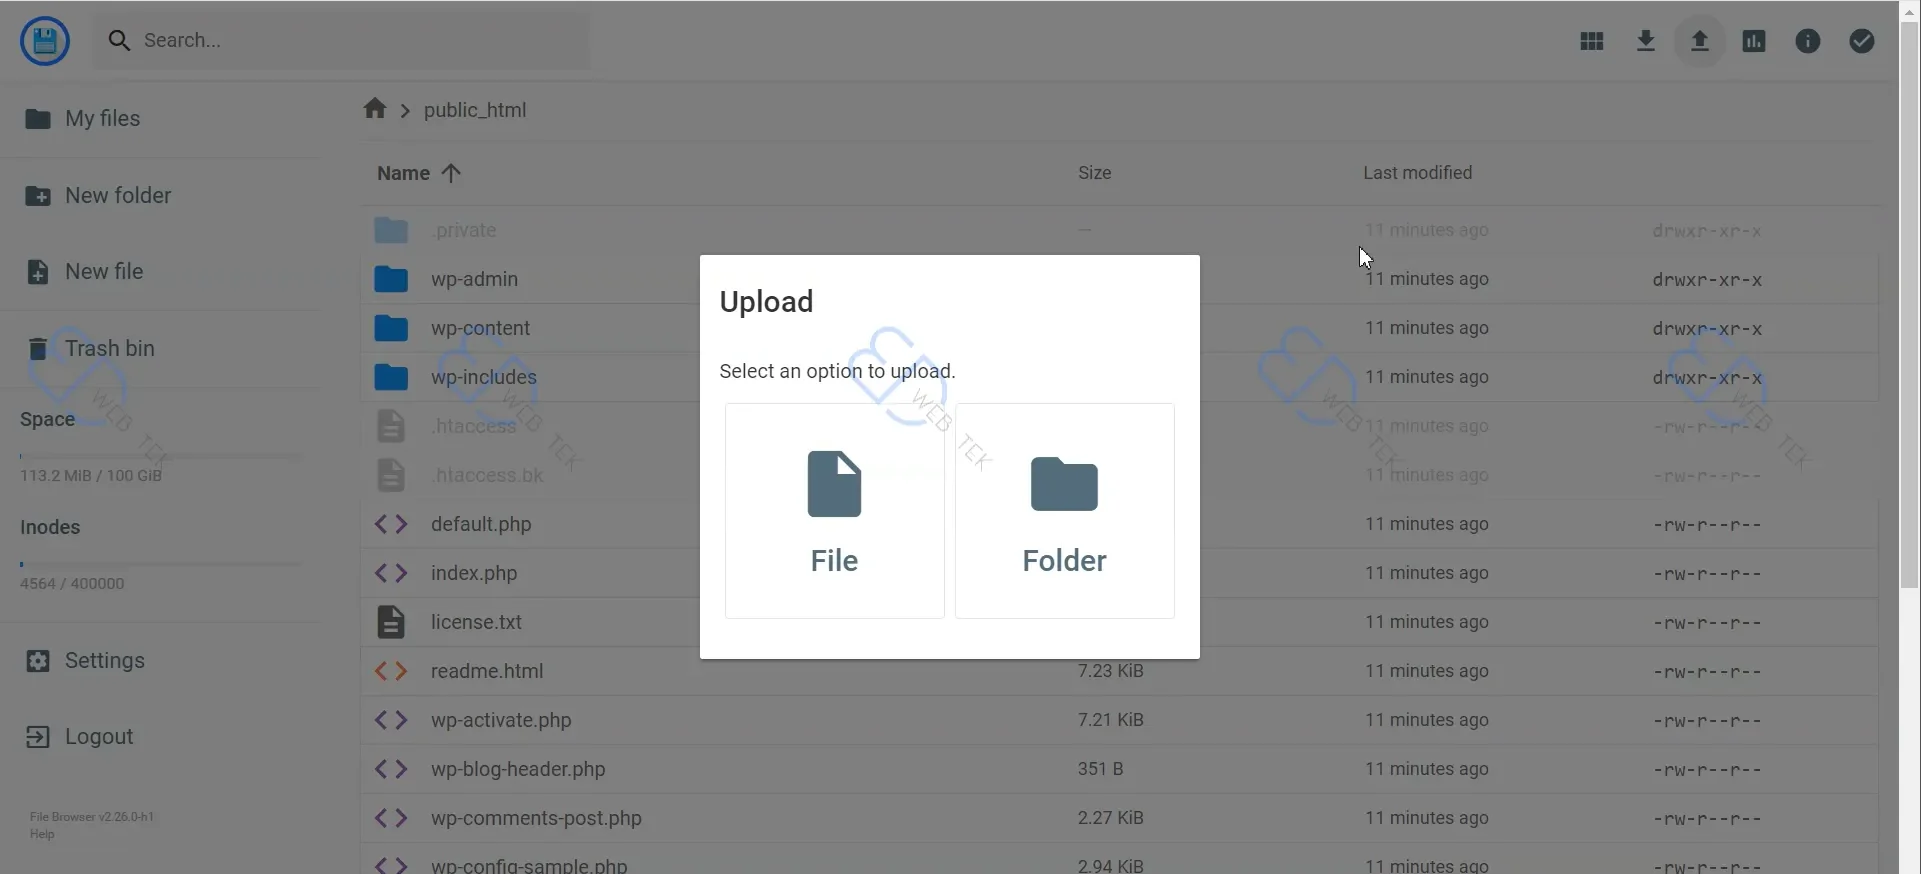
28. Upload File to public_html
Select file, not folder.
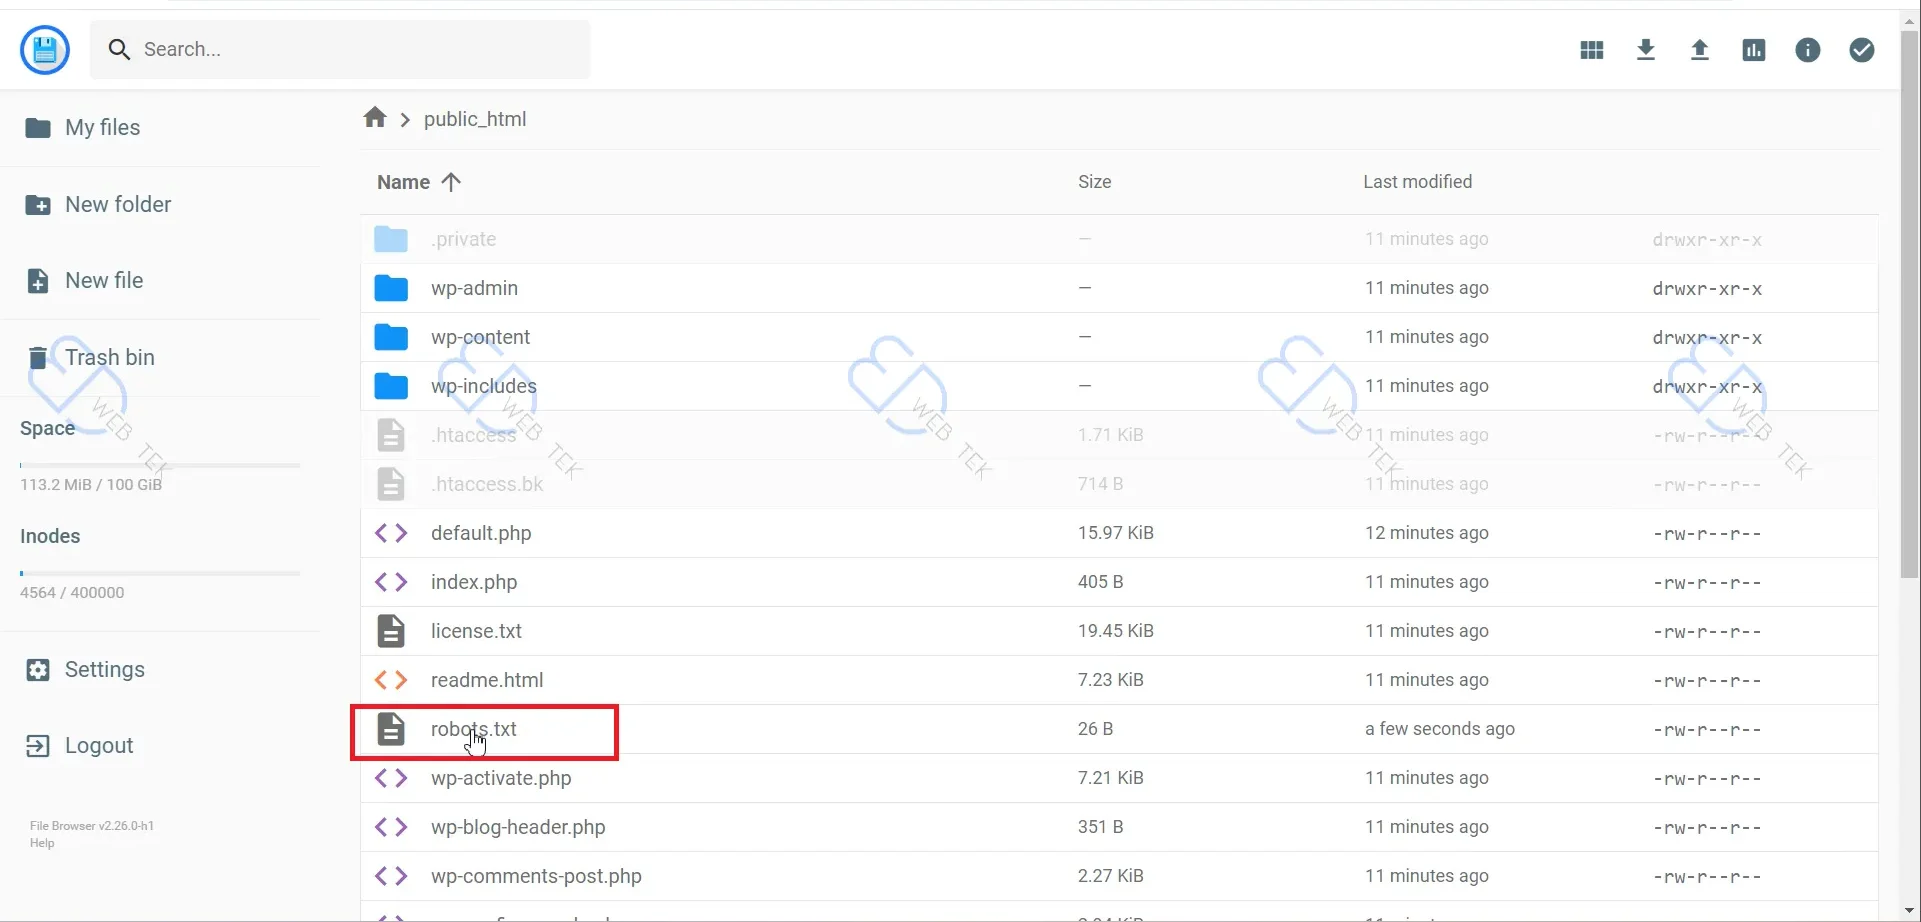
29. Upload robots.txt
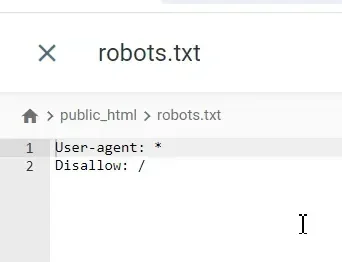
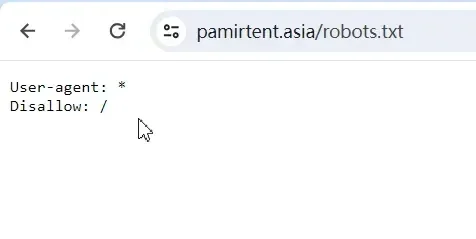
Create a text document named “robots” with the following two lines:
User-agent: *
Disallow: /
Save and upload to the public_html folder. These lines will block all search engines from indexing your site.
30. Confirm robots.txt Content
Double-click robots.txt to check the content.
31. Check robots.txt Settings
Enter “https://yourdomain/robots.txt” in the browser. If it displays the robots.txt content, the upload was successful.
Now you have successfully deployed a WordPress website on the server and temporarily blocked all search engines from indexing the pages by setting robots.txt. You can start building your website.