

After purchasing your domain, the next step is to get a cloud server to deploy a WordPress site. Many people new to website creation often confuse the relationship between WordPress, cloud servers, and websites. Simply put, WordPress is a website-building tool (also known as a Content Management System), and your cloud server is the platform that hosts your website. It’s like building a house: your website is the house, WordPress is your construction tool, and the cloud server is the foundation.
Choosing a Cloud Server
Now that you understand these relationships, the next step is to choose a cloud server to deploy a WordPress site. With so many servers on the market, how do you choose?
For Cross-border Business Needs: If your website is for cross-border business, choose an overseas server to deploy a WordPress site, which can ensure access speed and user experience.
Choose Established Server Companies: Opt for server companies with a long history because stability is crucial. Even a ten-minute server downtime can cause unpredictable damage to your website if you have traffic.
Ease of Use: If you’re not familiar with backend computer operations, choose servers designed for WordPress. These typically support one-click WordPress installations, saving time and avoiding the need to hire technicians, to easily deploy a WordPress website.
Customer Support: Choose a server company with 24-hour customer support. Having professional help available when your website encounters server-related issues is essential.
We recommend SiteGround, an established server company. You can purchase it through this link: bdwebtek.com/siteground. The first-year cost is $60/year, and the second year is $29/month. Although the price is higher, it’s worth it as a good server is not cheap.
How to Purchase a Server and Deploy a WordPress Site
1. Visit the SiteGround Homepage
Use the following link: bdwebtek.com/siteground
After entering the homepage, click on “Website.”

2. Choose a Plan
We recommend the second plan, “GrowBig.” This plan offers 20GB of web space and allows the creation of unlimited websites, with a monthly traffic limit of 100,000. This is more than sufficient for most early-stage websites, whether B2B or B2C. The first-year cost is $60.

3. Add a Domain
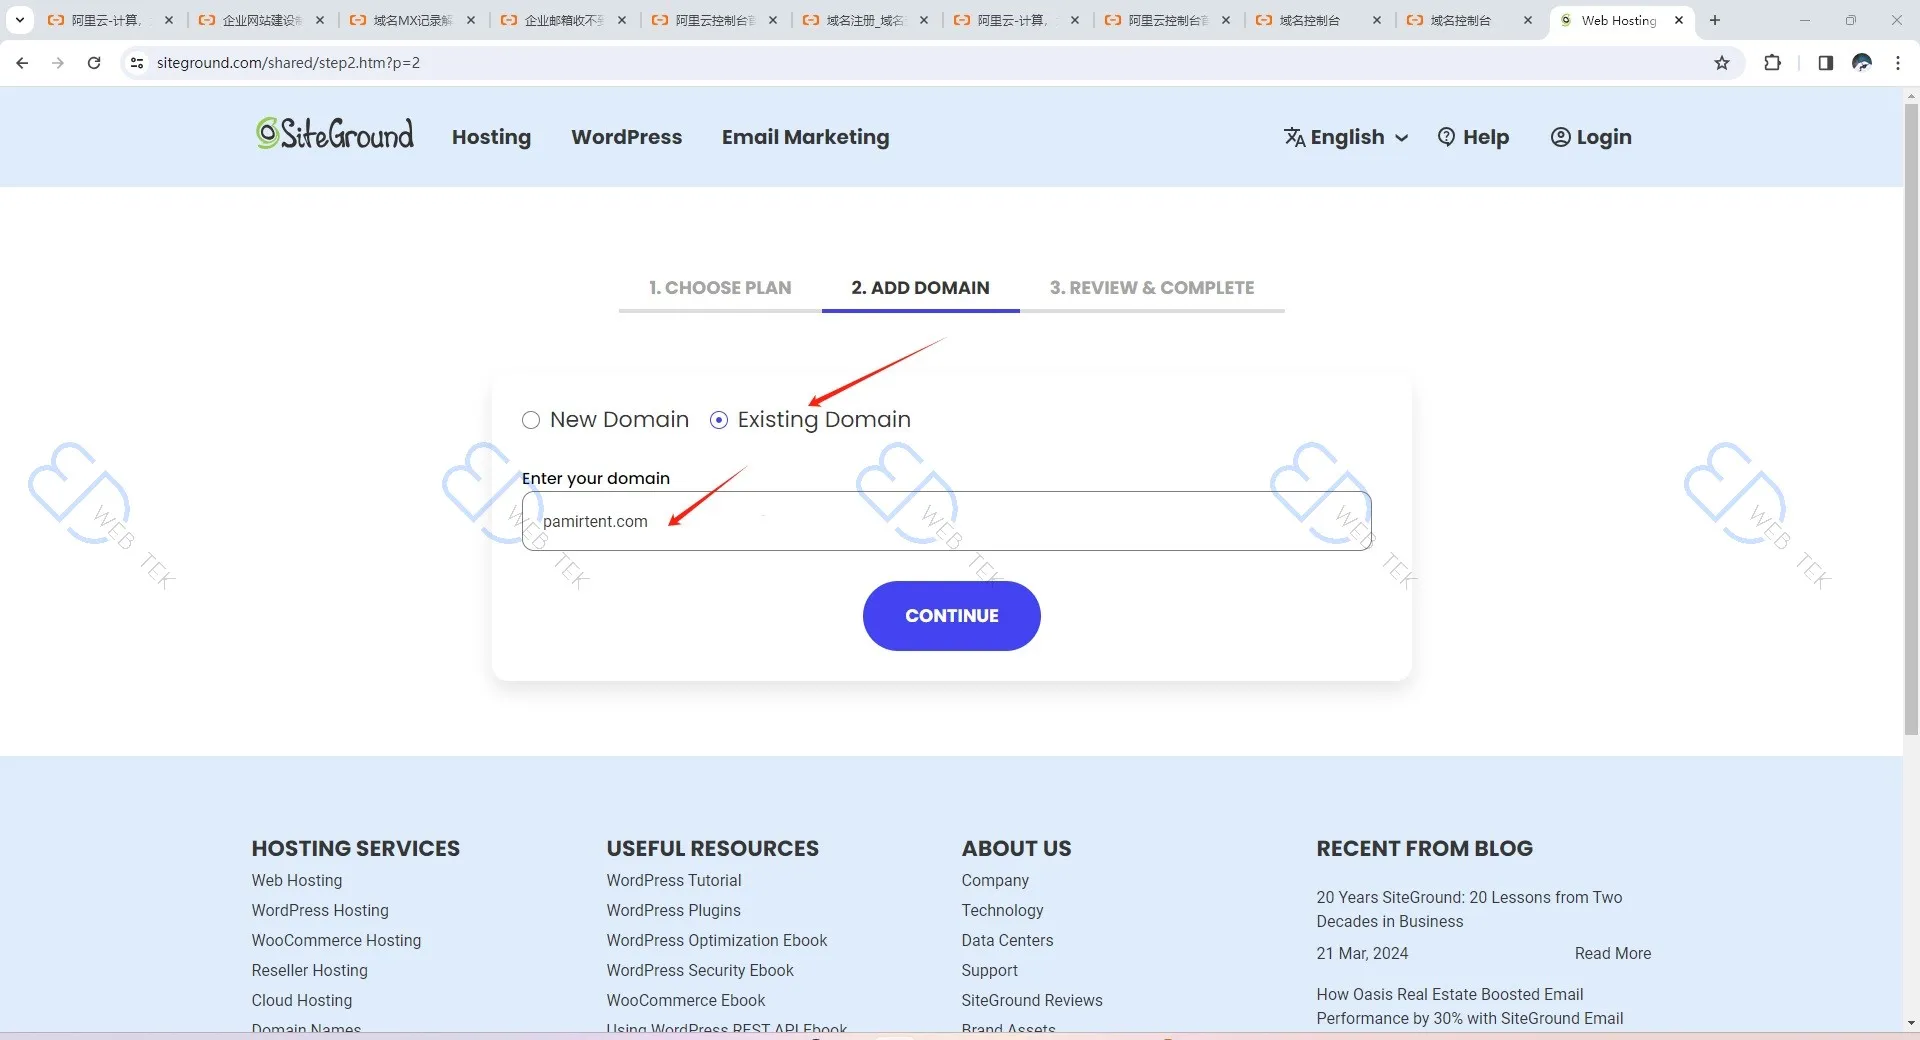
You can choose to add a New Domain or an Existing Domain. If you select New Domain, you purchase a domain through SiteGround. Here, we choose Existing Domain.
4. Fill in Purchase Information
Complete the purchase information accurately, as it will affect your login.

5. Fill in Client Information
Enter your credit card information. If you don’t have a credit card, you can choose PayPal. However, there’s no PayPal option here, so you need to contact customer support for a payment link (see the next step).

6. PayPal Payment through Customer Support
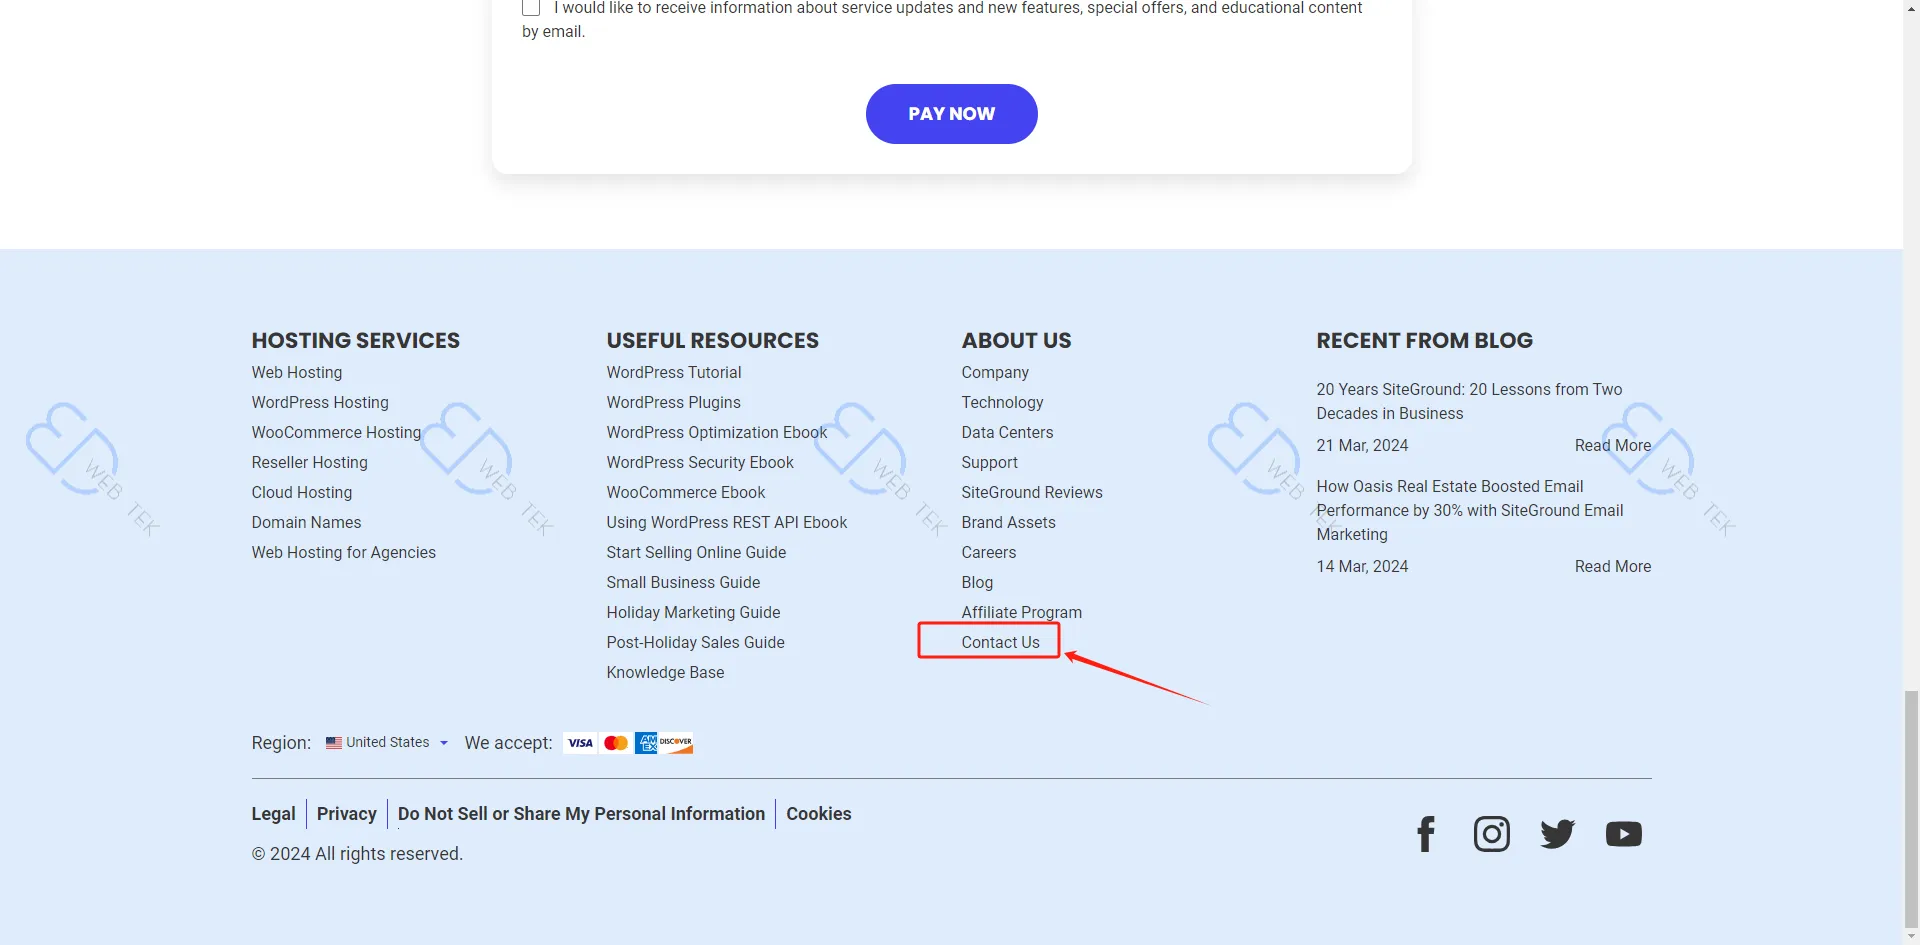
Scroll to the bottom and click “Contact Us.”
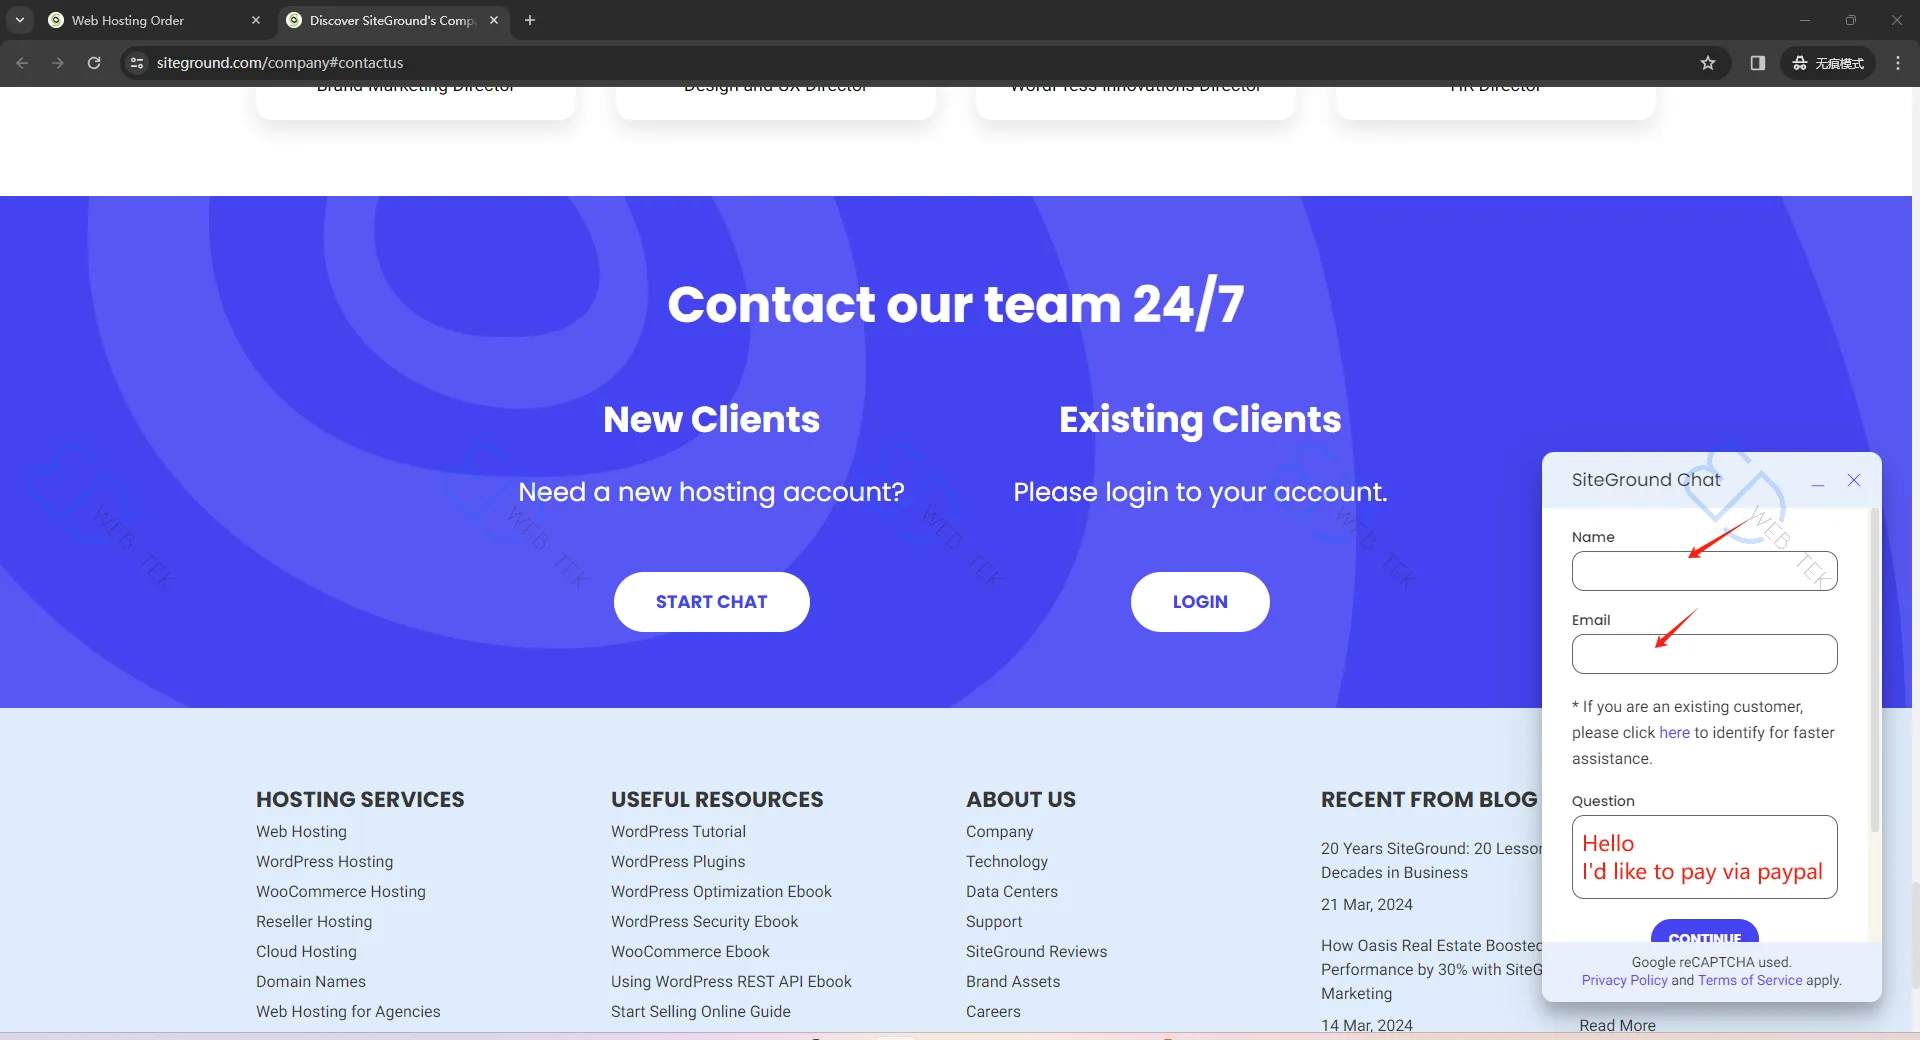
Select “New Clients” and click “START CHAT.”

7. Communicate with Online Support
In the chat window, enter your name and email, then send “Hello, I’d like to pay via PayPal.”
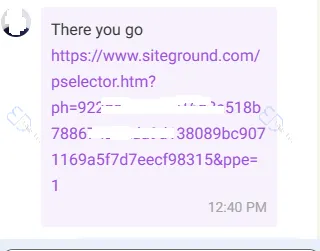
The support will send you a PayPal payment link.
8. Enter the Domain's SiteTools
After completing the above steps, your server purchase is successful. The page will show your domain, click “SiteTools” on the right.

9. Enter Domain's SiteTools
In the Dashboard, click “Install & Manage,” then click “WordPress+WooCommerce.” Enter the admin username and password to start deploying WordPress on your server.

10. Add a New Website
If you have more than one website, you can add them within the server. After logging into SiteGround, go to the “Website” section and click “NEW WEBSITE” at the top right to create a new site. The GrowBig plan allows multiple sites.

11. Add a Domain
You can choose to purchase a New Domain through SiteGround or use an Existing Domain bought elsewhere.

12. Choose to Start New or Migrate Old Site
Here you will be asked whether to “Start New Website” or “Migrate Website.” Click “Start New Website.” If it’s a purely informational site like a company showcase, blog, or news, choose WordPress. If it involves product management, choose WooCommerce.

13. Create Admin Username and Password
Create the admin username and password for the website backend.
Click “FINISH.”
The site is being created.


14. Site Creation Completed
When you see “You Are All Set,” it means WordPress is successfully deployed, and the site is ready. Below, there’s a “Point Your Domain” message indicating the need to point your domain’s DNS to SiteGround. It provides two records, which relate to the DNS modification step in the article “How to Buy a Domain on Alibaba Cloud.”


Next, we need to perform several SEO-related settings, such as configuring the robots.txt file to temporarily block search engines from indexing the site to avoid affecting your website’s SEO.
Block Search Engines Before Your Site Is Finished
15. Enter File Manager
Still on SiteGround, enter the website Dashboard, click “File Manager.”

16. Enter Website Root Directory and Upload File
Click “public_html,” which is the root directory of your website.
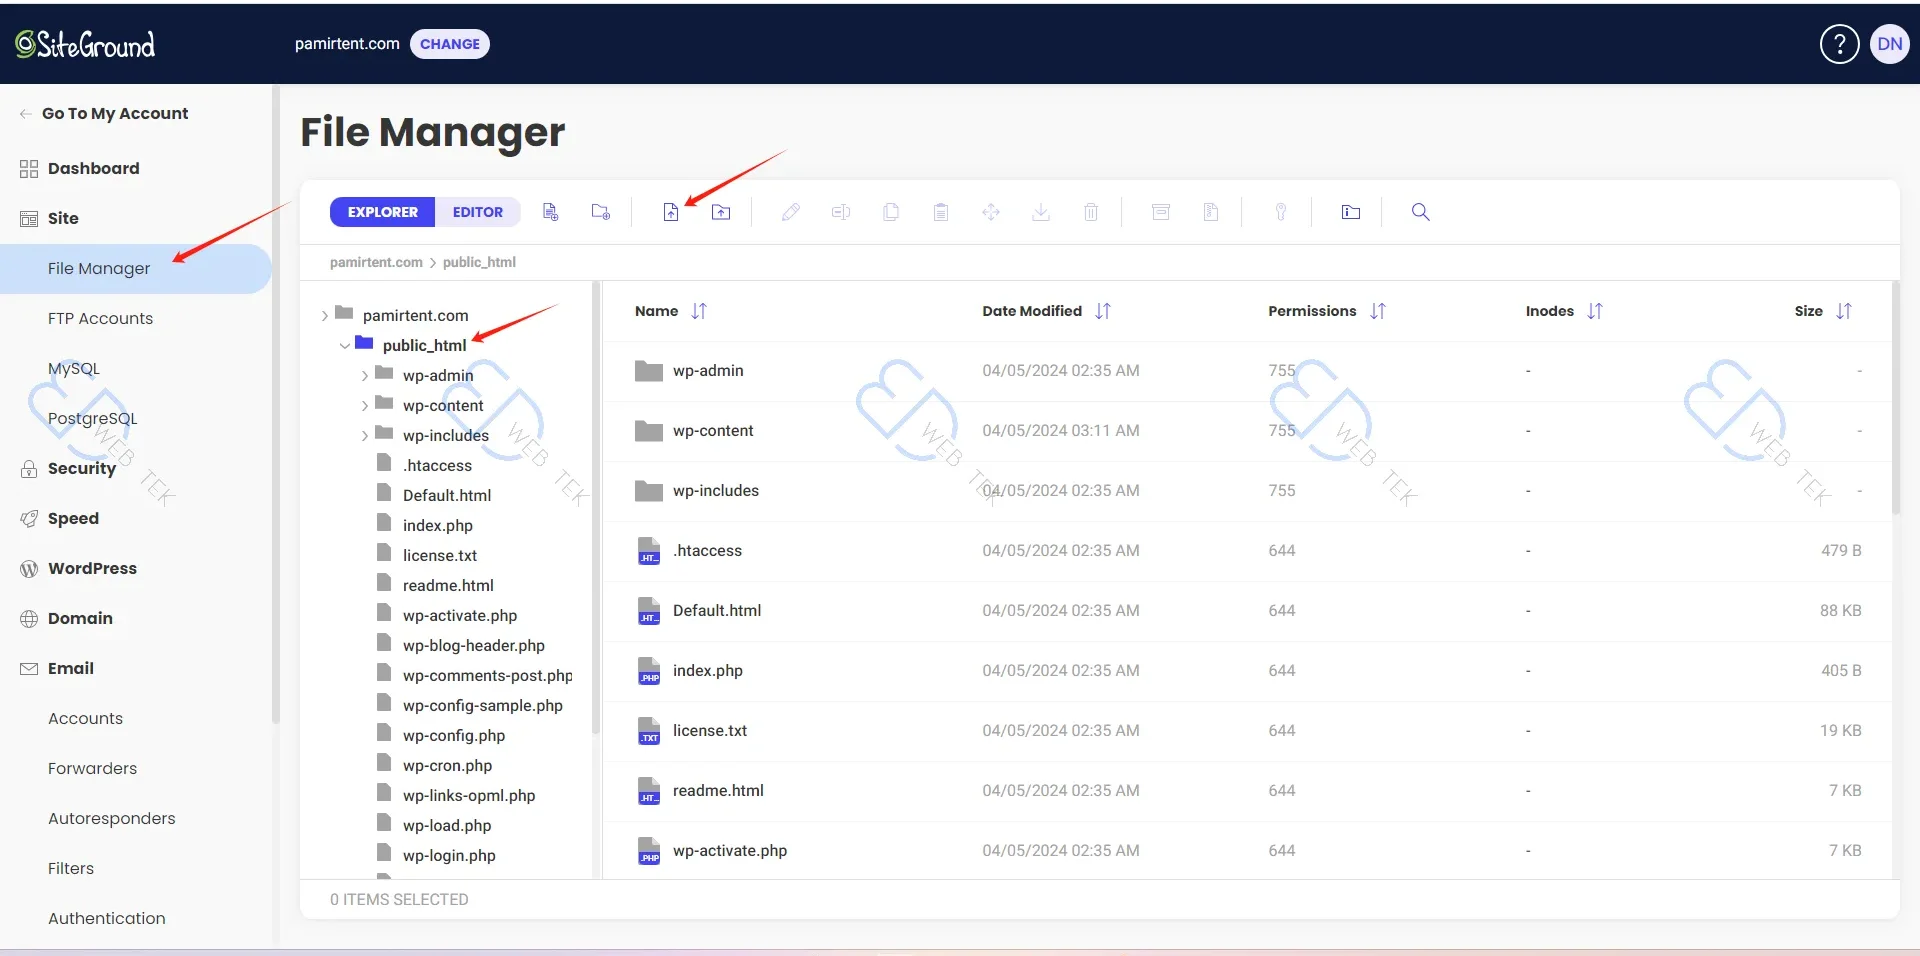
17. Upload robots.txt
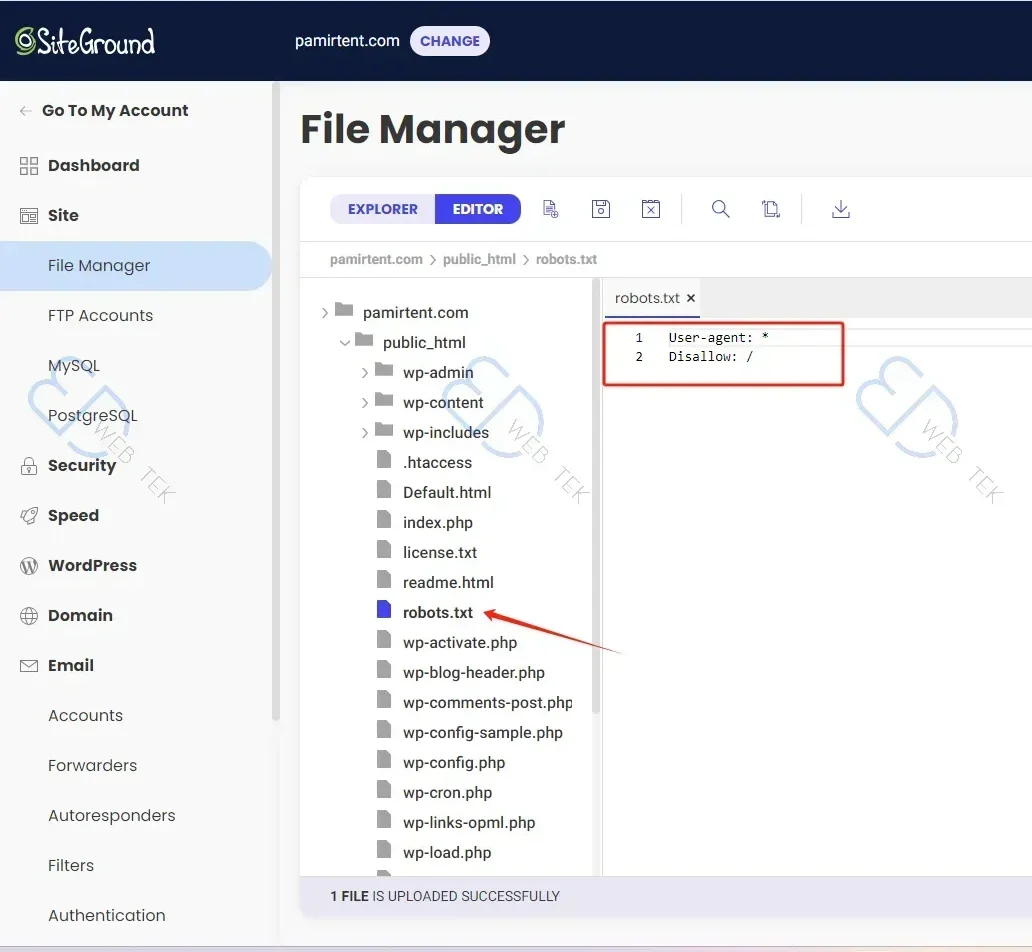
Create a text document named “robots,” and input the following two lines (in English):
User-agent: *
Disallow: /
These lines block all search engines from indexing your website.
After uploading successfully, you will see the text document in the root directory. Double-click to view and edit its content.
18. Check robots.txt Upload Success
Simply enter “https://yourdomain/robots.txt” in the browser. If it shows the content of robots.txt, it means the upload was successful.
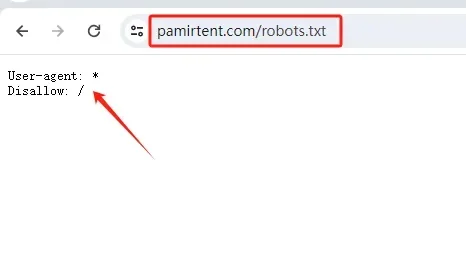
Now you have successfully deployed your WordPress site on the server and temporarily blocked all search engines from indexing the pages by setting robots.txt. You can start building your website.