Generating a page with an agent is easy; maintaining a whole WordPress site with one is a different problem. This post turns the process into a repeatable workflow: prepare staging, set up the project workspace and AGENTS.md context, build the design system, review locally, engineer the theme, configure SEO and structured data, accept on staging, and ship to production. Eight phases from first server to long-term maintenance, including the release checklist and the maintenance cadence that keeps an agent-maintained site stable.
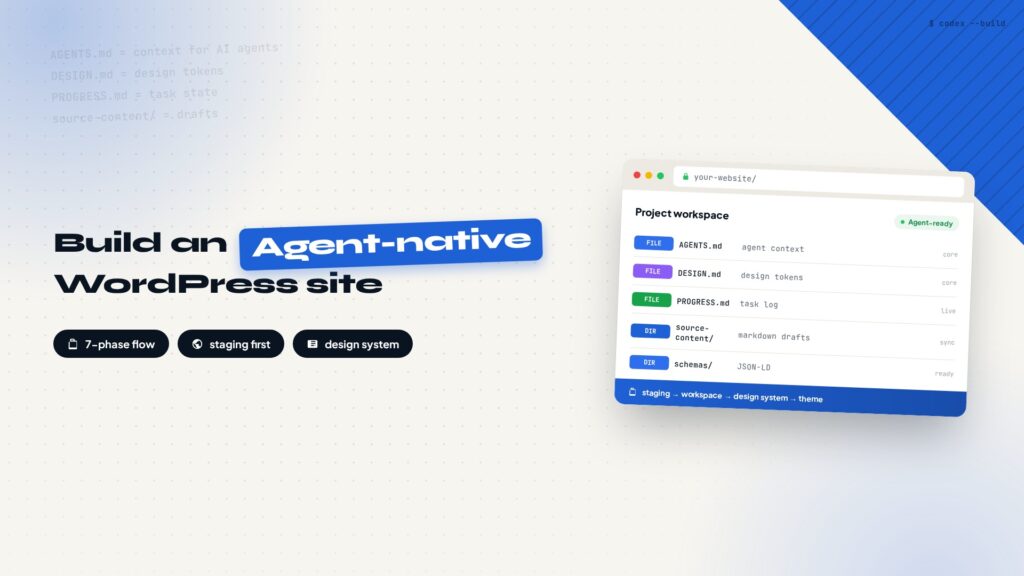
Generating a page with an agent is easy. Describe what you want and the HTML comes out. Making an agent maintain a WordPress site long-term is a different problem. It has to understand the project background, the design rules, and the technical constraints, know which file owns what, check the real live state before changing anything, and run a full check before anything is released.
This post organizes the whole flow into eight phases: prepare staging, set up the project workspace, build the design system, review locally, engineer the theme, handle SEO and structured data, accept on staging, and ship to production. The first three phases lay the foundation, the middle four produce pages, and the last one closes the loop. Everything is developed and reviewed in a non-production environment, and only then does it reach the production site.
Three ground rules
Before the phases, three ground rules. Every later step builds on them.
Confirm the real live state before touching local files. Local files can lag behind the live site. Before any sync, refactor, or mirroring task, read the current state from the live site first: pages, posts, products, categories, slugs, featured images, AIOSEO meta and schema, functions.php, the theme directory, and the loaded CSS and JS. A local snapshot is a working baseline, not automatically the final source of truth. When syncing, follow the explicitly designated live site and record the fetch time.
Every production change should be backup-able, verifiable, and rollback-able. Before a production release, keep at least a database backup, a wp-content and current child-theme backup, the change list, and JSON snapshots of the key objects before and after. Any batch update needs a clear target scope, idempotent logic (re-running creates no duplicates), a dry-run or read-only audit step, success and failure counts, and a rollback script or a recoverable backup.
Credentials never enter the project directory. WordPress Application Passwords, SSH private keys, AIOSEO API credentials, database passwords, and third-party API keys live only in a local secrets directory or a managed password manager. Do not write passwords into AGENTS.md, scripts, JSON payloads, or Git, do not upload a .env with real credentials to the site directory, and do not print full keys in chat logs, command output, or logs.
Phase 1: Prepare the staging environment
Create a staging environment on Hostinger or another host, using a separate staging domain or subdomain such as staging.example.com. Enable SSH, generate an SSH key on your machine, add the public key to the server, and configure ~/.ssh/config with a clear Host alias. Then configure SSL, the PHP version, the PHP memory limit, upload limits, and the database charset, and add a layer of access protection such as HTTP Basic Auth, IP restrictions, or a temporary password.
Staging must be blocked from search engines. You can use WordPress’s discourage-search-engines setting, HTTP Basic Auth or another access control, a noindex response header, or page meta. Do not rely on robots.txt alone, it cannot stop URLs from being discovered or indexed.
Finish the initial WordPress setup before page development: change the admin username and use a strong password, set the site title and permalinks, delete the sample content, install backup, cache, and security tools, confirm HTTPS and the REST API work, disable XML-RPC and open user registration, and record the WordPress and plugin versions.
Base the theme on Hello Elementor with a child theme. Name the child theme directory after the real server directory, do not assume it is always hello-theme-child-master. After activation, confirm style.css has a valid child theme header, functions.php has no PHP fatal errors, and the parent and child theme load in the right order. Also decide how each page renders: Elementor Canvas, Elementor Full Width, the theme default template, a custom page.php, or a project-specific page template. Different templates decide whether the theme outputs .site-main, the max width, and padding, so Elementor Full Width is not a universal default.
A suggested child theme structure:
hello-elementor-child/
├── style.css
├── functions.php
├── assets/
│   ├── css/
│   ├── js/
│   ├── images/
│   └── fonts/
├── inc/
├── template-parts/
└── page-templates/
Whether template-parts, page-templates, and inc are needed depends on the project size. Do not create a pile of empty directories for form’s sake.
Phase 2: Set up the project workspace and agent context
A suggested project directory layout:
your-website/
├── AGENTS.md
├── DESIGN.md
├── PROGRESS.md
├── TO-DO.md
├── README.md
├── source-content/
├── assets-source/
├── page-design/
├── pages/
├── templates/
├── seo/
├── schemas/
├── snapshots/
├── deploy/
├── scripts/
└── hello-elementor-child/
AGENTS.md holds project-level facts and constraints, not a one-off task description. It should cover at least: the company, products, customers, and business model; target markets, languages, and brand tone; the tech stack, theme, plugins, and server layout; connection aliases for live and staging; URL rules for pages, products, posts, and the resource center; ownership rules for CSS, JS, PHP, schema, and SEO; pages or Elementor content that must not be modified; the pre-release test checklist; and where credentials live, without writing the credentials themselves.
File names like CLAUDE.md or AGENTS.md depend on the agent tool. If the team uses multiple agents, maintain one shared project spec and use tool-specific files for the differences, so the rules never contradict each other.
PROGRESS.md and TO-DO.md track each phase: what is done, what is in progress, what comes next, blockers, change dates, the live environment, and verification results. Write tasks as verifiable actions, for example finish the SEO check on 12 product-category slugs, not just improve SEO.
Phase 3: Build the design system before the pages
The first time you brief an agent, provide the full background: the company introduction and manufacturing capability, core products and use cases, target customers and their buying process, target countries and market positioning, brand logo and colors, product and factory photos, the visual direction you want, and the visual elements and copy you do not want.
Finish the Home page first, then build one representative landing page to verify the design system transfers to a concrete marketing task. Visual requirements include hierarchy, contrast, whitespace, typography, color, and interaction, and they should match the industry, the customers, and the conversion goal. Do not chase design polish alone. Check whether the first screen states the product and its value clearly, whether the CTA is explicit, whether mobile works, whether contrast and tap targets pass, whether the imagery reflects the real product instead of generic stock photos, and whether the page loads acceptably.
Once Home and the landing page are final, have the agent distill the actual design rules into DESIGN.md: color tokens, background and state colors; fonts, sizes, line heights, and heading hierarchy; container width, grid, spacing, and responsive breakpoints; hero, CTA, button, form, table, FAQ, and card specs; image ratios, radius, shadow, and border rules; header, footer, and navigation behavior; mobile layout rules; reusable CSS classes and namespaces; and components or visual patterns that should not appear.
DESIGN.md is a design constraint, not an automatic guarantee that replaces human review. Every new page still needs visual and functional acceptance.
Phase 4: Generate, preview, and review locally
The agent generates a local HTML preview from DESIGN.md, the page directory materials, and the project rules. Check at least the following on every page:
- Desktop, tablet, and mobile layouts.
- Navigation, buttons, forms, and modals.
- Image, video, iframe, and font loading.
- Internal links, email links, and product links.
- Long titles, long tables, FAQ, and error states.
- Keyboard navigation, focus states, semantic headings, and color contrast.
- Reasonable degradation without JS or on slow networks.
- Console errors, 404s, mixed content, and duplicate IDs.
Move to the WordPress adaptation only after the local preview passes. Do not upload while continuing to edit unreviewed HTML.
Phase 5: Engineering the WordPress theme
Keep page content separate from theme code. A recommended split of responsibilities:
- style.css: the child theme declaration and a minimal amount of global base styles.
- assets/css/ and assets/js/: CSS and JS split by feature or page.
- template-parts/: reusable PHP fragments.
- page-templates/: page templates with a WordPress Template Name.
- inc/: registrations, filters, helpers, and configuration.
- WordPress page content: page-specific HTML.
Namespace the CSS so it does not pollute Elementor, WooCommerce, or other plugins:
.agent-site--contact .agent-contact-form {
  border: 1px solid #e6e4df;
  border-radius: 8px;
  padding: 1rem;
}
JS needs explicit dependencies, an initialization entry point, and error handling, and should not load on every page when only some pages need it.
Load all CSS, JS, and template support code through registered functions in functions.php or inc/. Do not scatter large style, script, or PHP logic in page content. When enqueueing, be explicit about the handle, file path, dependencies, version or file modification time, in_footer, the page-template or post-type condition, and whether defer, async, or module loading is needed. Whenever CSS, JS, or a PHP template is added, removed, or renamed, check functions.php, the conditional loading logic, and template references in the same pass. Search for references before deleting a file, so the live site never hits a 404 or a PHP fatal error.
Changing a slug is not just changing a URL. Check in parallel: the WordPress slug and canonical, page or template conditionals, enqueue conditions in functions.php, schema URLs and @ids, internal links and the sitemap, 301 redirects, and AIOSEO title and description. Save the old URL before the change, and after publishing verify the old URL 301s to the new one instead of returning 404.
Templates in the WordPress admin can mean different things: a page template file, an Elementor Theme Builder template, a WooCommerce single-product template, or single.php versus single-product.php in the theme hierarchy. Uploading a PHP file and enqueueing it does not make it selectable in the admin. To switch templates in the admin, use the correct WordPress page template header, Elementor Theme Builder conditions, WooCommerce hooks, or theme filters. When loading templates by product or post category, use stable conditional functions and verify priority, caching, and fallback templates.
Phase 6: SEO, AIOSEO, and structured data
Install AIOSEO, activate the Pro license, and set up site basics, Organization, WebSite, Breadcrumb, and sitemap. Confirm the title, description, canonical, robots, and Open Graph output, and check for duplicate output with Elementor, WooCommerce, caching, or another SEO plugin.
The WordPress REST API does not always provide full write access to AIOSEO schema. For batch updates, use controlled channels: the official AIOSEO API where available, a protected temporary plugin or mu-plugin bridge, WP-CLI, or a one-off server-side script. Only touch the AIOSEO data tables directly when necessary, and confirm the plugin version, field structure, and a backup first. Temporary endpoints must be permission-limited, source-restricted, and removed or disabled after use. Do not expose database write logic as a public REST endpoint.
Custom schema should not blindly replace all AIOSEO output. Decide by page type first:
- Home: Organization, WebSite, WebPage.
- Product category: CollectionPage, ItemList, BreadcrumbList.
- Single product: Product, Offer, AggregateRating (only with real data).
- Post: Article or TechArticle, BreadcrumbList.
- FAQ: FAQPage only when the page actually shows FAQ content.
If a custom graph already covers the WebPage role, you can disable the duplicate default WebPage graph and keep the Organization, WebSite, Breadcrumb, or other legitimate graphs. Never create duplicate, fake, or page-invisible information just to have schema.
After publishing, check with Google Rich Results Test and Schema Markup Validator: the JSON-LD is valid JSON, URLs use the correct domain, @id and canonical match the page URL, schema content matches the visible page content, and no graphs duplicate or conflict.
Phase 7: Upload to staging and accept
Before uploading local cleaned HTML to WordPress, confirm the target object type: a regular WordPress page, an Elementor page, a post, a WooCommerce product, a category archive, or a custom post type. Regular pages can be written into post_content or a Custom HTML block. Elementor pages depend on post meta such as _elementor_data and _elementor_edit_mode, and a plain HTML REST update must not overwrite them. For existing Elementor pages, keep their content unless migrating the Elementor data is an explicit requirement.
When a page needs Elementor Full Width, set the correct template value through the page template field or the WordPress API, and confirm the actual rendered result live. Do not rely on the option name shown in the page editor alone. If the site has no Elementor, or the child theme already customizes page.php or front-page.php, the Default Template works. As long as that template does not call the parent theme’s max-width content container with padding, the Default Template can achieve full width too.
Do not delete the whole live theme directory without a backup when uploading theme files. The recommended approach: back up the live child theme, compare the local and live file lists and hashes, upload only the changed files, exclude .env secrets and temporary files, run PHP lint, check file permissions, and clear theme, plugin, object, and CDN caches. Only do a directory-level sync when the local directory truly represents a complete releasable child theme and a backup and rollback plan already exists.
Staging acceptance should test at least: the homepage, navigation, footer, and main pages; product categories, single products, post archives, and single posts; form submission, email delivery, reCAPTCHA, and success and error states; desktop, tablet, mobile, and common browsers; page speed, image dimensions, caching, and console errors; 404, 301, canonical, sitemap, and robots; AIOSEO meta and schema; and WooCommerce pricing, stock, cart, or inquiry flows where applicable.
Phase 8: Ship to production
Pre-release checklist: staging has passed acceptance; the production database and files are backed up; the release scope is explicit; slug, old URLs, 301, and canonical are checked; no staging URLs, test emails, or test schema leak into production; no secrets are in the release package; and rollback steps are ready.
A recommended release order: ship theme code and static assets; ship the required plugins, mu-plugins, or configuration; update pages, posts, products, and categories; update SEO, schema, and internal links; clear caches and CDN; then run a production smoke test. If the production site already has users, orders, inquiries, or new content, do not overwrite the production database with the staging database. Use a reviewed incremental migration or API sync.
The production smoke test checks immediately: the homepage and 5-10 key URLs return 200; no PHP fatal errors, white screens, or 502/504; CSS, JS, fonts, and images have no 404s; forms and email work; key page titles, descriptions, canonical, and schema are correct; sitemap, robots, and Search Console status are normal; and the mobile first screen and main CTAs are not broken. After launch, watch error logs, server resources, cache hits, form email, and search-engine crawling. Before launch, finish the security configuration. We already covered this in the guide to setting up security headers on Cloudflare, and it slots in right here.
Turn repeatable flows into project-level skills
Once a flow is stable and repeated, distill it into a project-level skill. Do not harden an unstable flow right after its first success. Good candidates: page preview HTML generation, WordPress cleaned HTML conversion, AIOSEO meta and schema batch updates, resource-center article import and internal-link mounting, shared CSS maintenance, single-product or single-post template publishing, and live snapshot diff audits with rollback.
Each skill contains SKILL.md, scripts, references, templates, and examples. SKILL.md states the trigger conditions, input files, pre-checks, execution steps, prohibitions, verification, rollback, and output files. Scripts support dry-run, logging, error exit codes, and idempotent execution.
Project-specific skills live in the project directory; only cross-project ones are installed globally for the agent. Anything involving company brands, servers, domains, or internal credentials should not become an unisolated generic template.
Long-term maintenance cadence
| Frequency | What to check |
|---|---|
| Every content update | Update pages, products, or posts, check slug, internal links, featured image, alt, meta, and schema, verify page return codes and key CTAs, update PROGRESS.md and the change log |
| Weekly | Review forms, email, 404s, and server error logs, check key page availability and speed, confirm backups ran |
| Monthly | Test WordPress, theme, plugin, and PHP updates on staging first, check sitemap, Search Console, and indexing status, check broken links, redirect chains, and orphan pages, review media usage, cache, and database growth, audit permissions, admin accounts, and Application Passwords |
| Every major redesign | Re-fetch the full live content, save snapshots of pages, posts, products, categories, SEO, and schema, generate a URL change table and 301 rules, run full regression on staging, and observe for at least one full business cycle after release |
Definition of done
A page or a set of pages is done only when all of the following hold:
- Local preview passed.
- Content, images, links, and forms passed checks.
- CSS, JS, and PHP ownership is clear and conditional loading is correct.
- SEO meta, canonical, and schema are verified.
- The staging page passed responsive and functional acceptance.
- Production is backed up before release.
- Production URLs, assets, forms, and logs passed checks.
- Change records, snapshots, and rollback info are saved.
- Repeatable parts are distilled into project-level skills or scripts.
Full workflow recap
The eight phases form one complete build flow, from the staging environment to the production launch. Every new page, product, and post afterwards reuses the same assets and rules. With project-level skills accumulating, the agent understands your site better over time, and maintenance cost keeps dropping.
Building a WordPress site that works natively with AI agents, eight phases
Staging
Separate subdomain, no indexing, child theme ready.
Workspace
AGENTS.md and the four context files.
Design system
Finalize Home and Landing, distill DESIGN.md.
Local review
Pass preview checks before WordPress.
Theme engineering
Separate content from code, enqueue rules.
SEO and schema
AIOSEO setup, schema by page type.
Staging acceptance
Functional, responsive, SEO checks.
Ship to production
Backup, ordered release, smoke test.
every Thursday.
Hosting reviews, builder comparisons, performance tips, and plugin picks — curated weekly for WordPress site owners and builders.