Deploying a WordPress website using Hostinger is a straightforward process, perfect for beginners. Start by purchasing a domain and choosing a Hostinger hosting plan, such as the Business plan for optimal features. After setting up your account and completing payment, log in to Hostinger and begin the website setup. Select WordPress as your platform, create a username and password, and choose your website type. Install WordPress and configure DNS settings through your domain registrar, like Alibaba Cloud. Finally, block search engines from indexing your unfinished site by uploading a robots.txt file to your server. This ensures a smooth start to your WordPress site deployment.
After buying your domain, the next step is getting a cloud server and deploying WordPress on it. Think of it like building a house: your website is the house, WordPress is the construction tool, and the cloud server is the foundation. This guide covers choosing a server, the full 23-step Hostinger deployment walkthrough, and — critically — how to temporarily block search engines while you build, so an unfinished site never gets indexed.
Many beginners get confused about how WordPress, cloud servers, and websites relate to each other. Simply put: WordPress is a website-building tool (a Content Management System), and your cloud server is the platform that hosts the finished result.
Choosing a Cloud Server
With so many server providers on the market, how do you actually choose one?
| Criteria | Why It Matters |
|---|---|
| Cross-border business needs | If your site serves an international audience, use an overseas server to keep access speed and user experience solid for those visitors |
| Established server companies | Stability is crucial — even 10 minutes of downtime can do real damage if you have live traffic |
| Ease of use | If you’re not comfortable with backend server operations, choose a host designed for WordPress with one-click installs, so you skip hiring a technician |
| Customer support | 24-hour support matters — you want professional help available the moment something server-related breaks |
We recommend Hostinger — cost-effective and beginner-friendly. You can purchase through this link: bdwebtek.com/hostinger, starting around $3.90/month.
How to Purchase a Server and Deploy WordPress
1. Visit the Hostinger Homepage
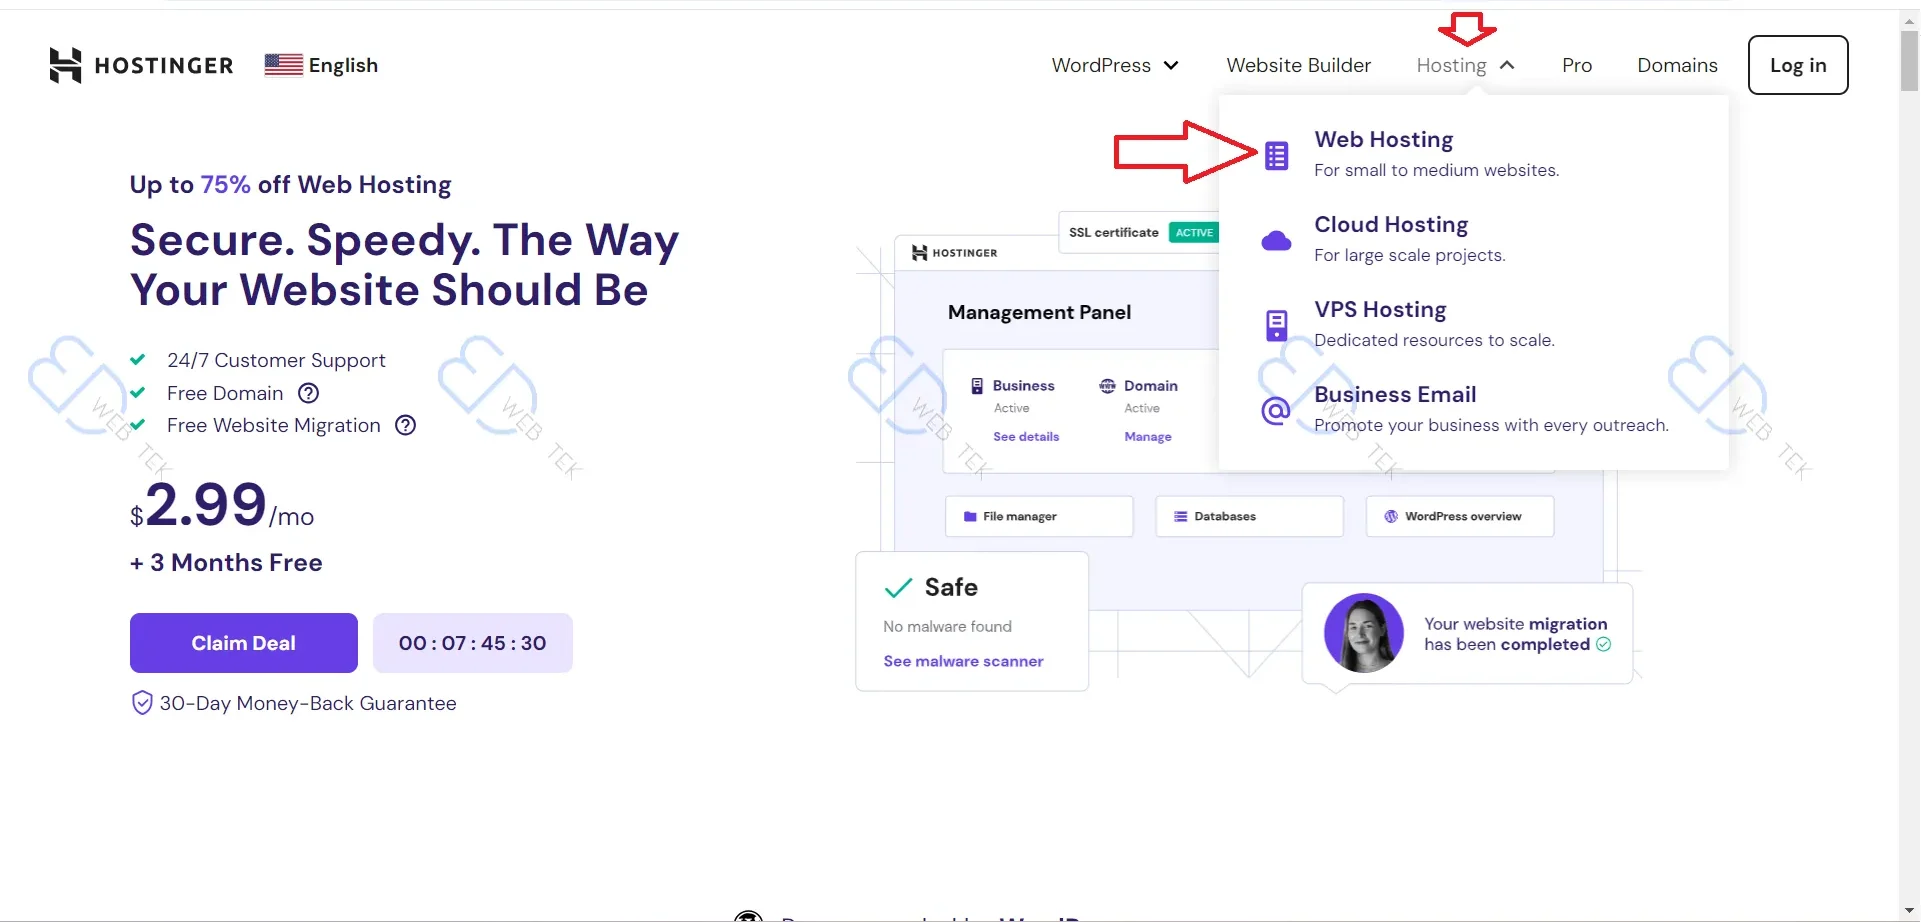
Use this link: bdwebtek.com/hostinger. On the homepage, select Web Hosting.
2. Choose a Plan
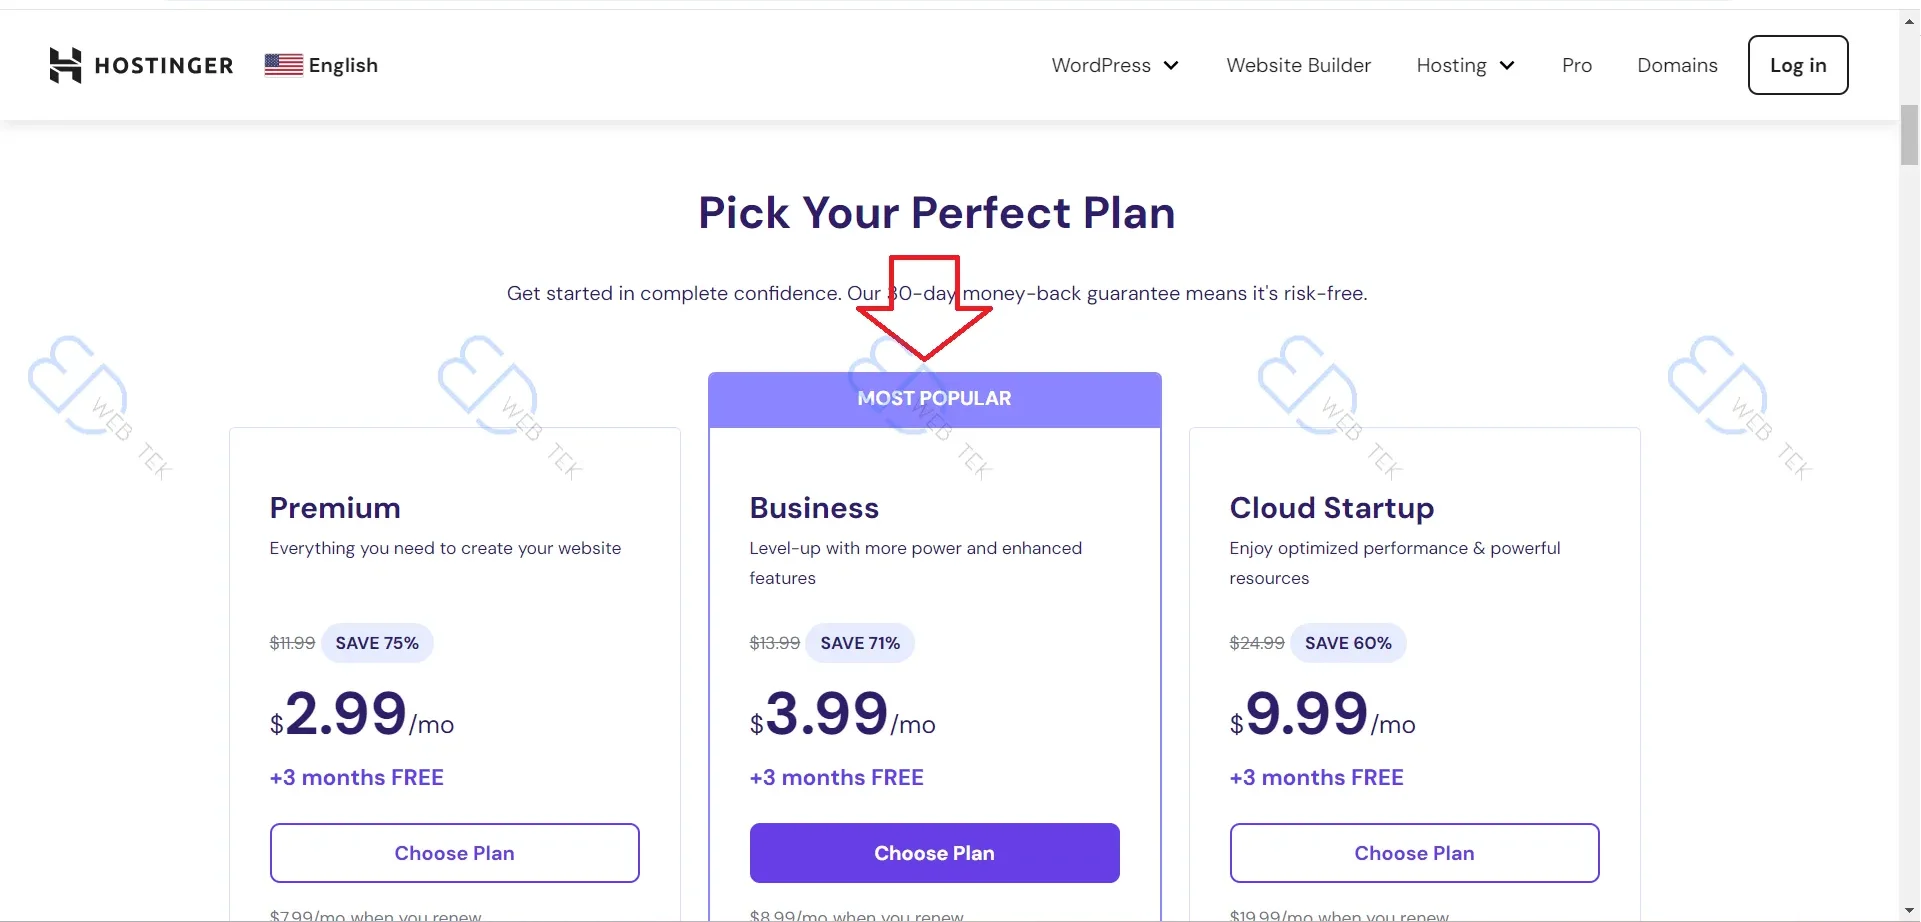
The Business plan is our recommendation — it’s the most popular choice, supporting up to 100 websites, 200GB SSD storage, and 100,000 monthly visits, which is more than enough for most B2B and B2C sites.
3. Choose the Purchase Duration
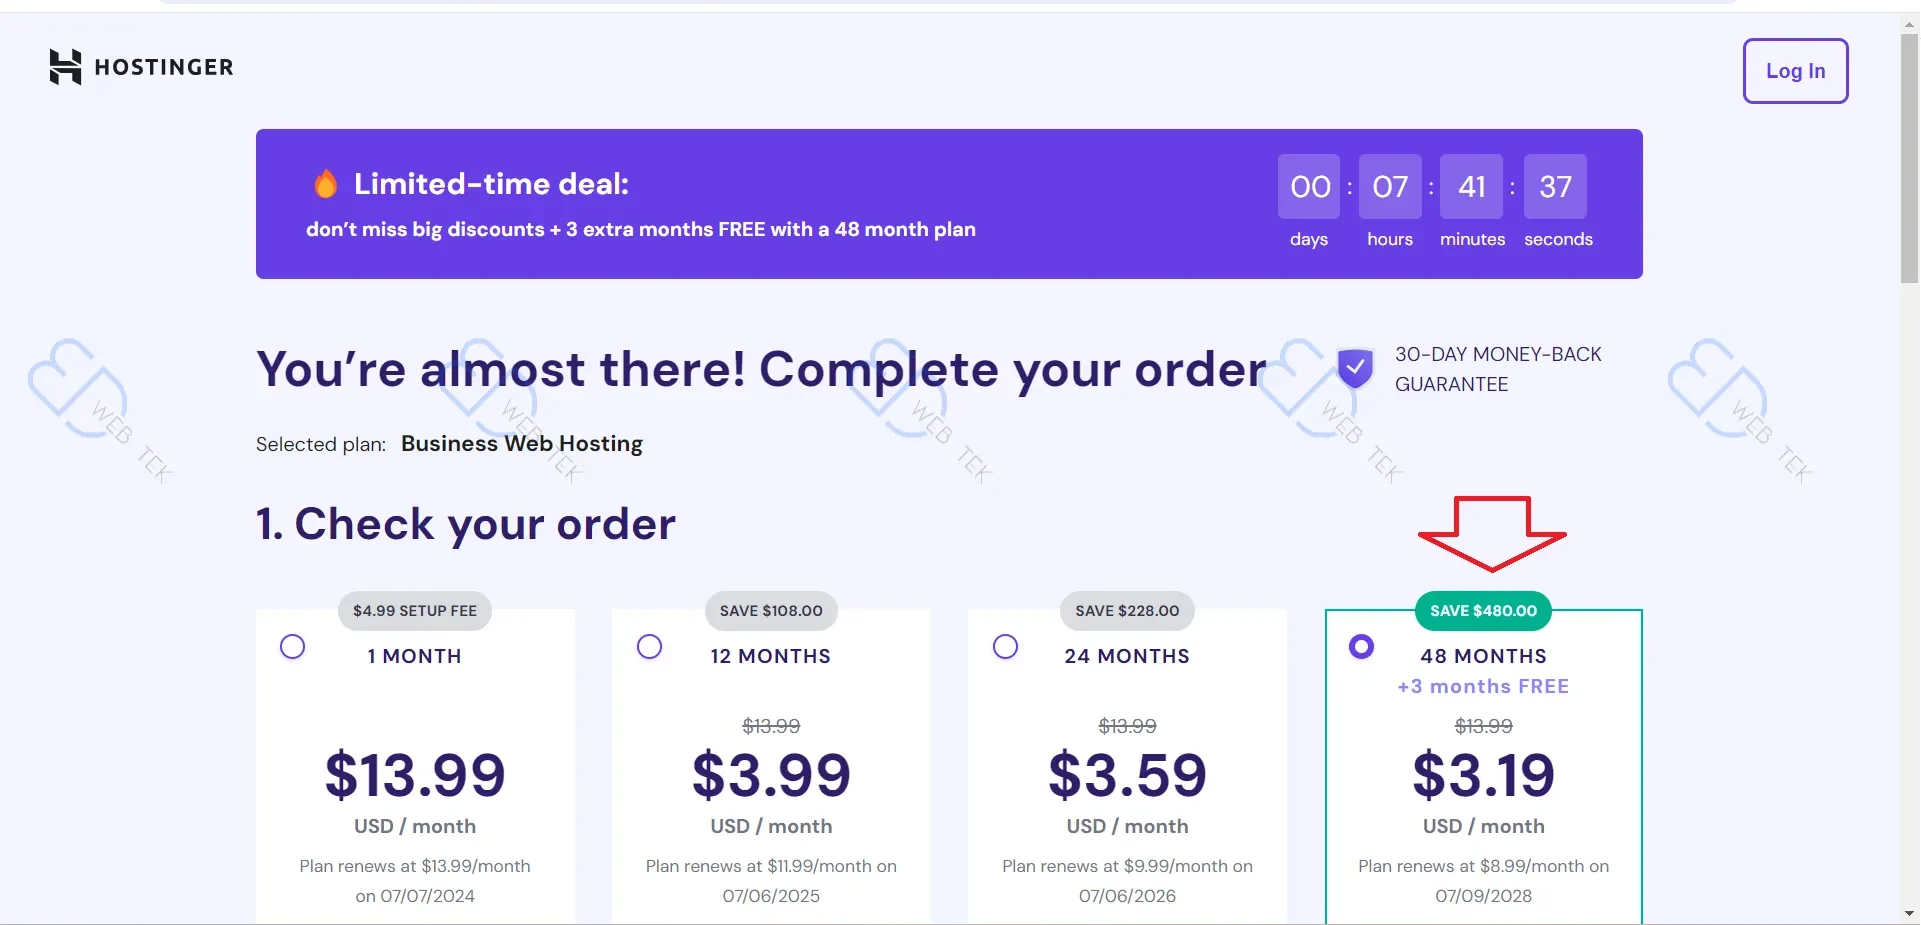
The 48-month term offers the lowest monthly rate — under $4/month.
4. Create an Account
Make sure your IP shows as overseas (e.g., the United States) — Hostinger may otherwise redirect you to Hostinger China based on IP location, where prices can differ.
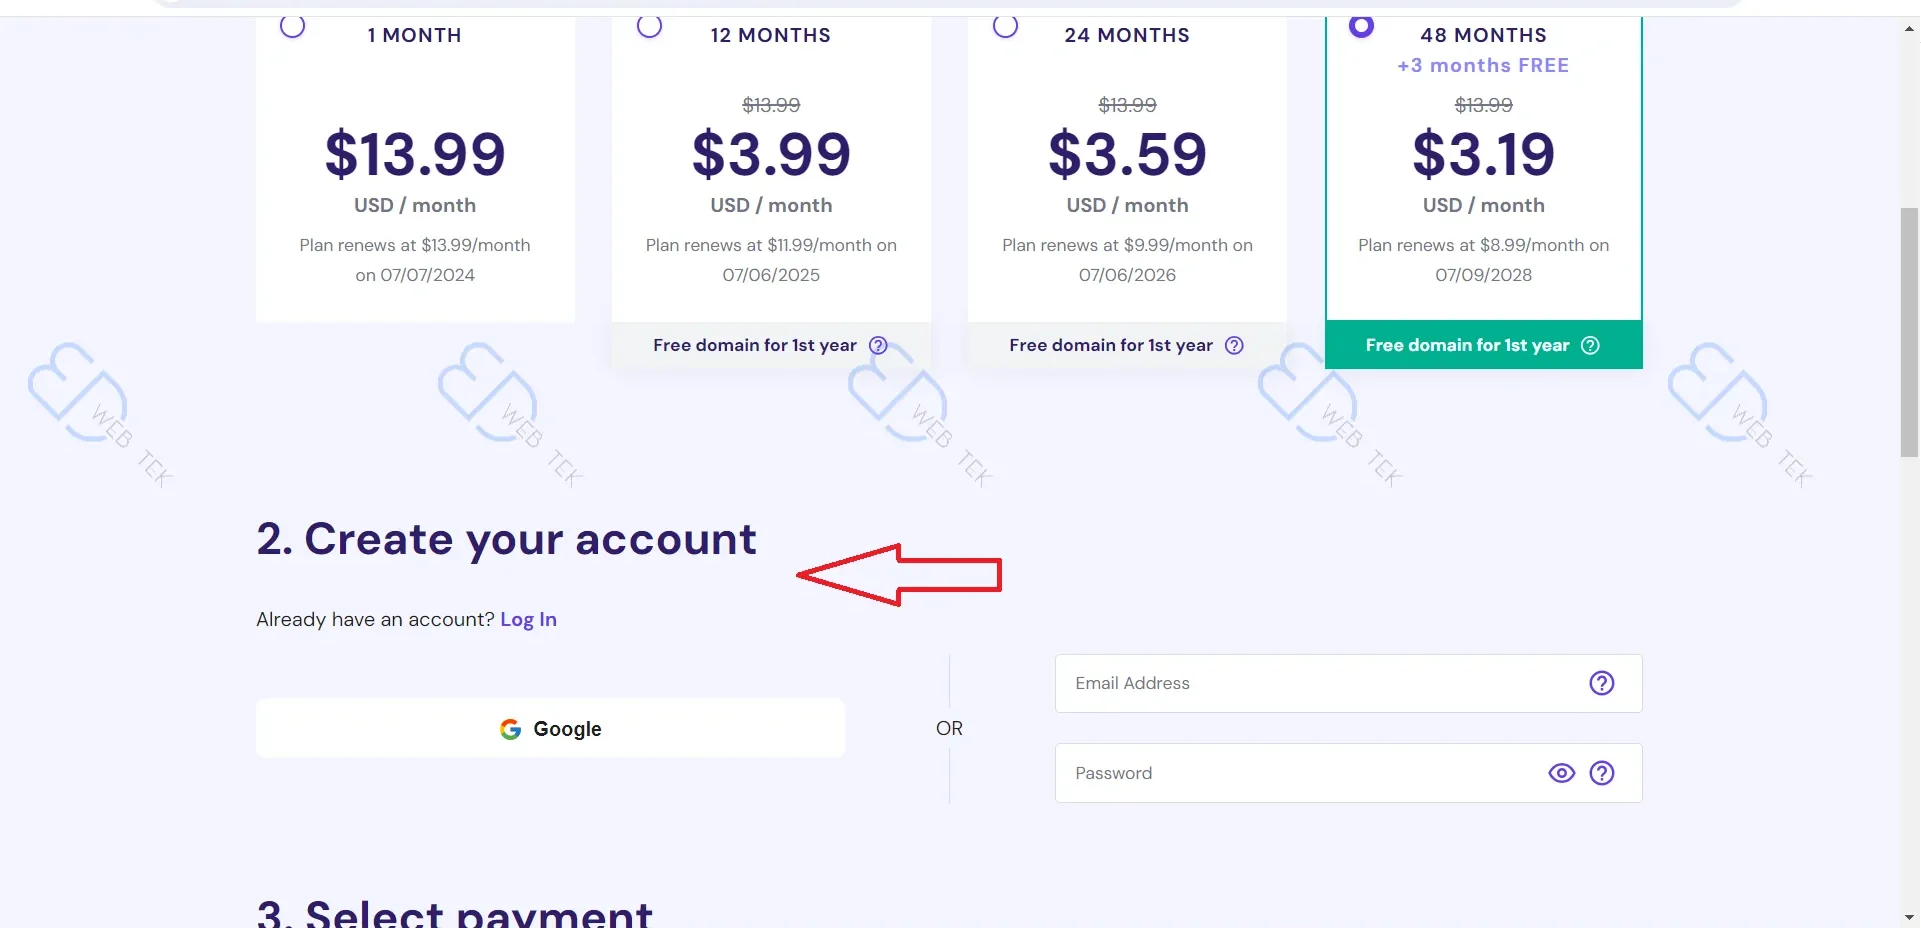
5. Choose a Payment Method
Hostinger supports credit card, PayPal, Google Pay, Alipay, and Coingate — convenient for buyers worldwide.
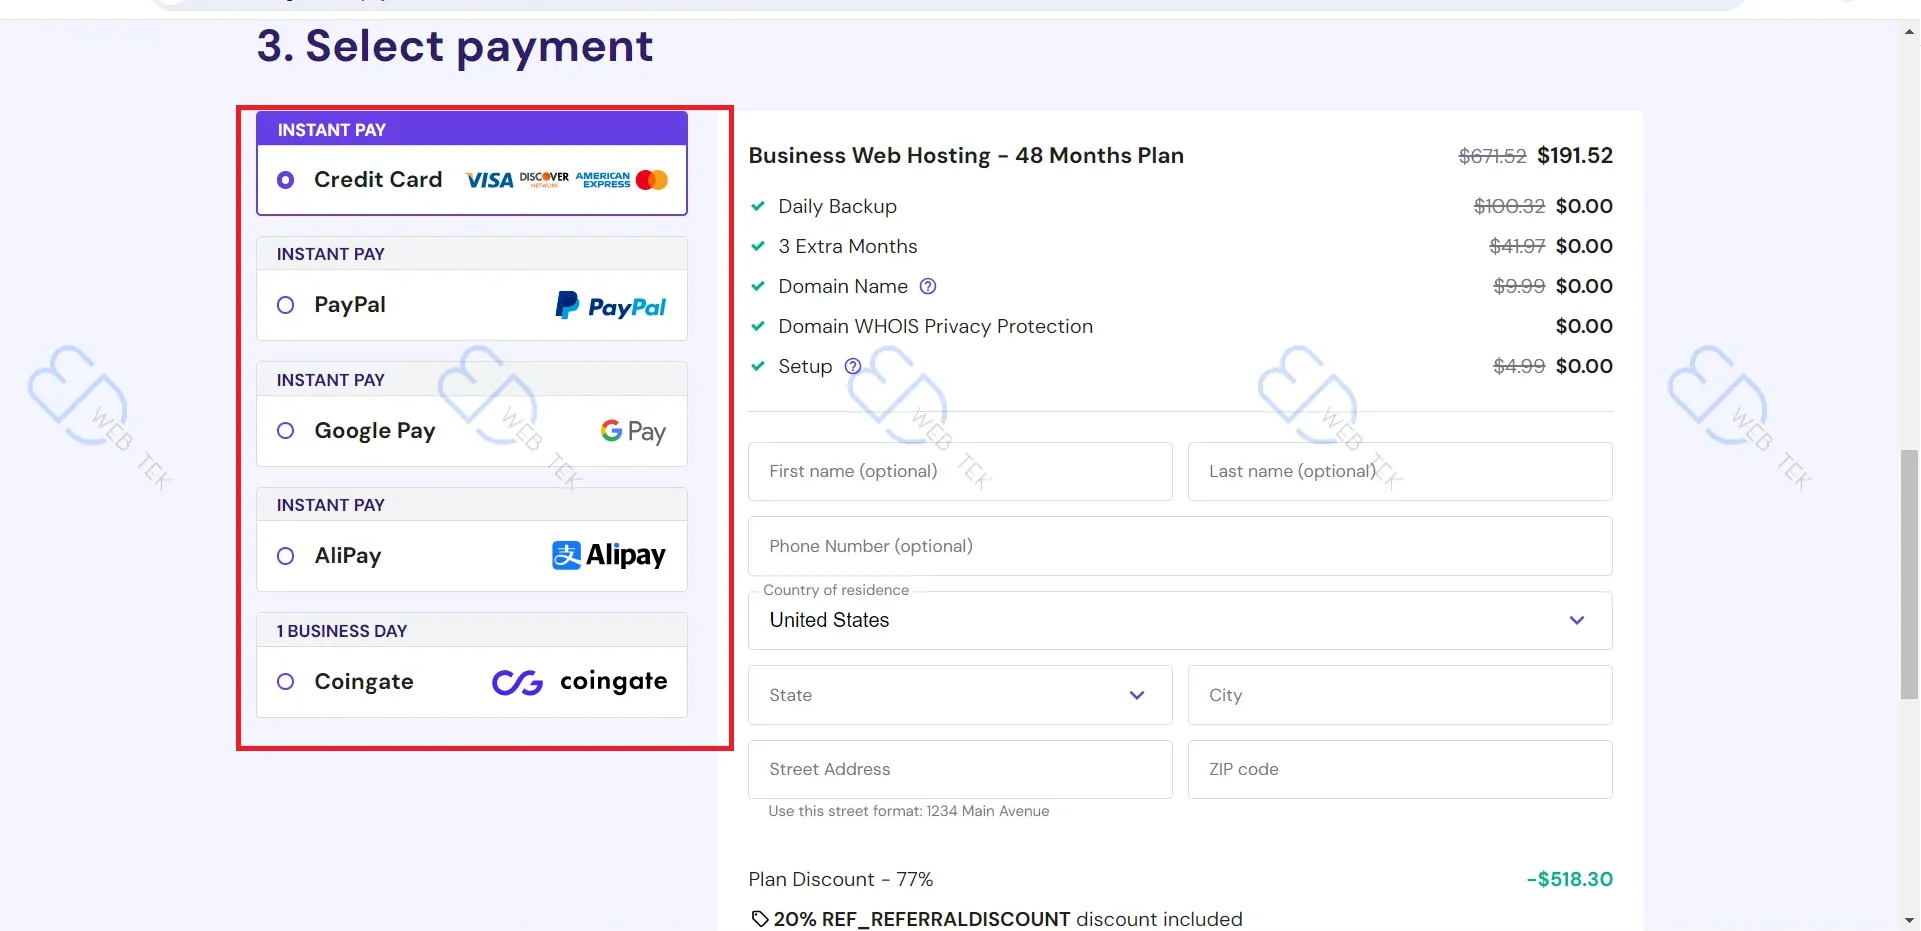
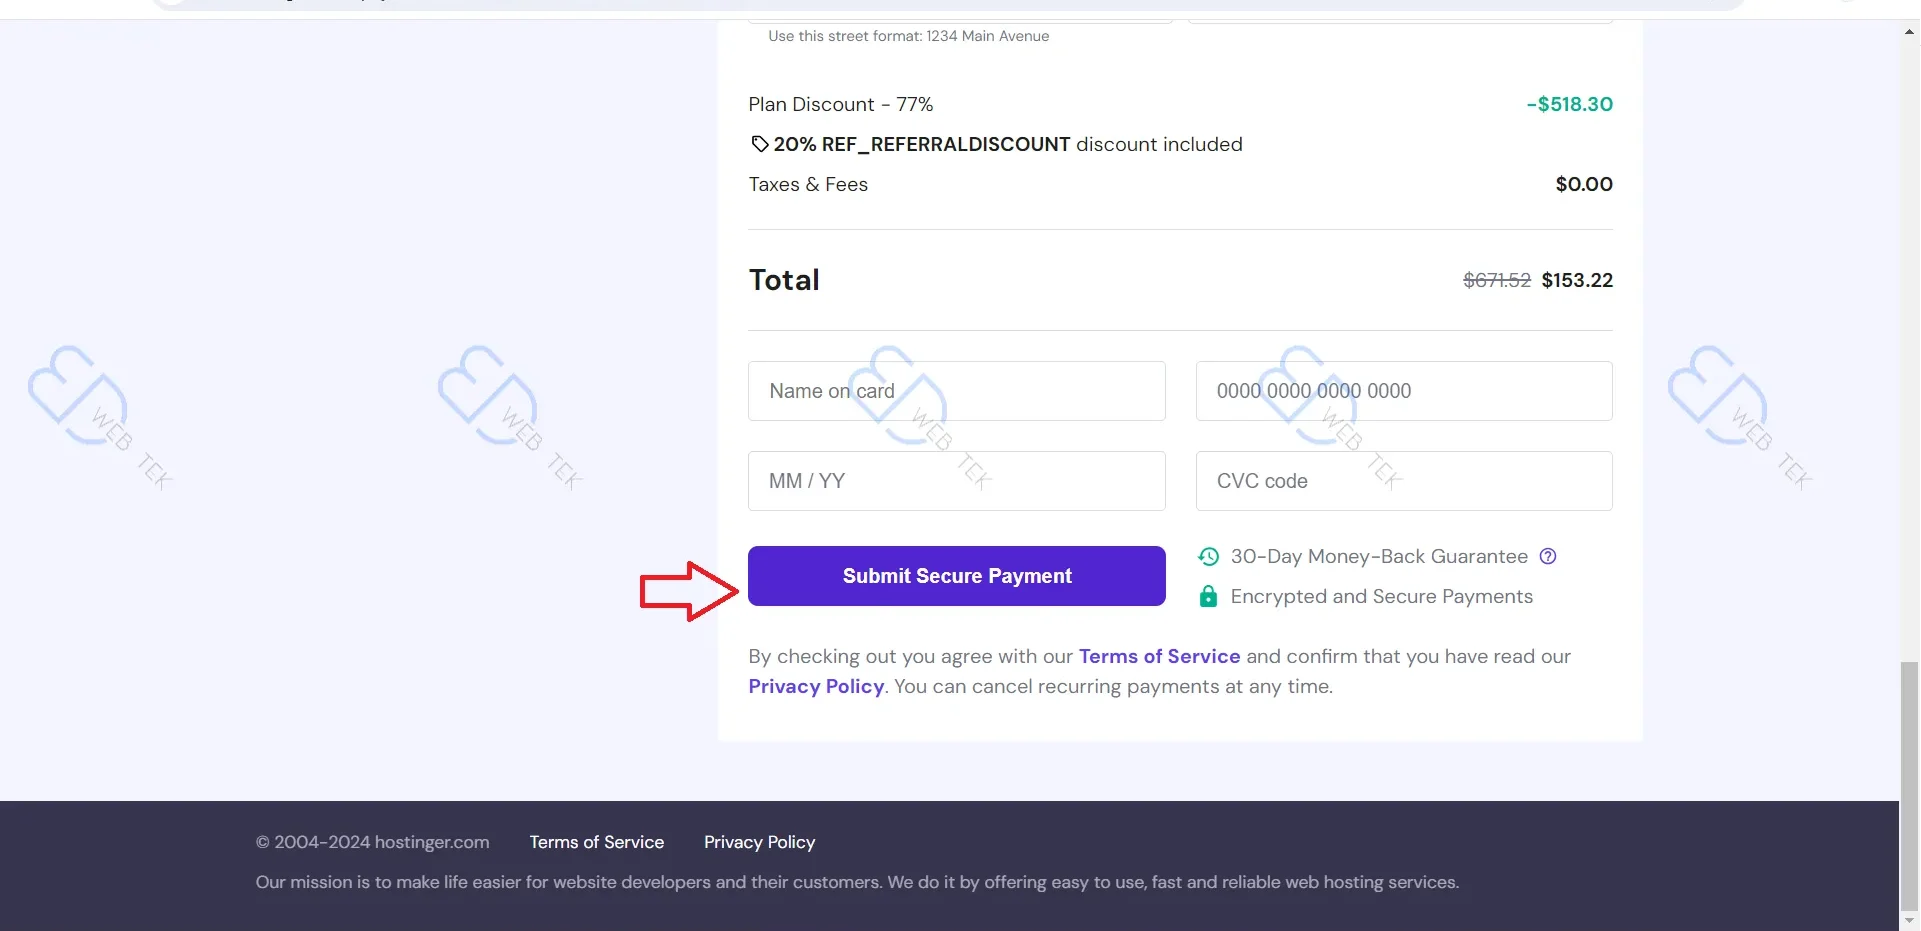
6. Payment
Fill in your information and submit payment.
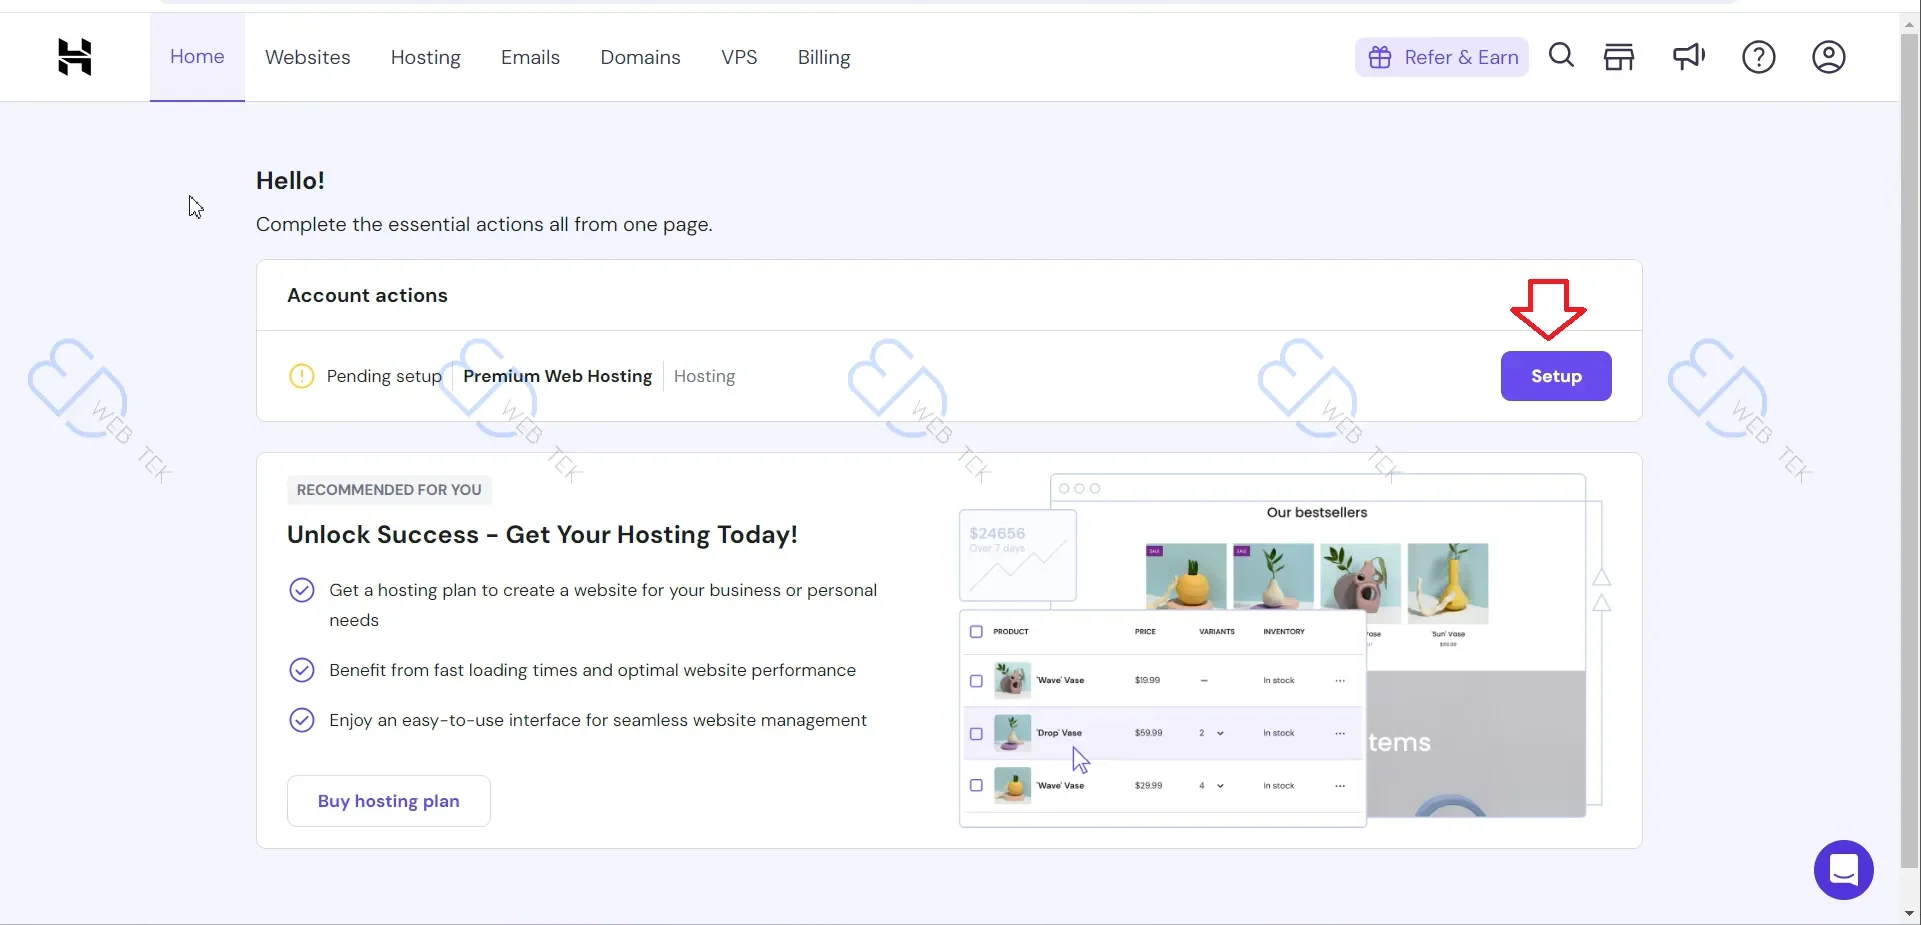
7. Log In to Hostinger
You’ll see no websites on your server yet. Click Setup to start creating one.
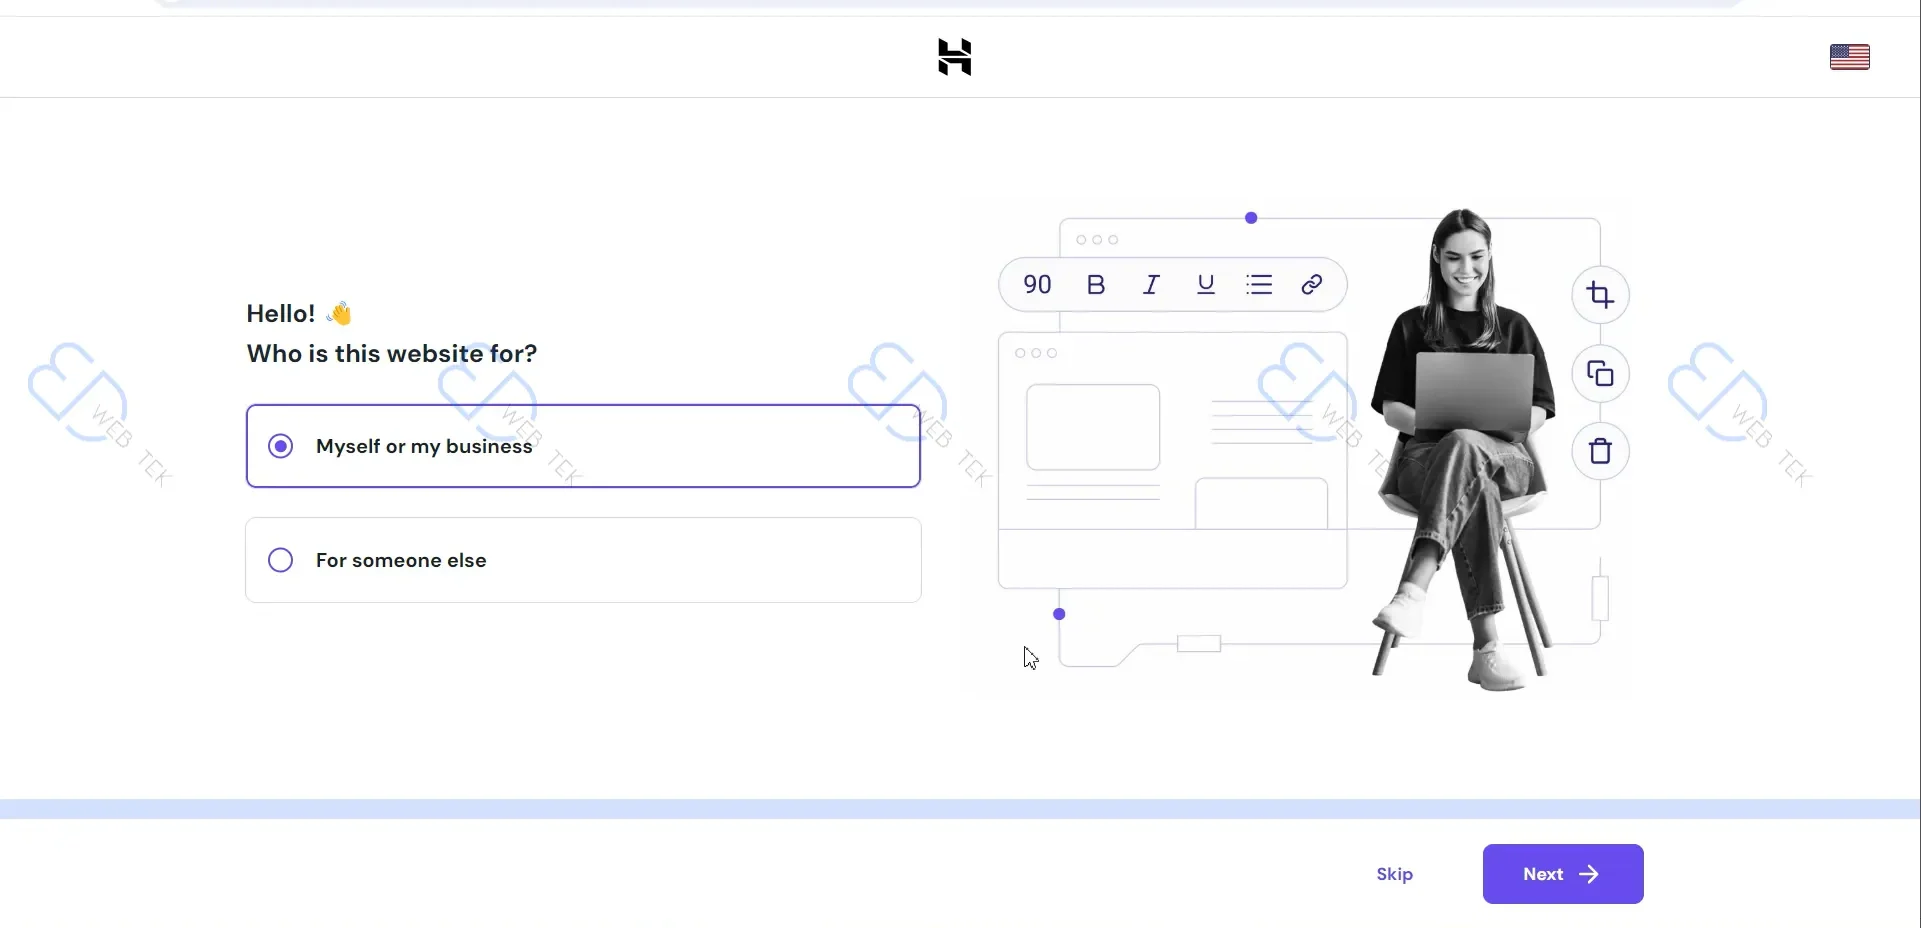
8. Create a Website
Select the first option to create a website for yourself, then click Next.
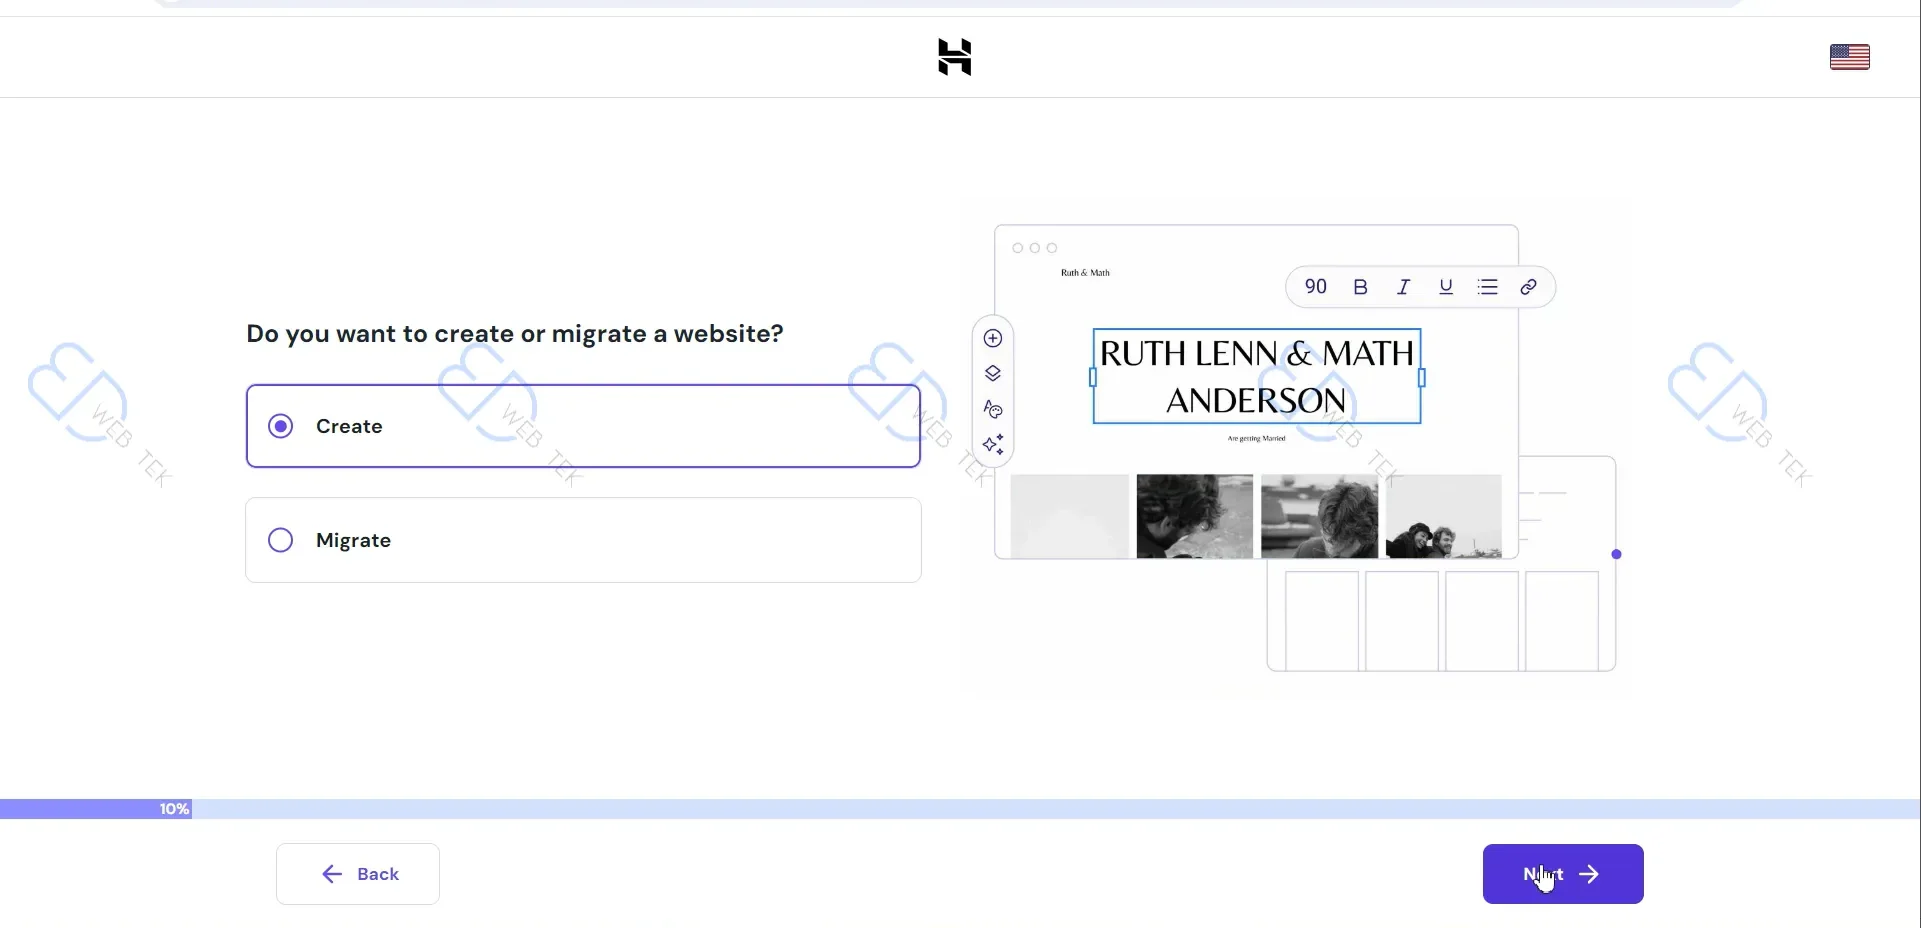
9. Choose to Create a New Website
Choose whether to create a new site or migrate an existing one. For a new website, select Create and click Next.
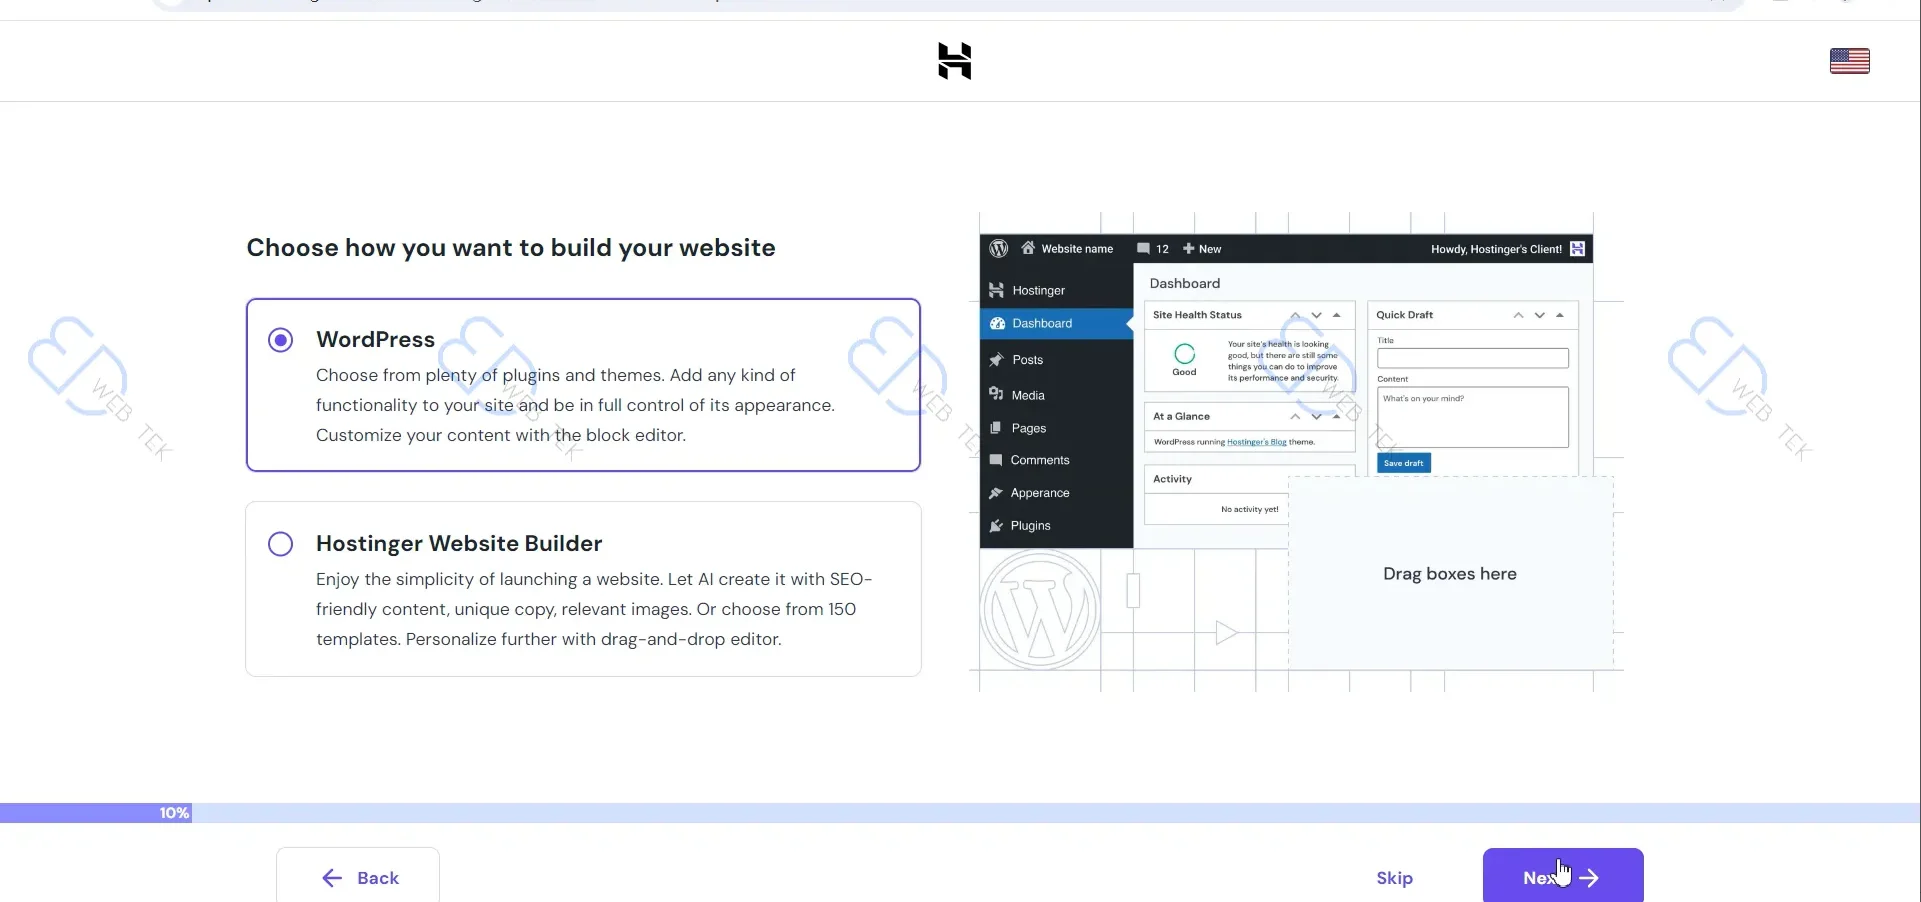
10. Select WordPress
Select WordPress and click Next.
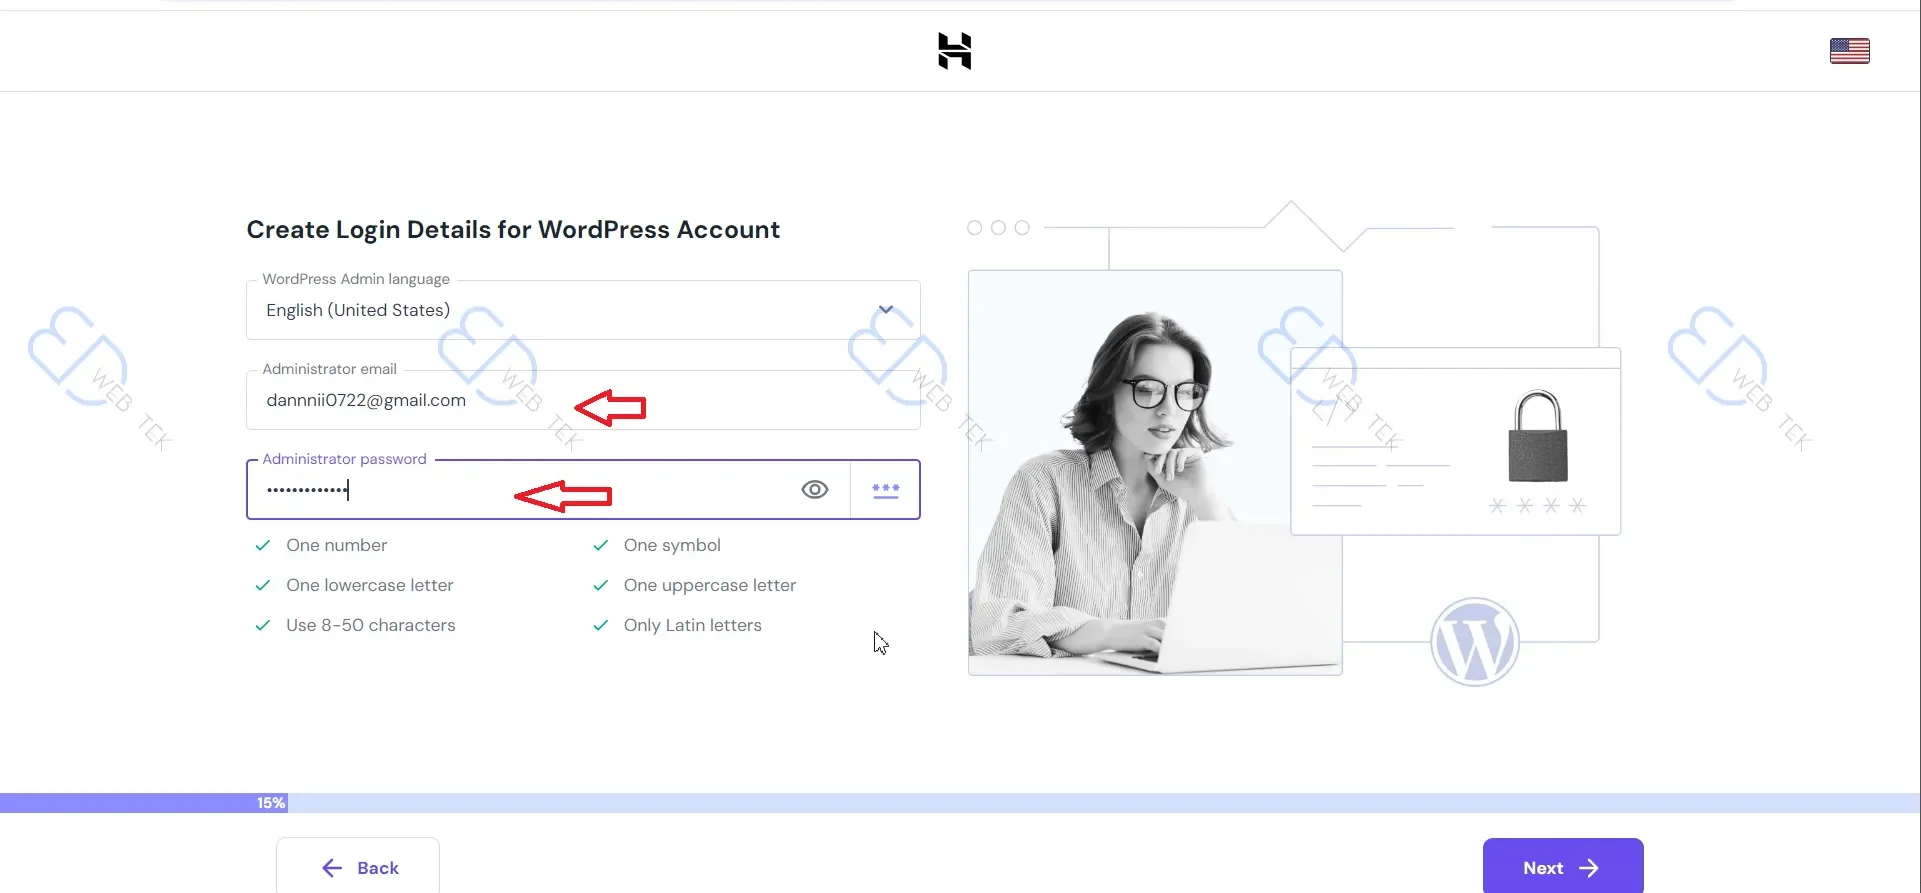
11. Create WordPress Credentials
Create a WordPress username and password — at least 8 characters, with uppercase, lowercase, numbers, and symbols. Click Next.
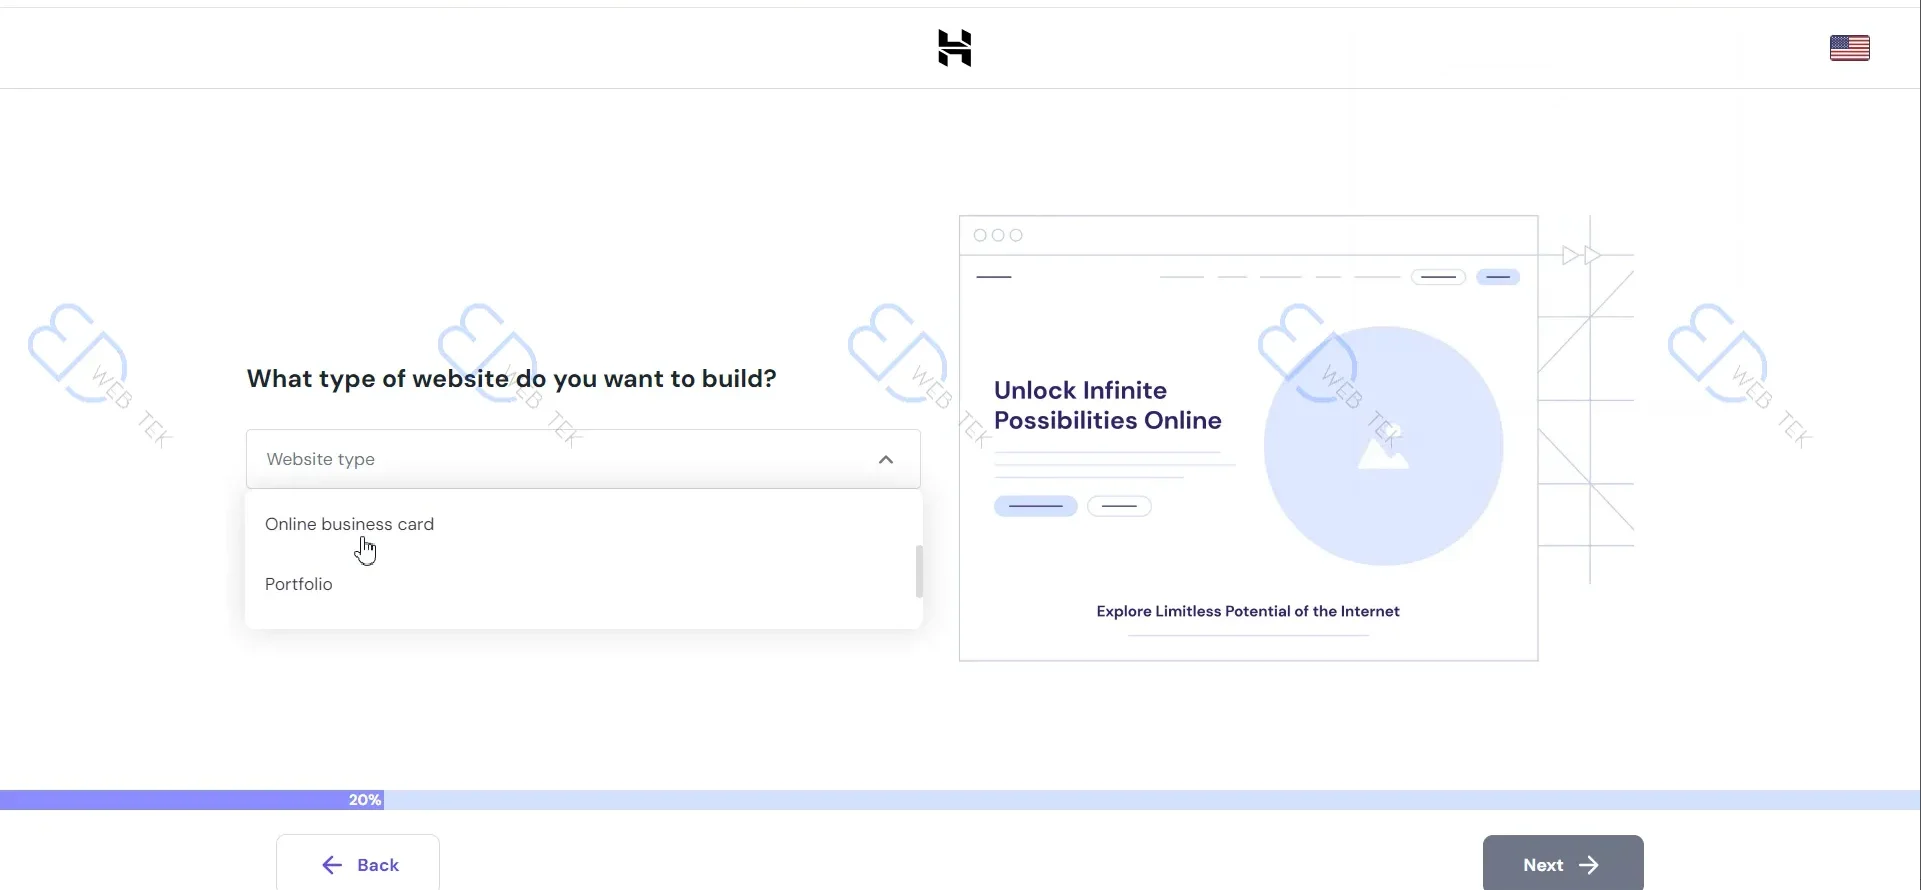
12. Choose the Website Type
Select your website type and click Next.
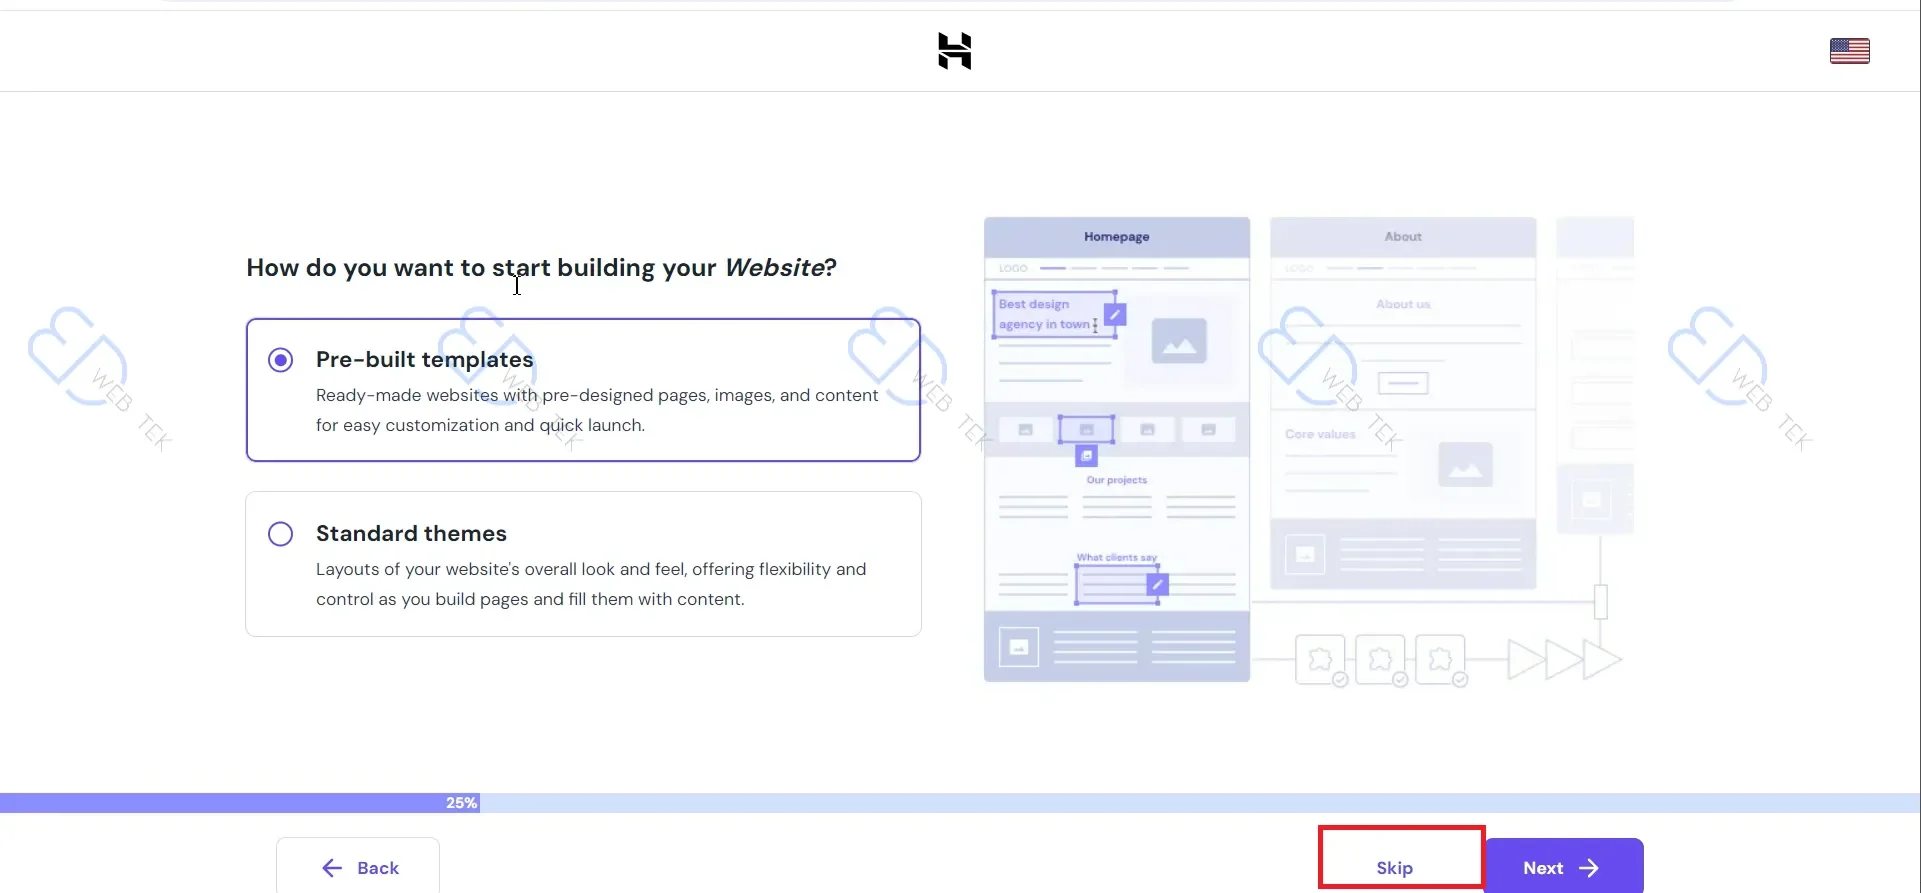
13. Choose Whether to Pre-Install a Template
Choose Skip to start customizing your website from scratch.
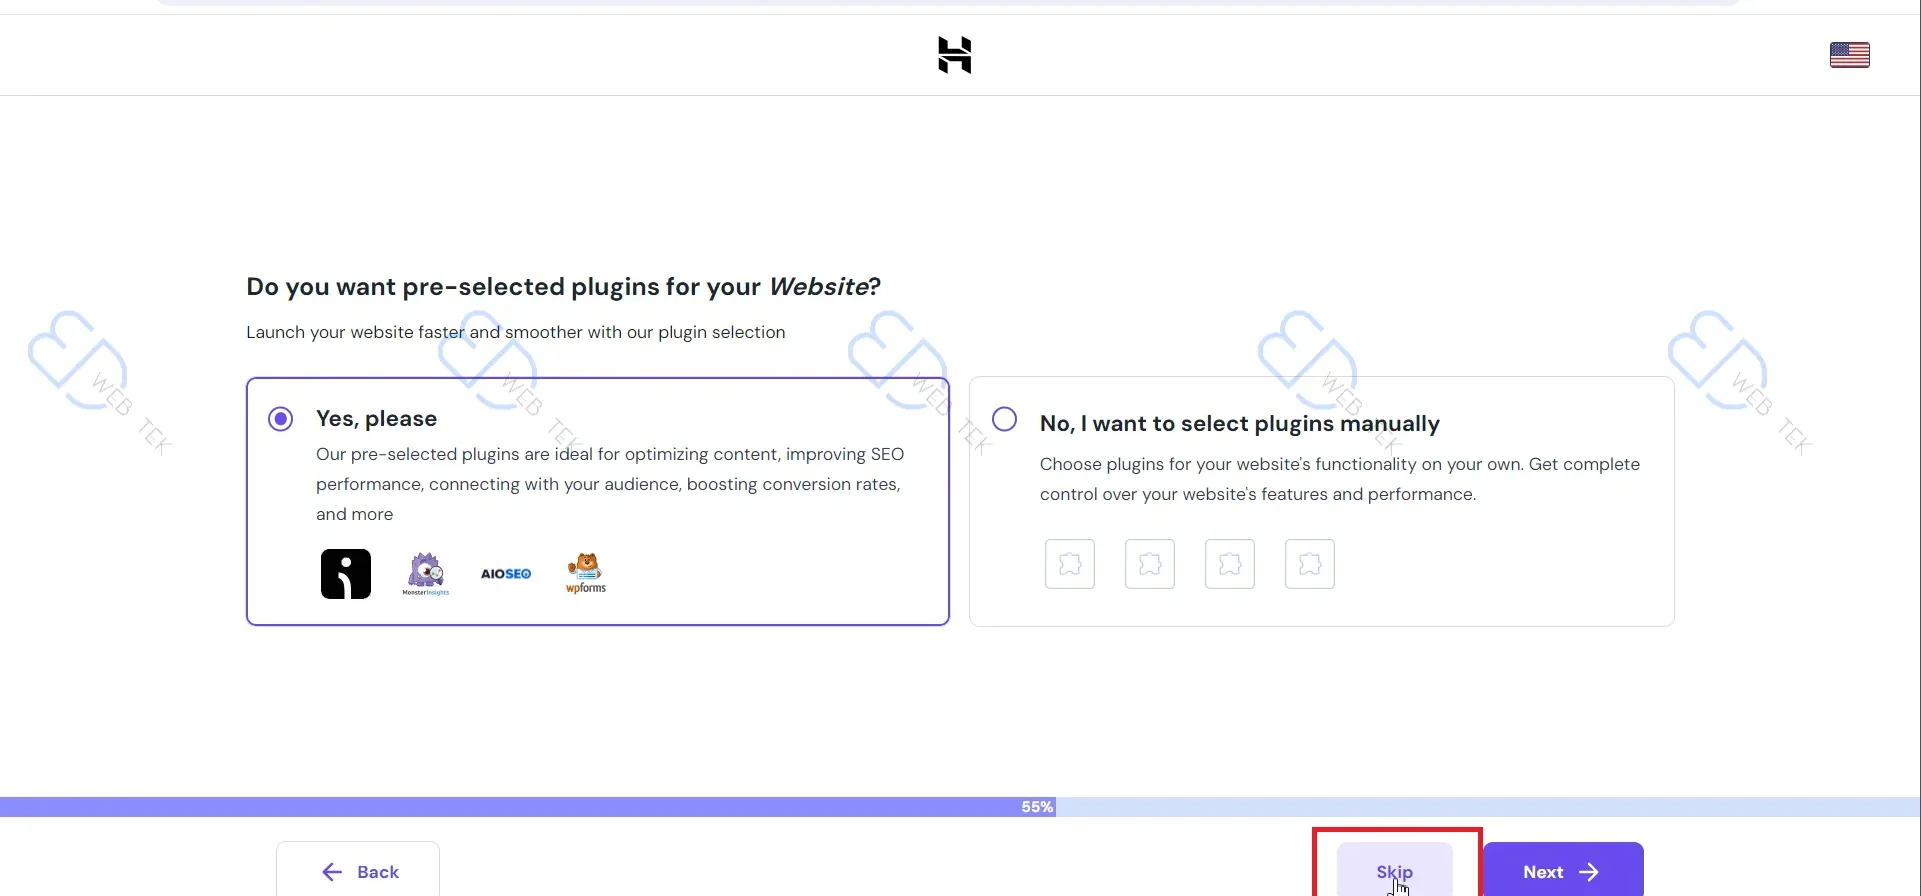
14. Choose Whether to Pre-Install Plugins
Choose Skip here too — decide which plugins you actually need yourself, since unnecessary ones can drag down performance.
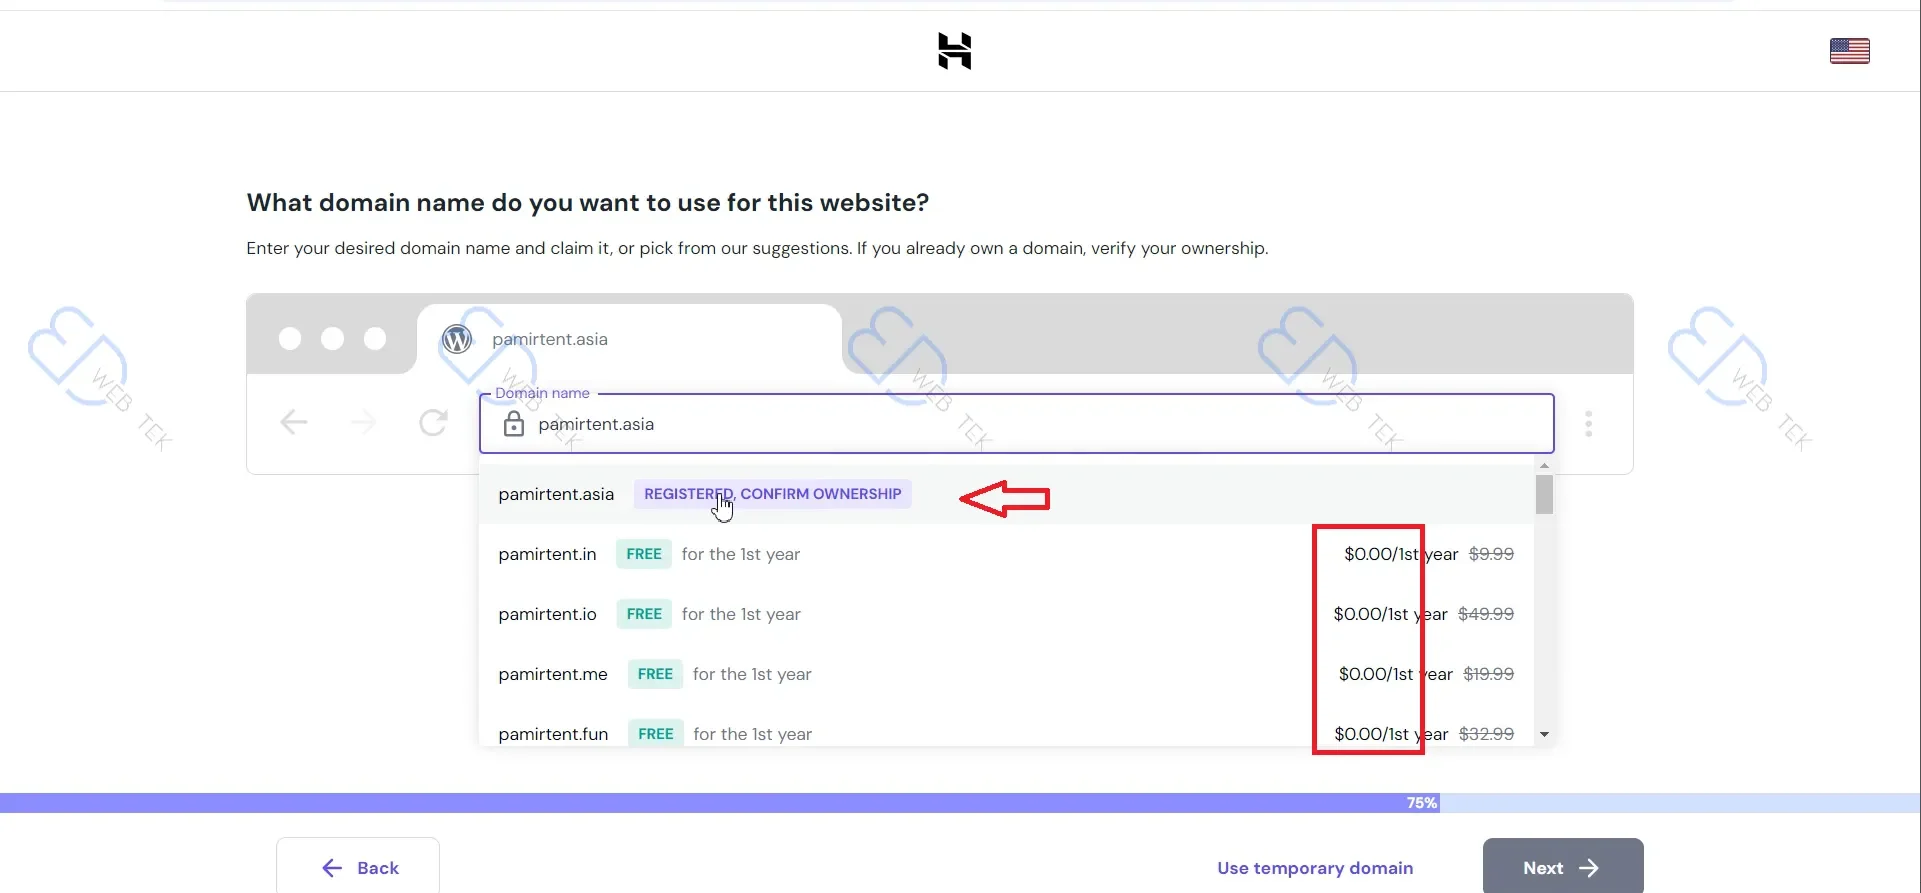
15. Domain Search
If your domain shows REGISTERED (because it was registered elsewhere, e.g. Alibaba Cloud), confirm ownership, or pick a different suffix if one’s available. Click Next.
16. Choose a Data Center
Options include US East, US West, Brazil, Lithuania, UK, France, India, and Indonesia. Pick whichever is closest to your target market — or the US if you’re targeting a global audience. Click Next.
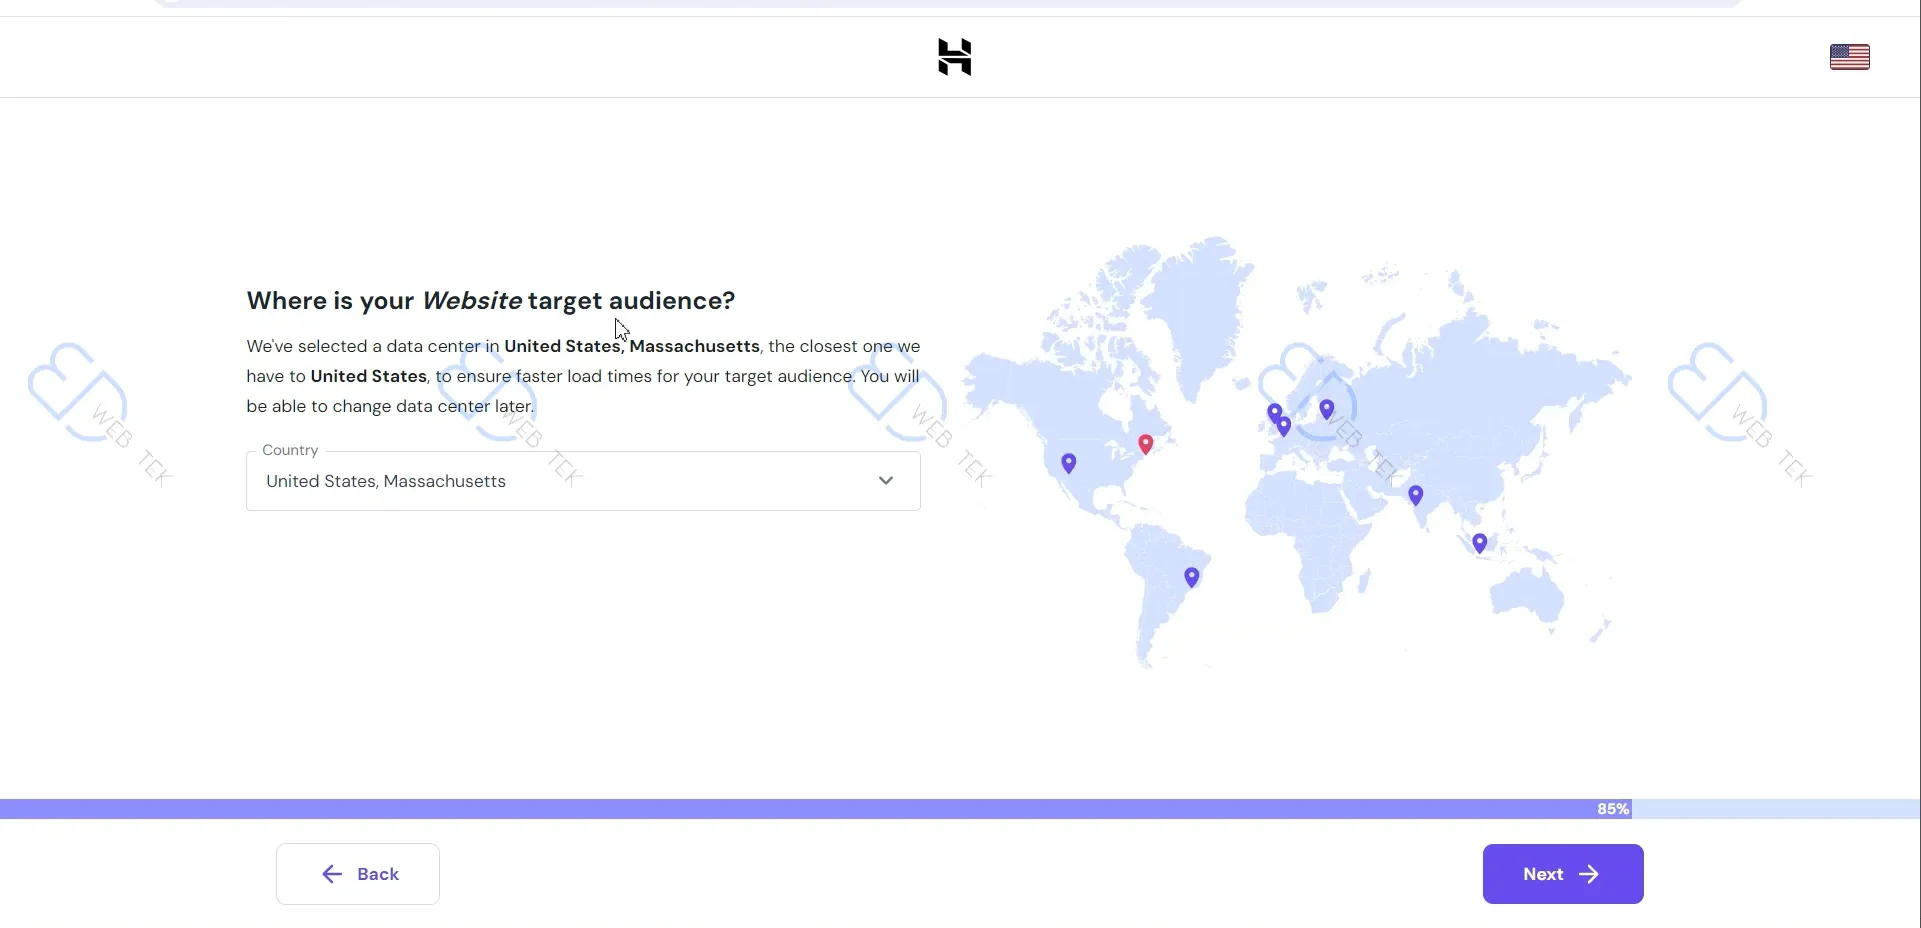
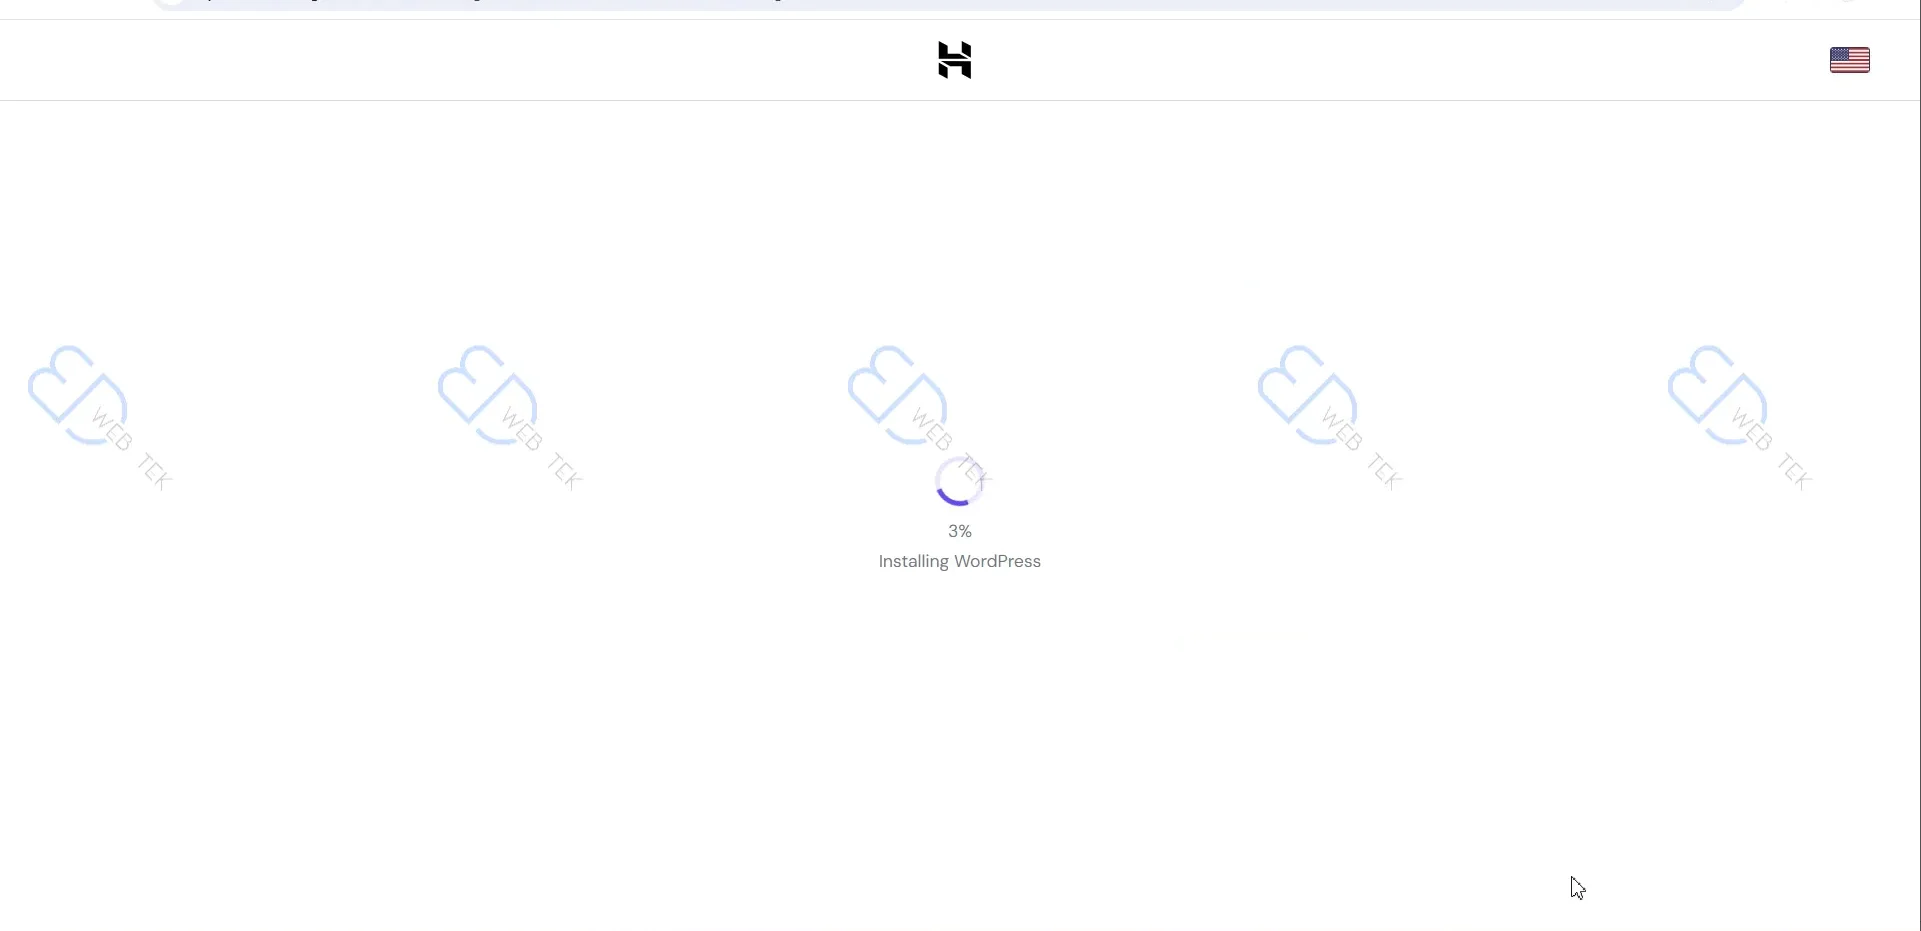
17. Wait for WordPress Installation
WordPress takes 1-2 minutes to install.
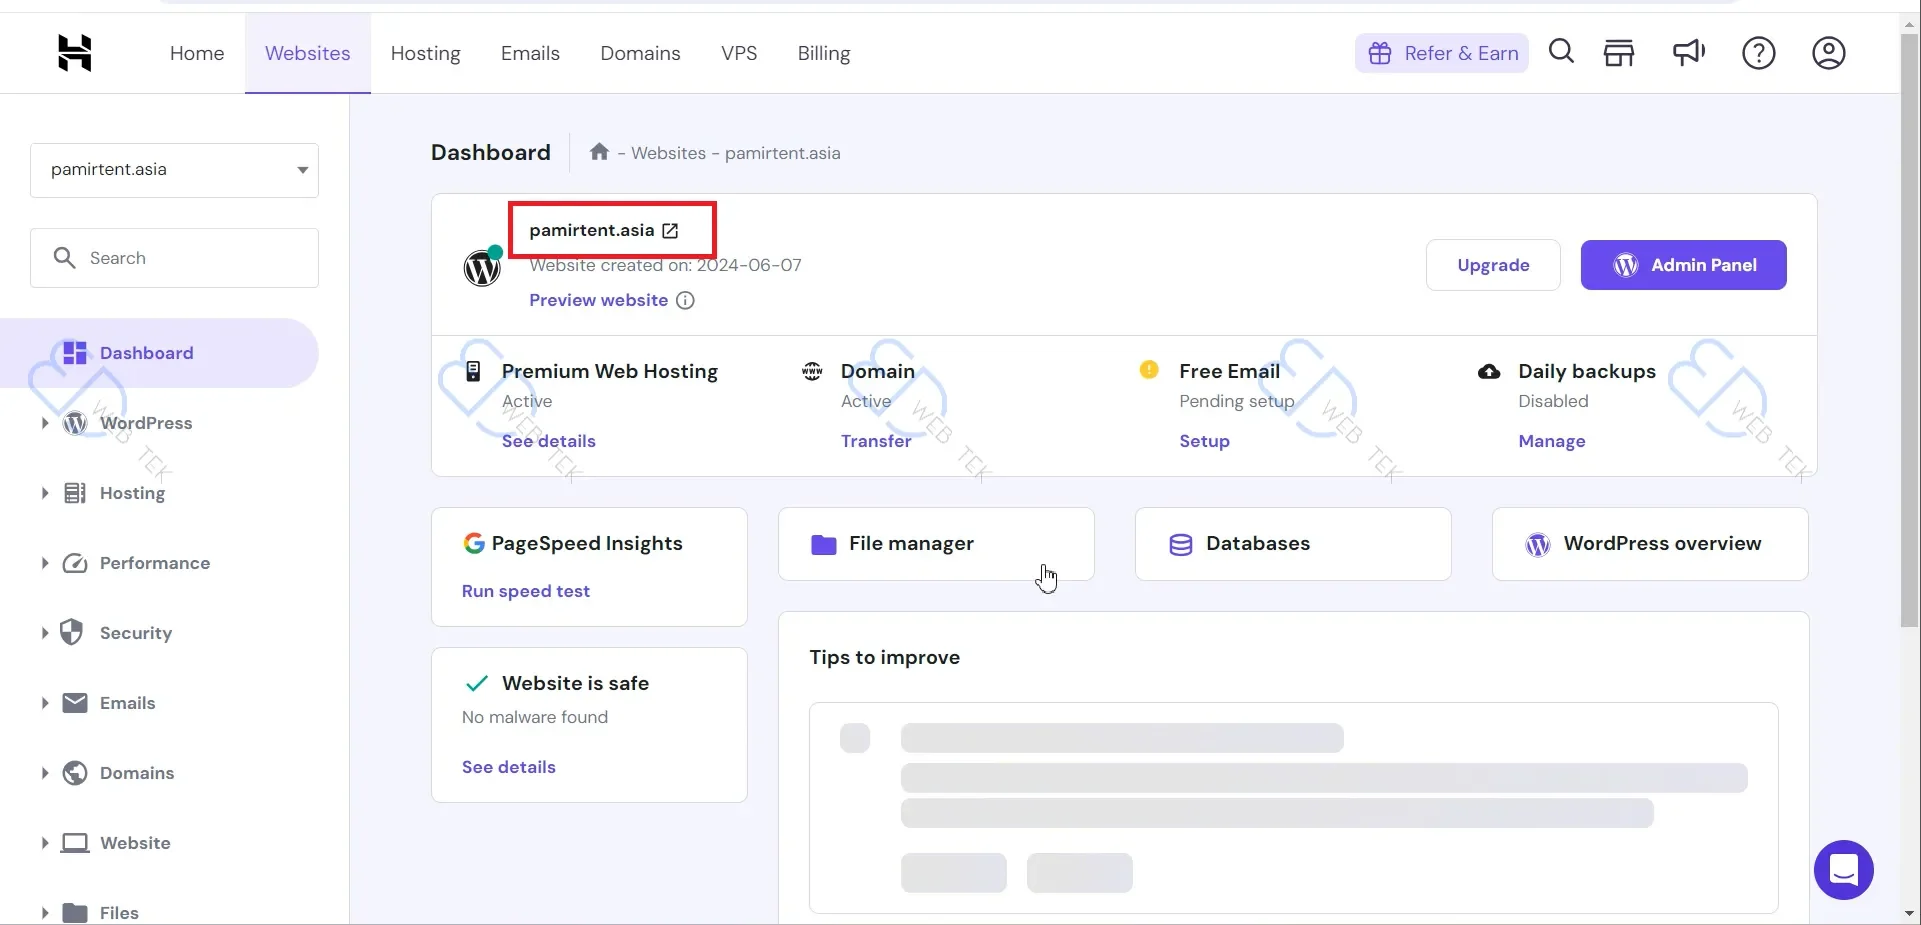
18. Hostinger Website Control Panel
In the Hostinger panel, you’ll see your domain listed, confirming WordPress installed successfully. No red prompt means DNS is already pointed correctly; if there is one, that’s covered in the next step.
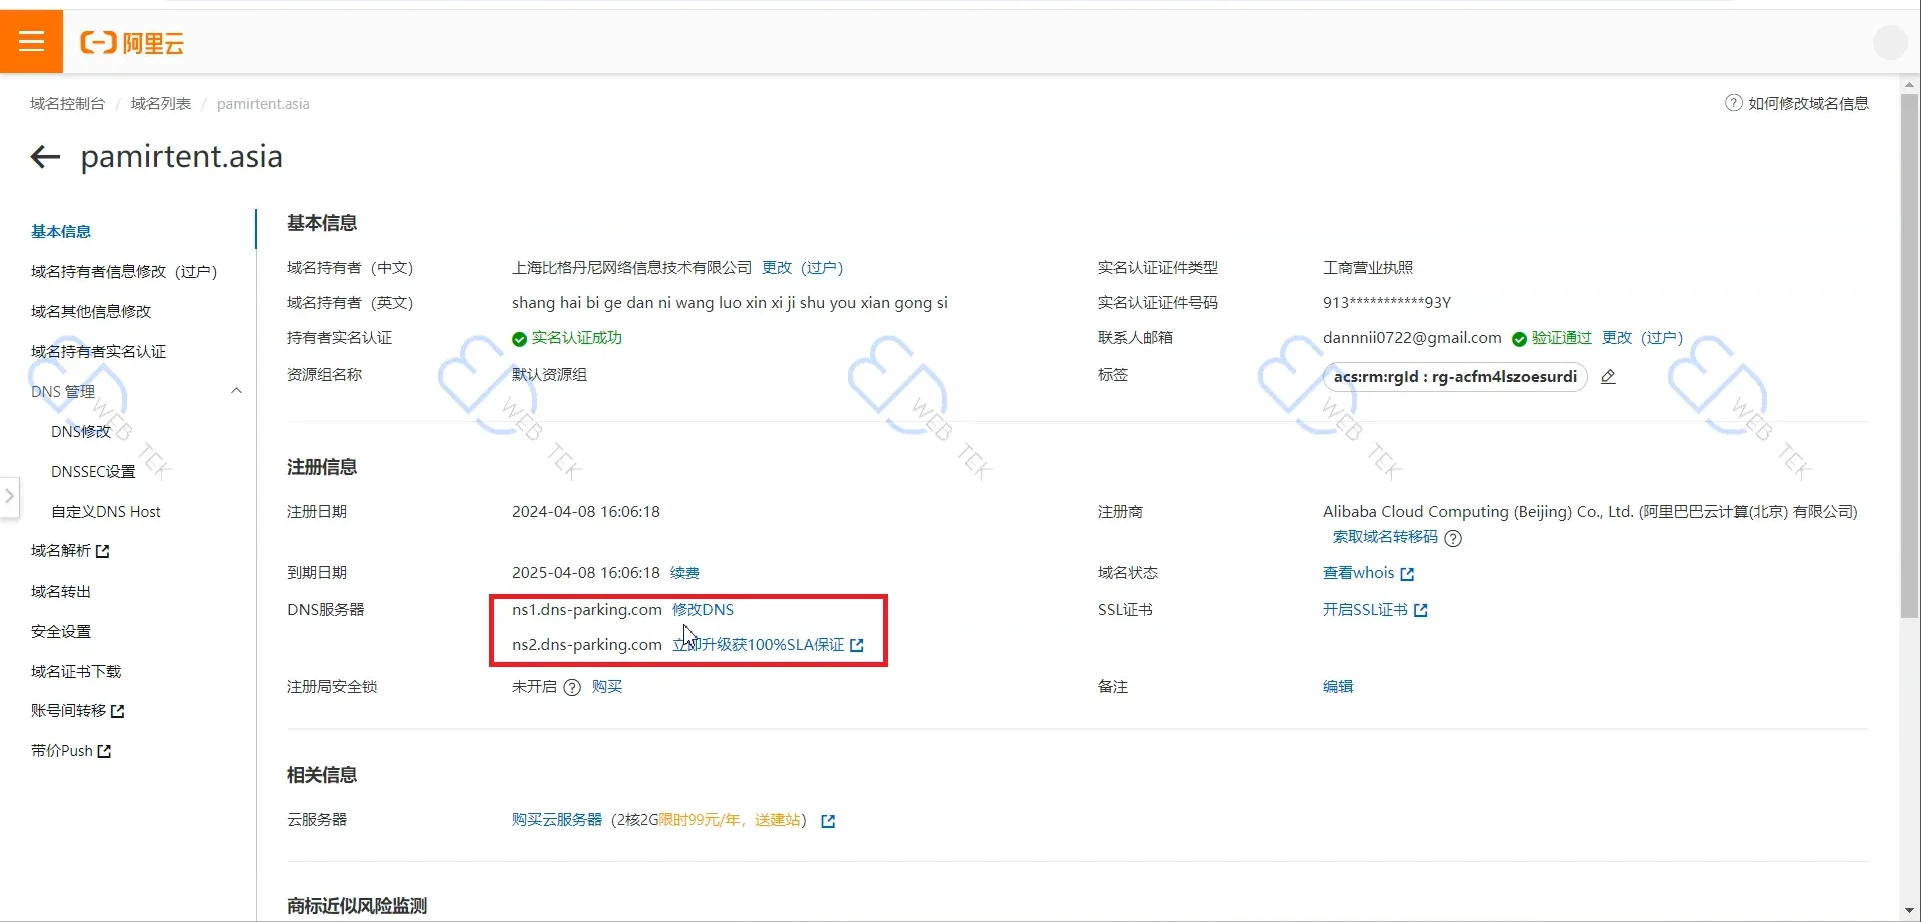
19. Modify DNS in Your Domain Console
In your domain registrar’s console (Alibaba Cloud shown here), update the DNS servers to ns1.dns-parking.com and ns2.dns-parking.com as provided by Hostinger. If your domain is registered elsewhere, the process is similar.
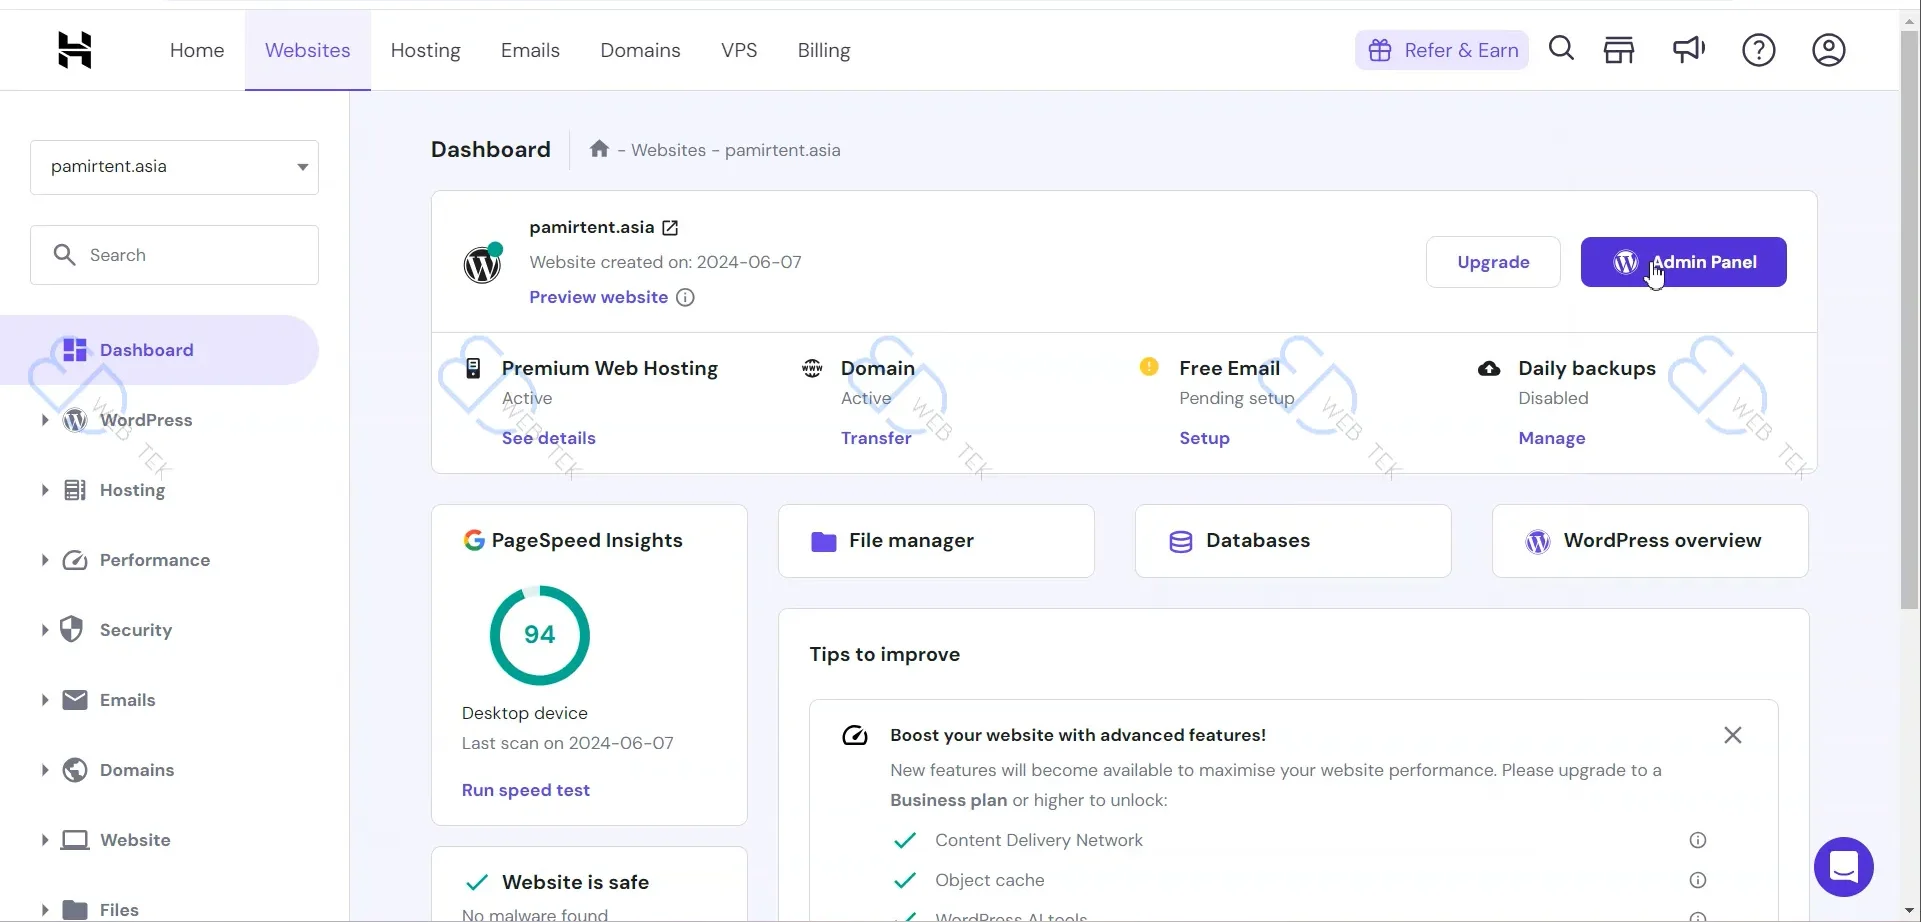
20. Access WordPress Backend Through Hostinger
In the Hostinger backend, click Admin Panel to go straight into the WordPress admin.
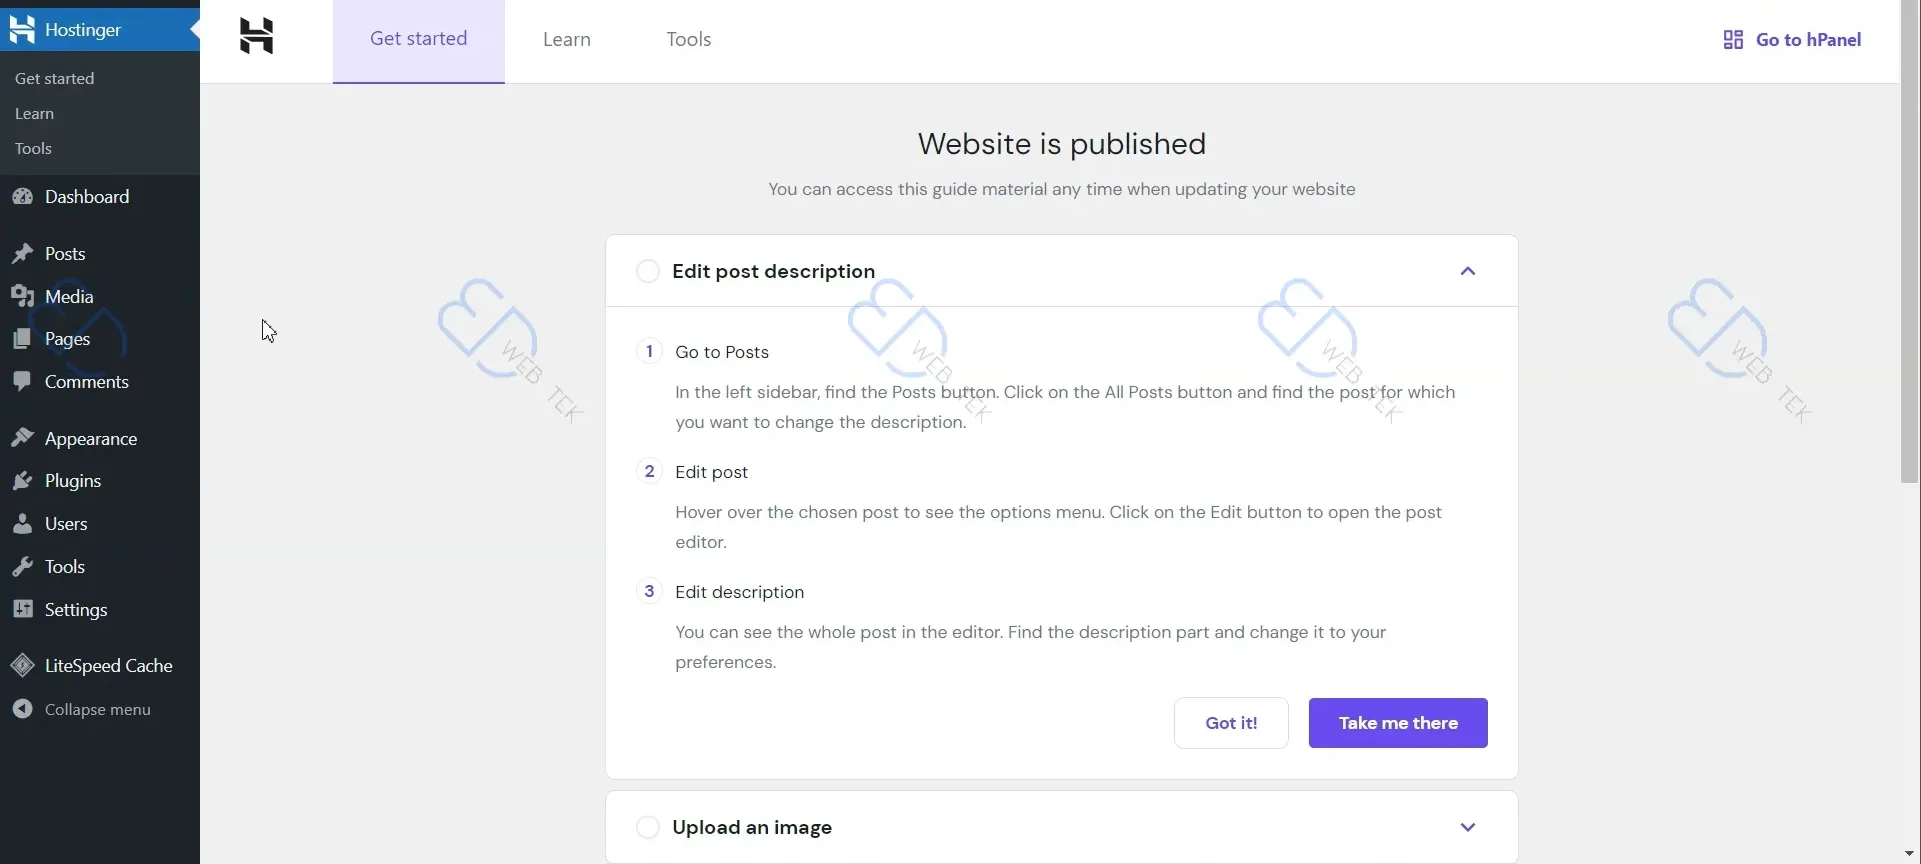
21. Enter the WordPress Backend
This is the WordPress backend interface — reaching this means deployment is complete.
22. WordPress Backend Login URL
Instead of logging in through Hostinger every time, go directly to your domain followed by /wp-admin.

23. WordPress Login
This is the WordPress login screen.

Block Search Engines Before Your Site Is Finished
Your site is now live on a real domain — which means Google can already find and index it, half-built. These 8 steps stop that from happening while you keep building.
24. Block Search Engines
To prevent search engines from indexing your unfinished site, log in to Hostinger and add a text file that temporarily blocks crawlers.
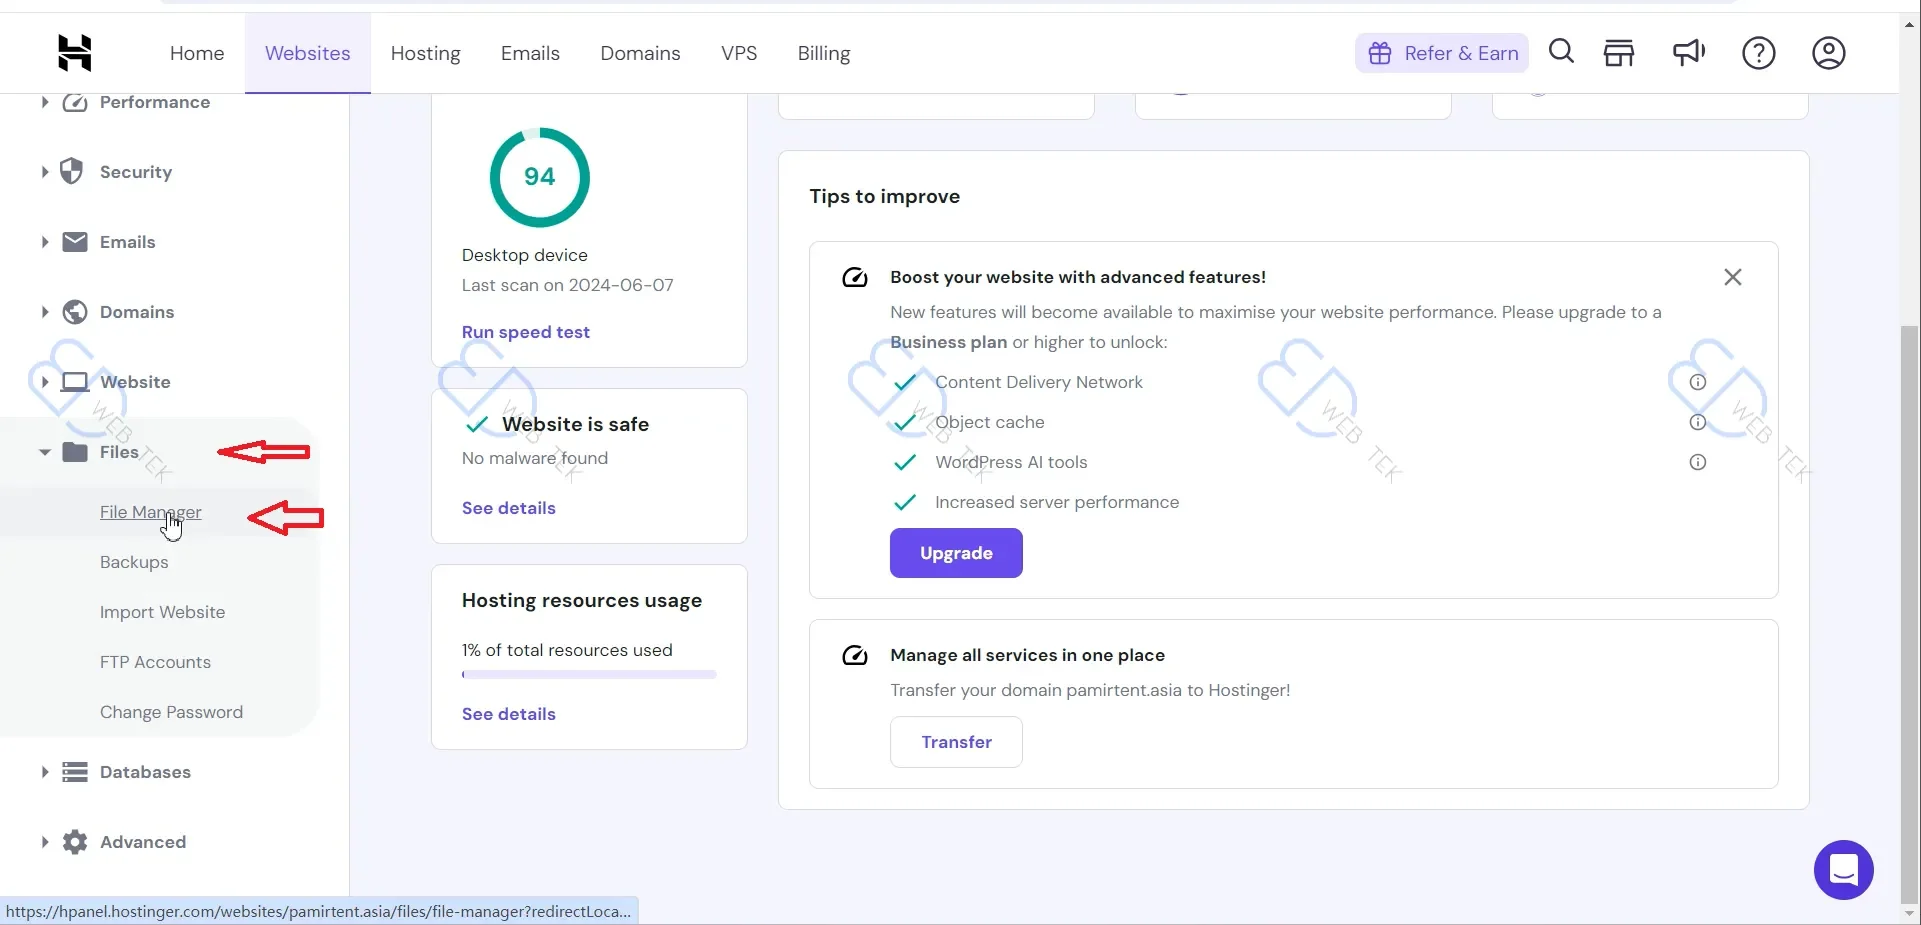
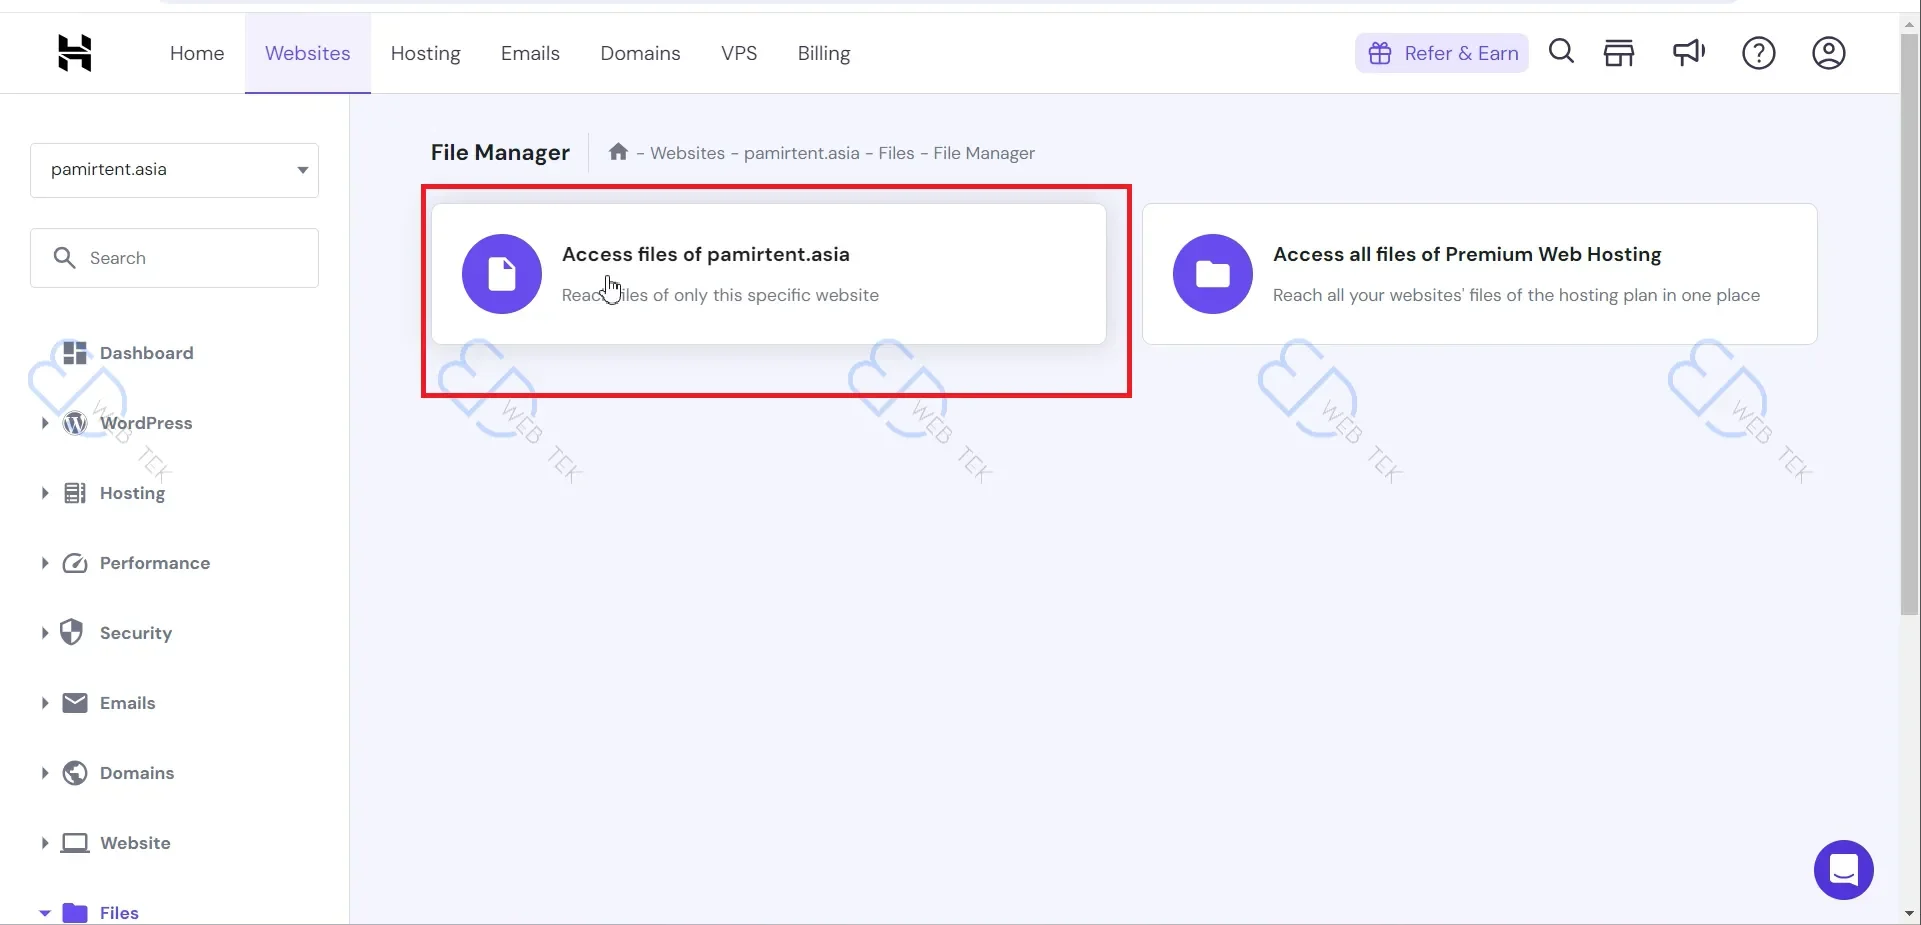
25. Enter the File Directory
Click Access files.
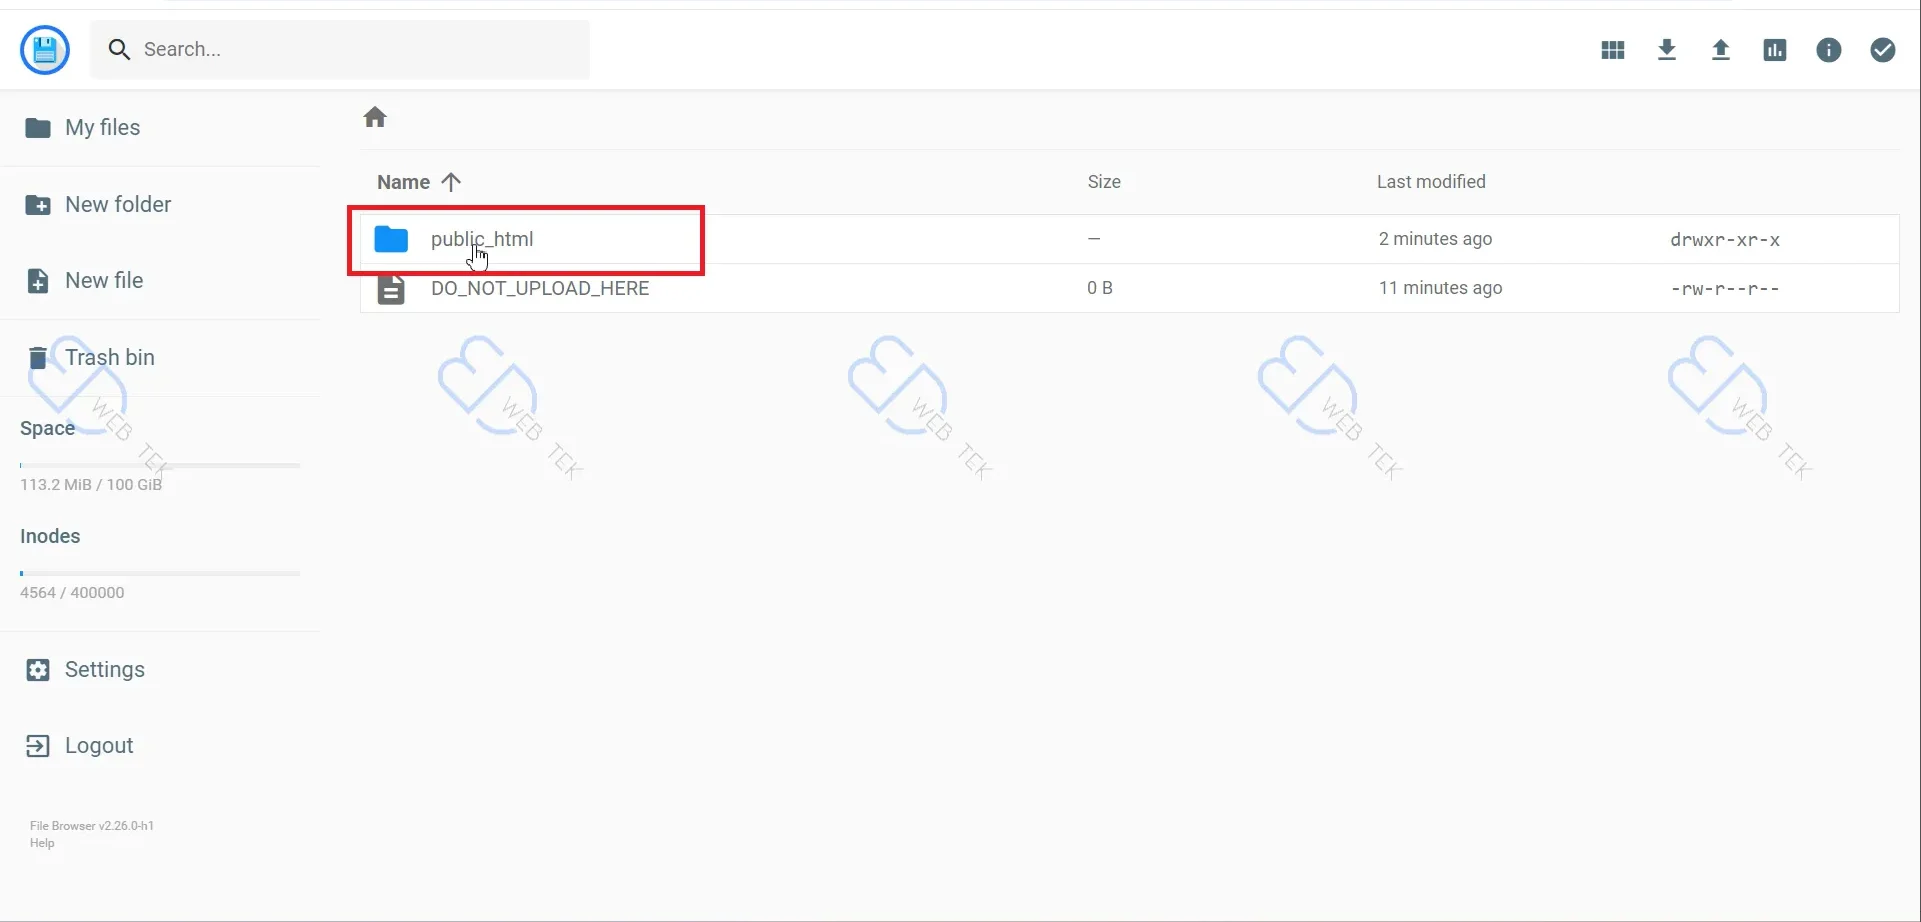
26. Enter the Website File Directory
Double-click the public_html folder.
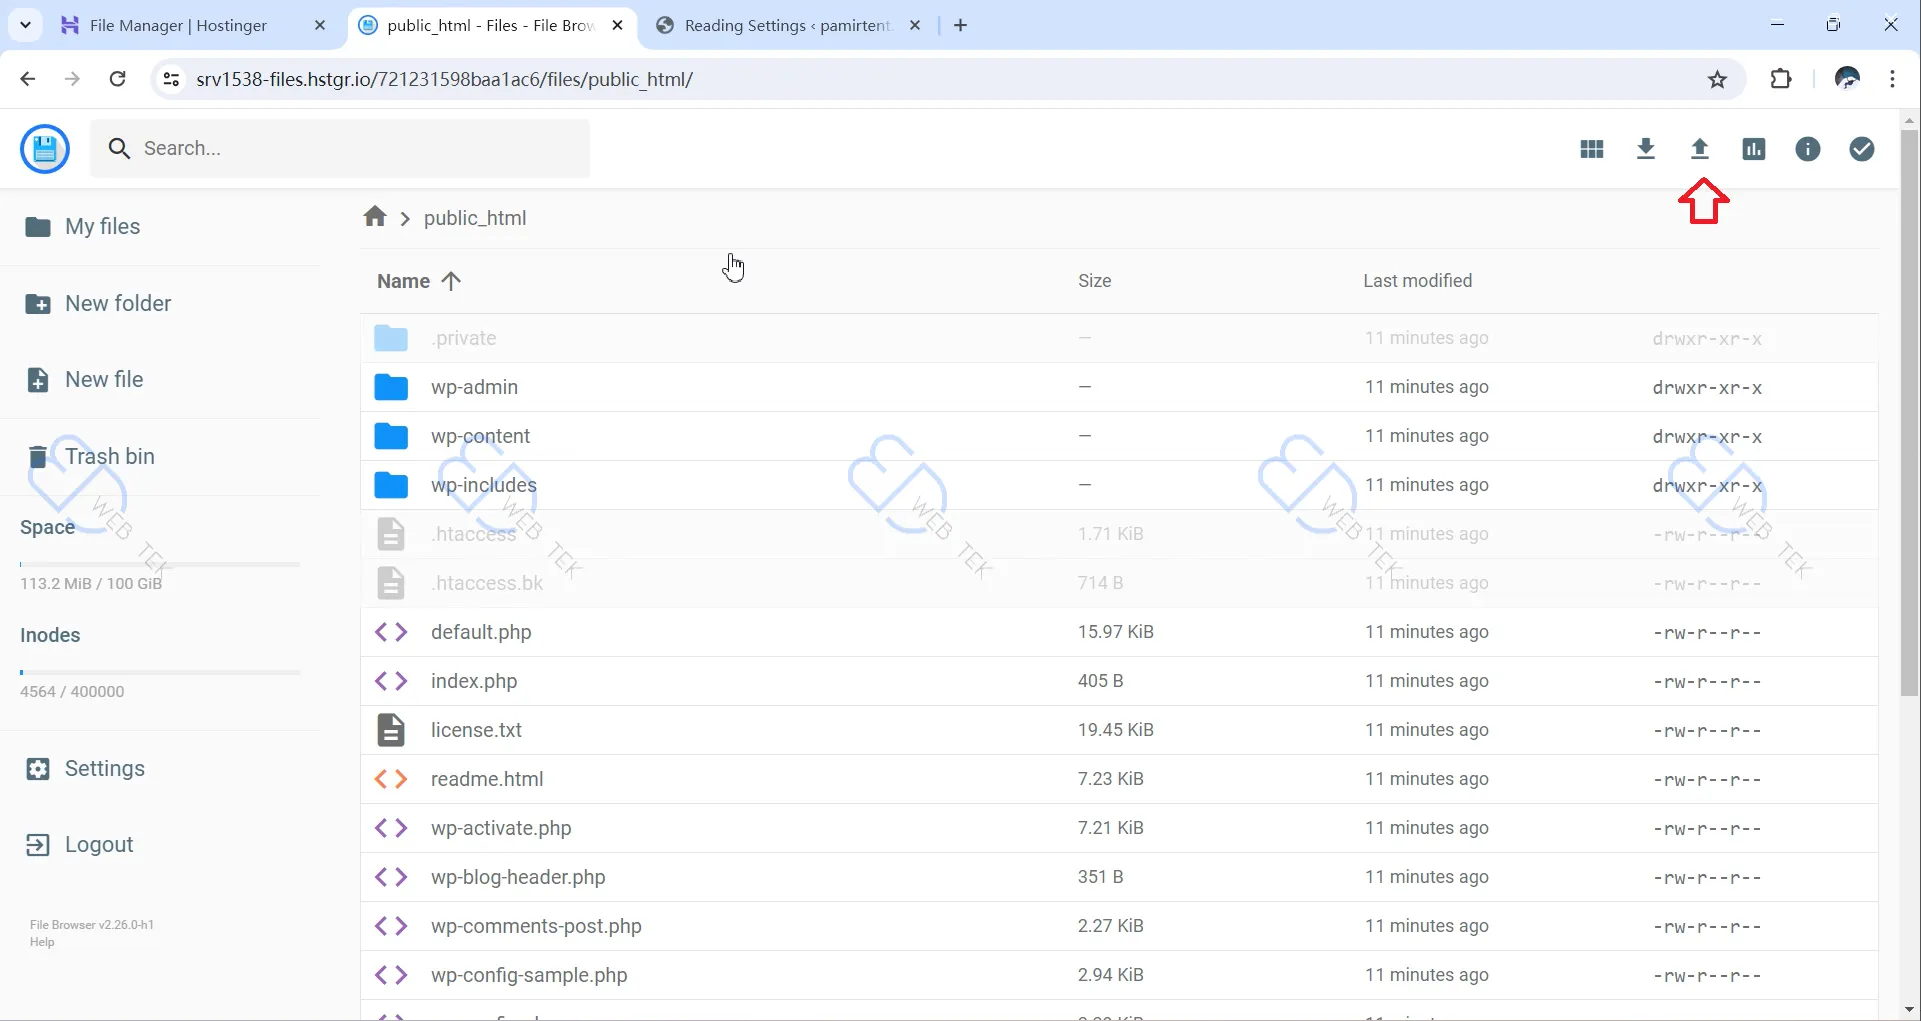
27. Upload a File
Click the upload arrow to upload a file.
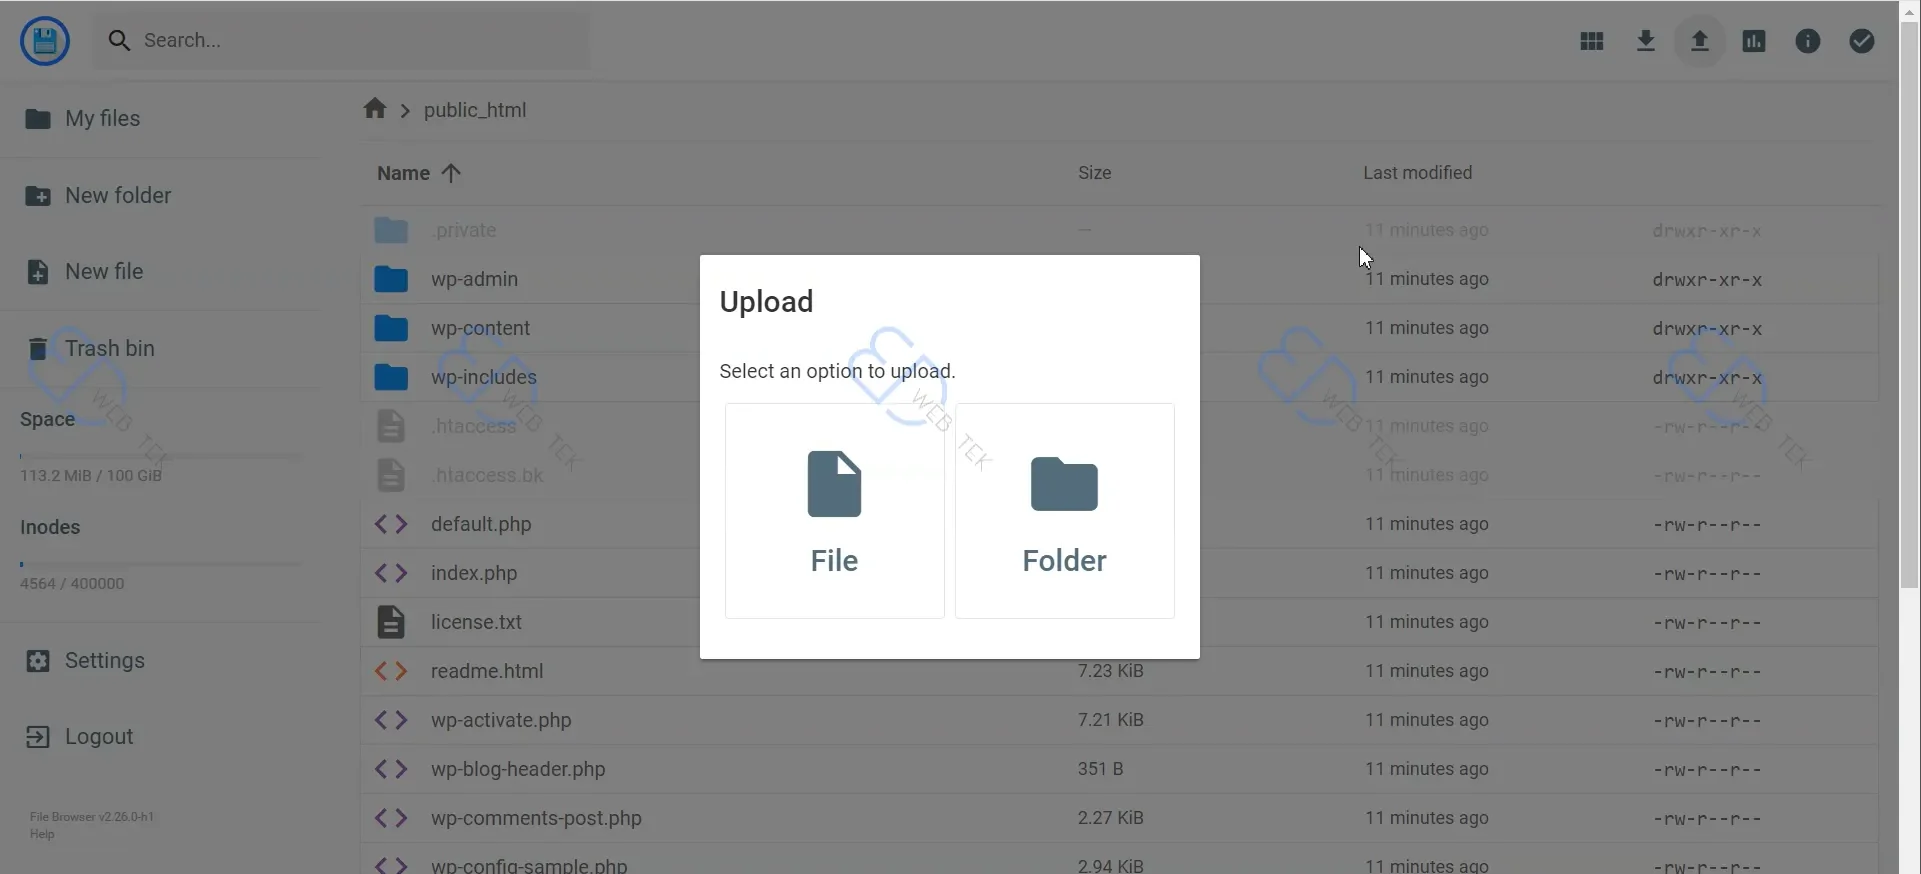
28. Upload the File to public_html
Select the file itself, not a folder.
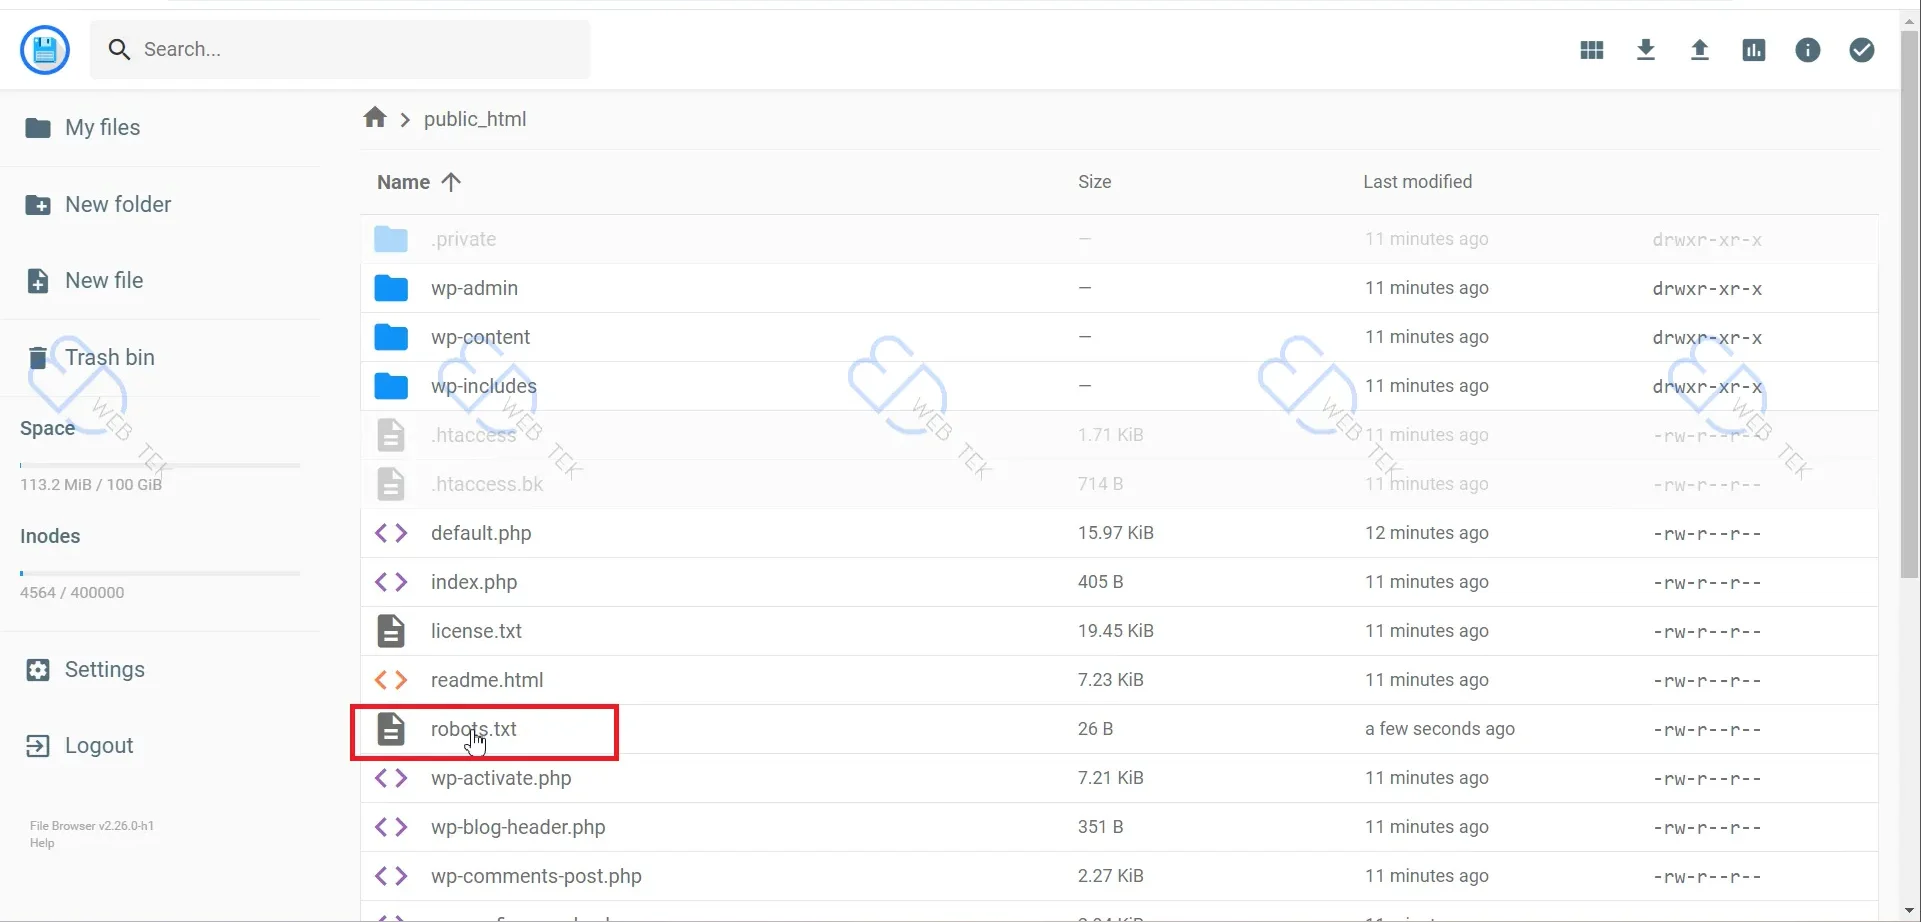
29. Upload robots.txt
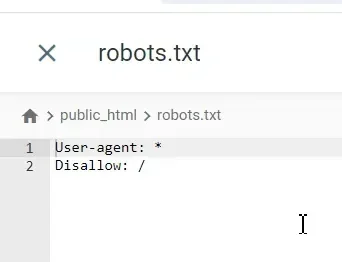
Create a text file named “robots” with these two lines:
User-agent: *Disallow: /
Save and upload it to the public_html folder — this blocks all search engines from indexing your site.
30. Confirm robots.txt Content
Double-click robots.txt to check its content.
31. Verify robots.txt Is Live
Enter https://yourdomain/robots.txt in your browser. If it displays the file’s content, the upload worked.
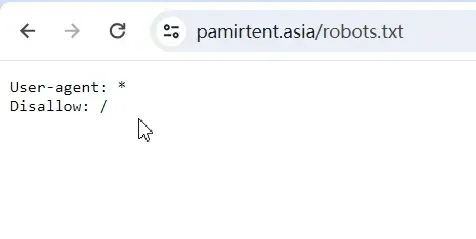
This Disallow: / rule is a switch, not a one-time setting — it stays in effect until you delete or edit robots.txt. It’s an easy step to forget once the site is finished and ready to launch, and the consequence is quiet but serious: your finished site sits invisible to Google indefinitely, with no error or warning telling you why. Set a reminder to revisit public_html/robots.txt the moment your site is ready to go live.
You’ve now successfully deployed a WordPress website on Hostinger, and robots.txt is temporarily blocking search engines from indexing it while you build. You’re ready to start building your website.
every Thursday.
Hosting reviews, builder comparisons, performance tips, and plugin picks — curated weekly for WordPress site owners and builders.