This article walks through installing and configuring Google Tag Manager: creating an account, adding the two code snippets to your site (with WPCode on WordPress), configuring the GA4 tag, verifying data with Tag Assistant, and submitting the configuration for publishing, in 27 steps with screenshots.
Google Tag Manager (GTM) lets site owners deploy and manage tags like Google Analytics and Google Ads without touching code. For a standalone site, tracking is the foundation of marketing decisions. Once GTM is in place, adding tracking codes, events, and conversion goals all happens in the dashboard.
Here’s the full walkthrough video:
YouTube: How to install and configure Google Tag Manager (GTM)
Install the GTM code
First, get GTM’s code onto your site: create the account, copy the snippets, insert them with a plugin, and test.
Step 1: Search for GTM
Log in with your Google account and search for Google Tag Manager.

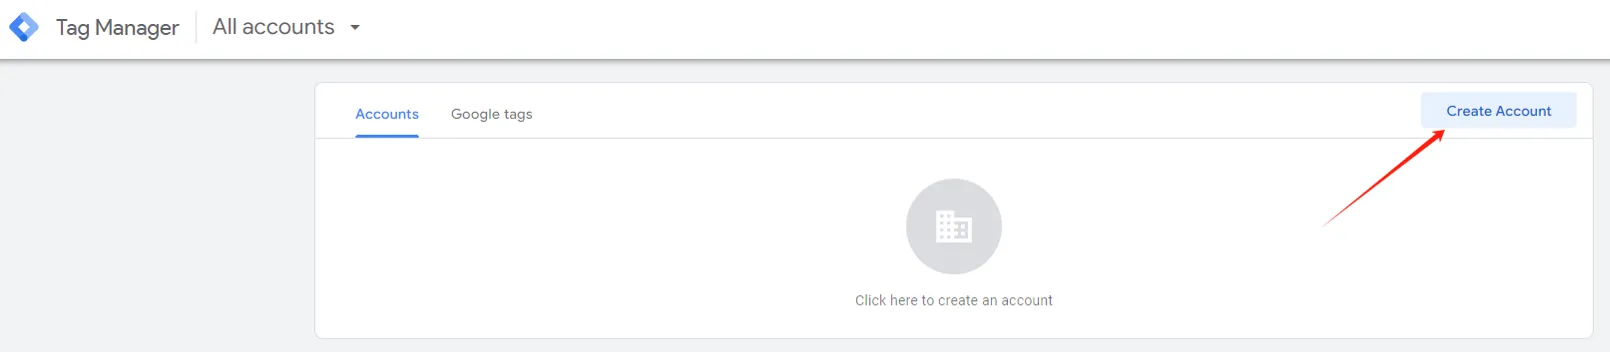
Step 2: Create an account
Click the Create account button in the top right to create a new GTM account.
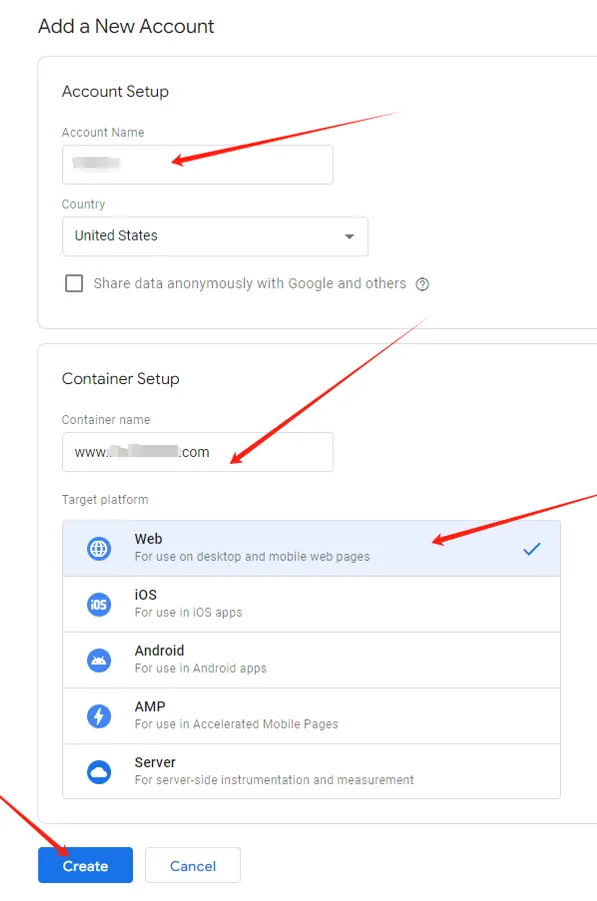
Step 3: Add a new account
Fill in the account name, country, container name, and platform type. For a website, choose Web as the platform.
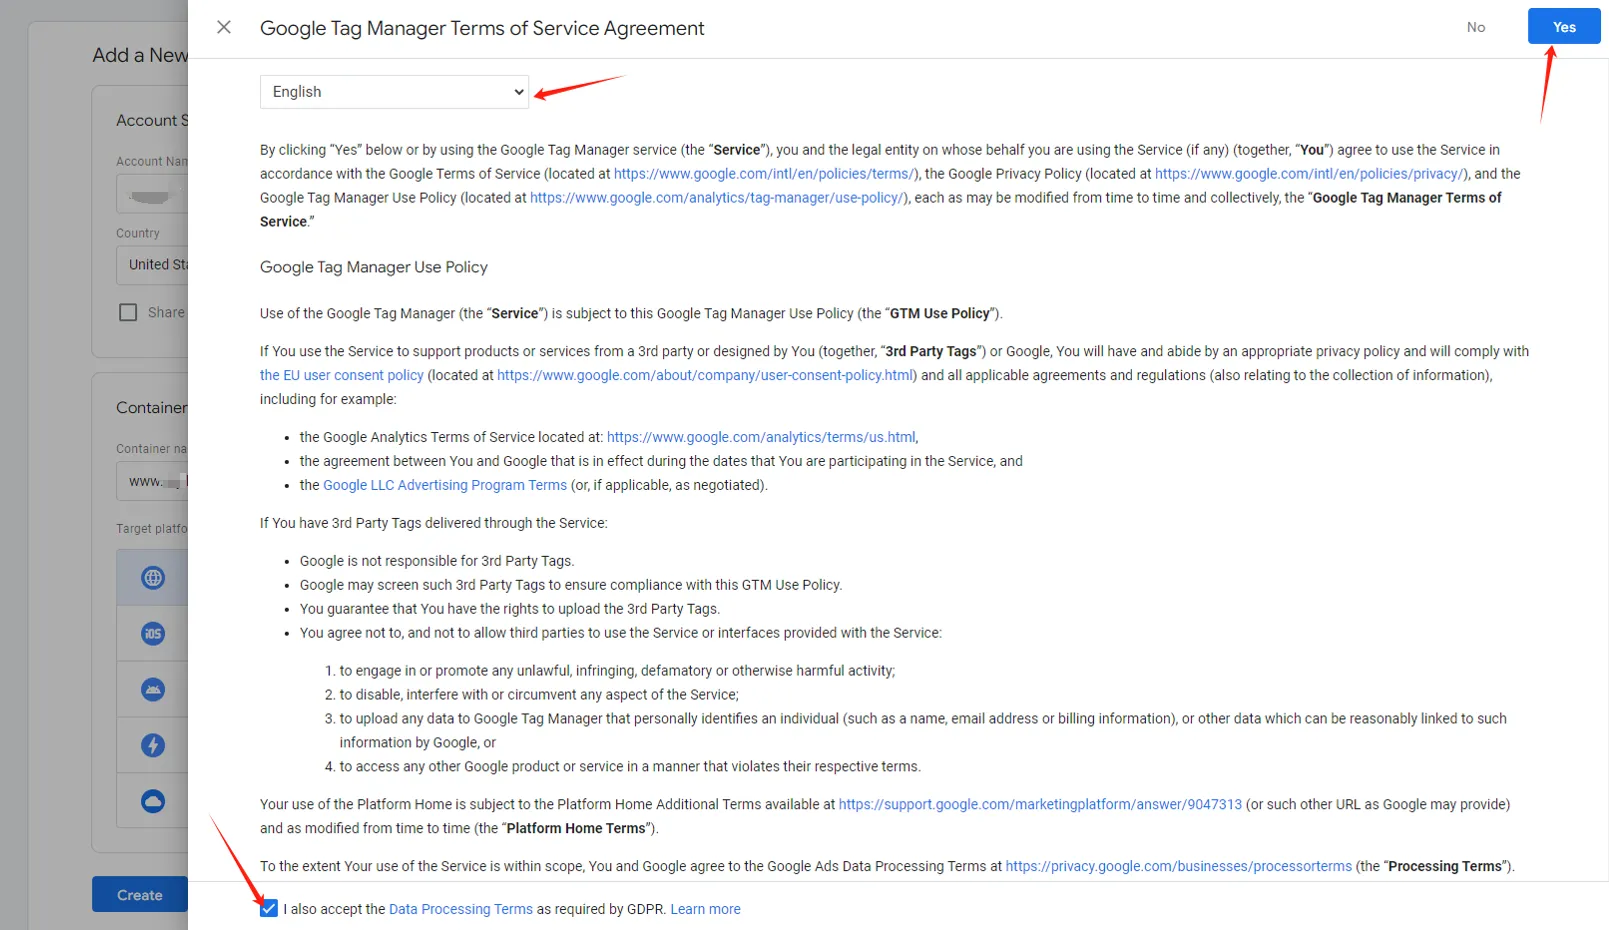
Step 4: Accept GTM’s terms of service
Accept Google Tag Manager’s terms of service.
Step 5: Get your installation code
Google Tag Manager gives you two snippets to add to the head and body of your site. It’s simpler than it sounds; here’s how it works on WordPress.
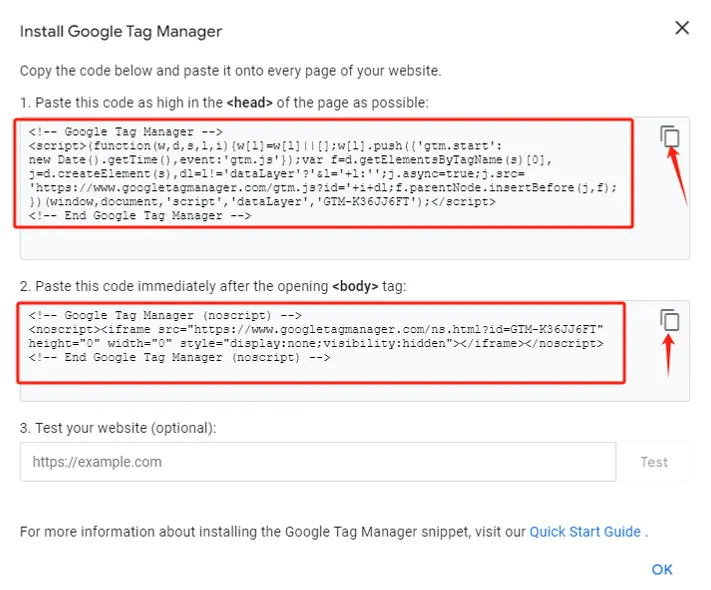
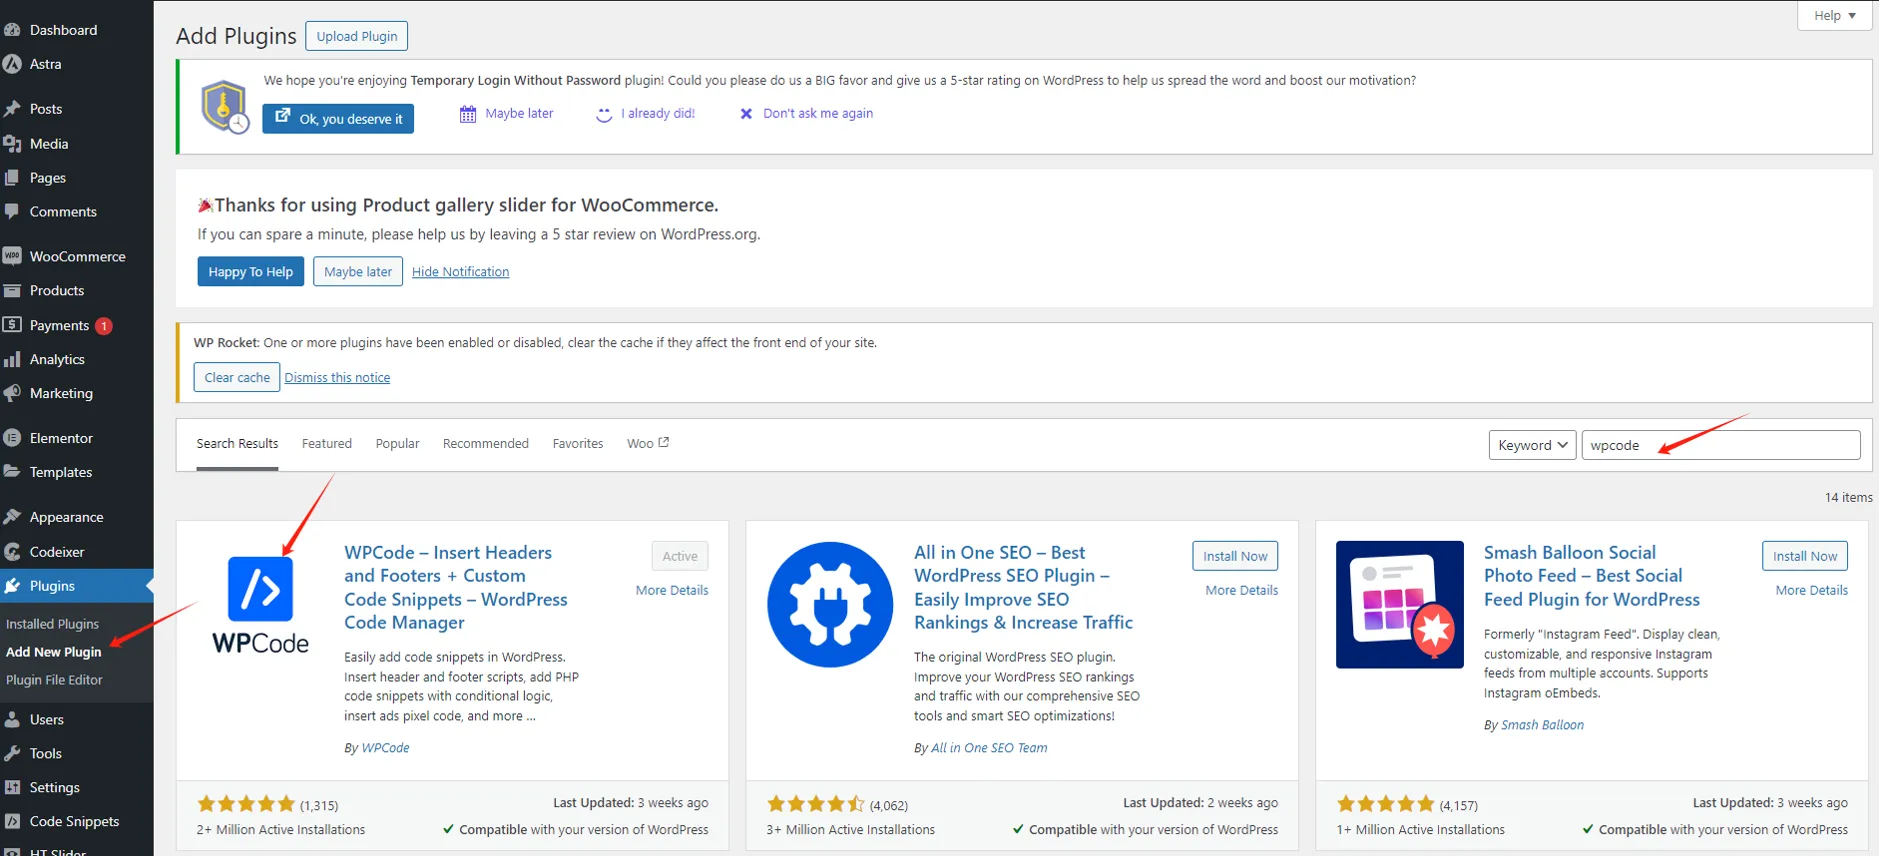
Step 6: Install the WPCode plugin
In the WordPress admin, add a plugin called WPCode.
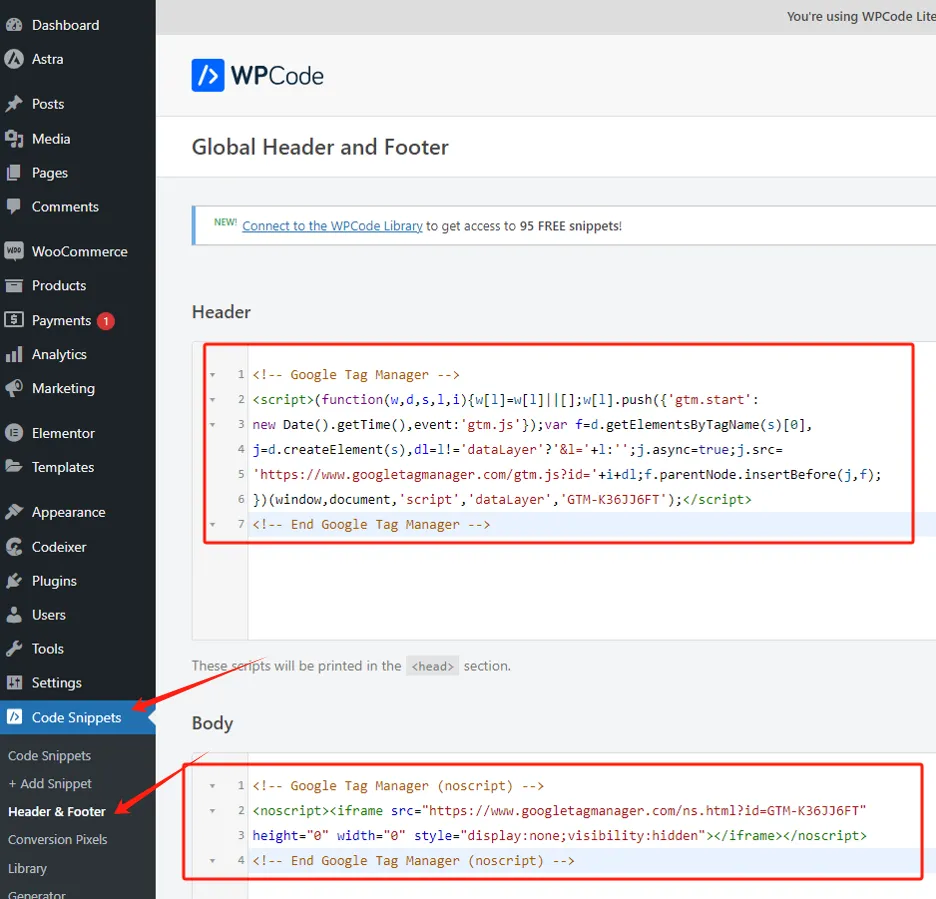
Step 7: Add the code to header and body
After installing WPCode, open Code Snippets, then Header & Footer, and paste the two GTM snippets into the Header and Body sections on the right. Save when done.
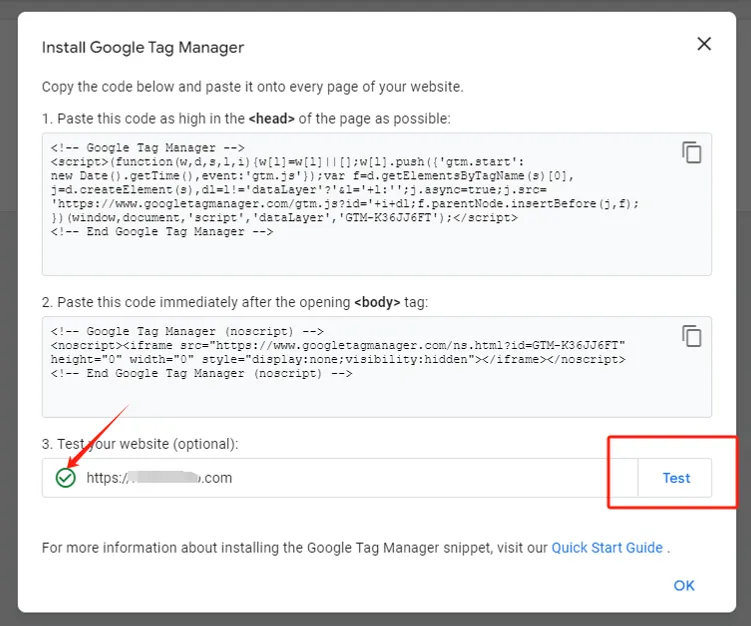
Step 8: Test the installation
Back in Google Tag Manager, click Test. A green checkmark on the left means the code was added successfully.
Configure the GA4 tag
With the code in place, configure the GA4 tag in GTM, connecting the data stream you created earlier.
Step 9: Add a new tag
Click New to add a tag.
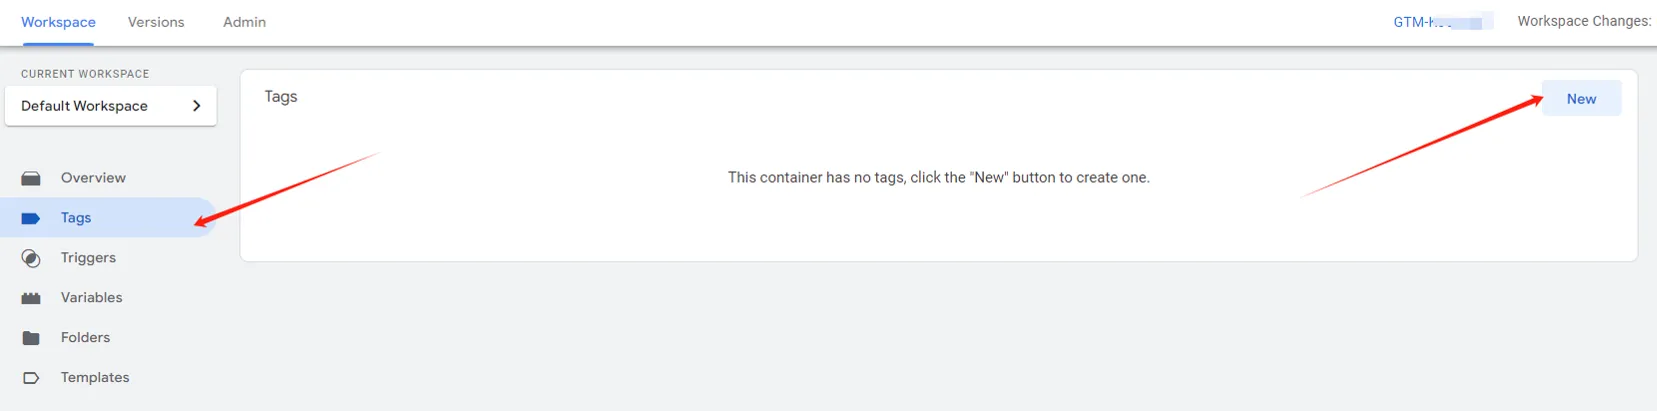
Step 10: Name the tag
Name the tag and click Tag configuration.

Step 11: Select the tag type
Choose the tag type and click Google Analytics.
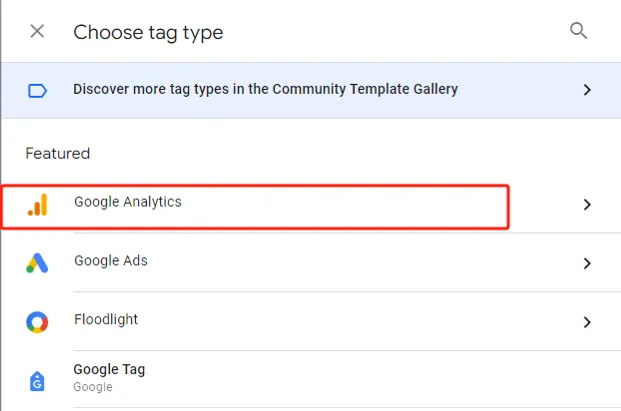
Step 12: Select Google Tag
Choose Google Tag under Google Analytics.

Step 13: Enter the tag ID
Find the Tag ID (the Measurement ID) in GA4 and enter it in GTM. If you haven’t created GA4 yet, see this guide on creating a GA4 data stream. How to locate the ID is in the next step.
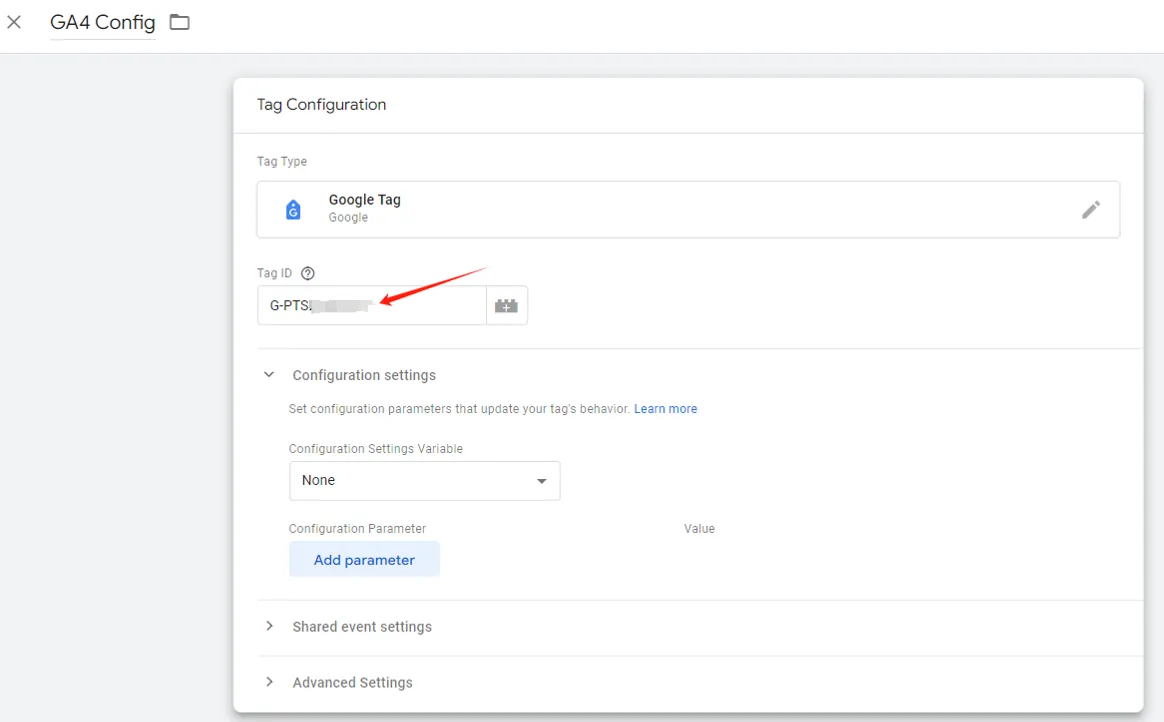
Step 14: Find the tag ID in GA4
If you just created GA4, click Start collecting data in the last step and select your website.

If GA4 already exists, log in and click the gear icon in the bottom left to open Admin.
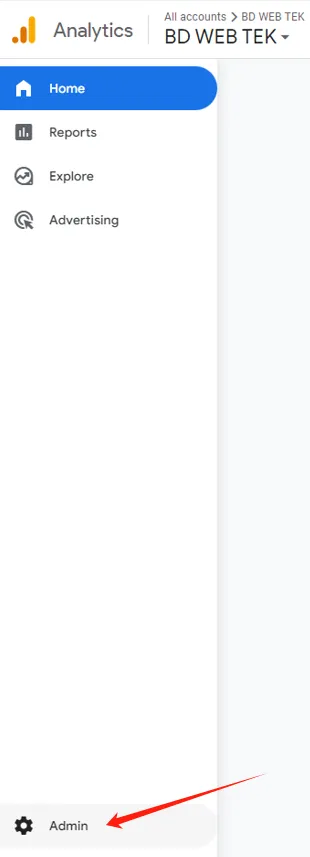
Click Data streams, and your website appears on the right; click it.
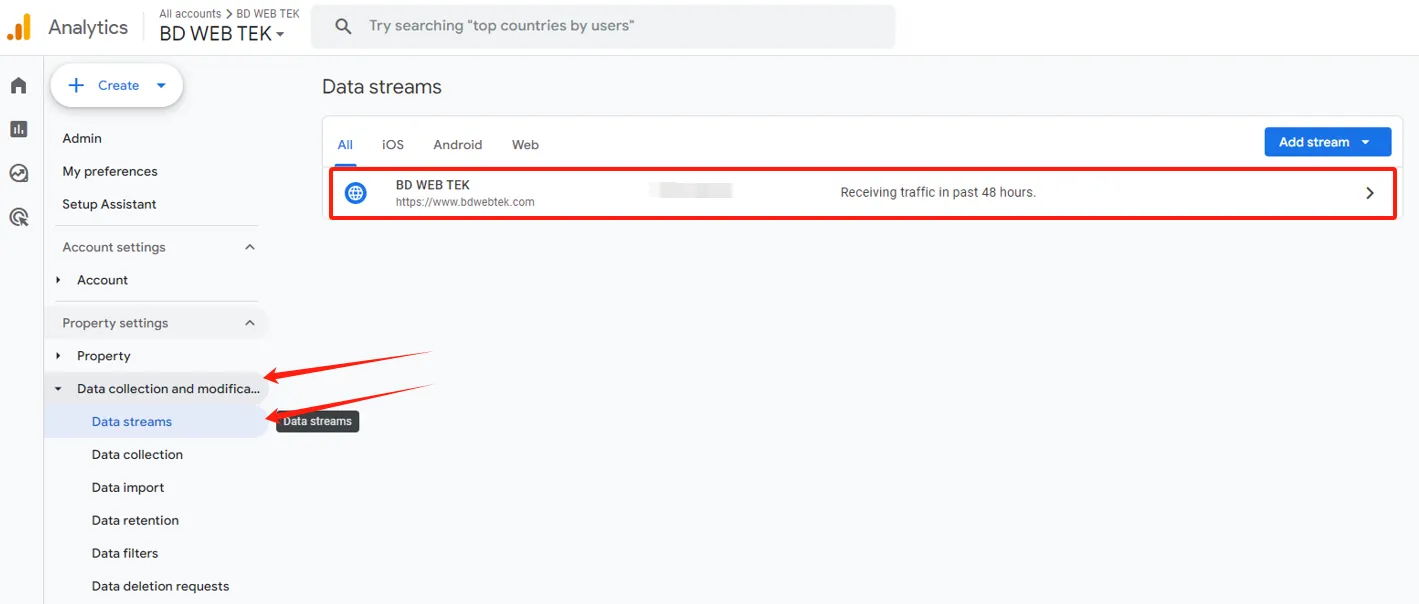
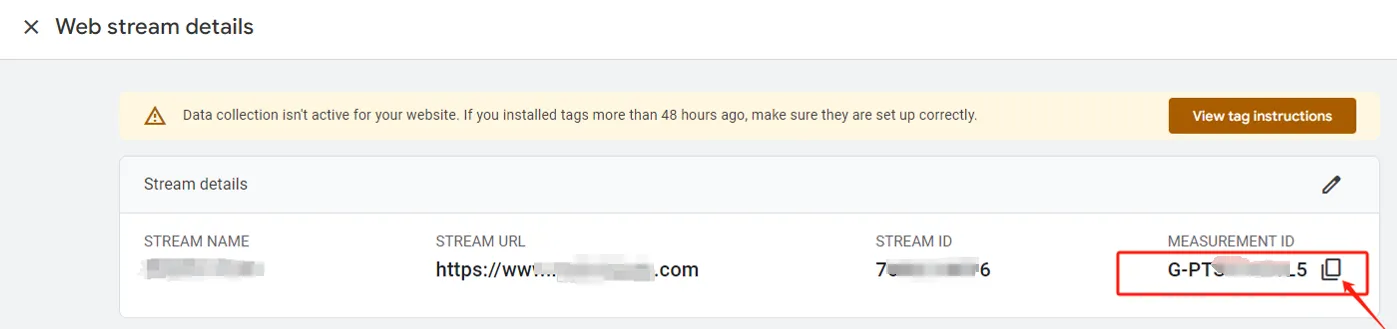
In Web stream details, copy the MEASUREMENT ID and paste it into GTM’s Tag ID field.
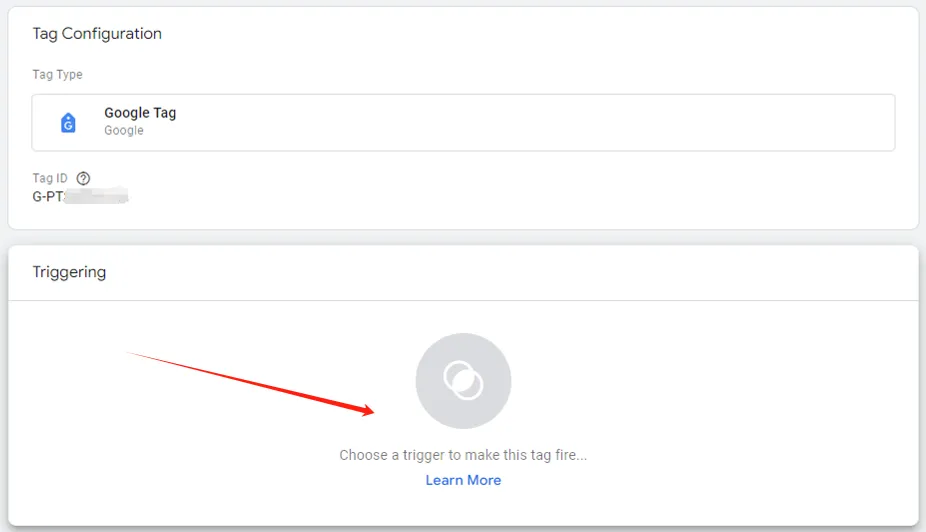
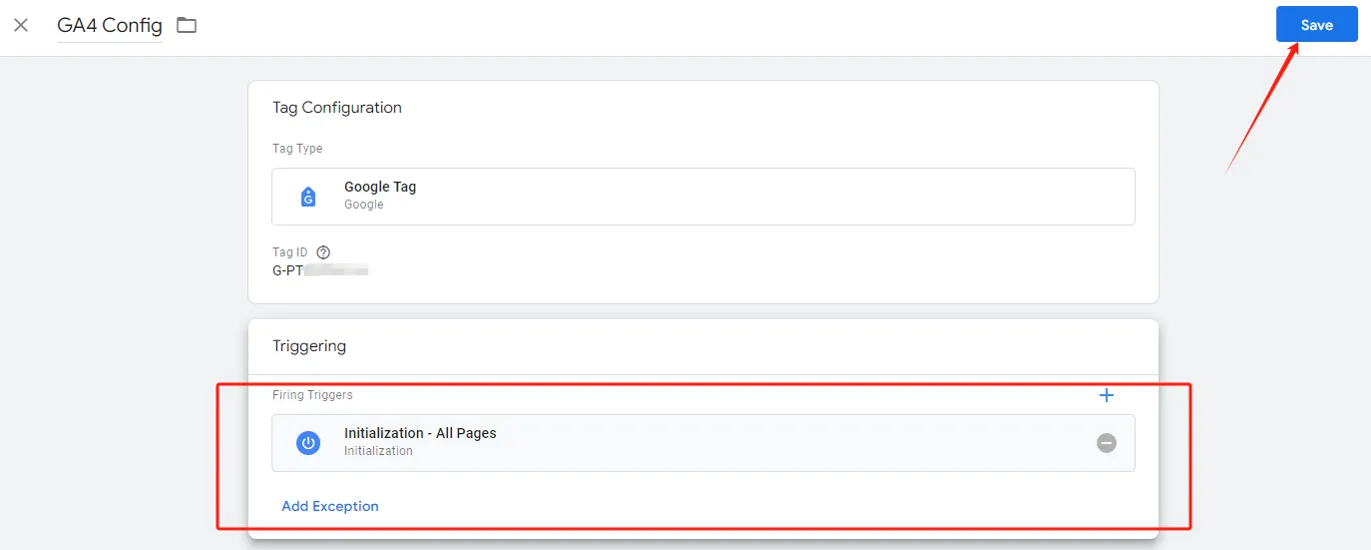
Step 15: Set the trigger
Back in GTM, click Triggering.
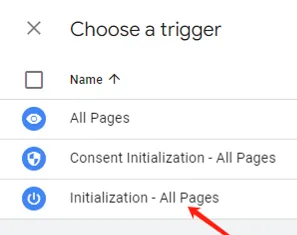
Step 16: Choose Initialization – All Pages
Select Initialization – All Pages. This is the basic setup for connecting GA4 through GTM and collects all regular behavior data as visitors browse.
Step 17: Save
Save the GA4 initialization configuration.
Verify the data is flowing
Before publishing, verify the configuration with preview mode and Google Tag Assistant to confirm data is actually being collected.
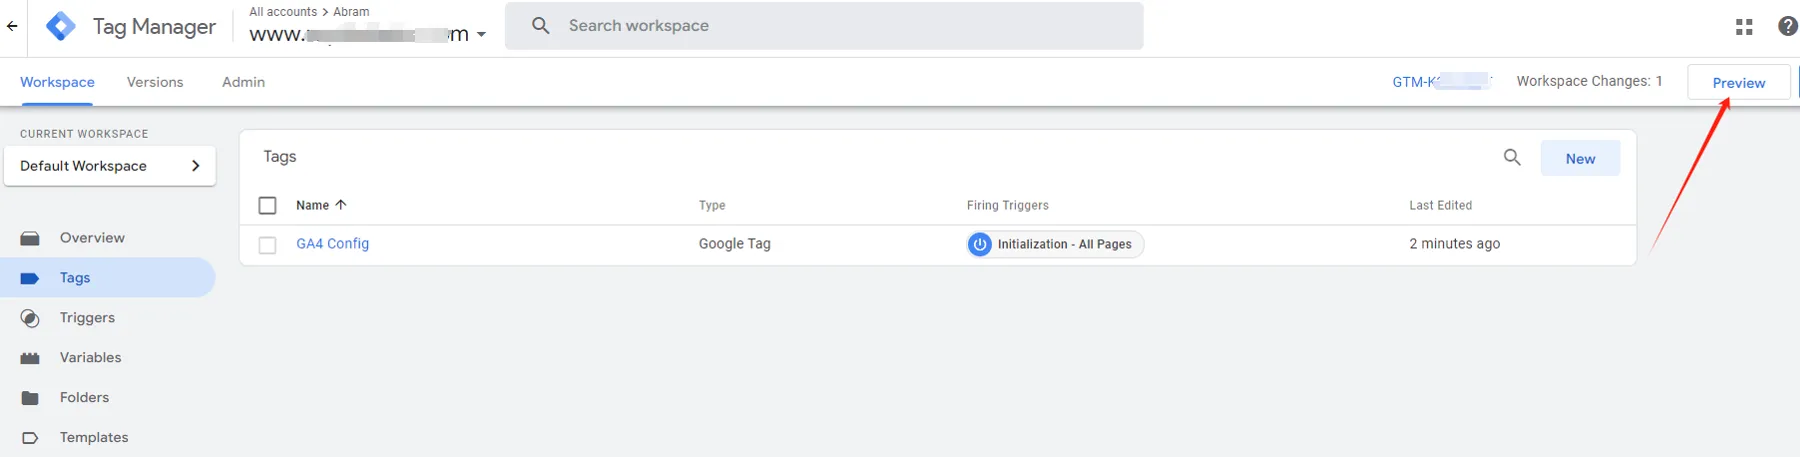
Step 18: Preview
Preview the configuration live to see if it works.
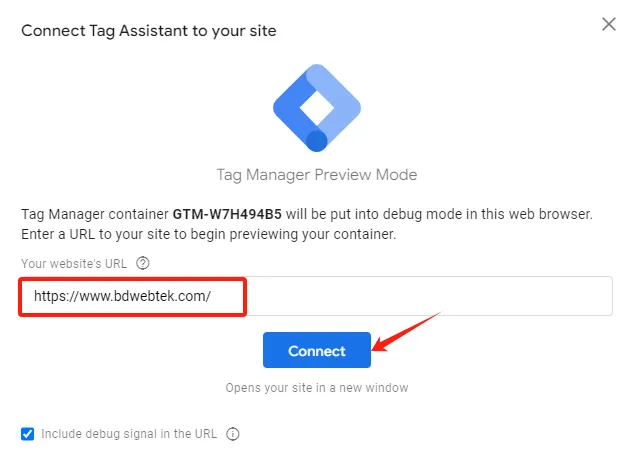
Step 19: Connect Google Tag Assistant
Click Connect to link Google Tag Assistant to your website.
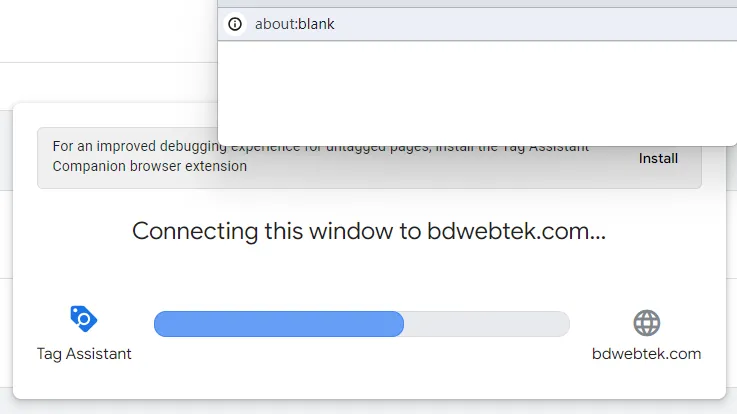
Step 20: Connecting
It shows connecting; wait a moment.
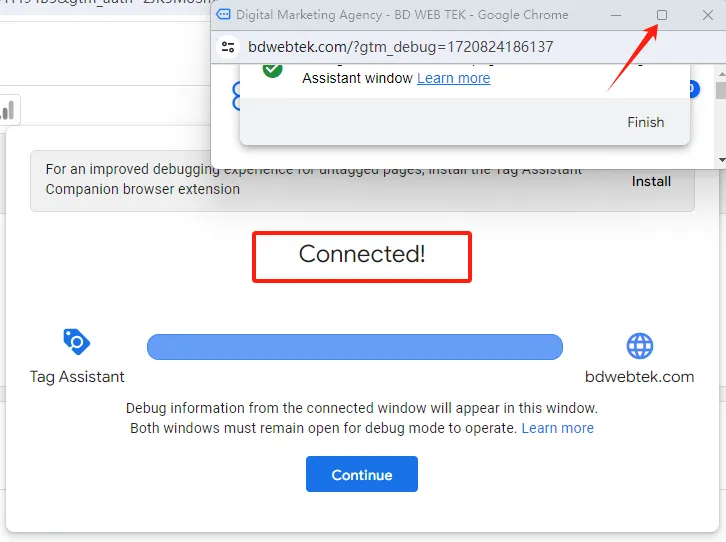
Step 21: Connected
When it shows Connected, the connection is live. Maximize the site preview window.
Step 22: Browse your website
Browse your site and click around; a Tag Assistant connected notice appears at the bottom right.

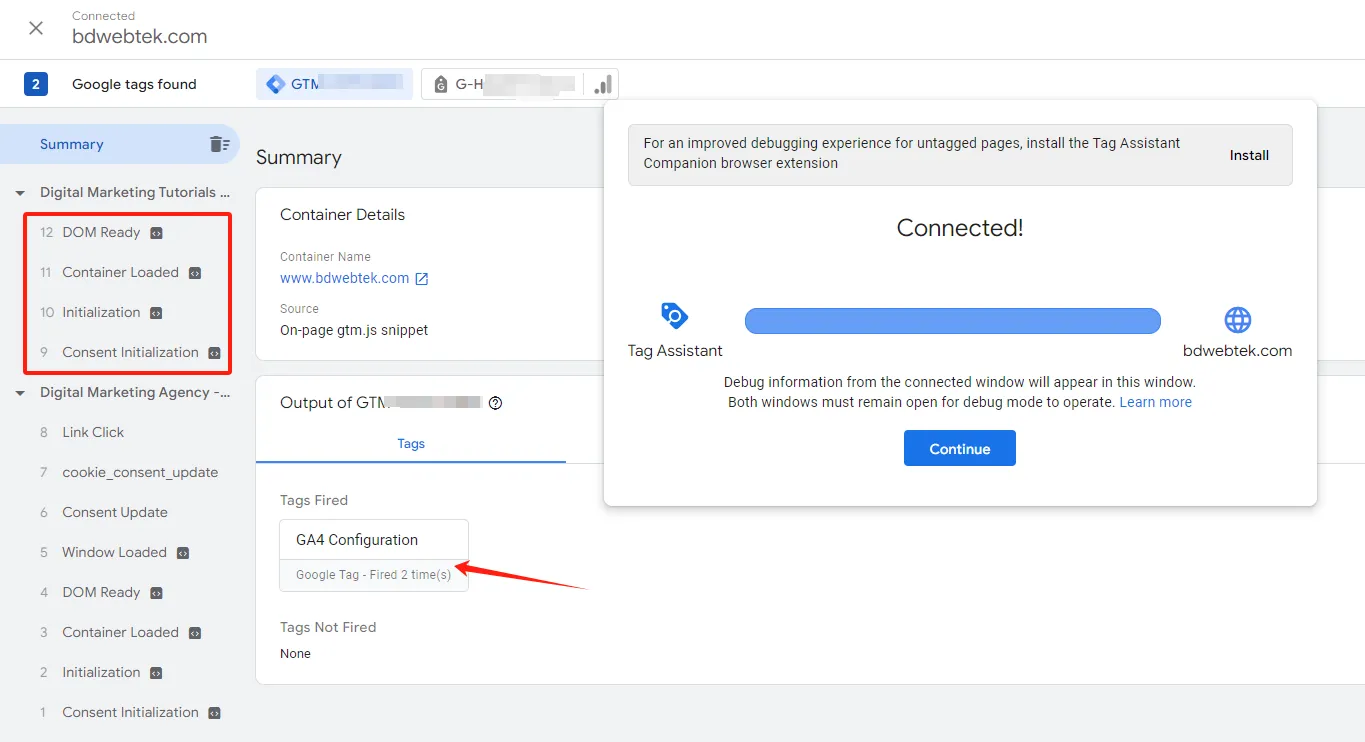
Step 23: View activity in Tag Assistant
Back in Google Tag Assistant, the left panel records the browsing activity you just did.
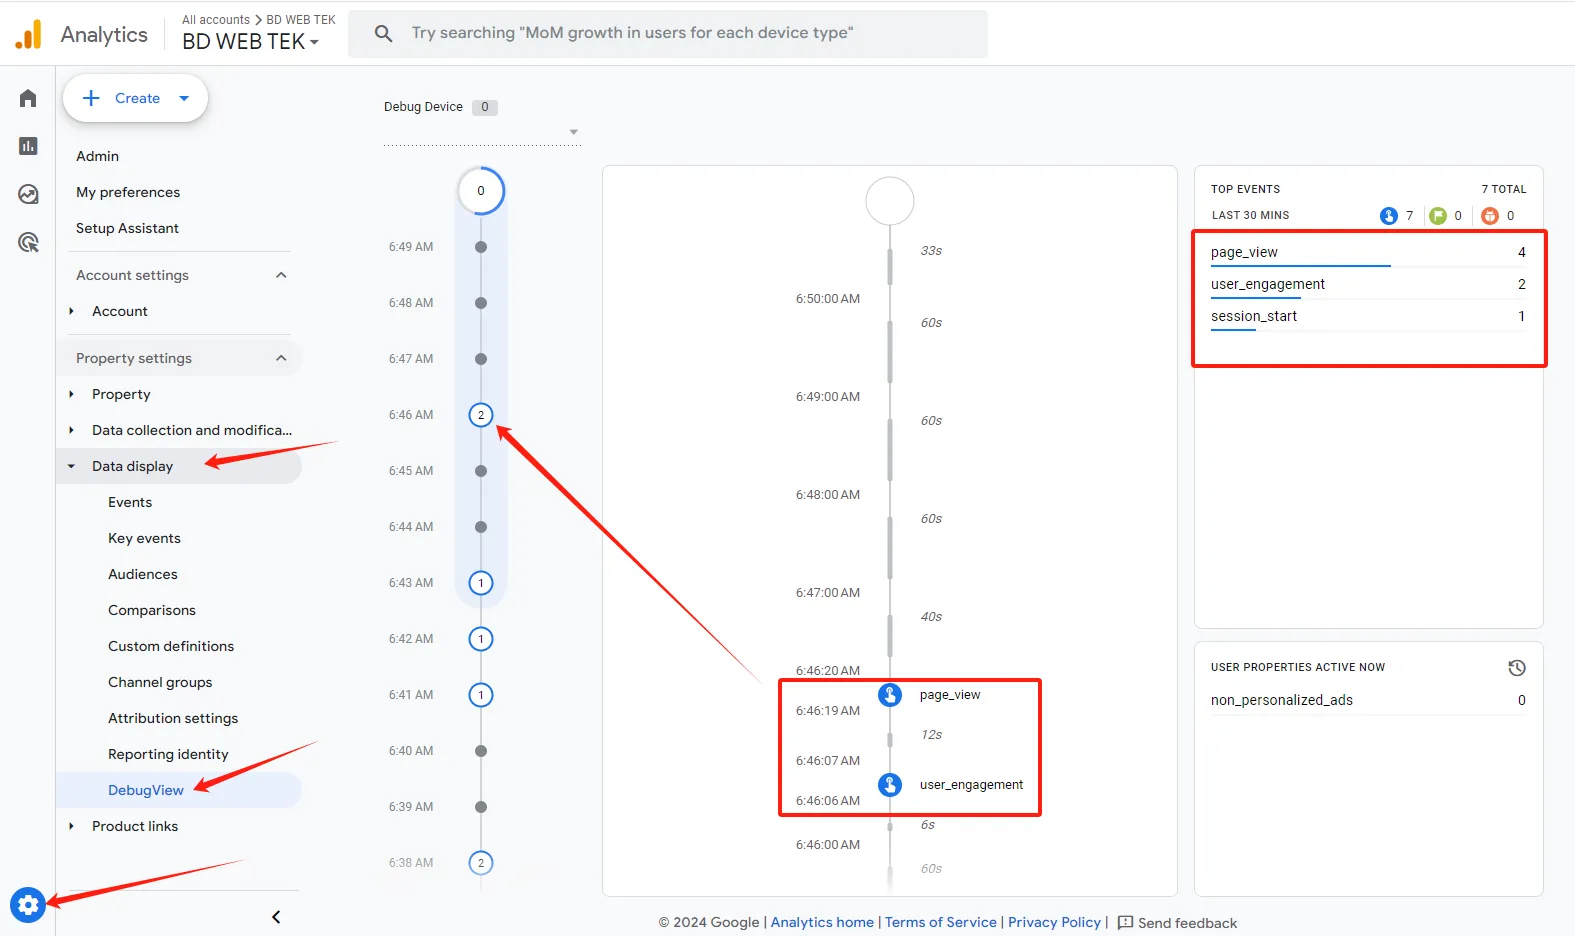
Step 24: View activity in GA4
Log in to GA4, click the gear icon in the bottom left, choose DebugView, and you’ll see the same activity. That confirms the GA4 initialization works.
Submit and publish
After verification, submit the configuration for publishing.
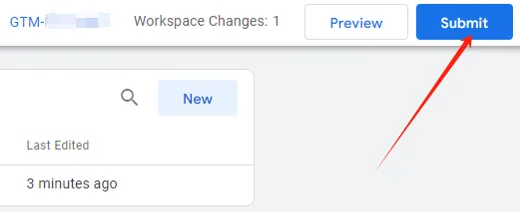
Step 25: Submit
Back in GTM, click Submit to send your configuration.
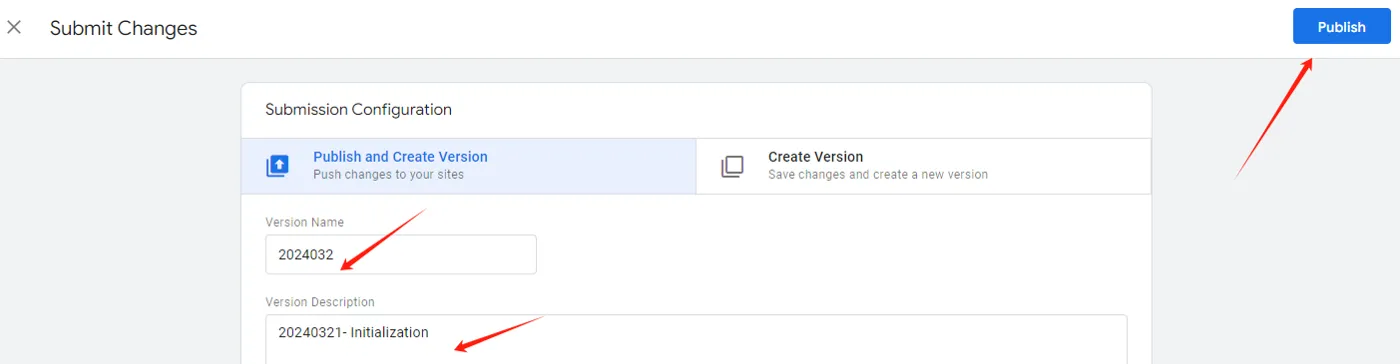
Step 26: Publish
Name this configuration and add a short description so you can recognize it later.
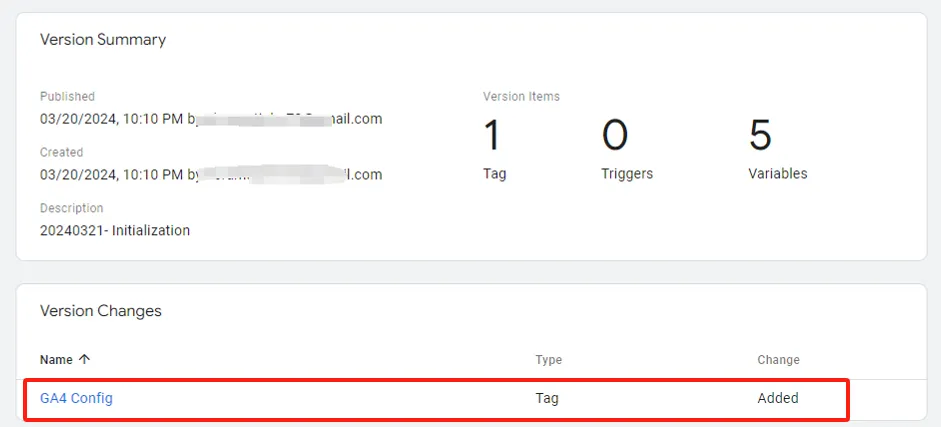
Step 27: Configuration summary
After publishing, a configuration summary shows the details of this setup.
GTM is now installed and connected to GA4. Events and conversion goals can be added from the GTM dashboard from here on, without touching the site code. With behavior data in place, combine it with Search Console indexing data and the data loop for your site is complete.
every Thursday.
Hosting reviews, builder comparisons, performance tips, and plugin picks — curated weekly for WordPress site owners and builders.