SSH key authentication is the most secure way to connect to a cloud server. This guide explains how the private and public key pair works, why Ed25519 beats RSA for new keys, and how to generate keys on macOS, Linux, and Windows. You will also add the public key to your VPS, set up SSH Agent to stop retyping your passphrase, and configure ~/.ssh/config aliases so ssh my-vps logs you in directly.
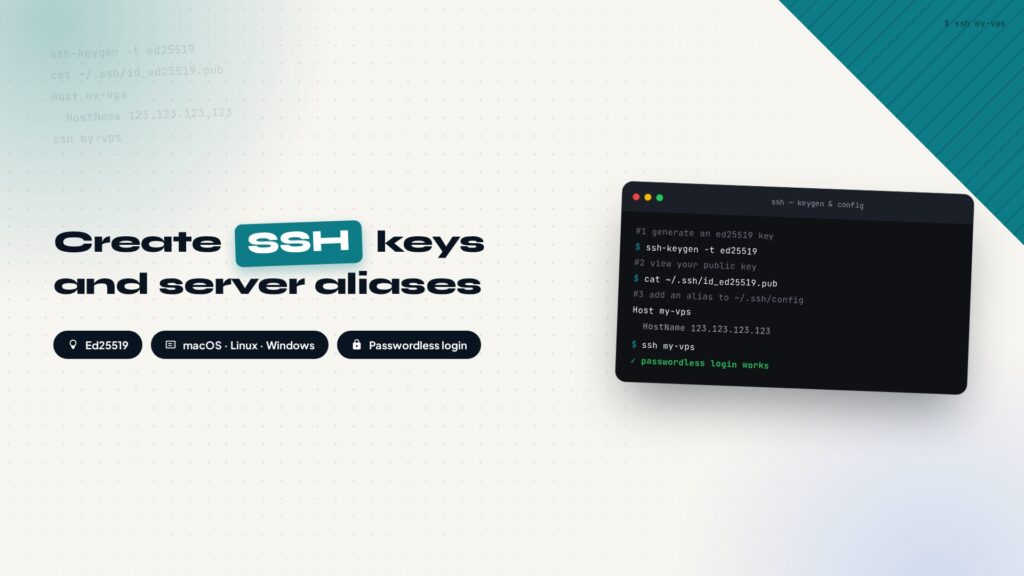
SSH key authentication is one of the safest and most recommended ways to connect to a cloud server.
Traditional logins rely on a username plus a password. Once that password leaks or gets brute-forced, the server is wide open. SSH keys replace it with a matched pair of files: a private key that stays on your computer and a public key that lives on the server. The private key never leaves your machine, and the authentication process does not send any password over the network.
Mainstream cloud providers, including AWS, DigitalOcean, Hetzner, Hostinger VPS, Vultr, and Linode, recommend SSH key login, and some platforms disable password login by default.
This guide walks through creating SSH login keys on macOS, Linux, and Windows, adding the public key to your VPS, and setting up an SSH alias. Once configured, typing ssh my-vps connects you directly, so you no longer need to type ssh root@server-ip from memory.
How SSH Key Authentication Works
An SSH key consists of two files: a private key and a public key. Creating a key generates both at the same time, and the two correspond to each other. The public key can be handed to the server safely; the private key must stay on your own computer.
How SSH key authentication works
Your computer
Holds the private key id_ed25519, never shares it
→
SSH handshake
Client signs with the private key, server verifies
→
VPS server
authorized_keys stores the public key, login granted after verification
Private Key
The private key file is named id_ed25519 and proves that you are who you claim to be. It lives only on your computer, for example /Users/username/.ssh/id_ed25519 on macOS or C:\Users\username\.ssh\id_ed25519 on Windows.
Never upload the private key to a server, send it to anyone, or commit it to a GitHub repository. Whoever holds your private key can log into your server.
Public Key
The public key file is named id_ed25519.pub. Its content is a single line that starts with ssh-ed25519, for example:
ssh-ed25519 AAAAC3NzaC1lZDI1NTE5AAAAxxxx user@computerThe public key is safe to upload to your VPS. The server stores it in the ~/.ssh/authorized_keys file of the target user and uses it to verify your signature during login.
Why Ed25519?
Three algorithms are commonly offered when you create an SSH key: RSA, ECDSA, and Ed25519. RSA has the longest history and the widest compatibility, while ECDSA depends on the quality of system randomness and has seen side-channel concerns. For new keys, Ed25519 is the direct recommendation: shorter keys, faster signing, and stronger security, with support in every modern OpenSSH release.
| Dimension | RSA | Ed25519 |
|---|---|---|
| Key length | Long (default starts at 3072 bits) | Very short (256 bits) |
| Security | High | Higher, built on a modern mature curve |
| Signing speed | Slower | Faster |
| File size | Large | Small |
| Recommendation | Average, mainly for legacy systems | Recommended, the default for new keys |
Everything below therefore uses ssh-keygen -t ed25519. Only reach for RSA if you must connect to a very old service or device.
Create an SSH Key on macOS
macOS ships with OpenSSH built in. No extra software is needed; open a terminal and generate the key.
Step 1: Open Terminal
Open Launchpad, enter the Other folder, and click Terminal. The faster route is Command + Space to open Spotlight, then type Terminal and press Return.
Step 2: Generate the SSH Key
Run the following command in Terminal:
ssh-keygen -t ed25519Terminal asks where to save the key:
Generating public/private ed25519 key pair.
Enter file in which to save the key (/Users/your-username/.ssh/id_ed25519):The default location is /Users/your-username/.ssh/id_ed25519. Press Return to accept it.
Step 3: Set a Passphrase
Terminal then shows Enter passphrase (empty for no passphrase): and asks you to confirm the passphrase once more.
This passphrase is not the VPS password and not your macOS login password. It protects the private key file on your computer. Even if id_ed25519 is copied by someone else, the key stays unusable without the passphrase. Set one on the first setup: type the same passphrase twice and press Return to finish.
Step 4: Confirm the Generated Files
Move into the SSH folder and list it:
cd ~/.ssh
lsYou should see two files: id_ed25519 (the private key) and id_ed25519.pub (the public key).
Step 5: Copy the Public Key
Print the public key with:
cat ~/.ssh/id_ed25519.pubThe output looks like ssh-ed25519 AAAAC3NzaC1lZDI1NTE5AAAAIBxxxxx username@MacBook. Select the whole line and copy it. In the VPS control panel, open the SSH Keys page, click Add SSH Key, paste the public key, and save.
Create an SSH Key on Linux
Linux (Ubuntu, Debian, CentOS, and other distributions) follows the same flow as macOS, with the default path at /home/username/.ssh/id_ed25519.
Step 1: Generate the Key
Open a terminal and run:
ssh-keygen -t ed25519Step 2: Confirm the Save Location
Press Return when asked for a save path to accept /home/username/.ssh/id_ed25519.
Step 3: Set a Passphrase
When Terminal shows Enter passphrase, type a passphrase that protects the private key and confirm it. The prompt appears twice, and both entries must match.
Step 4: View the Public Key
Run the following command and copy its output:
cat ~/.ssh/id_ed25519.pubAt this point ~/.ssh/ contains two files: id_ed25519 (the private key) and id_ed25519.pub (the public key).
Create an SSH Key on Windows
Windows used to require tools like PuTTY, but Windows 10 and Windows 11 ship with OpenSSH built in. Use PowerShell directly, with nothing extra to install.
Step 1: Open PowerShell
Search for PowerShell in the Start menu and open it.
Step 2: Generate the SSH Key
In PowerShell, run:
ssh-keygen -t ed25519Step 3: Confirm the Save Location
Press Return when prompted with Enter file in which to save the key to use the default C:\Users\your-username\.ssh\id_ed25519.
Step 4: Set a Passphrase
Enter a passphrase that protects the private key and confirm it once more.
Step 5: Confirm the Generated Files
Open File Explorer and go to C:\Users\your-username\.ssh\. You should see id_ed25519 and id_ed25519.pub.
Step 6: Copy the Public Key
Back in PowerShell, run:
type $env:USERPROFILE\.ssh\id_ed25519.pubCopy the full single line of output. You will paste it into the VPS in the next section.
Add the SSH Key to Your VPS
Whether you use Hostinger, DigitalOcean, Hetzner, Vultr, or AWS, adding an SSH key through the control panel follows the same flow: open your VPS dashboard, find the SSH Keys entry, click Add SSH Key, fill in a name, paste the public key, and save.
Warning
Always paste the public key from id_ed25519.pub into the control panel. Never upload the id_ed25519 private key file. Once the private key is uploaded or leaked, the security of that server is gone.
The form fields are similar everywhere. Use a name like My MacBook SSH Key and paste the full line that starts with ssh-ed25519 into the key box. After saving, the server writes the public key into the target user’s ~/.ssh/authorized_keys, for example /root/.ssh/authorized_keys for the root user. Some providers also let you select an existing SSH key when creating a VPS instance, so the new machine accepts key login immediately.
Test Your First SSH Login
With the public key in place, test the login with your username and the server IP:
Replace root with your actual username and 123.123.123.123 with the server’s public IP. On the first connection, Terminal asks you to confirm the server fingerprint:
Are you sure you want to continue connecting (yes/no)?Type yes and press Return. If you set a passphrase when creating the key, you will see Enter passphrase for key:. Enter the passphrase you chose during key generation. Once you reach the server’s command prompt, SSH key login is working.
Configure SSH Agent and Stop Typing Your Passphrase
With a passphrase set, every SSH login asks for it again, which gets tedious. SSH Agent loads the private key into memory so the current session stops re-prompting you.
On macOS, add the private key and store it in the Keychain:
ssh-add --apple-use-keychain ~/.ssh/id_ed25519Then edit ~/.ssh/config and add the following lines:
Host *
AddKeysToAgent yes
UseKeychain yesmacOS then adds the key to the agent automatically and keeps it in the Keychain.
On Linux, start ssh-agent first, then add the private key:
eval "$(ssh-agent -s)"
ssh-add ~/.ssh/id_ed25519On Windows, set the ssh-agent service to start automatically, start it, and add the key from PowerShell:
Set-Service ssh-agent -StartupType Automatic
Start-Service ssh-agent
ssh-add $env:USERPROFILE\.ssh\id_ed25519Set Up an SSH Login Alias
When you manage several VPS boxes, such as a Hostinger VPS, DigitalOcean Droplets, Hetzner Cloud, and AWS EC2, typing ssh [email protected] every time is slow and easy to get wrong. The SSH config file ~/.ssh/config lets you assign a short alias to each server, so ssh my-vps is all you need.
Set Up the Alias on macOS and Linux
The config file is ~/.ssh/config. Create it if it does not exist, then open it with nano:
touch ~/.ssh/config
nano ~/.ssh/configAdd a block for one server:
Host my-vps
HostName 123.123.123.123
User root
IdentityFile ~/.ssh/id_ed25519Save and exit (Control + O to save, Control + X to quit in nano). From now on, ssh my-vps is equivalent to running ssh [email protected] -i ~/.ssh/id_ed25519.
Set Up the Alias on Windows
The Windows config file lives at C:\Users\your-username\.ssh\config. Note that the file has no extension. If it does not exist, create a new file named config with exactly the same content as on macOS and Linux:
Host my-vps
HostName 123.123.123.123
User root
IdentityFile ~/.ssh/id_ed25519Save it, and ssh my-vps connects from PowerShell right away.
Managing Multiple Servers
Say you manage three VPS boxes. Add one Host block per server in ~/.ssh/config like this:
Host hostinger-vps
HostName 1.2.3.4
User root
IdentityFile ~/.ssh/id_ed25519

Host digitalocean-vps
HostName 5.6.7.8
User root
IdentityFile ~/.ssh/id_ed25519

Host hetzner-vps
HostName 9.10.11.12
User root
IdentityFile ~/.ssh/id_ed25519After that, type ssh hostinger-vps for Hostinger, ssh digitalocean-vps for DigitalOcean, and ssh hetzner-vps for Hetzner. No need to remember IPs or usernames.
Frequently Asked Questions
1. Is the SSH key passphrase the server password?
No. The SSH key passphrase protects the private key file on your computer. The server password is the one used to log in as your VPS user. They are completely different. If you forget the passphrase, there is no recovery path: generate a new key pair and reconfigure the server.
2. Can I upload the private key to my VPS?
Never. Upload id_ed25519.pub, the public key. The id_ed25519 private key stays on your local computer. Leaking the private key is like handing over the keys to your server.
3. Does deleting a local SSH key affect the server?
No, the server is not affected. Deleting the local private key only means this computer can no longer log in. Only when you remove the matching public key from authorized_keys on the server will that key be rejected.
Recommended Setup
For personal VPS use, the full combination is best: Ed25519 with a passphrase, SSH Agent to remember it, and SSH aliases to manage the servers. The passphrase protects the private key file, the agent removes the repeated typing, and aliases keep multi-server connections simple.
Automated deployments are different. GitHub Actions, CI/CD pipelines, AI agents, Codex, and Claude Code connect without human interaction and cannot answer an interactive passphrase prompt. They typically use an Ed25519 key with no passphrase, and the risk is contained by restricting how the key is used and granting only the necessary users and commands. Generate a dedicated key for automation and keep it separate from your daily login key.
Key Takeaway
Personal use: Ed25519 + passphrase + SSH Agent + SSH alias. Automated deployments: Ed25519 without a passphrase plus minimal permissions, and never share a key between the two scenarios.
Summary
Setting up SSH key login on a VPS comes down to five steps: generate a key pair on your computer, copy the public key, upload it to the server’s authorized_keys, configure SSH Agent to skip the repeated passphrase prompt, and finally set an SSH alias so a single ssh my-vps command logs you in.
The full SSH key workflow
Generate the key
ssh-keygen -t ed25519
Copy the public key
cat ~/.ssh/id_ed25519.pub
Add it to the VPS
authorized_keys stores the public key
Set up SSH Agent
ssh-add remembers the key
Set an SSH alias
~/.ssh/config alias, ssh my-vps
macOS, Linux, and Windows look different on the surface, but all three run the same OpenSSH standard underneath. Once you know this flow, you can secure almost any cloud server with SSH keys and manage multiple VPS boxes with short aliases.
every Thursday.
Hosting reviews, builder comparisons, performance tips, and plugin picks — curated weekly for WordPress site owners and builders.