A fixed residential IP is the foundation for running social accounts long term. This walkthrough covers buying an ISP residential IP from IPRoyal: signing up, creating the order, choosing 1 proxy on a 90-day US plan, turning on the subscription so the IP stays yours, and saving the Socks5 credentials for the client.
The previous post covered building your own dedicated node with an AI agent. That node settles your entry point, but the exit IP is what decides who the platforms think you are. The two are separate problems: a fast node with a datacenter exit, or an exit shared with a crowd of other users, still gives your accounts a network environment that looks abnormal.
That is why anyone running accounts long term puts a fixed ISP residential IP behind the node. This post walks through buying one from IPRoyal, from signing up to holding the proxy credentials you can paste into a client. Five steps in total.
Step 1: Create an Account and Sign In
Open IPRoyal, register, and sign in. Once the email is verified, two entries in the dashboard cover everything below: Proxies and My Orders, with the work happening under Proxies.
ISP Residential IP vs Datacenter IP
An ISP proxy carries an IP registered to a local carrier, so a platform sees what looks like an ordinary home or business broadband user. A datacenter IP belongs to a hosting provider, and a shared proxy means many people running through the same IPs at the same time. The first looks like a real person browsing, the second is far easier for a platform to sort into a risk bucket, which is what you are paying for when you buy residential IPs for long-term accounts.
Step 2: Choose ISP and Create a New Order
Under Proxies in the left menu, pick ISP to open the ISP proxy page, then click Create a New Order.

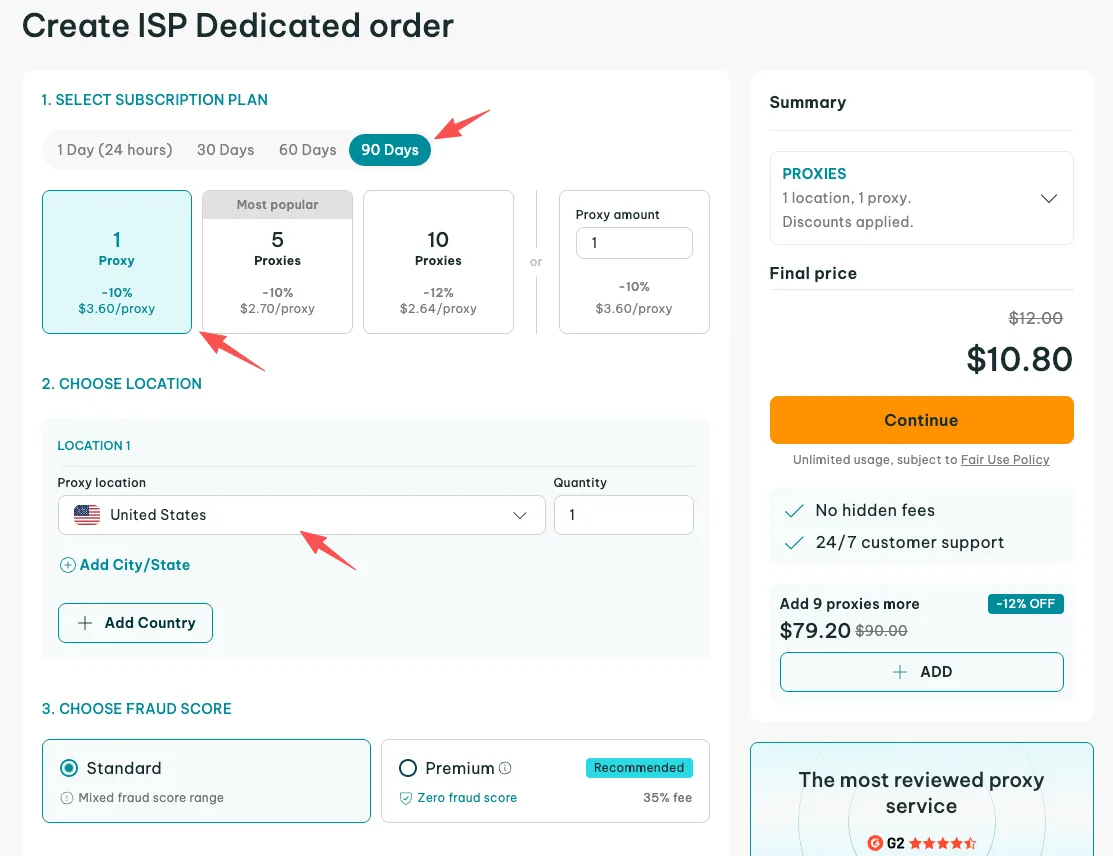
Step 3: Pick Quantity, Duration and Location
The order page asks for three things: how many proxies, how long, and where. This walkthrough uses 1 proxy, 90 days and the United States, which is enough while an account is still warming up; add more later as you need them. Match the location to your target market, so accounts aimed at the US market sit behind a United States exit. Keeping the exit region consistent with how the account behaves matters more than any single IP. Then place the order and pay.
Step 4: Turn On the Subscription and Keep the Same IP
This step is the one people skip, and it decides whether the IP stays yours. Once payment clears, go to the ISP view and find your order:
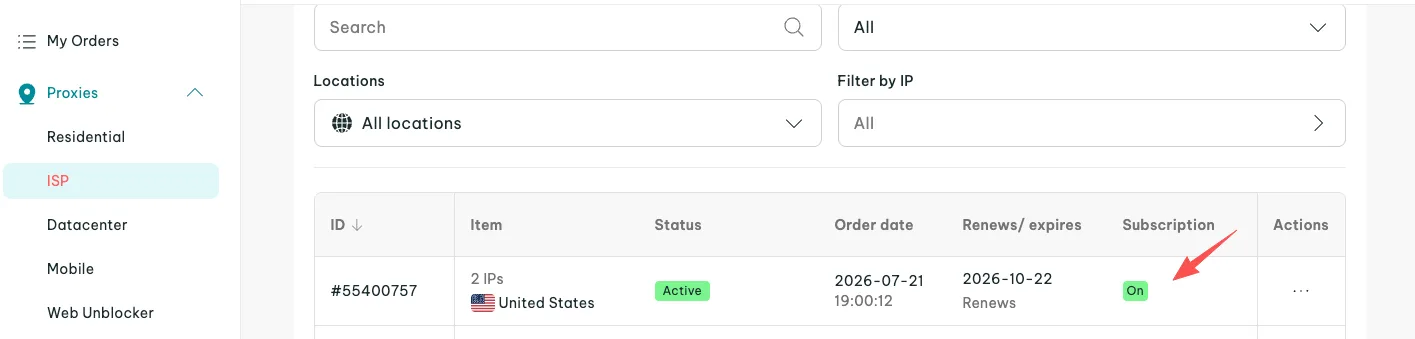
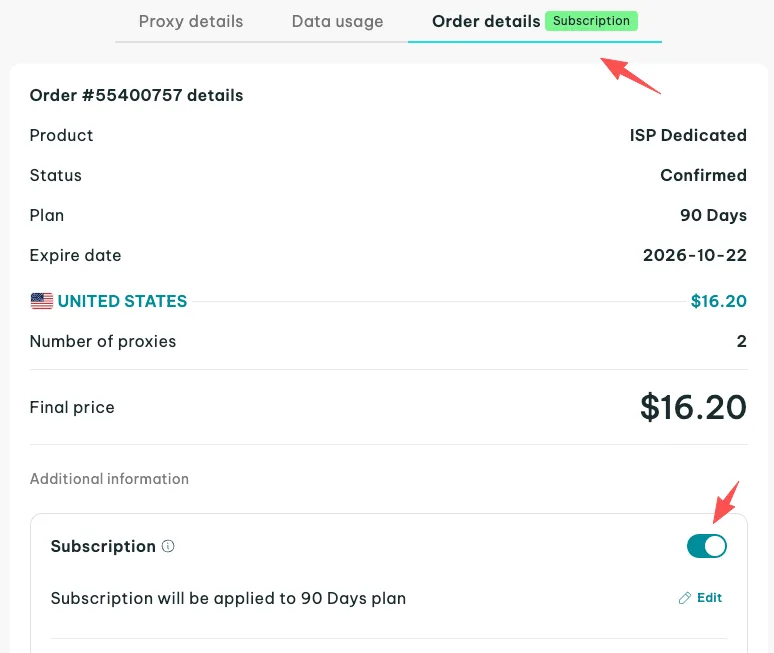
Open the order, switch to the Order Details tab, and turn the Subscription toggle on under Additional Information. With it on, the order renews by itself when the 90 days are up and the same IP carries over. Without it you buy again at expiry, the IP often changes, and the login history and device trust your accounts built up on the platform start over.
Step 5: Save the Proxy Credentials With Socks5
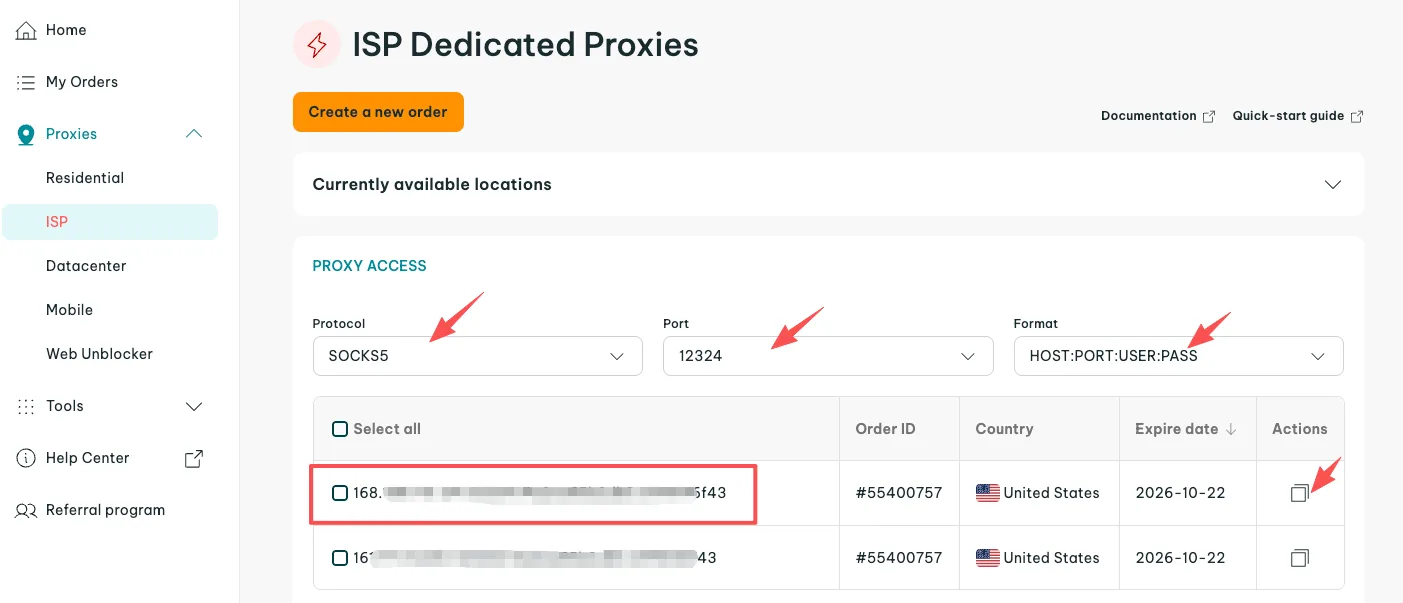
Once the order is live, go back to the ISP view, open the proxy details, set Protocol to Socks5, and copy the string:
168.45.145.675:12324:146dgd2457g667:dd24etg678fa34
Read it in order and you have four values: IP address, port, username and password. Split them when you fill in a client rather than pasting the whole string into one field. Keep all four somewhere safe, because the chained proxy setup in the next post uses exactly these values.
PRO TIP Swap the Port Before Anything Else
If the IP stops connecting, try another port on the same order first, which clears up most cases. If a different port still fails, contact IPRoyal support and ask them to check the state of that IP.
The Whole Flow in Five Steps
From signing up to holding working credentials, the purchase comes down to five steps.
The workflow in five steps
Sign Up
Create the IPRoyal account
New Order
Place it from the ISP page
Pick the Config
Quantity, duration, location
Turn On Subscription
Auto-renew, same IP
Save the Credentials
Socks5 plus four values
Next: Wiring the ISP IP Into a Chained Proxy
Buying the IP only gives you an exit, it is not connected to your network yet. The next post turns the ISP IP into a chained proxy, so your network exit becomes a native US residential IP and the risk flags you get from Facebook, Instagram, ChatGPT and Claude drop sharply.
every Thursday.
Hosting reviews, builder comparisons, performance tips, and plugin picks — curated weekly for WordPress site owners and builders.