Register a domain and set up DNS on NameSilo, Namecheap, and GoDaddy. Covers A records and custom nameservers, with screenshots and a comparison table to help you point your domain at your host.
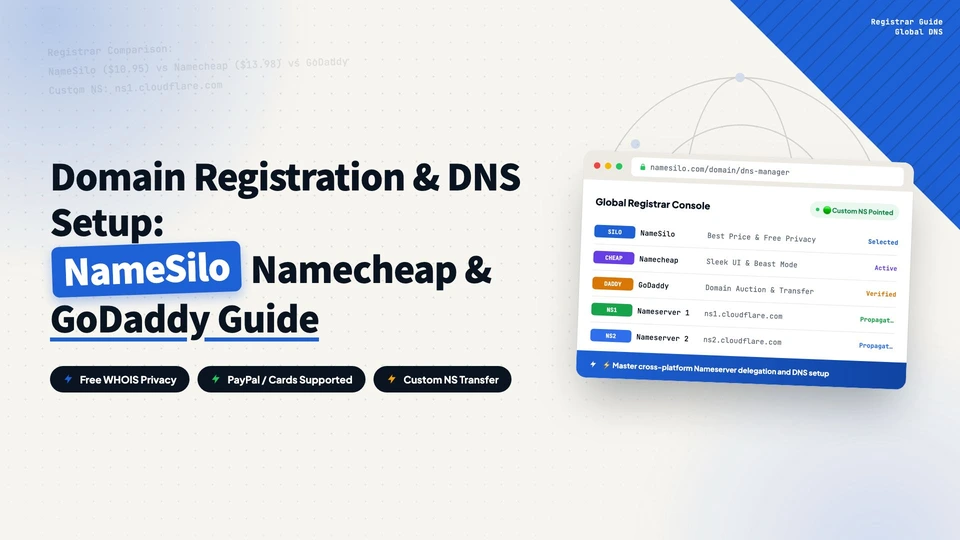
Registering a domain is the first step to getting a website online. But buying the domain is only half the job: you also need to point it at your hosting server so visitors can actually reach your site. This guide covers both, on the three mainstream registrars: NameSilo, Namecheap, and GoDaddy.
Pick the registrar with the best price for the TLD you want, then follow the steps. The core flow is the same on all three: register the domain → verify your identity → configure DNS to point at your host.
Before You Start: DNS Explained
DNS (Domain Name System) translates a domain like yoursite.com into an IP address like 12.34.56.78, the actual address of your server. Think of it as the internet’s phone book.
After buying a domain, you have two ways to connect it to your host:
Option A: Add A Records (Keep DNS at Your Registrar)
Log in to your registrar, open the DNS settings, and add A records pointing to your host server’s IP address. All DNS traffic stays handled by the registrar. This is the simpler option, with no extra setup on the host side.
Option B: Change Nameservers (Transfer DNS to Your Host)
Replace the registrar’s default nameservers with the custom NS addresses your hosting company provides (Hostinger and others all provide these). From that point on, DNS is managed from your hosting control panel instead of the registrar.
If you are using a managed WordPress host like Hostinger, Option B (change nameservers) is usually the better choice, because you manage DNS, email, and SSL in one panel. For a self-managed VPS or cloud server, Option A (A records) is more straightforward.
1. NameSilo
Part 1: Register a Domain
Create an account at NameSilo and click Register in the top right after logging in.
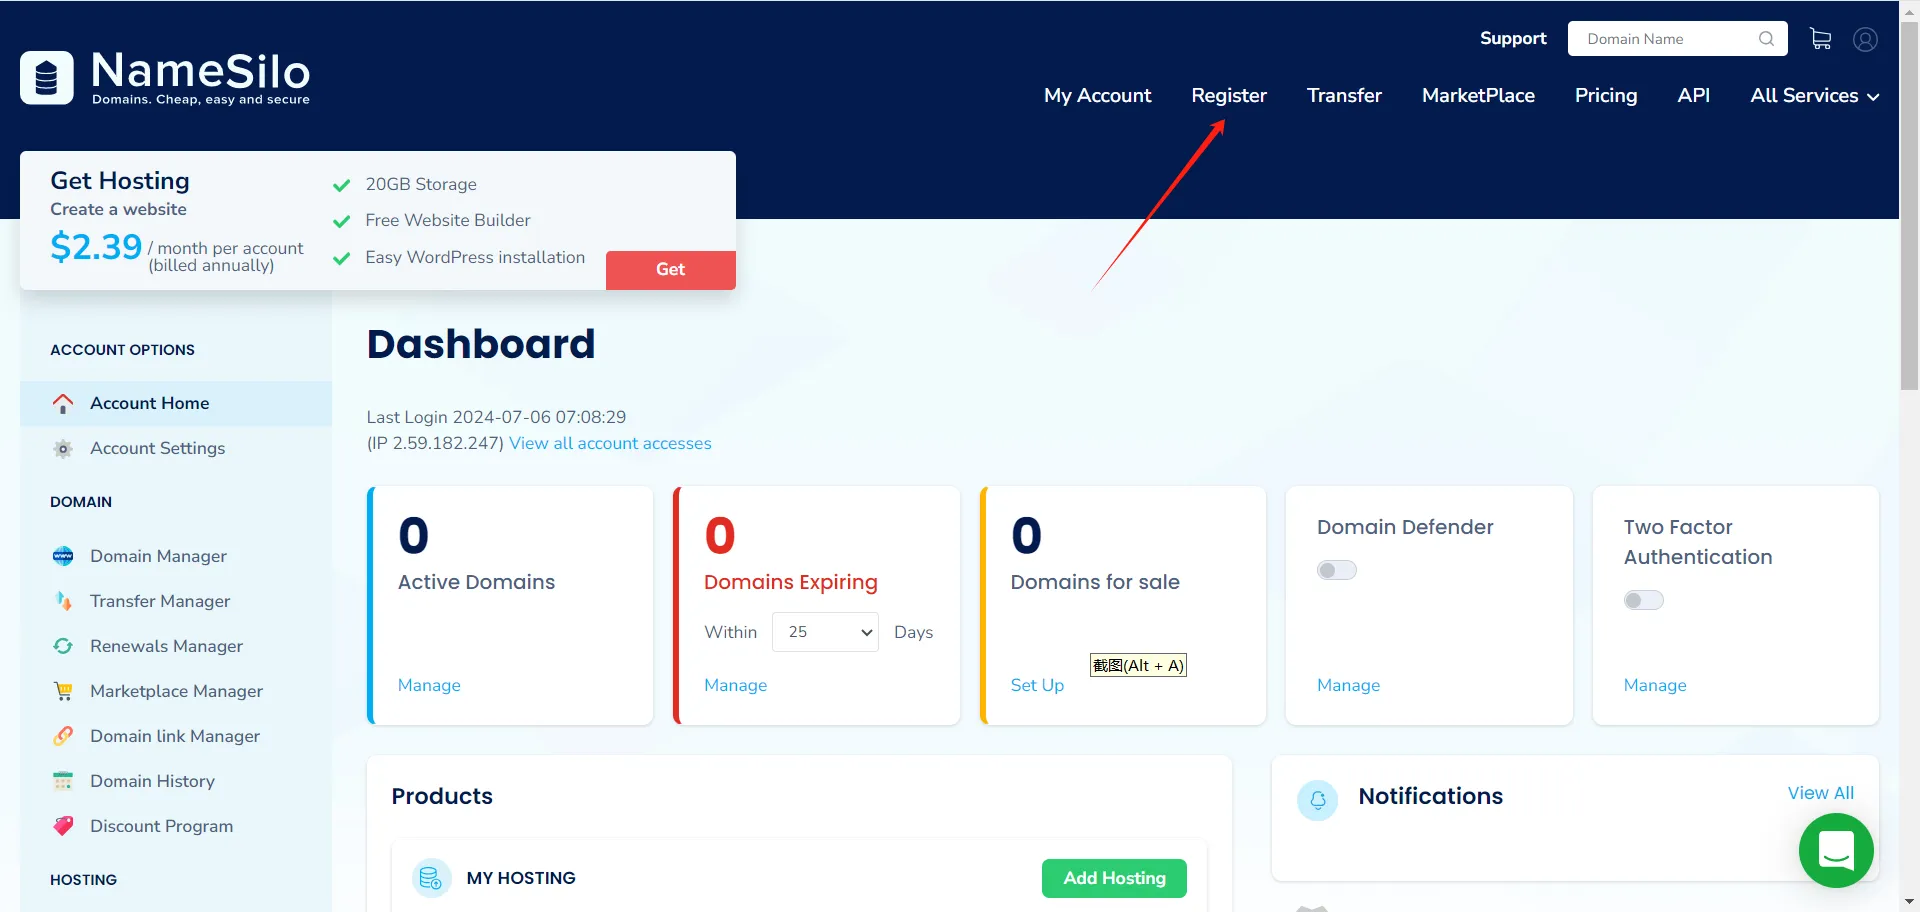
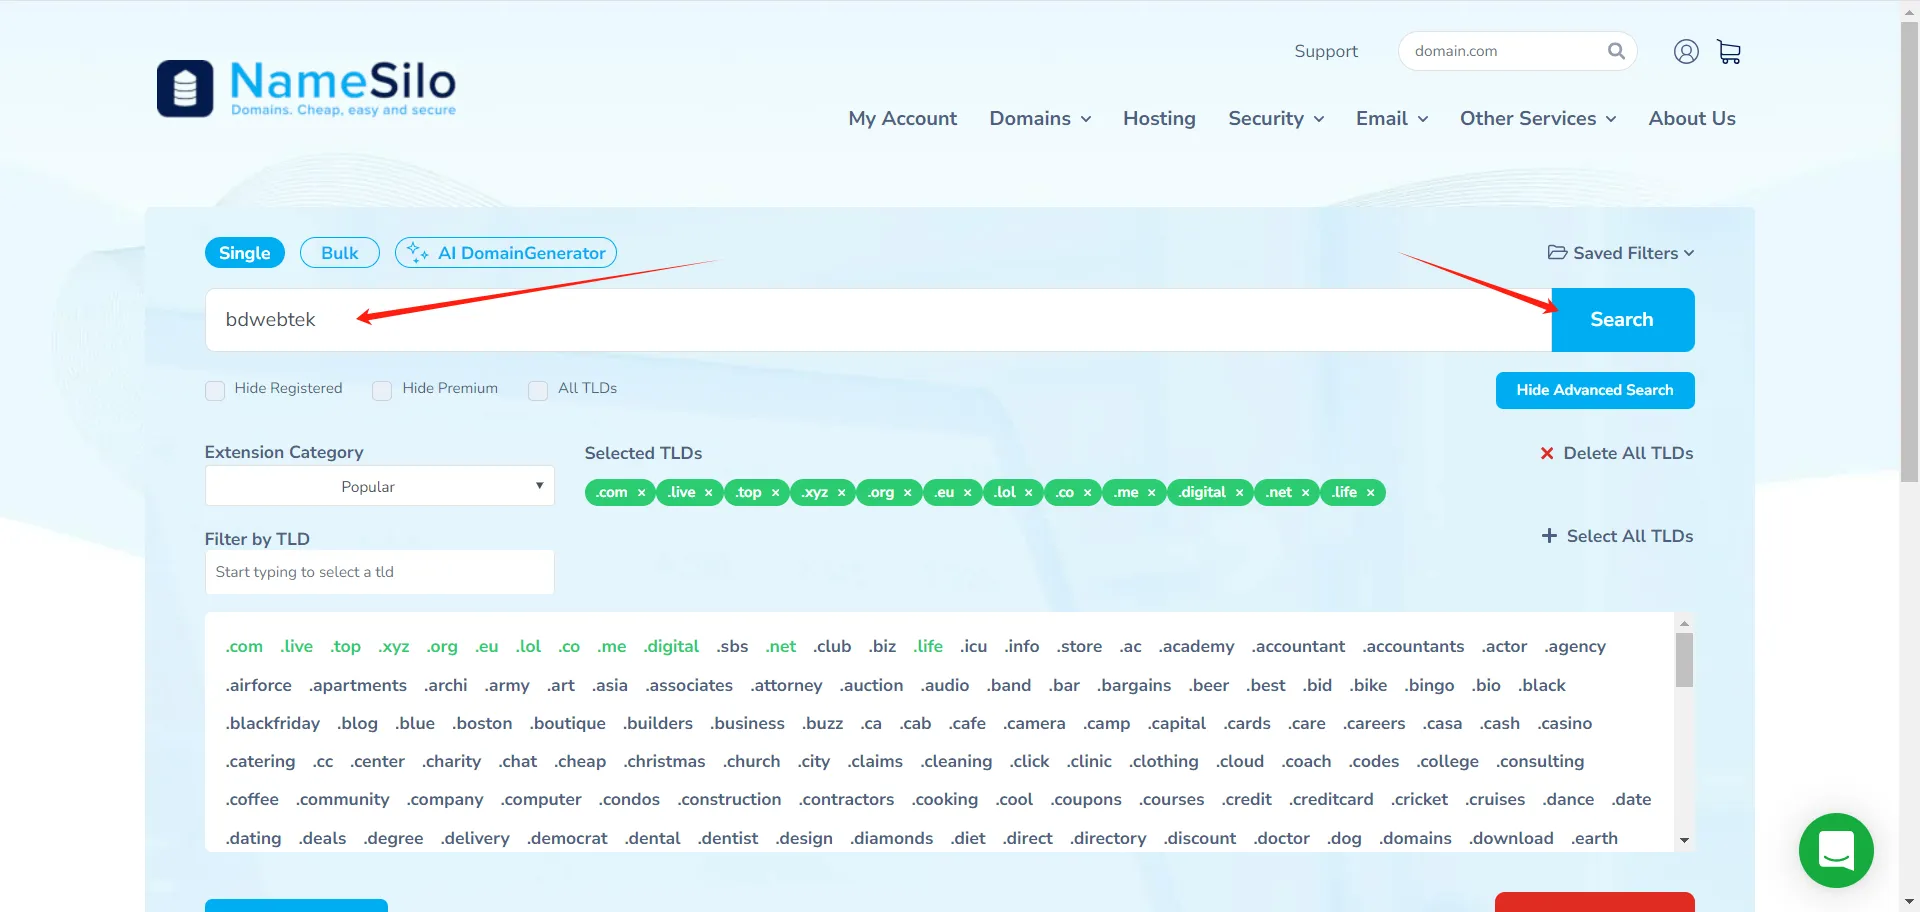
Type the domain you want in the search box and check availability.
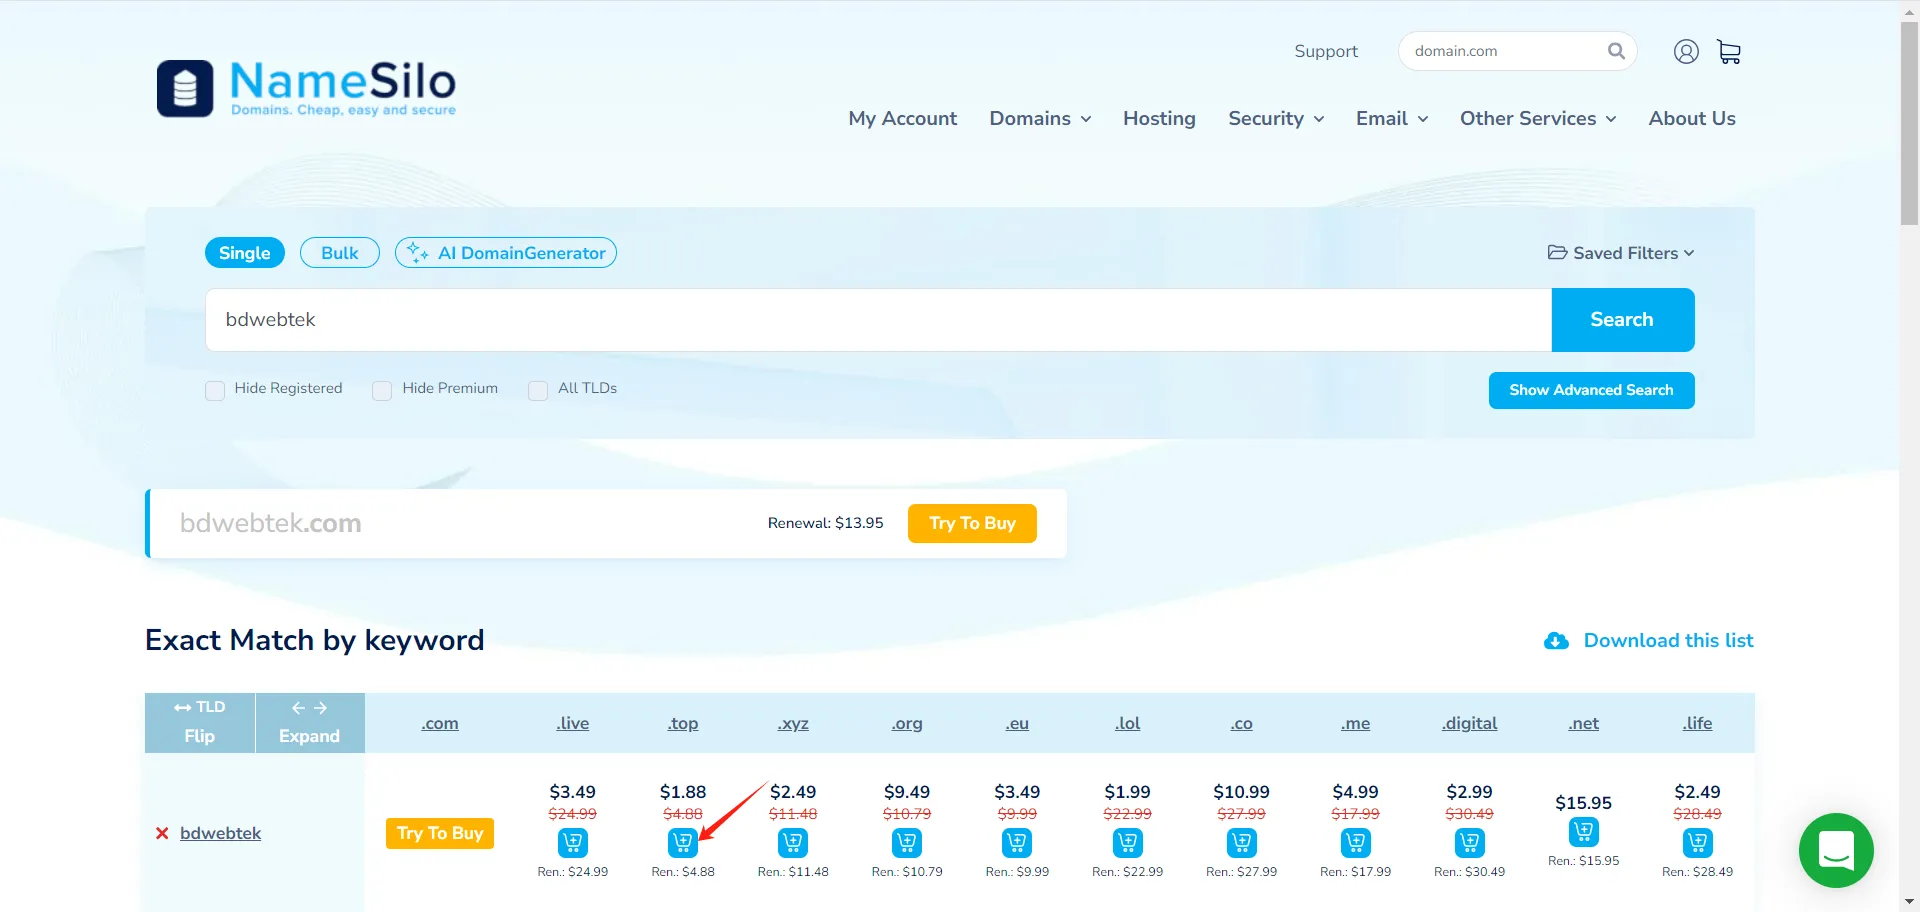
Available TLDs appear with their prices. If you see Try To Buy, the domain is already registered and you would need to negotiate with the current owner, usually at a higher price. Pick an available TLD and add it to the cart.
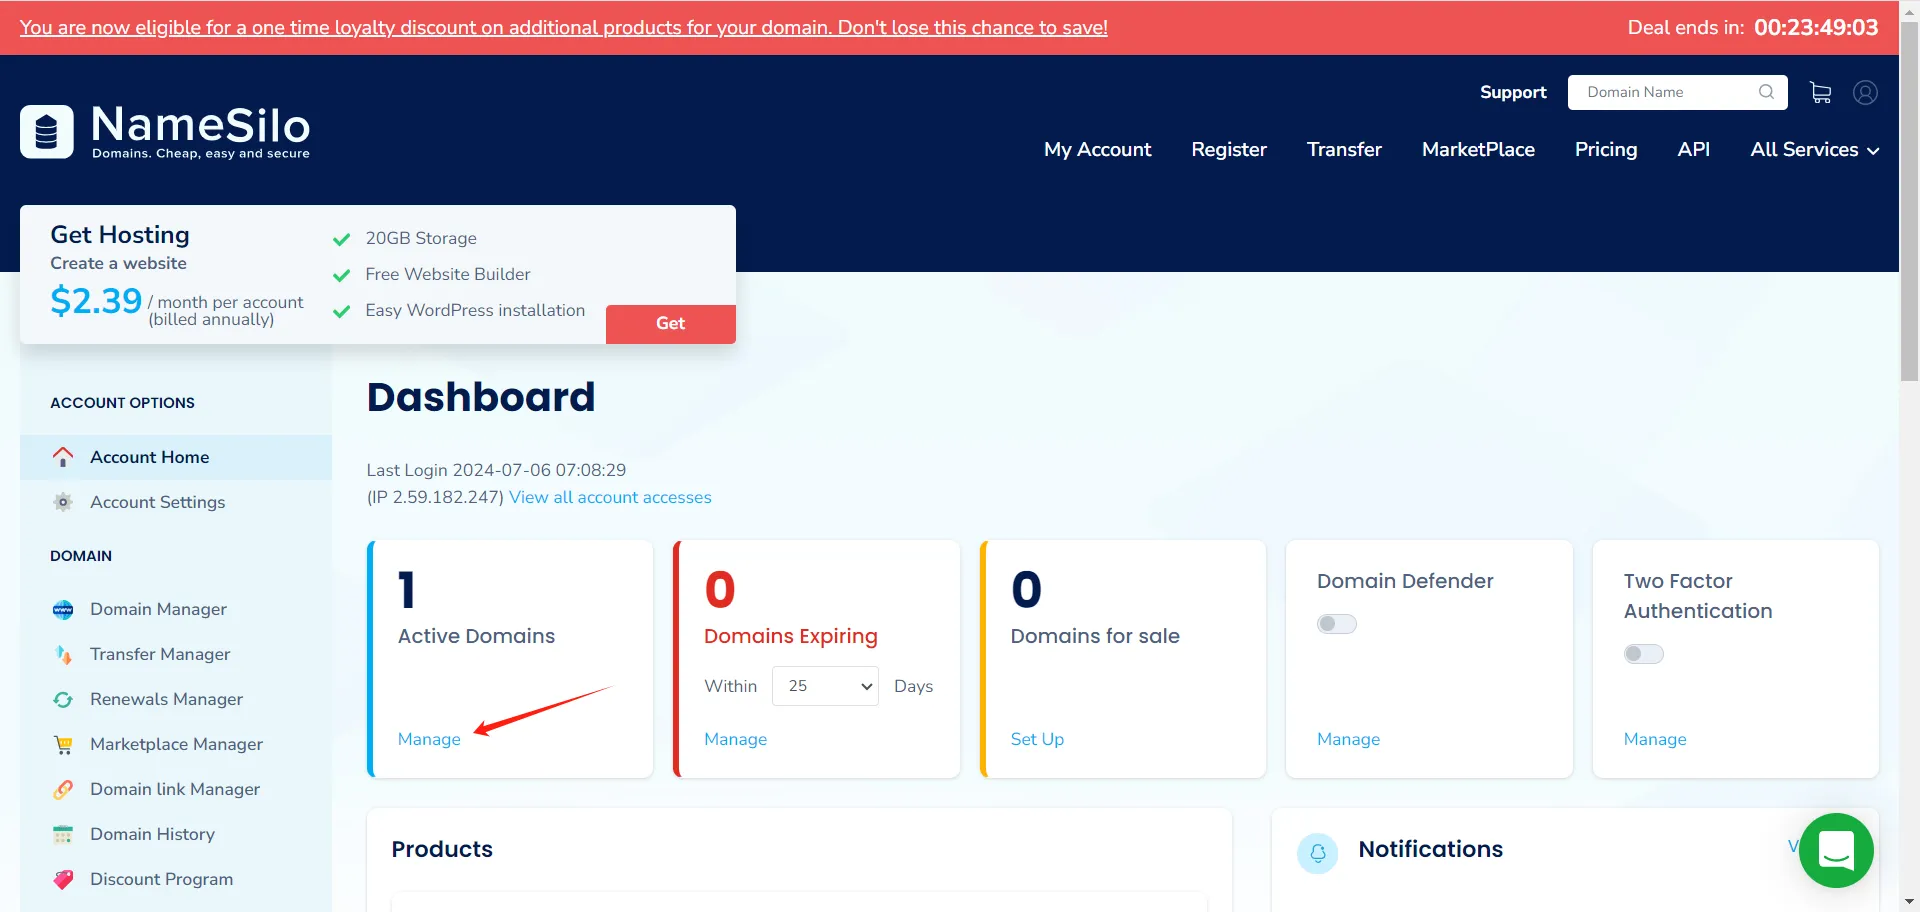
After payment, you land on the Account Home page. You should see the new domain under Active Domains. Click Manage.
Part 2: Set Up DNS
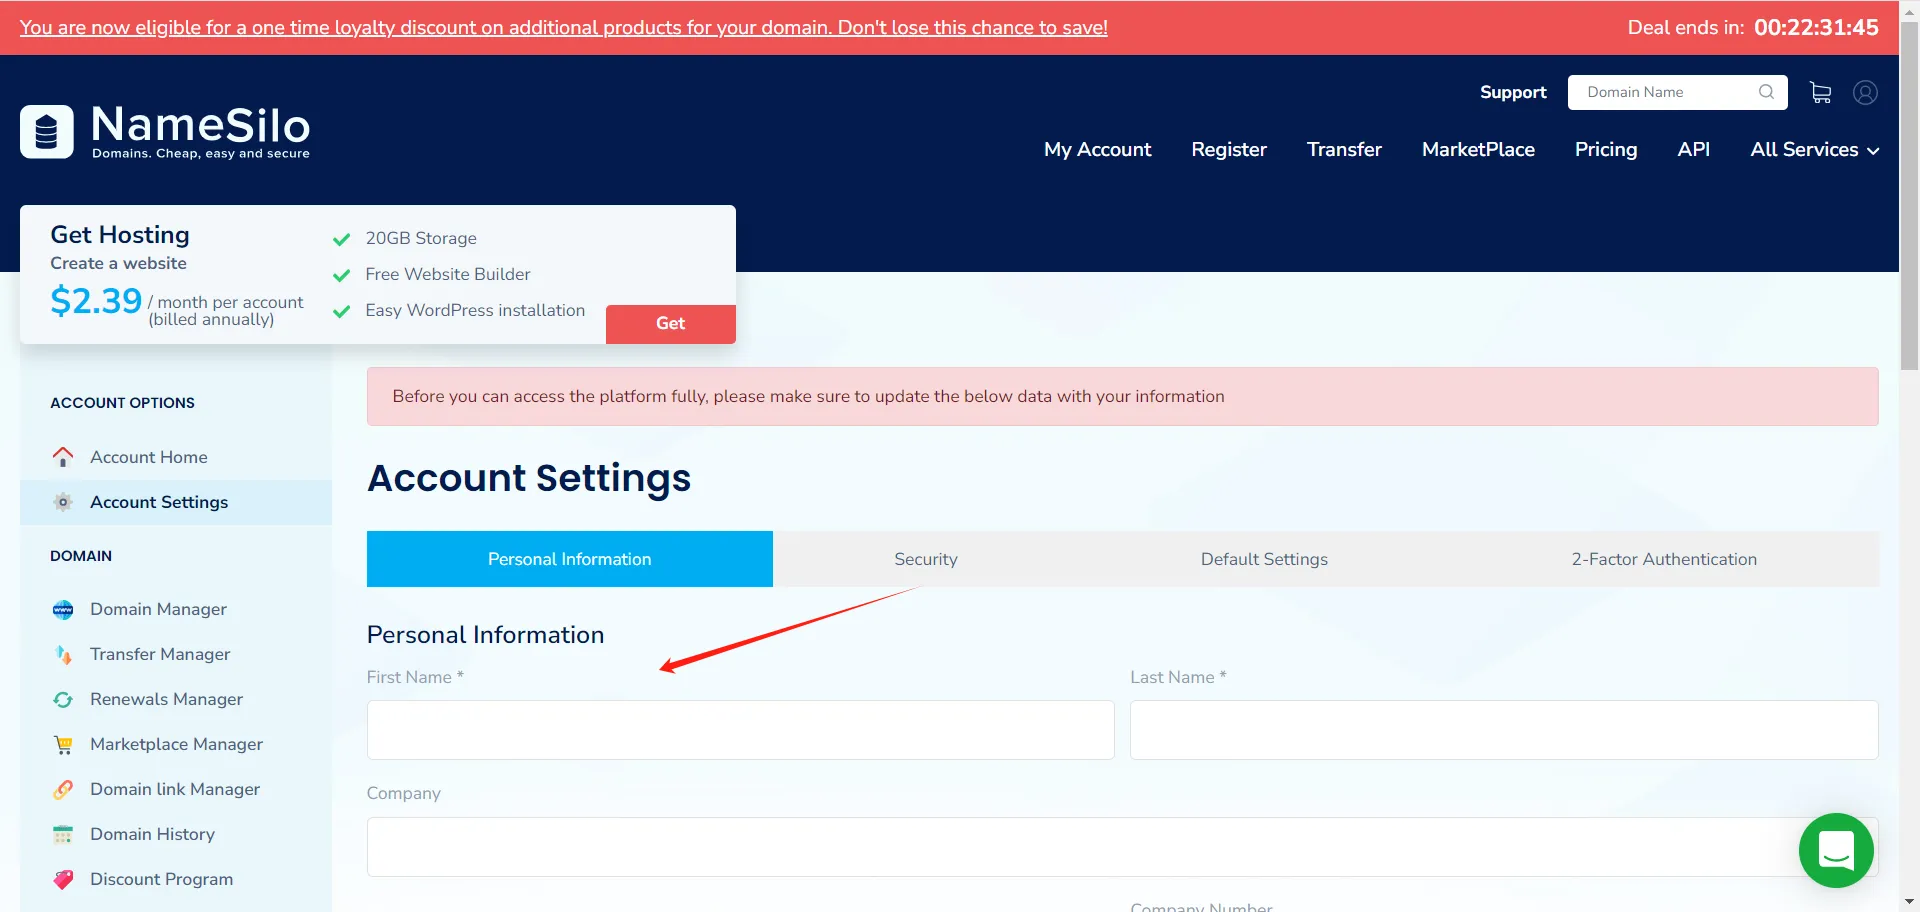
First, complete your account information to verify domain ownership.
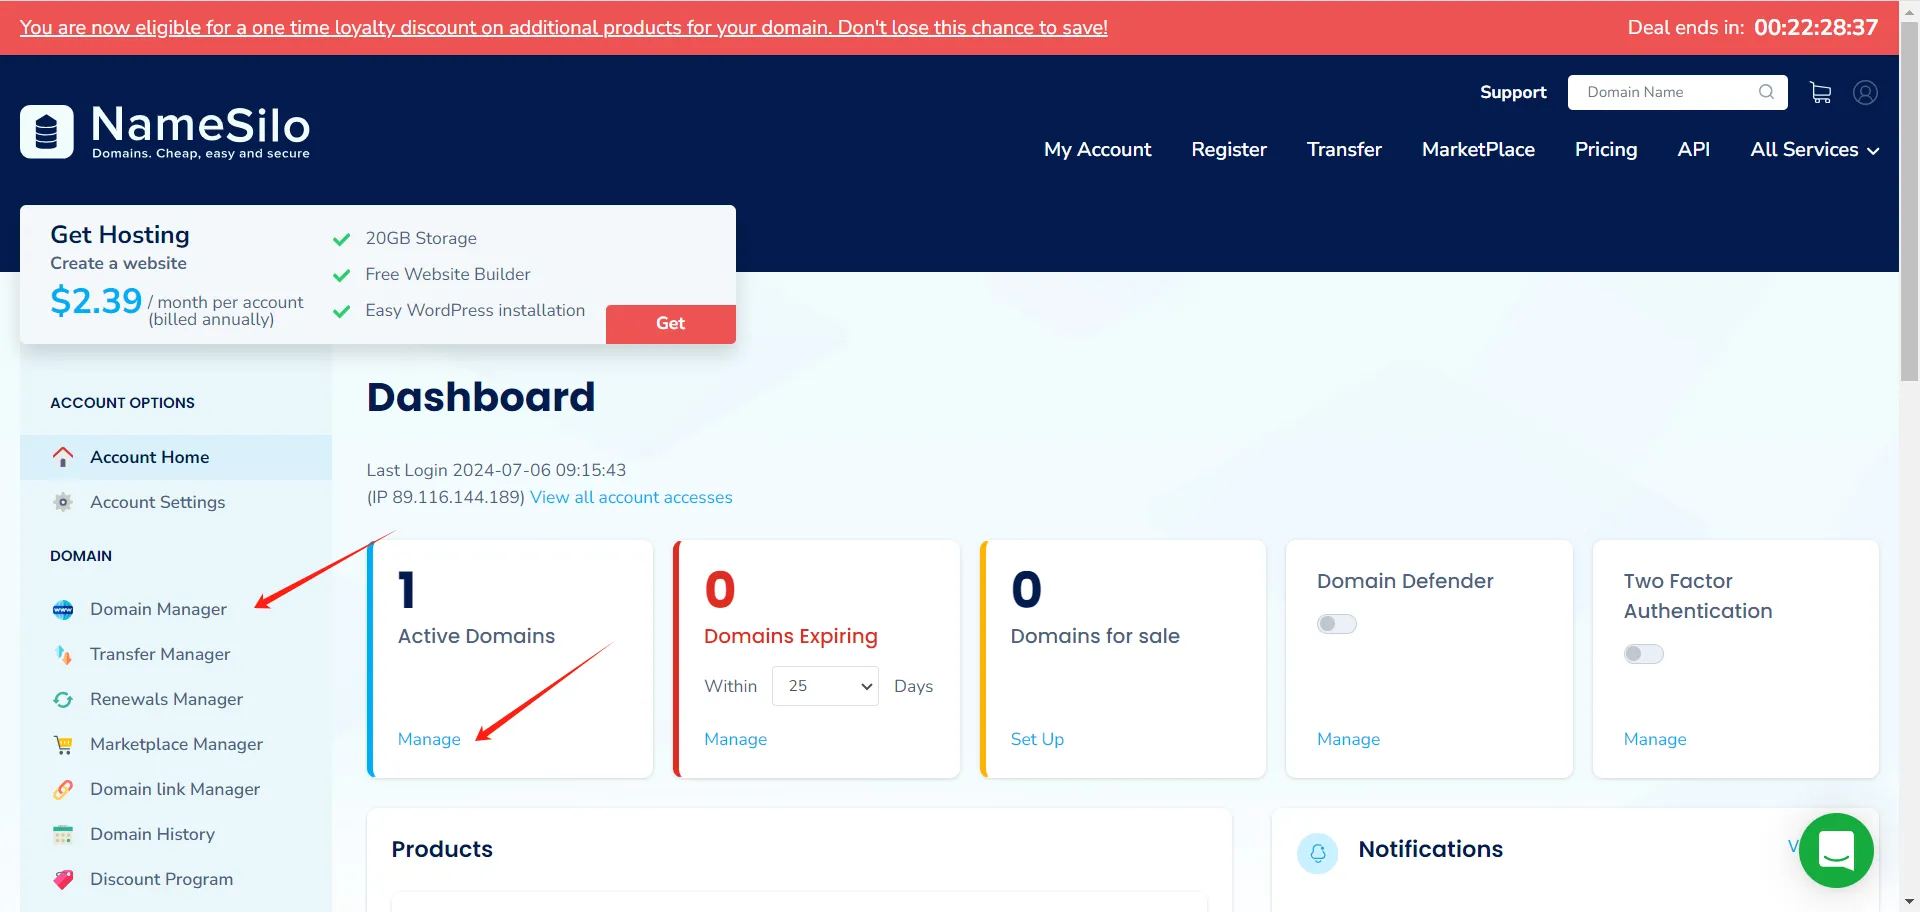
After verification, return to Account Home. Go to Domain Manager from the sidebar, or click Manage on the domain.
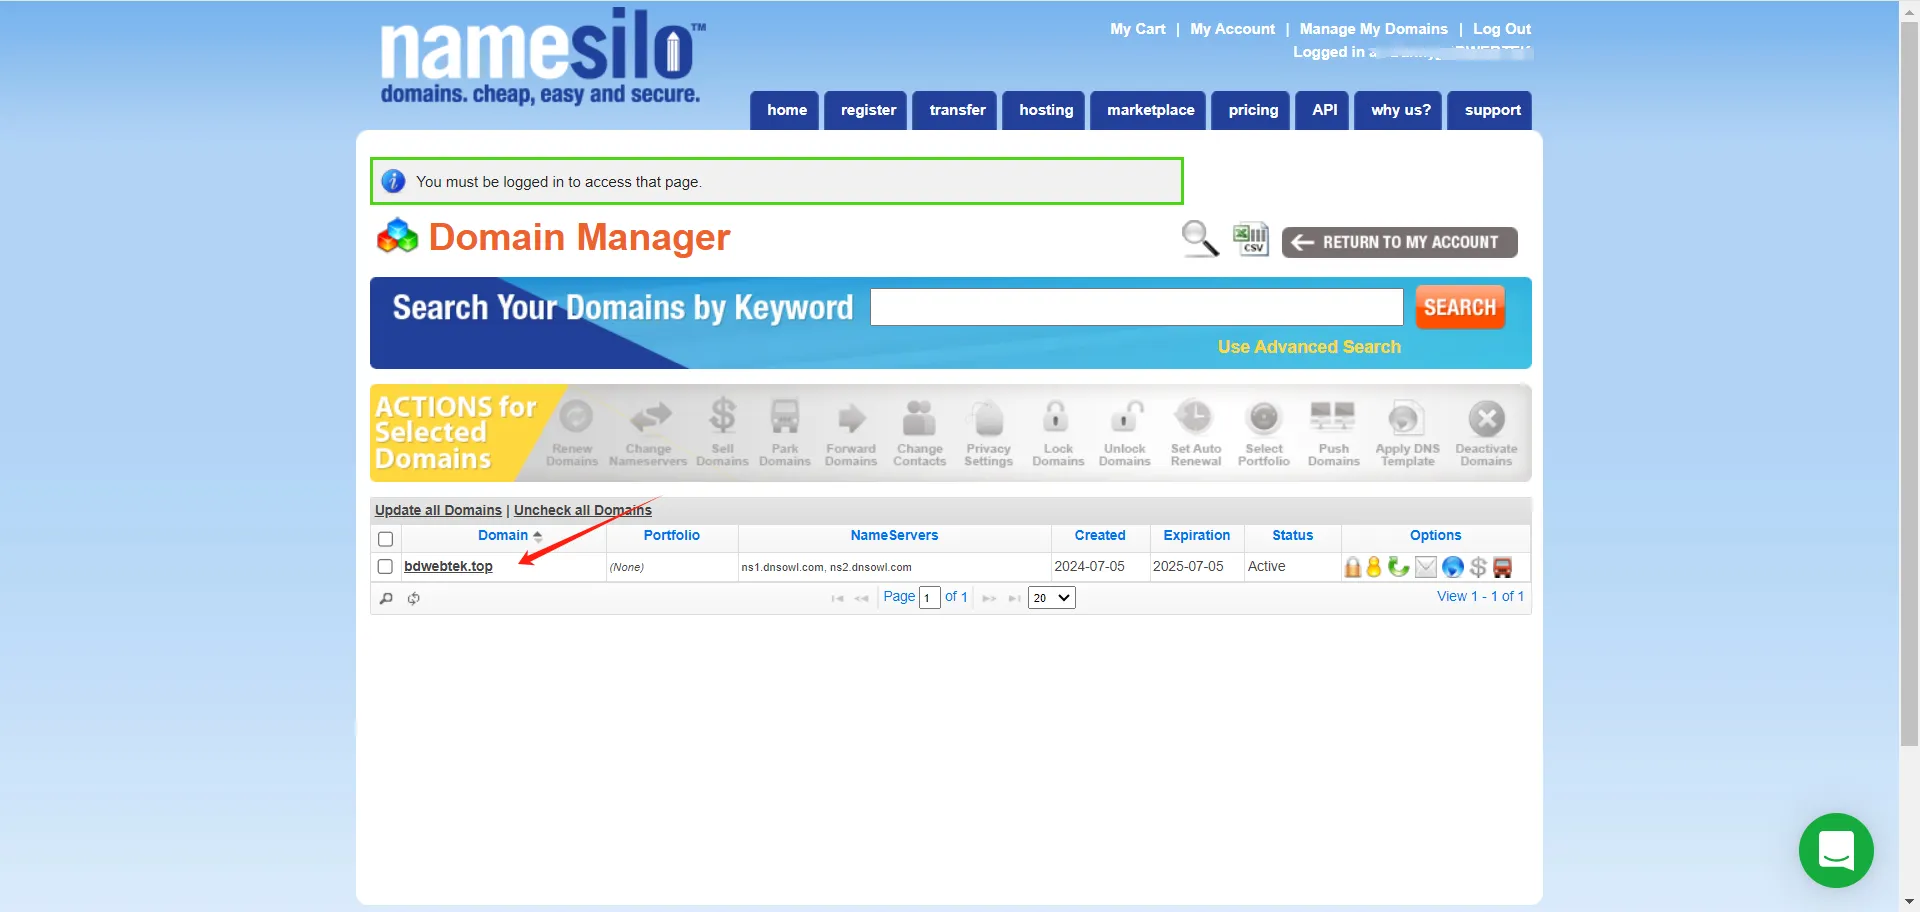
In Domain Manager, click the domain you want to configure.
Option A: Add A Records
Keep DNS at NameSilo and add A records pointing at your server. Click DNS on the domain settings page.
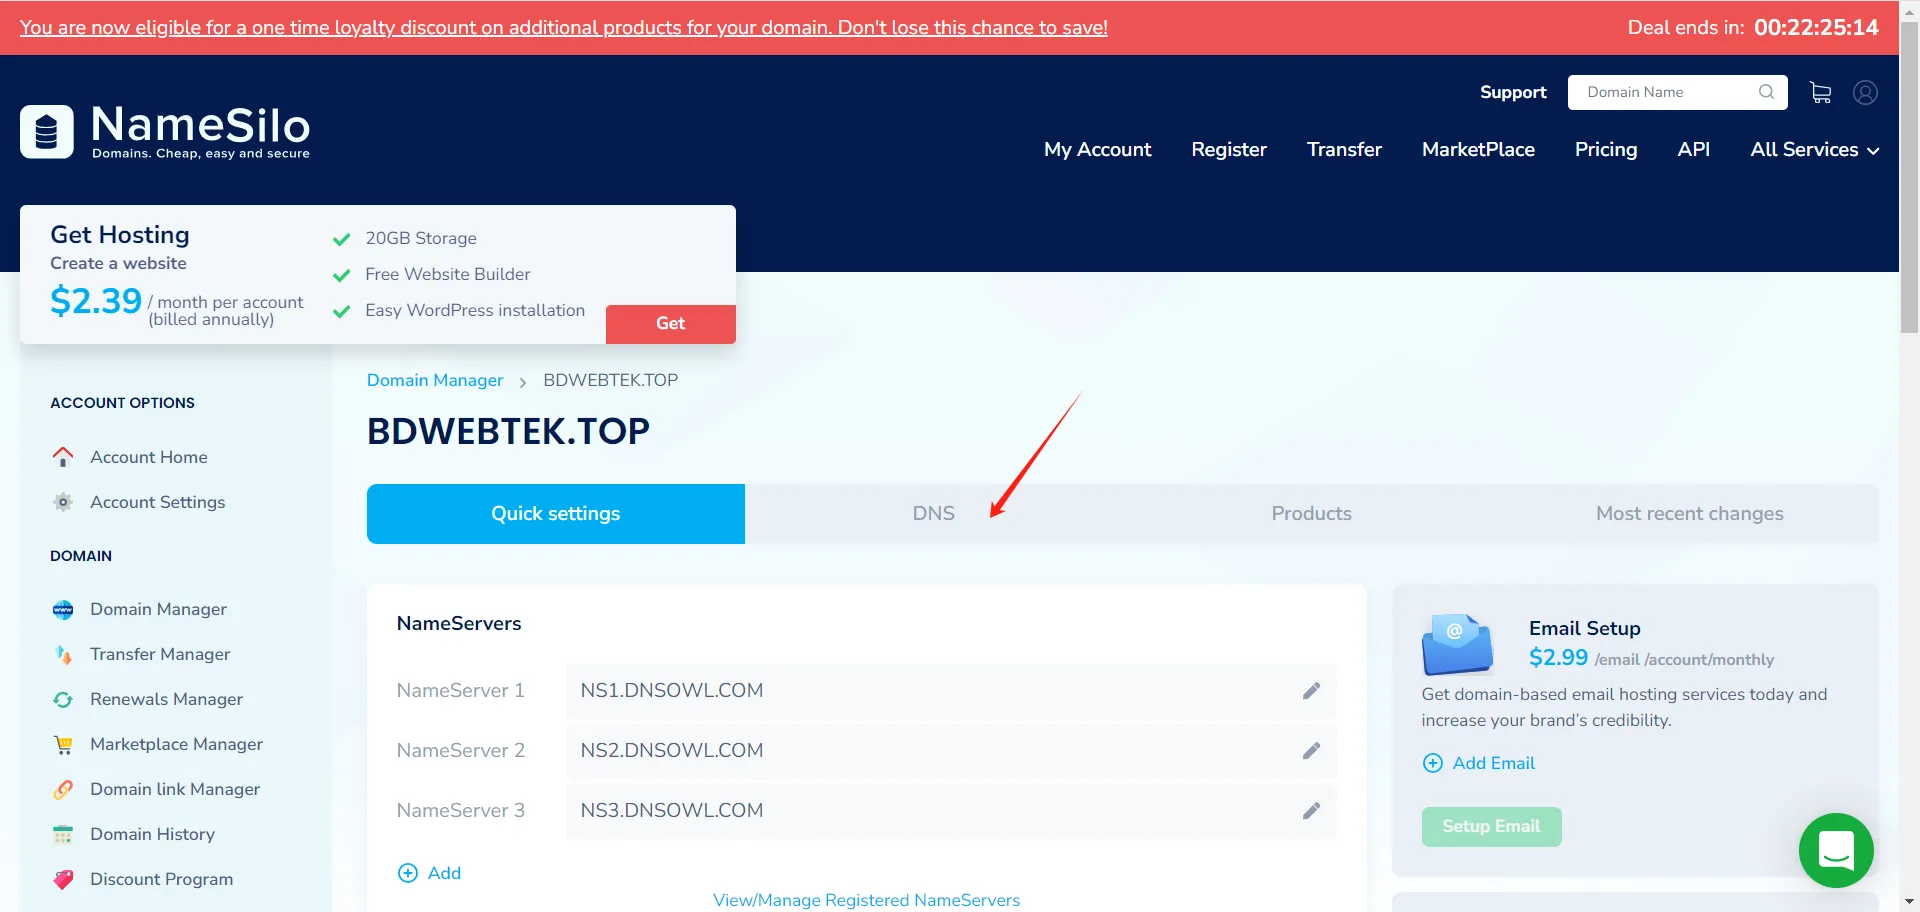
Add two A records. First, find your server’s public IP address. If you are using Hostinger, see how to find your public IP. Assuming the IP is 12.34.56.78, add:
Host: @, type: A, value: 12.34.56.78
Host: www, type: A, value: 12.34.56.78
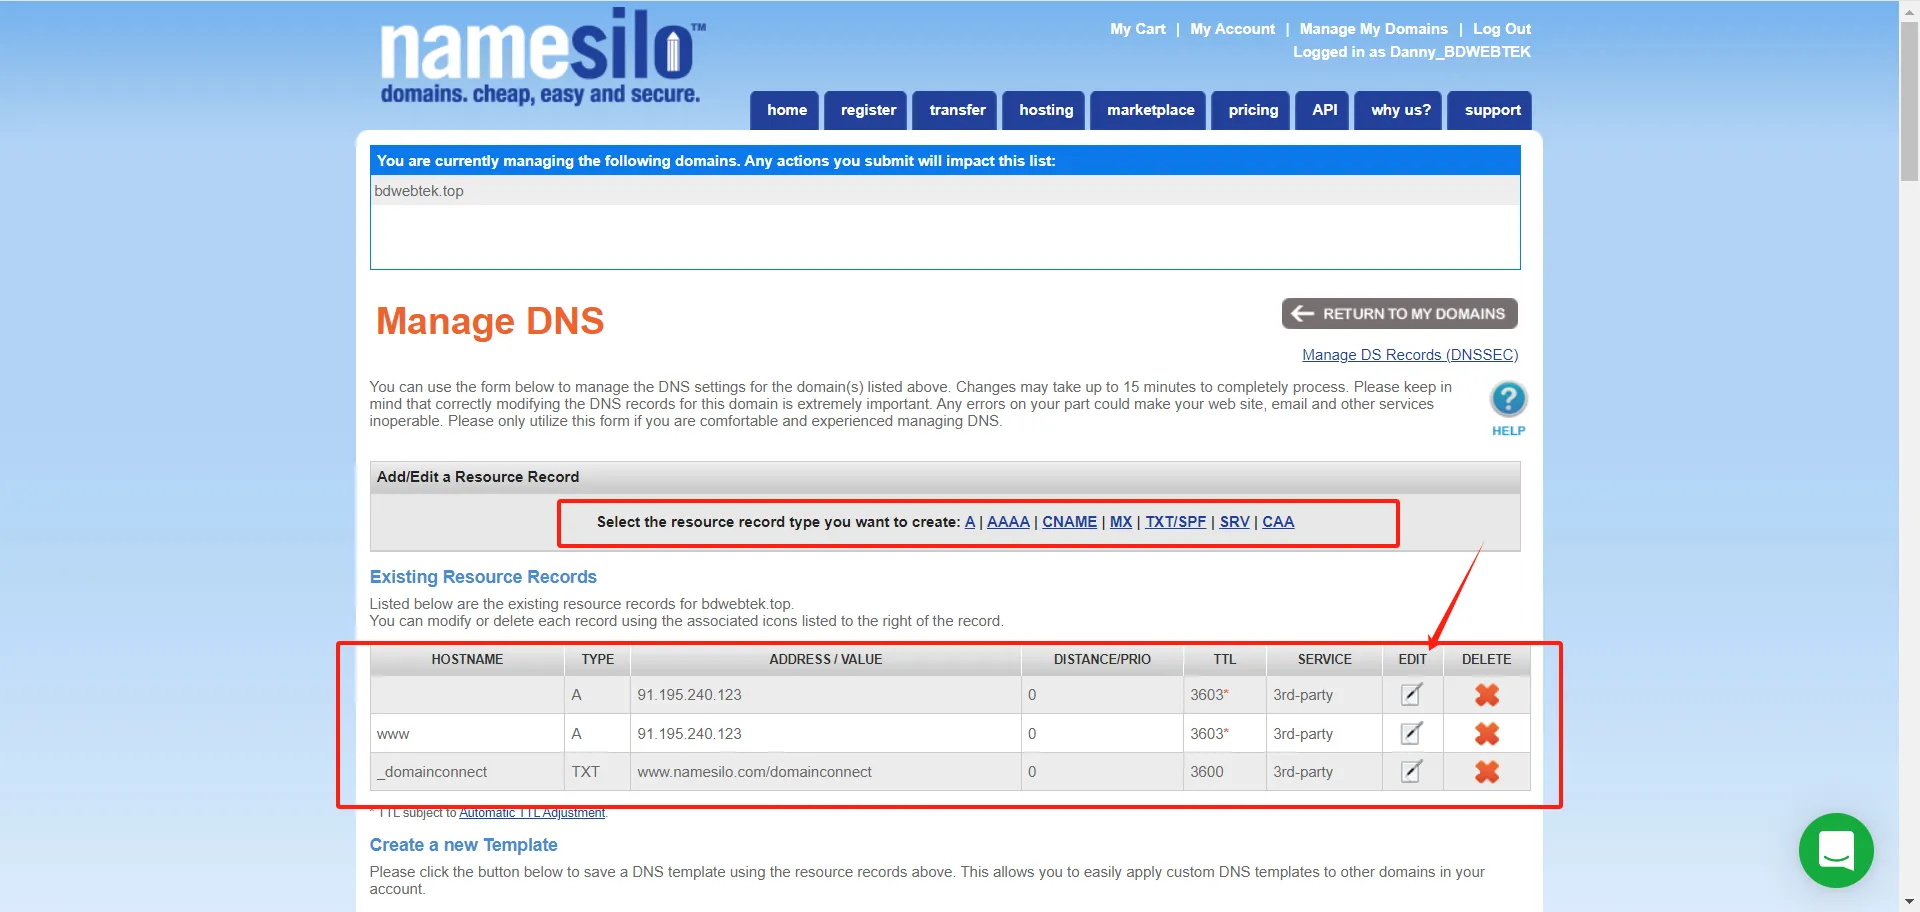
Option B: Use Custom Nameservers
Transfer DNS management to your host. On the Quick Setting page, find the Name Servers section and replace the defaults with the NS addresses your host provides.
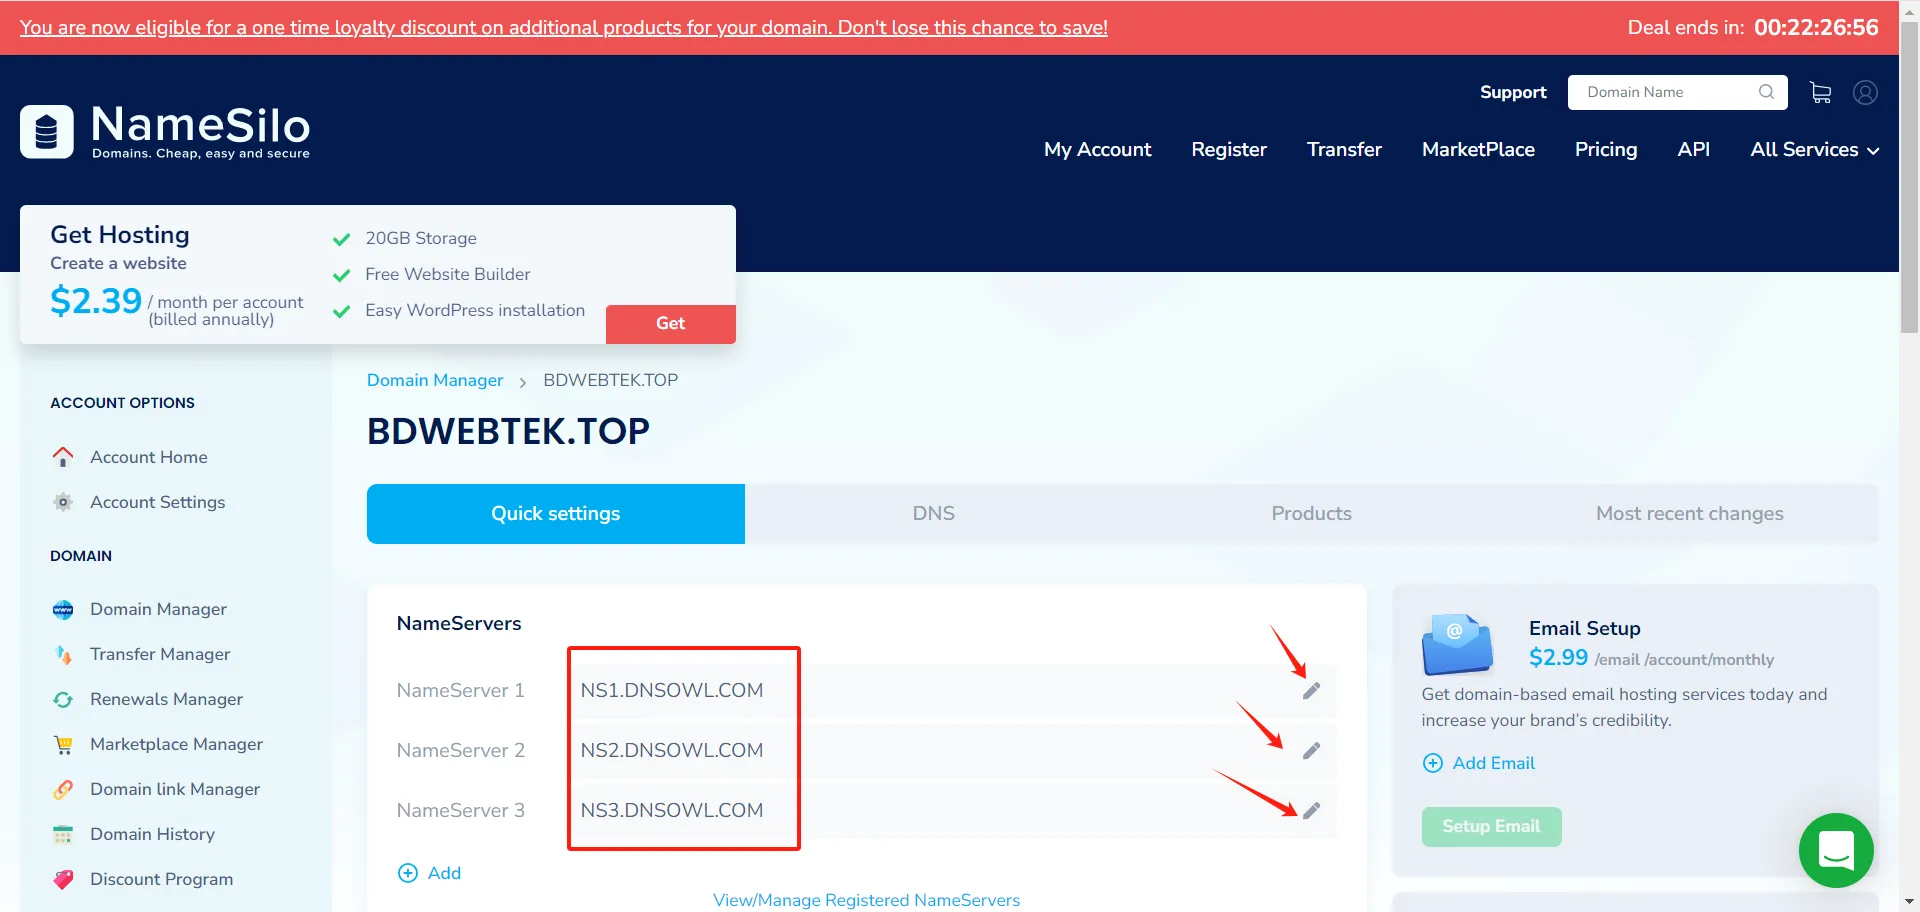
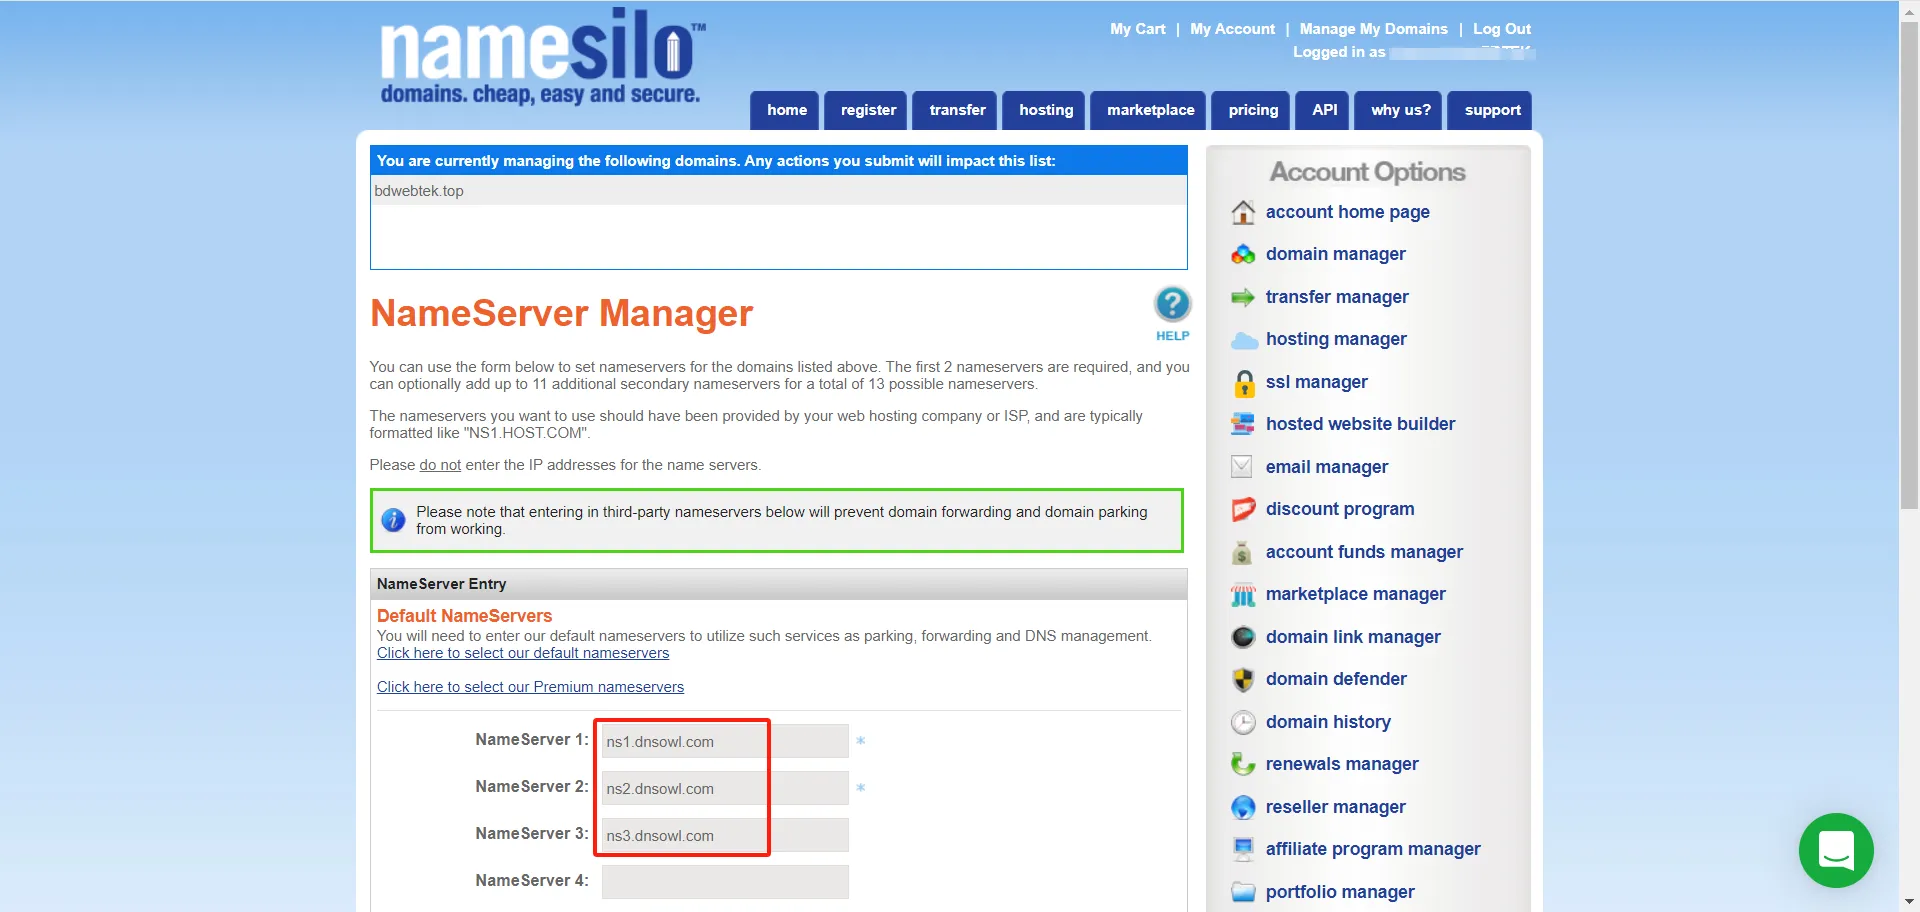
Hostinger users: see how to point your domain to Hostinger.
Important: pick either A records or nameserver changes, not both. DNS changes can take up to 48 hours to propagate worldwide, but usually complete within a few hours.
2. Namecheap
Part 1: Register a Domain
Create an account at Namecheap and type the domain you want to register in the search box.
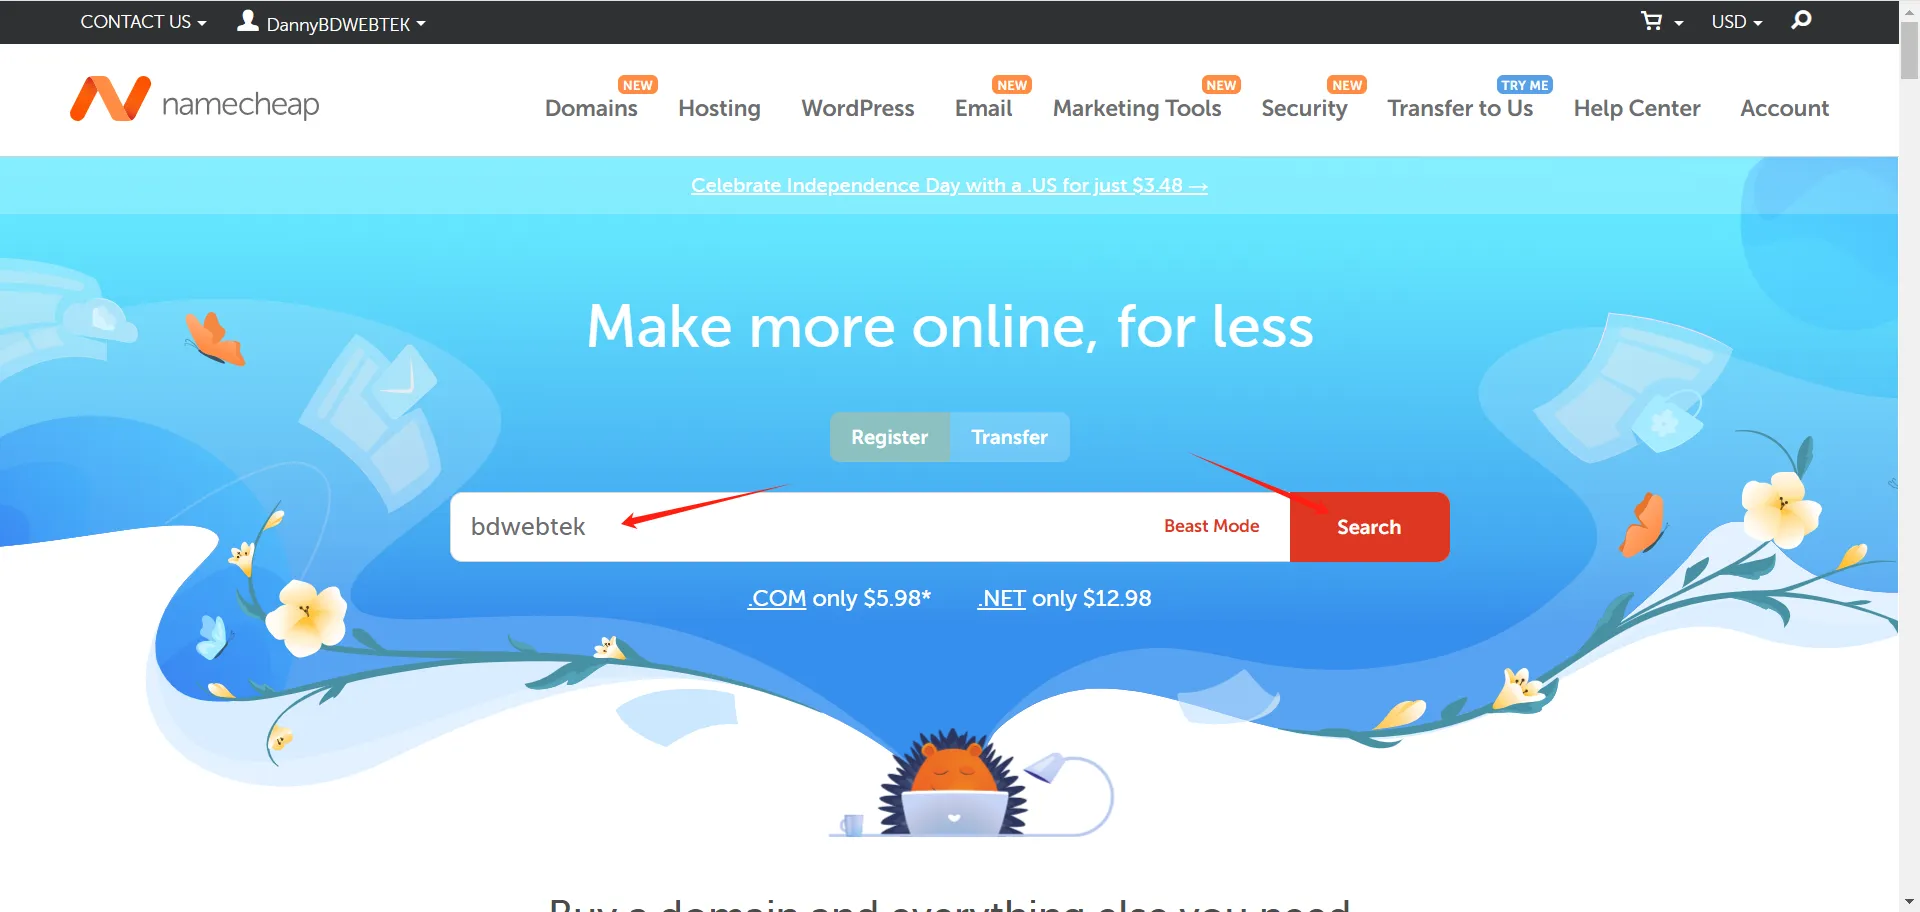
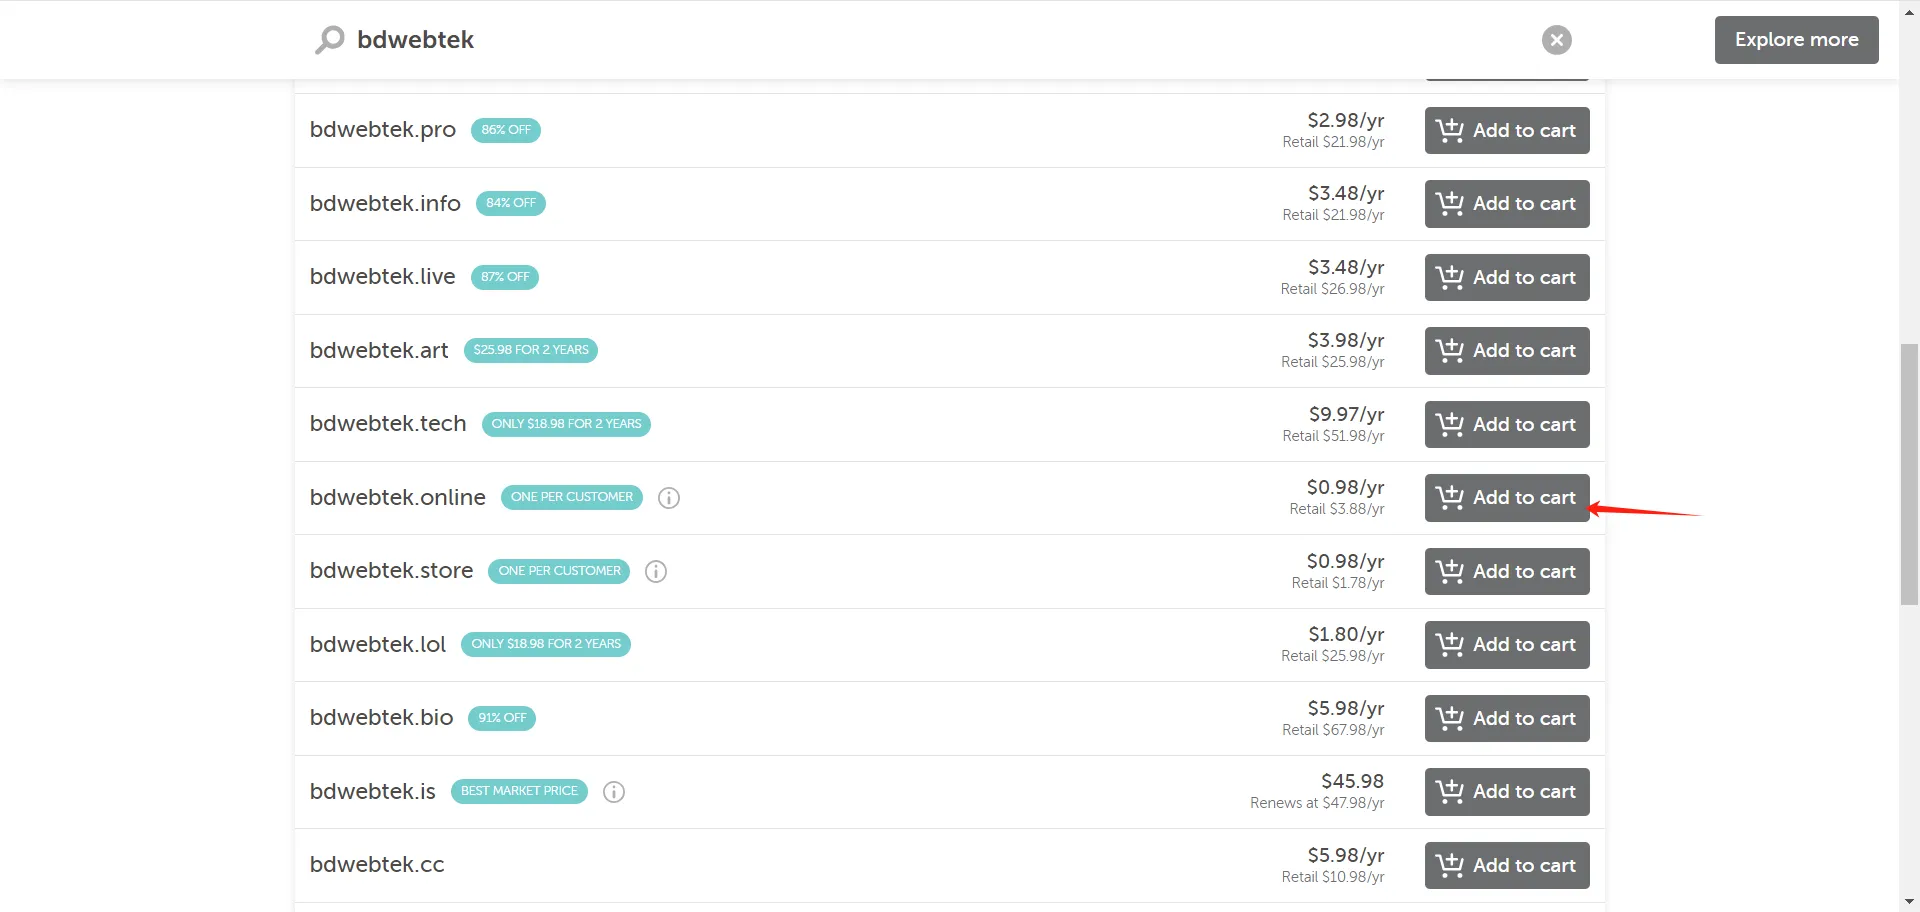
Pick an available TLD from the results and add it to the cart.
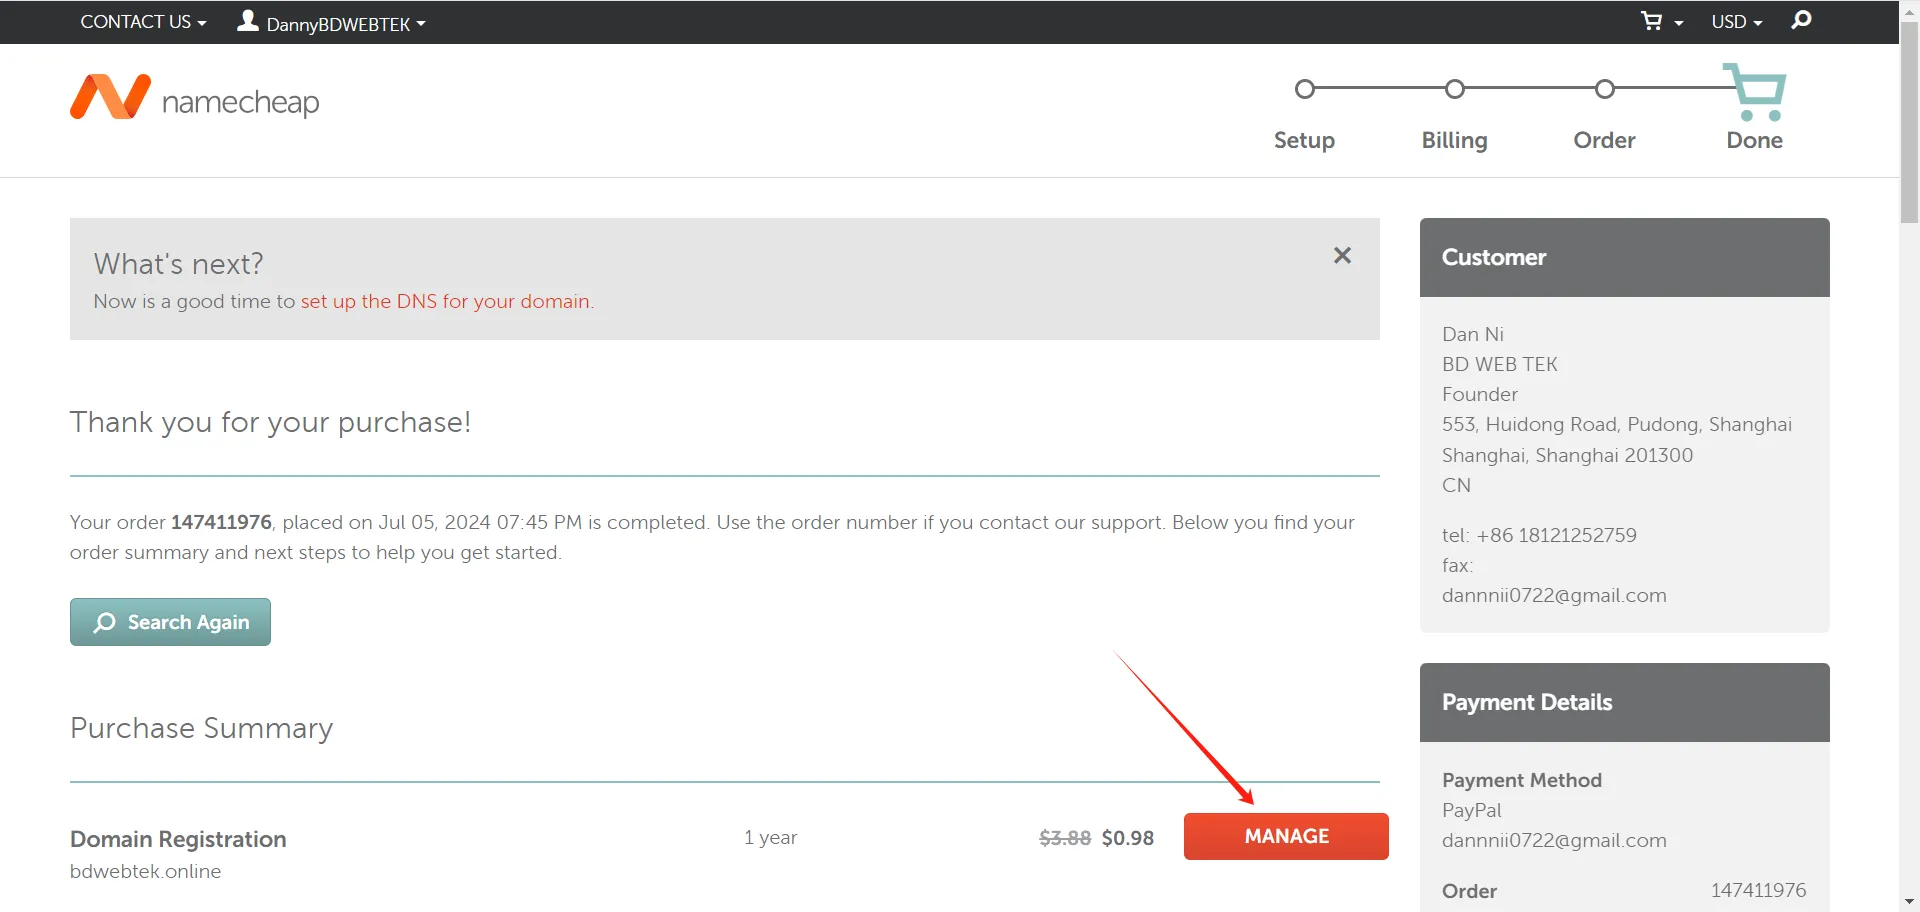
Complete the purchase, then click Manage to open the domain management page.
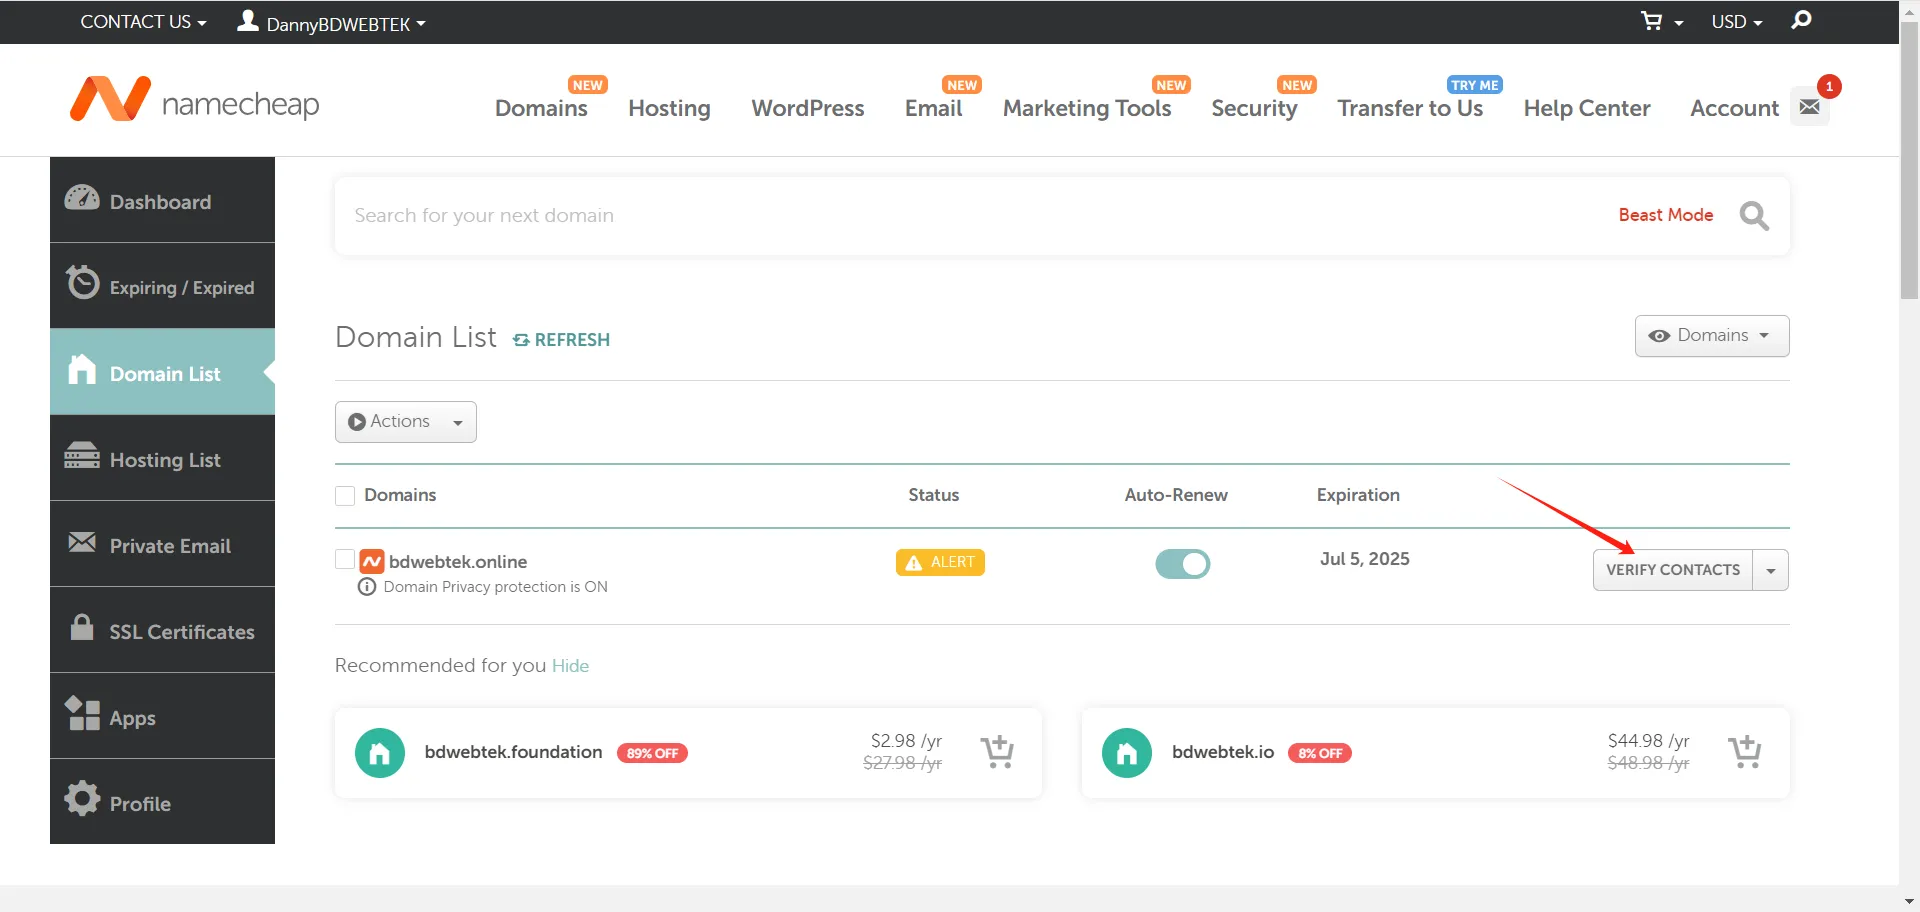
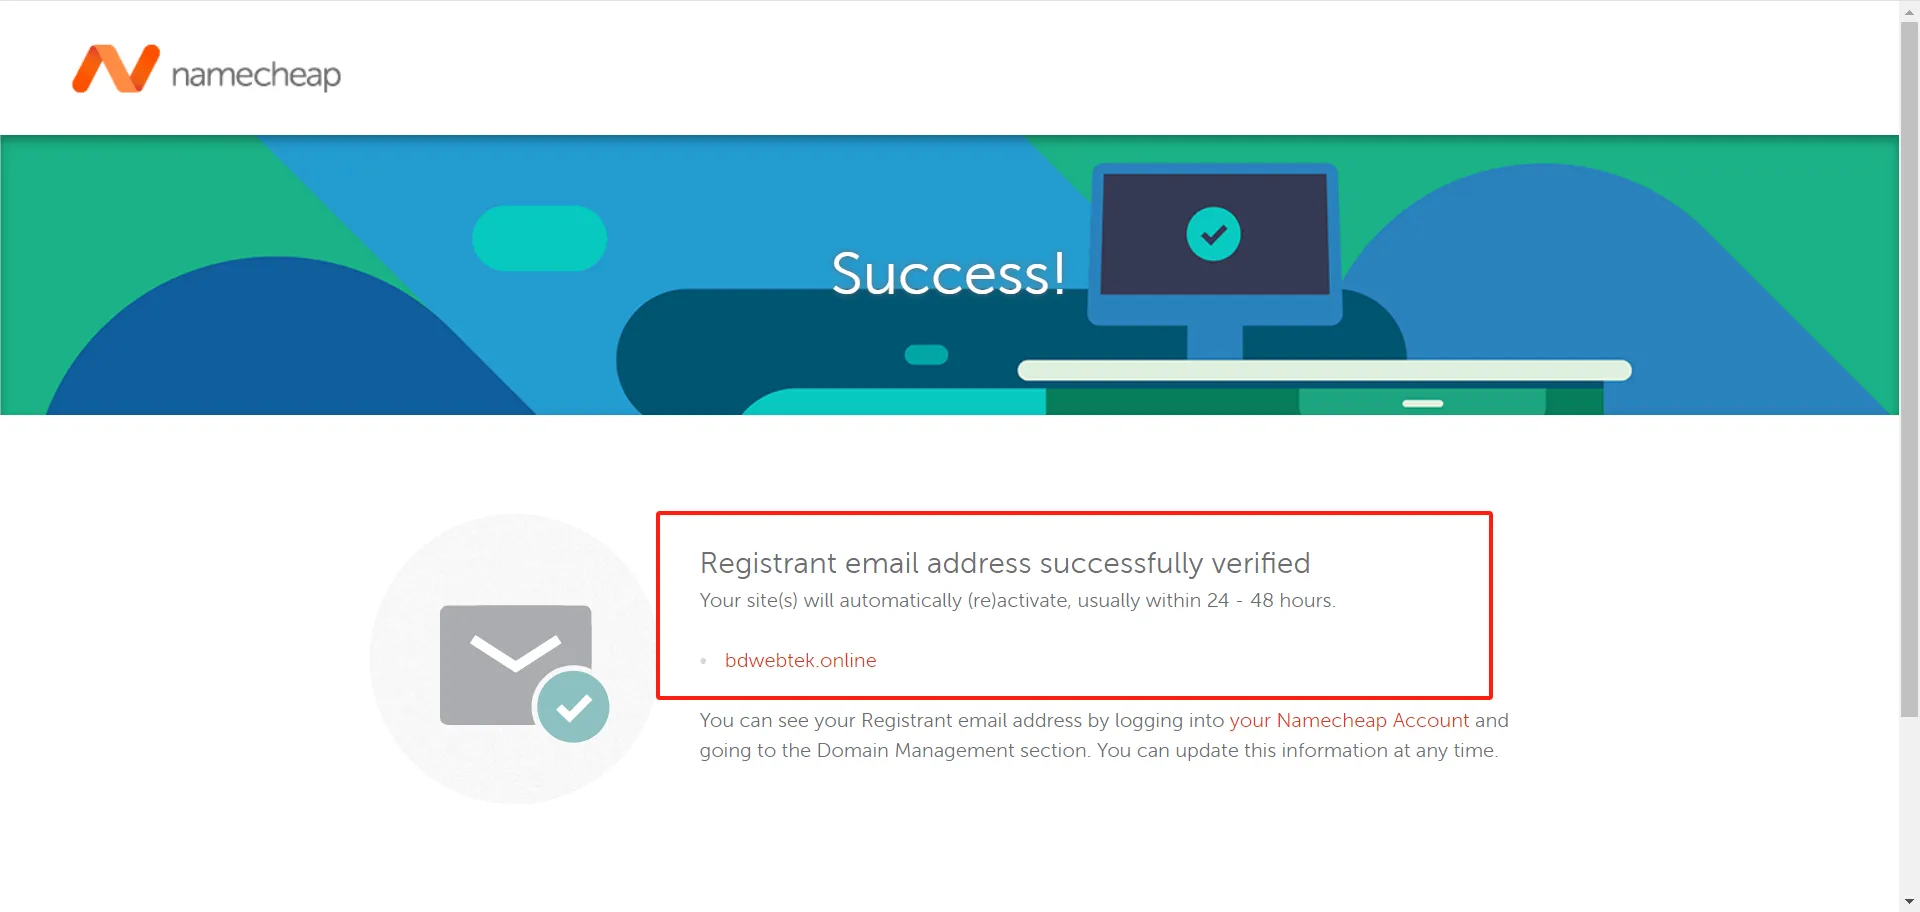
Click Verify Contacts and complete the email verification. Namecheap requires this step before the domain fully activates.
Part 2: Set Up DNS
After verification, the domain status changes to Active.
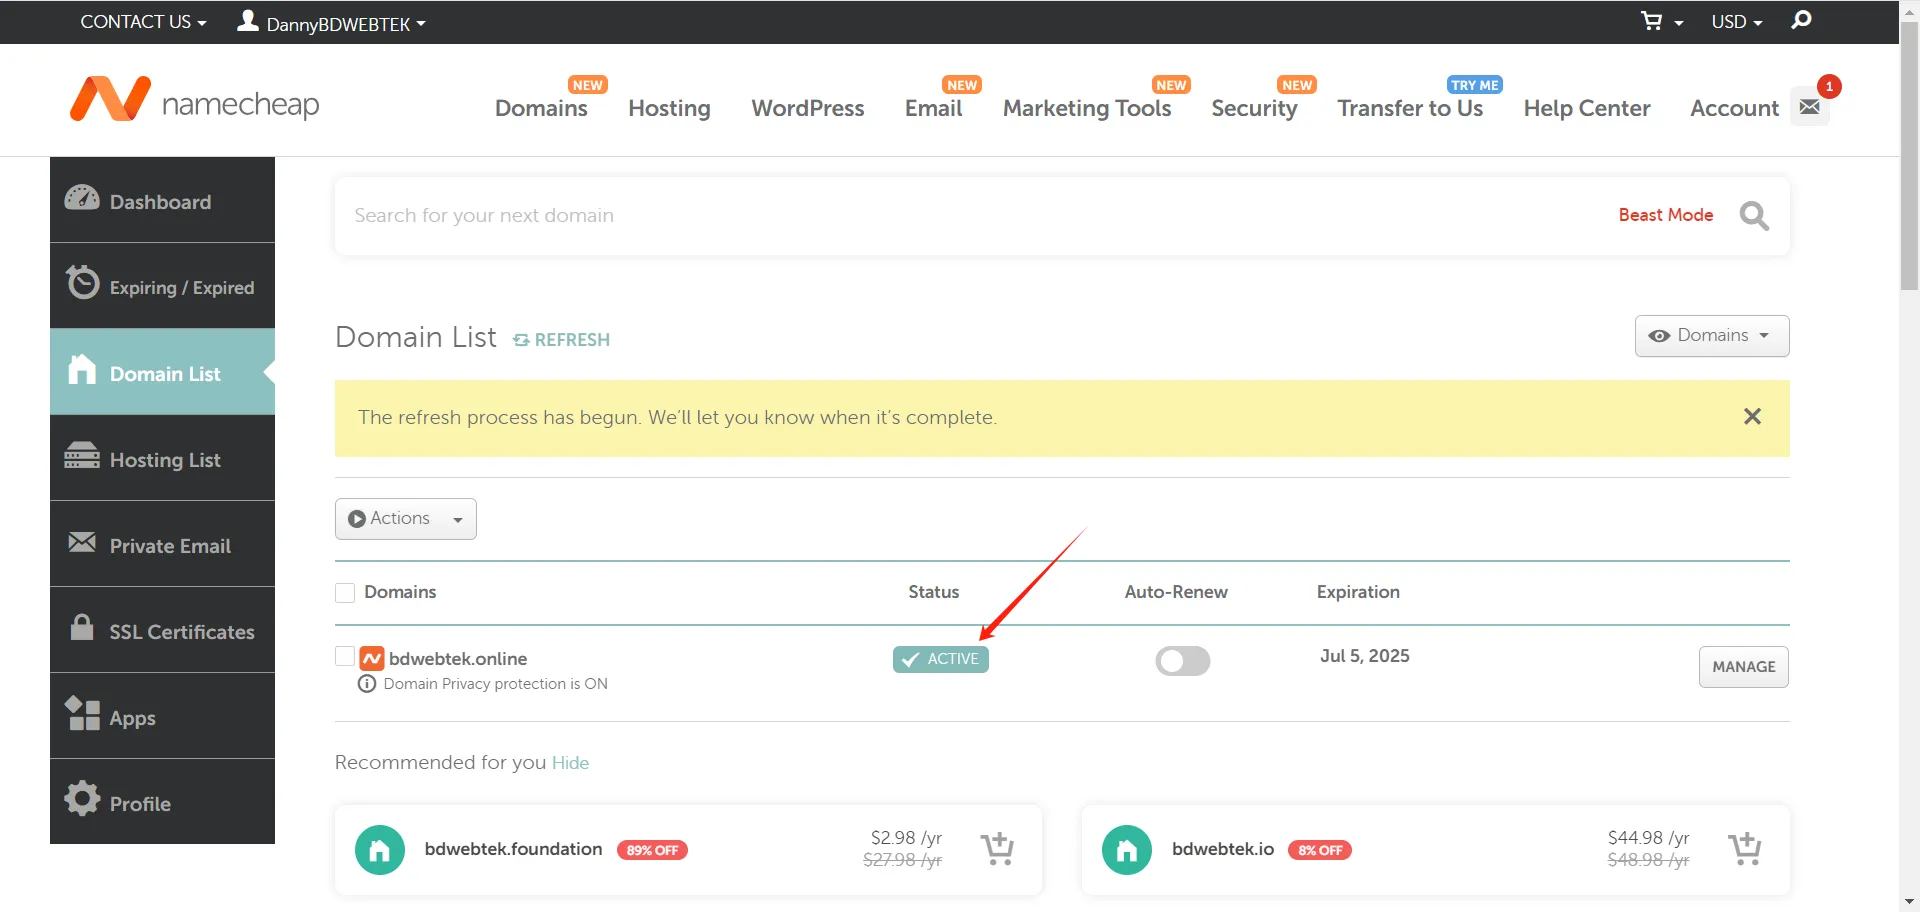
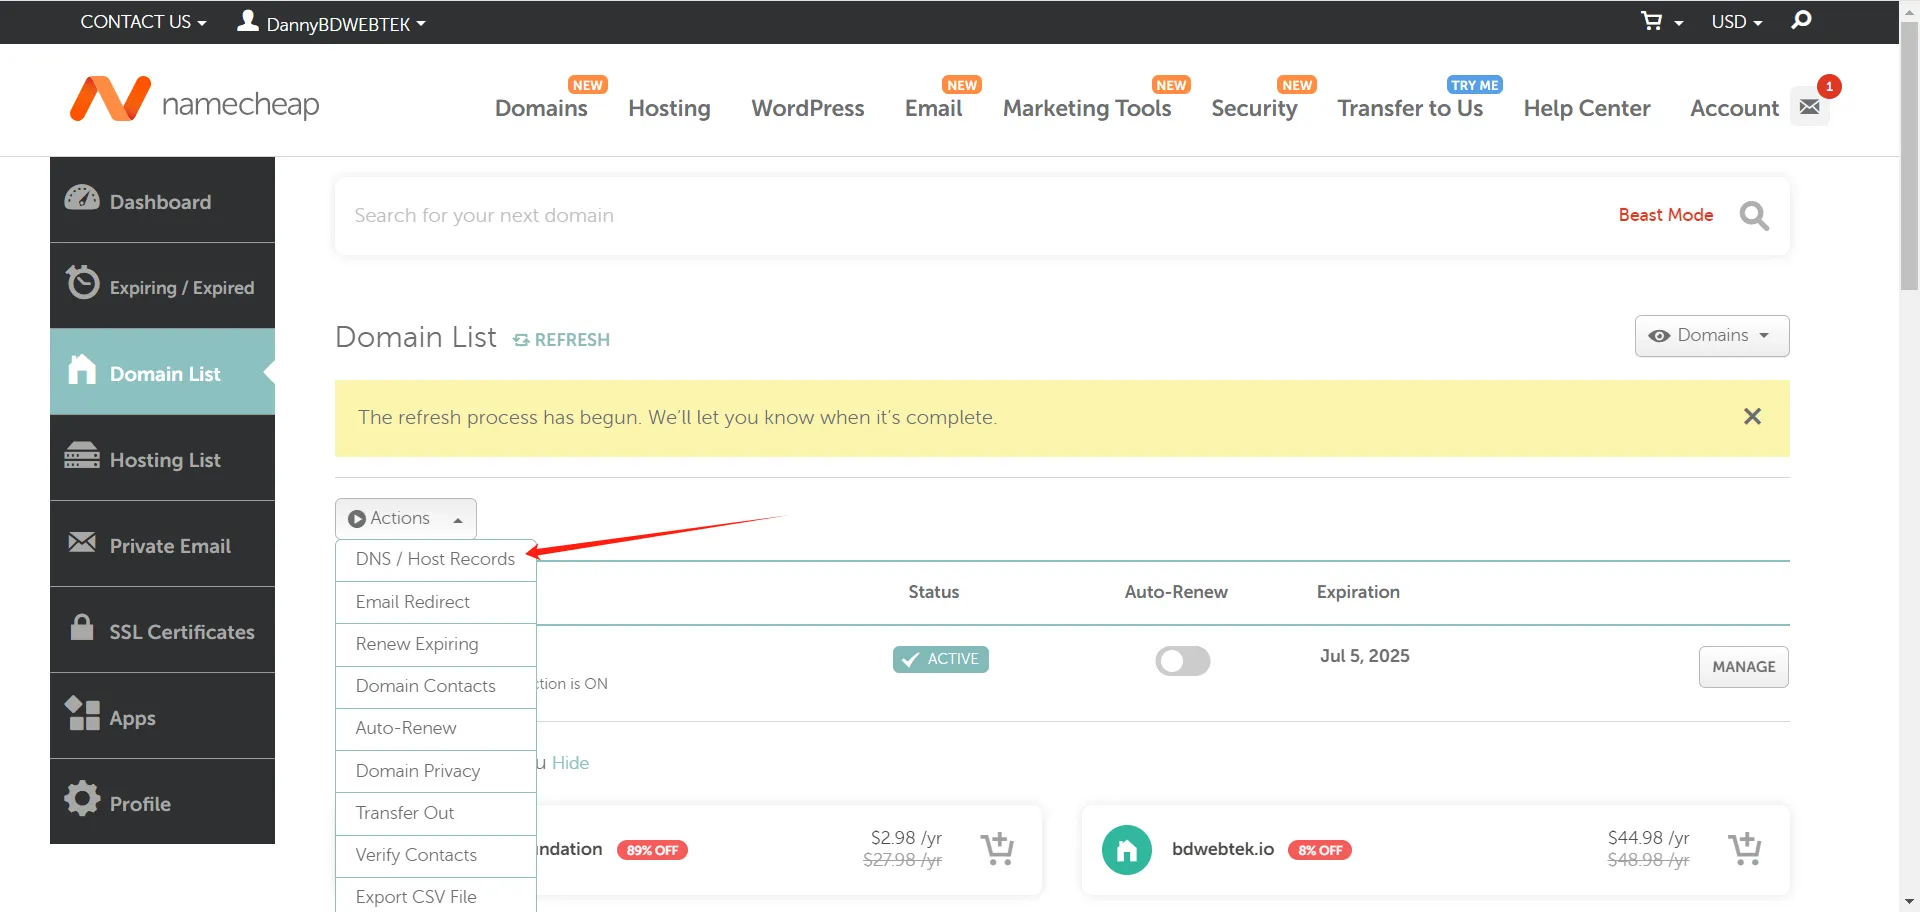
On the domain management page, click Actions and choose DNS/Host Records.
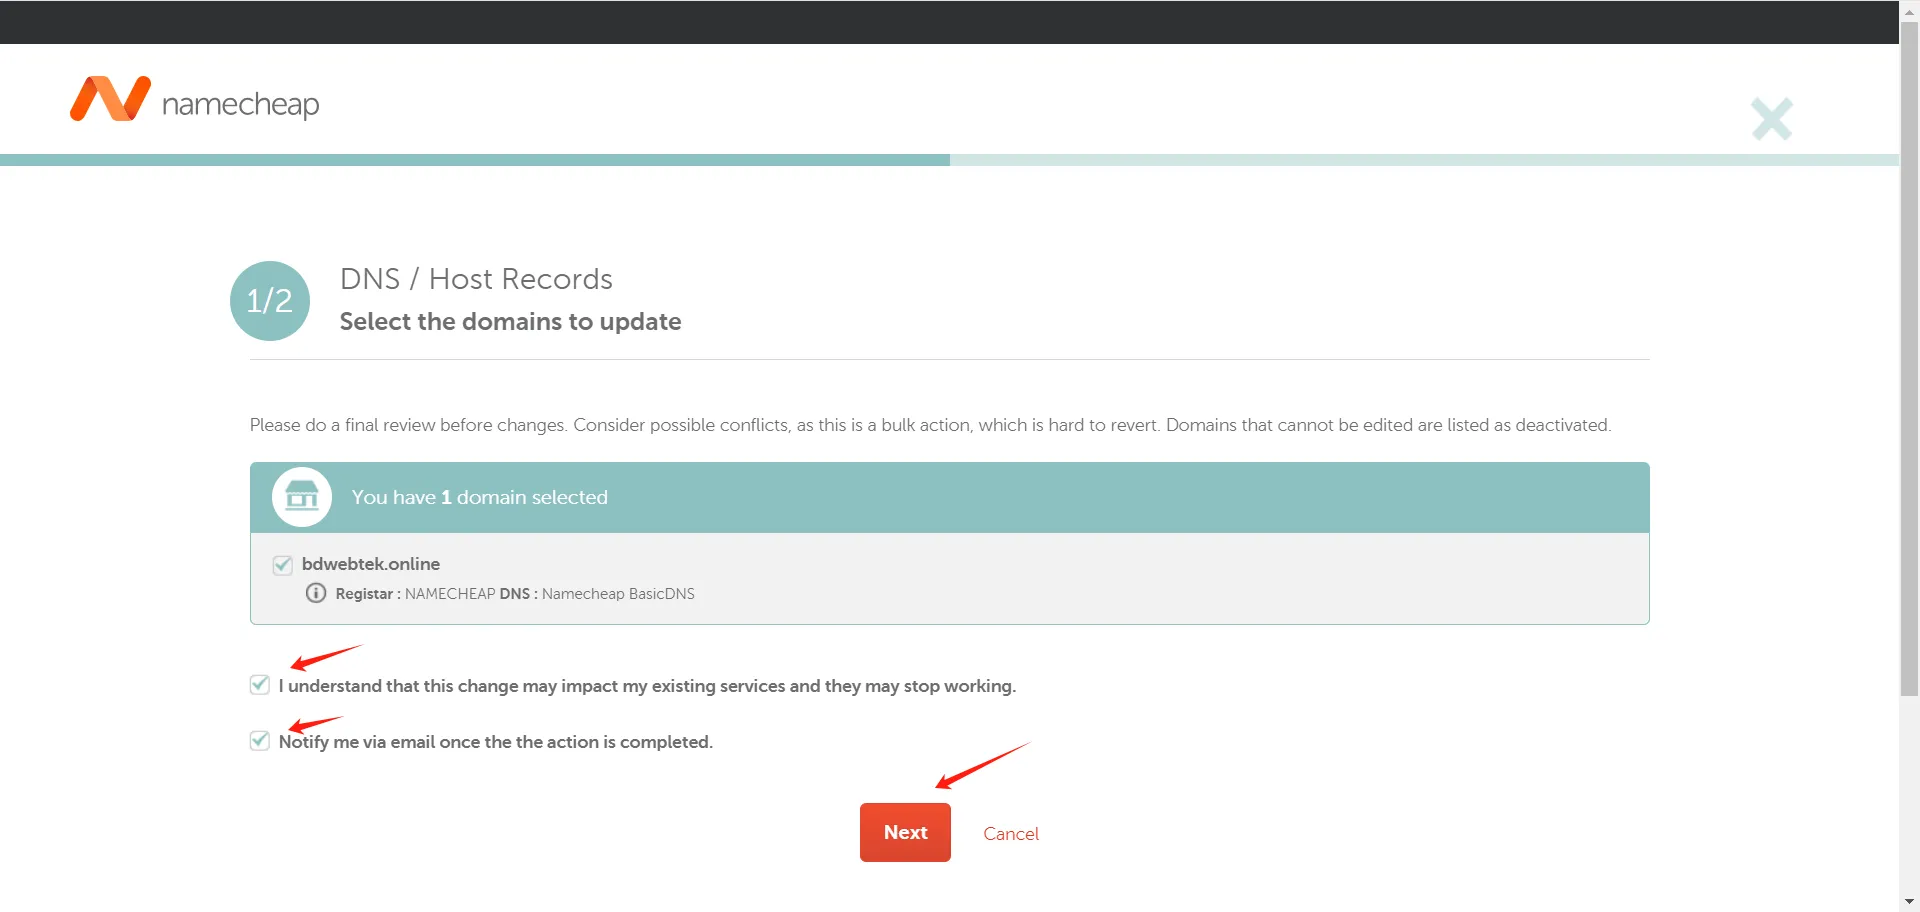
Check the two options at the bottom and click Next.
Option A: Add A Records
Select Namecheap BasicDNS and check I want to update Host Records.
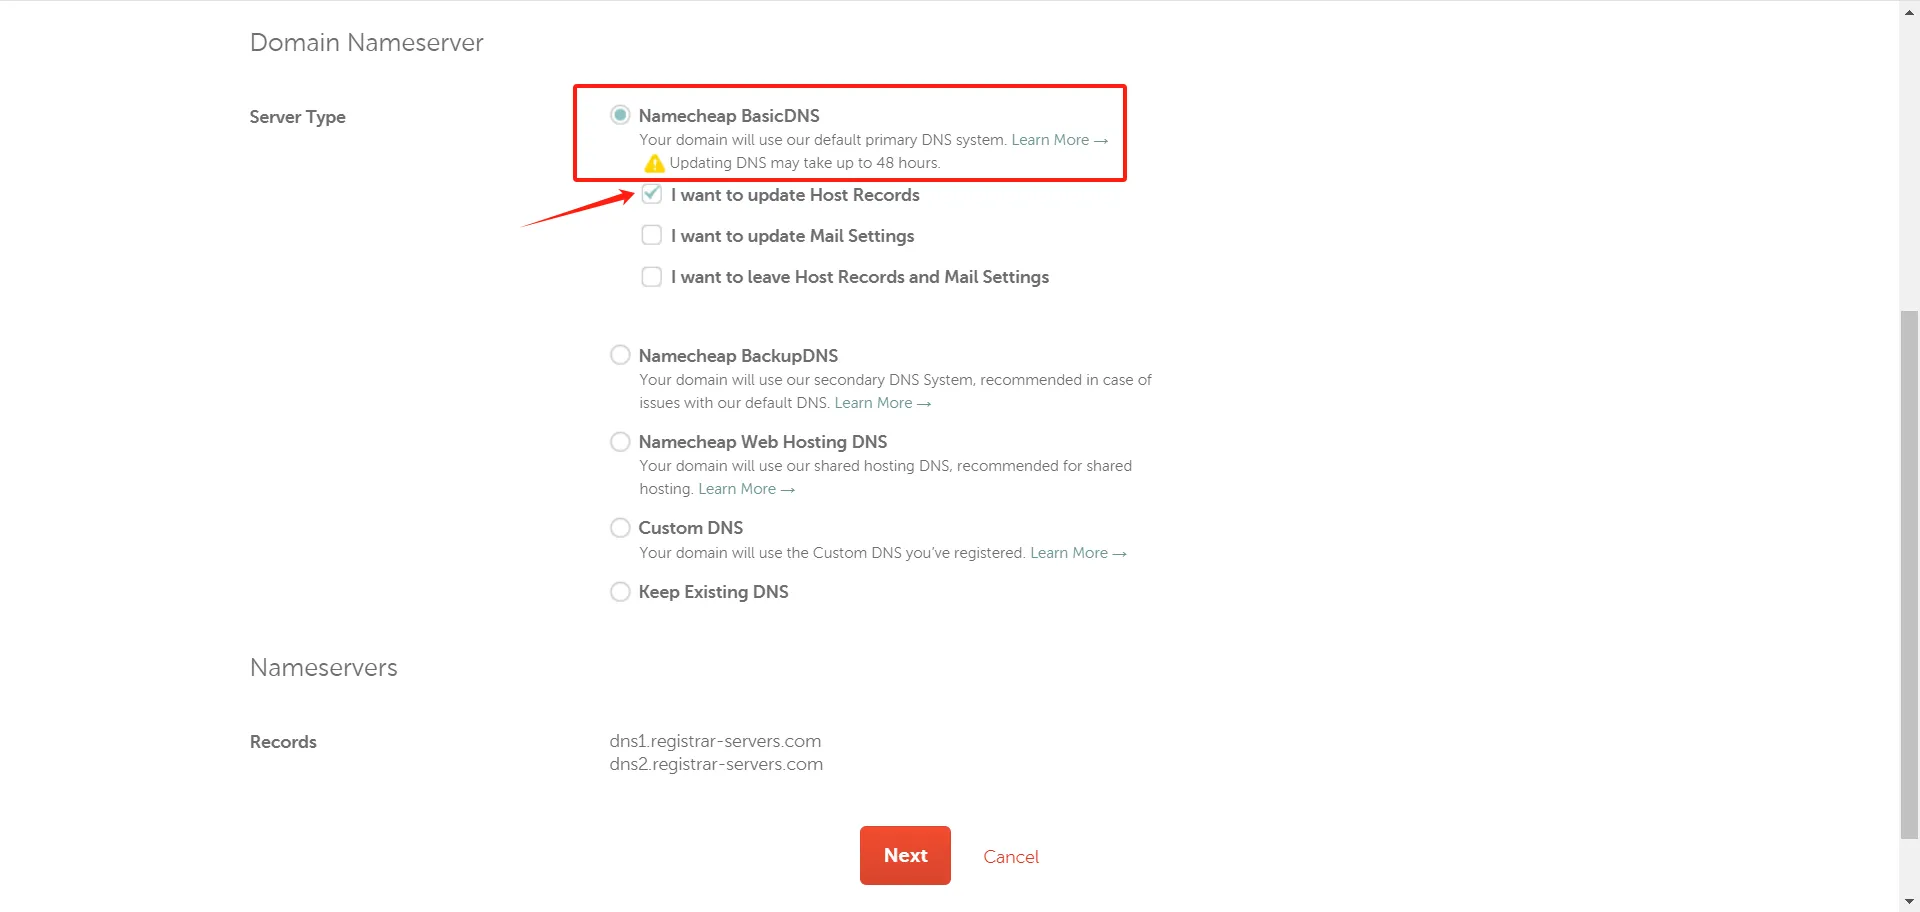
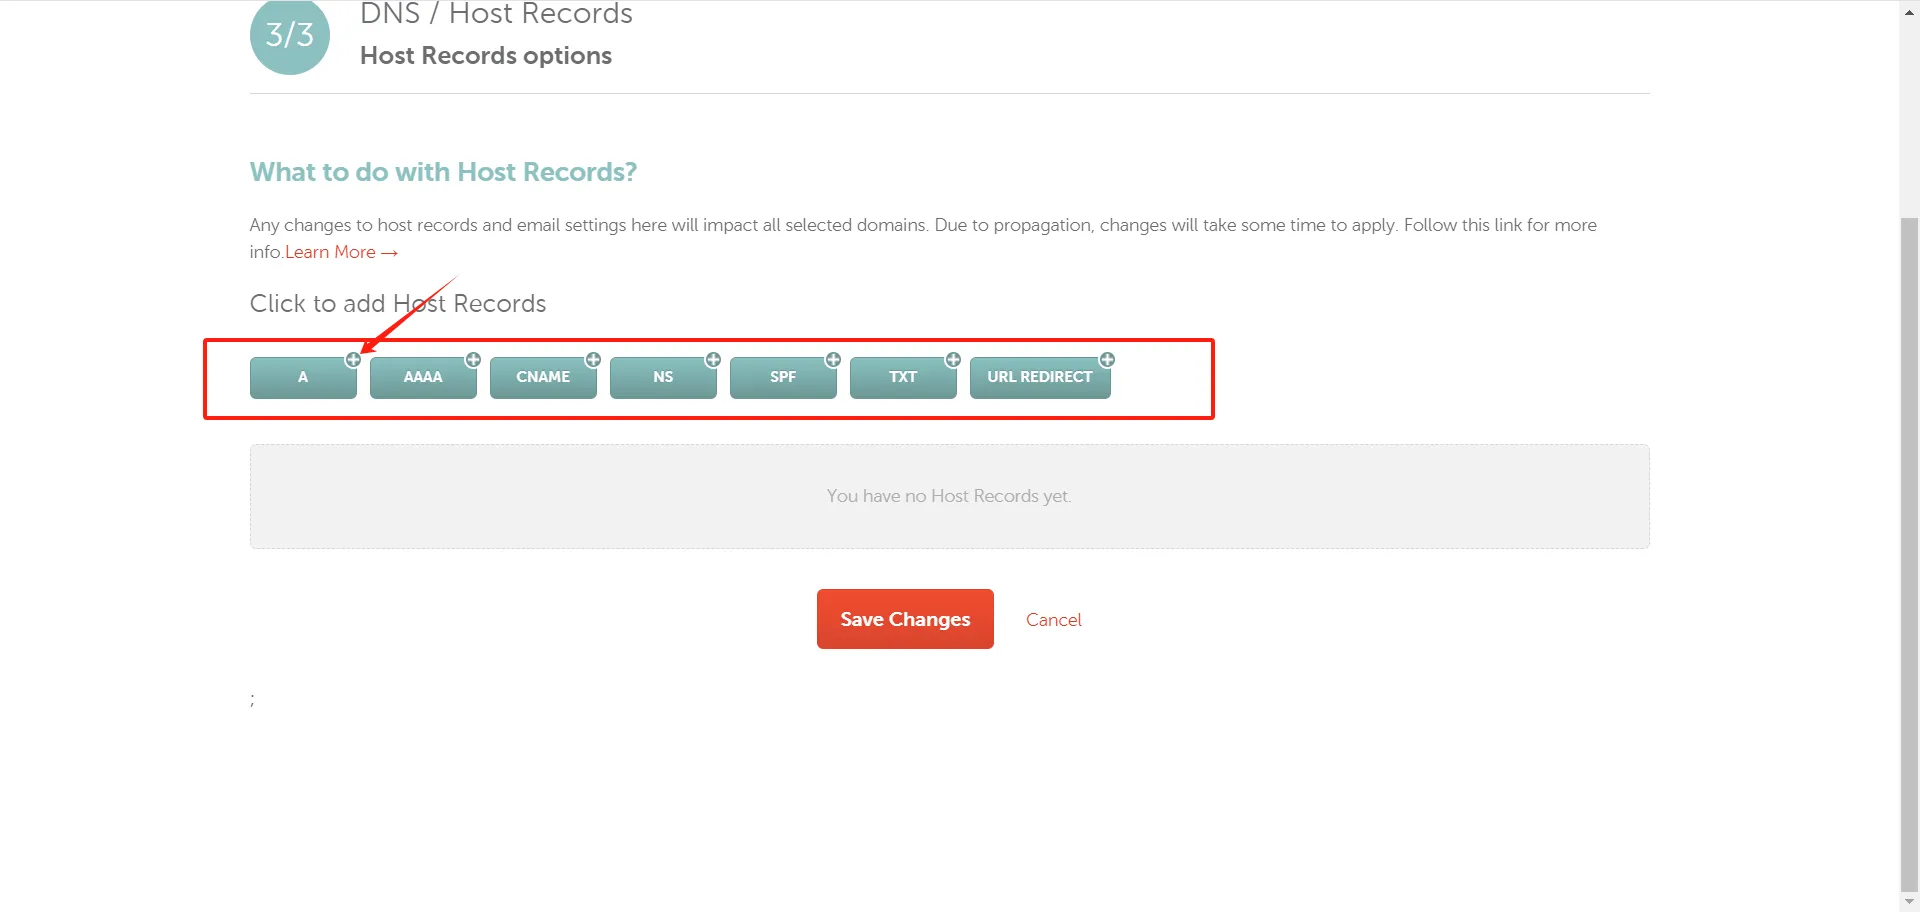
Add two A records pointing to your server IP (if you are on Hostinger, use this guide to find your public IP):
Host: @, type: A, value: 12.34.56.78
Host: www, type: A, value: 12.34.56.78
Option B: Use Custom Nameservers
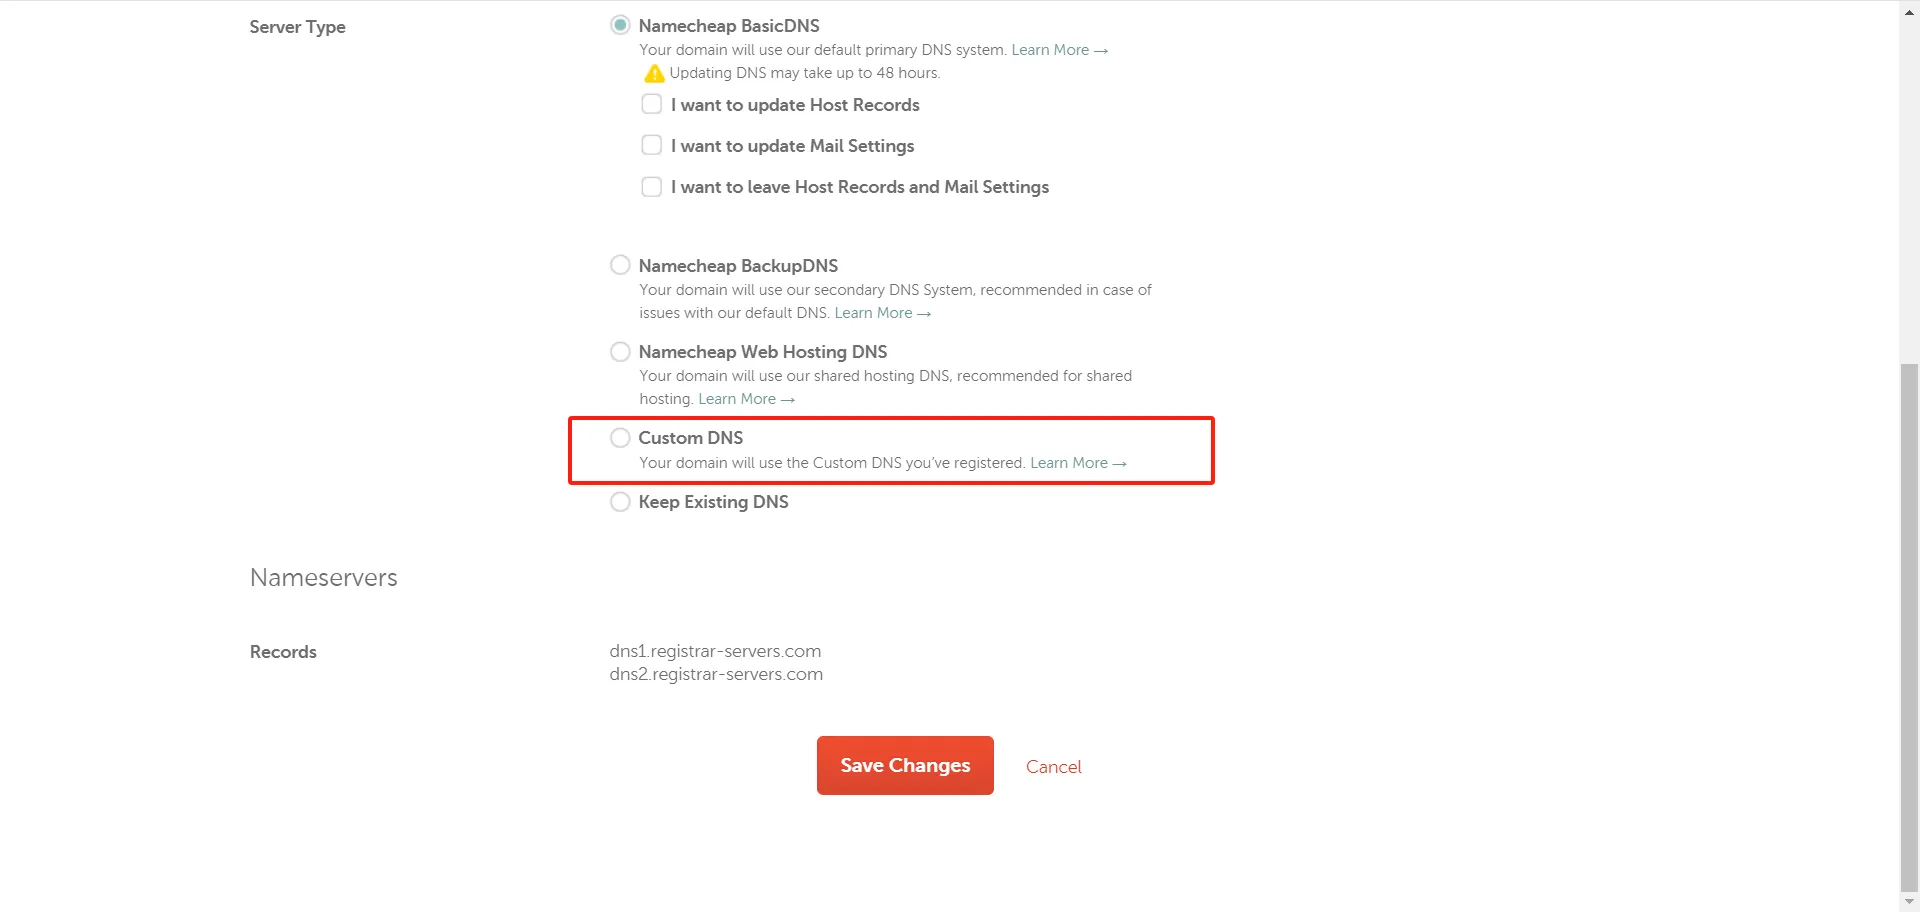
Choose Custom DNS instead of BasicDNS and enter the NS addresses your host provides.
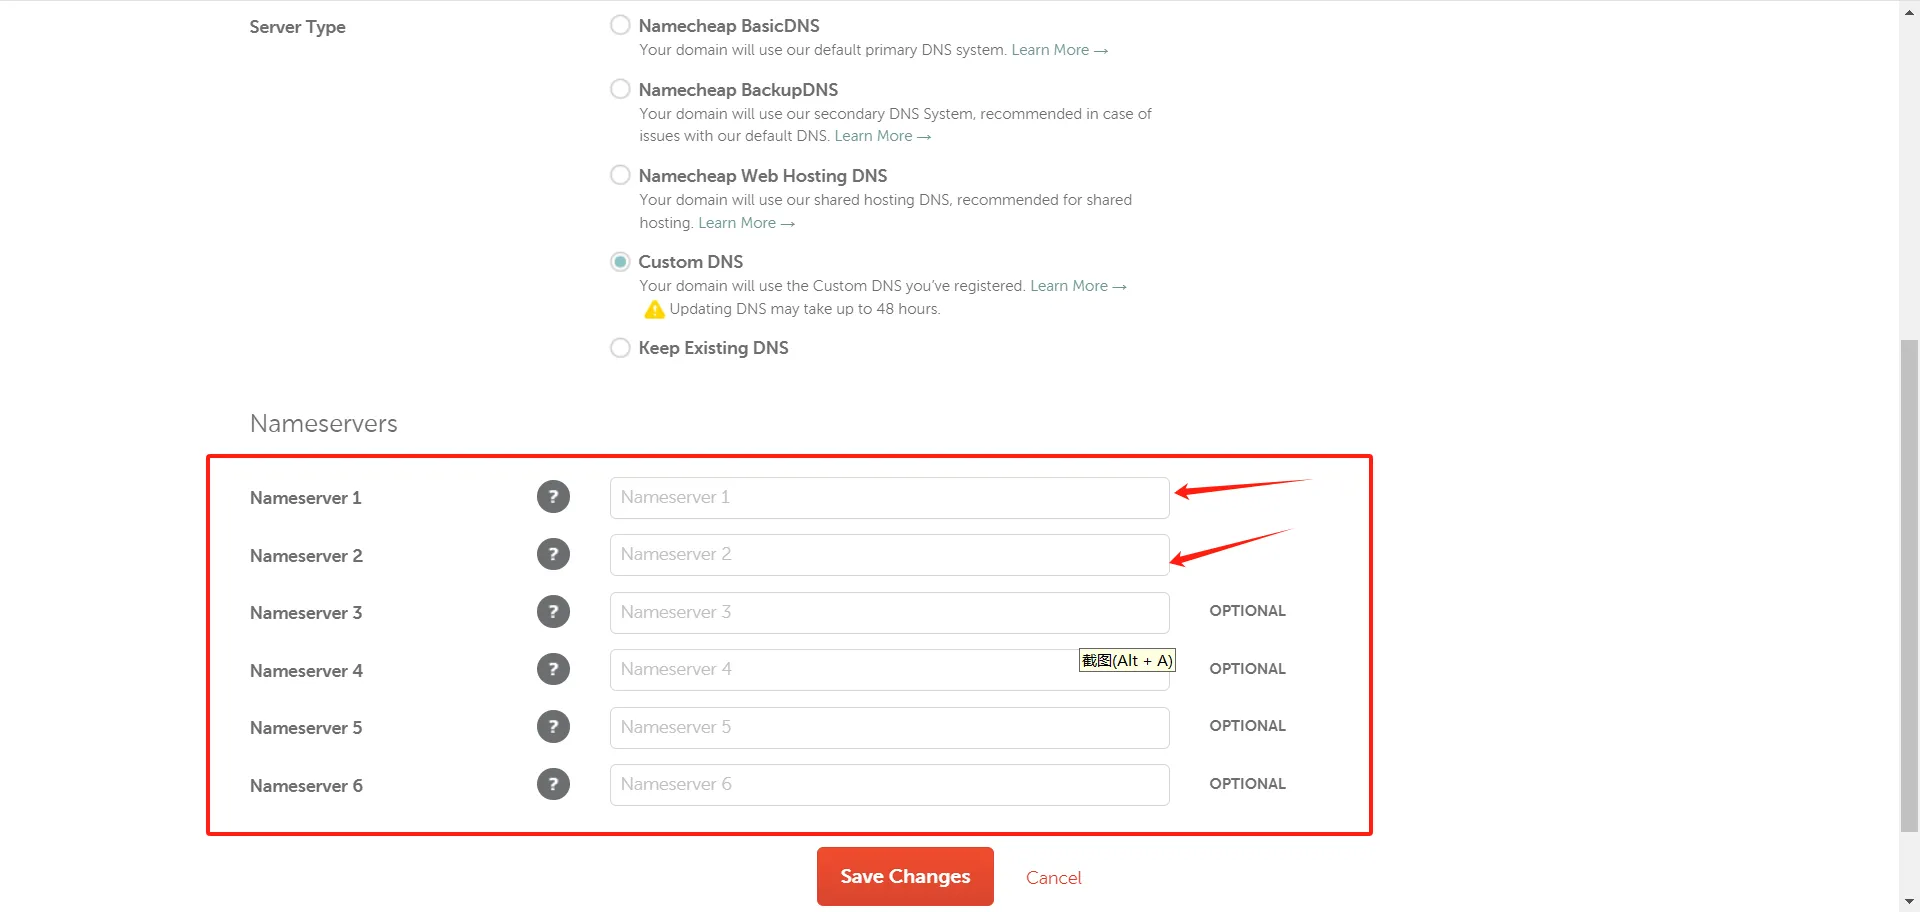
Hostinger users: see how to point your domain to Hostinger.
3. GoDaddy
Part 1: Register a Domain
Create an account at GoDaddy and search for the domain you want.
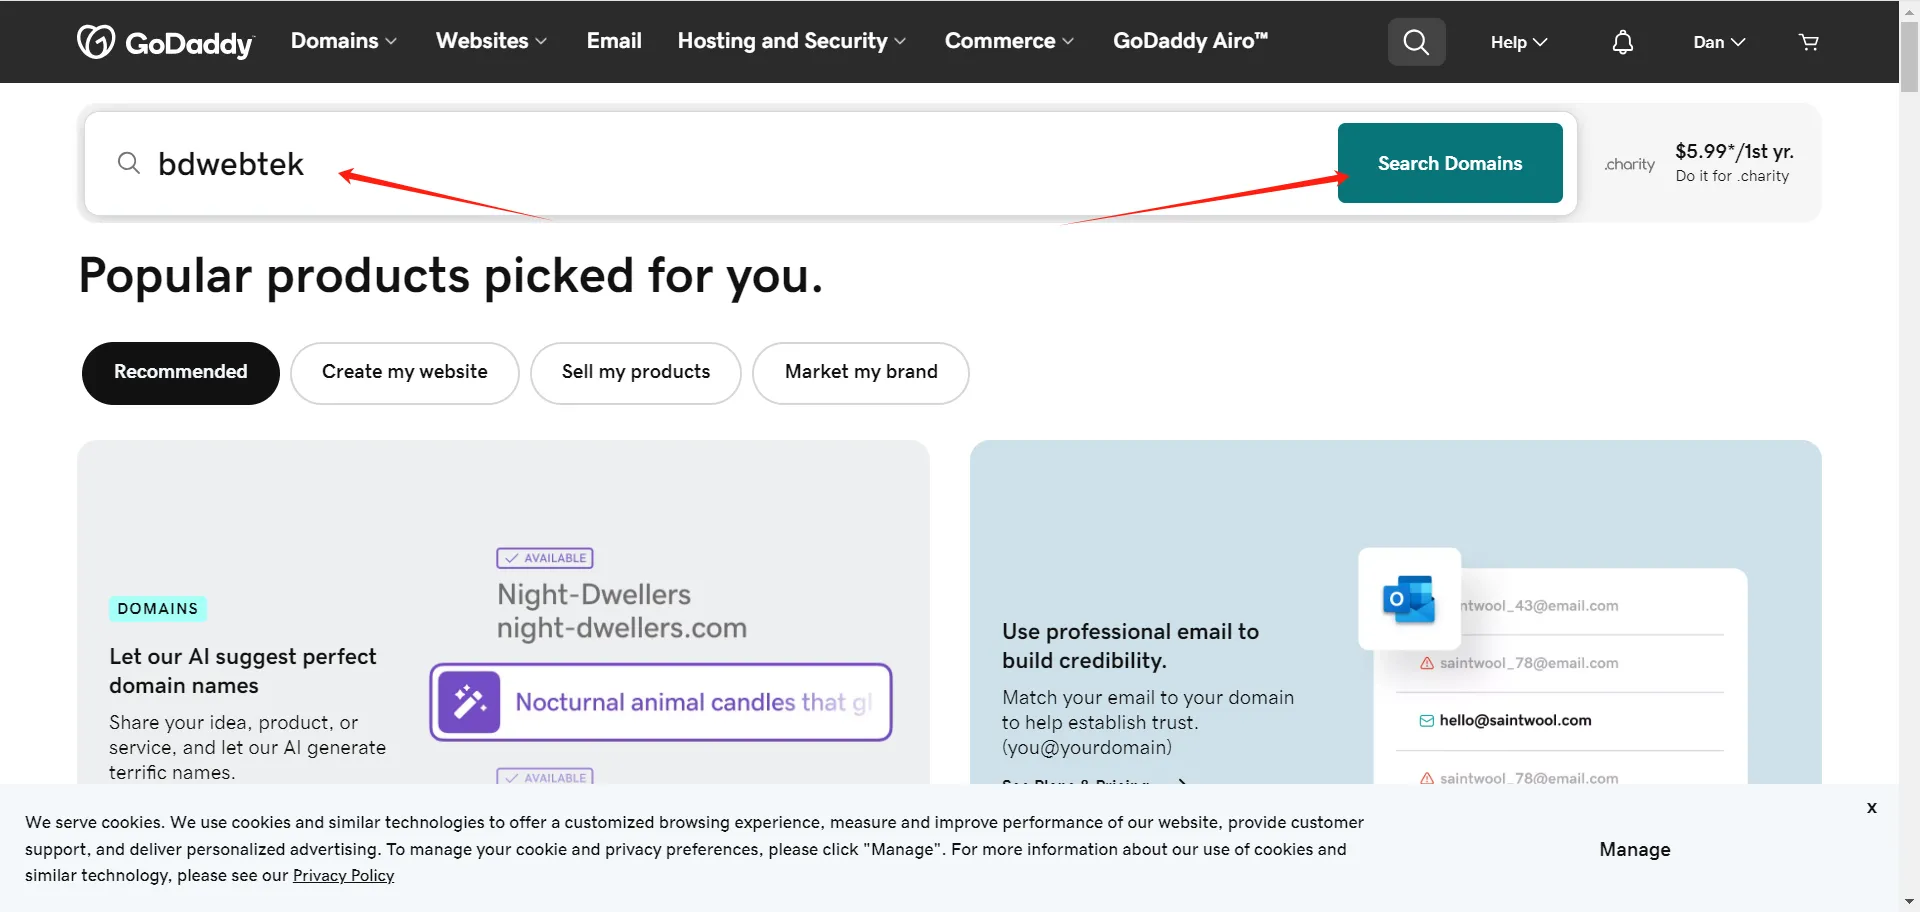
Pick an available domain, add it to the cart, and complete the purchase.
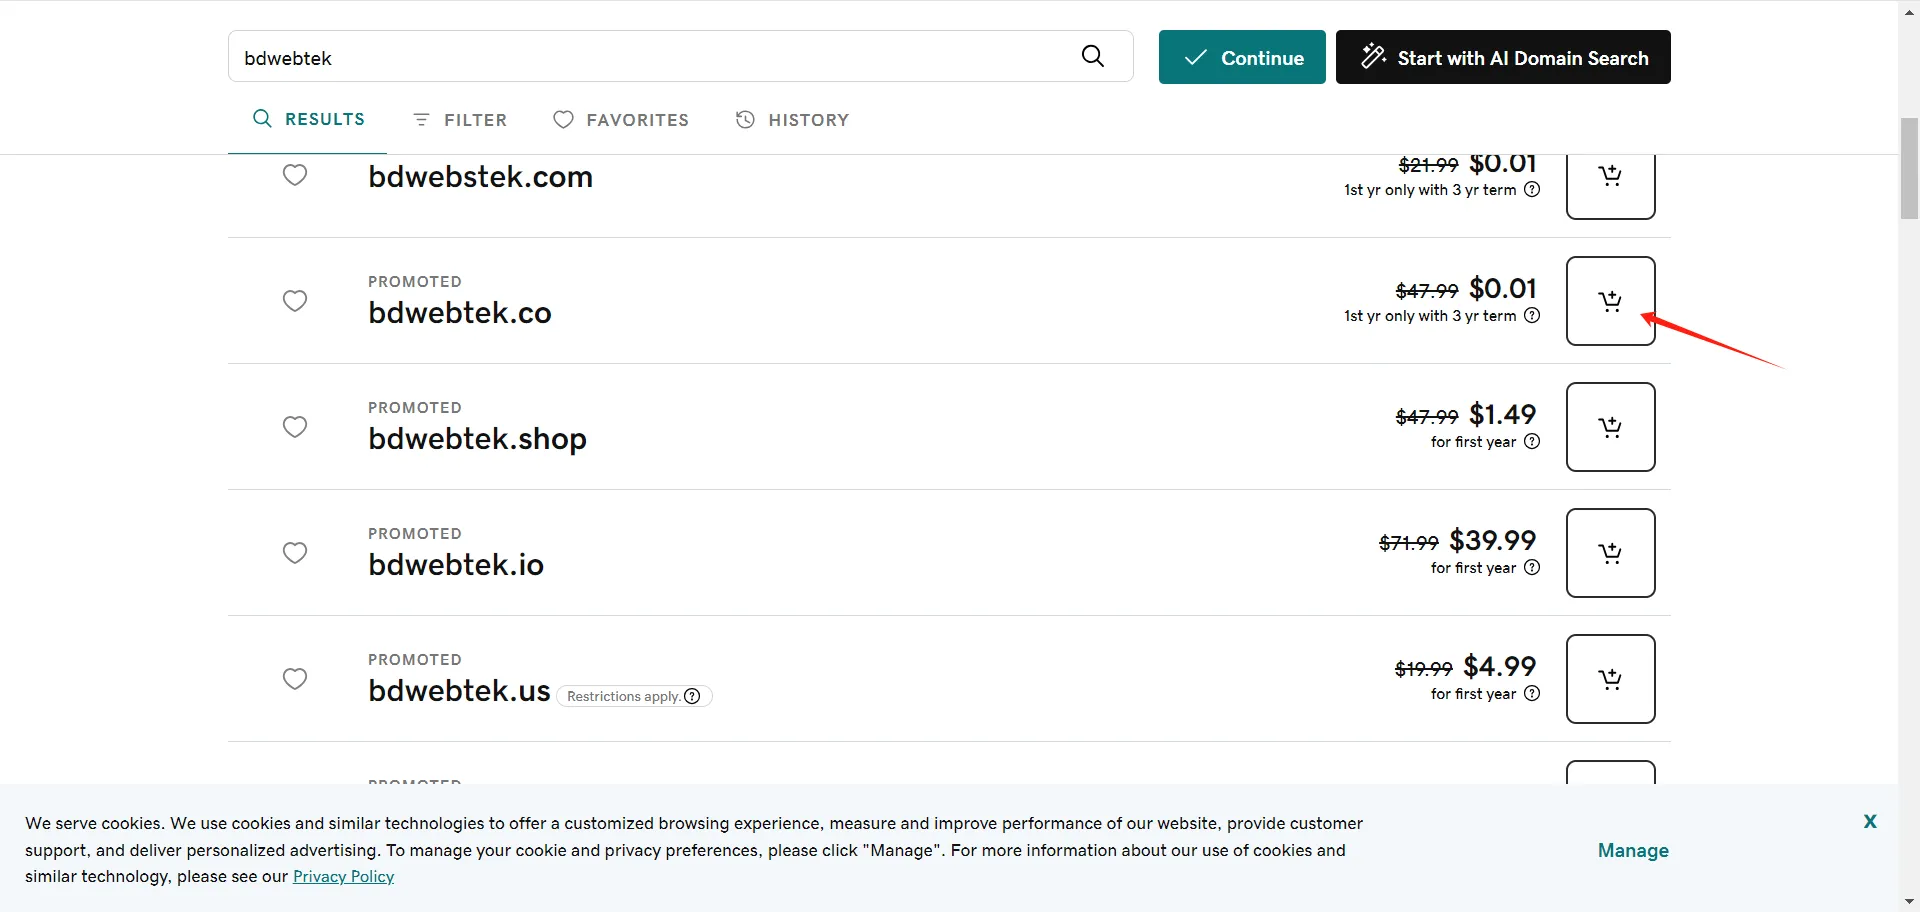
Part 2: Set Up DNS
In My Account, click Domain in the sidebar.
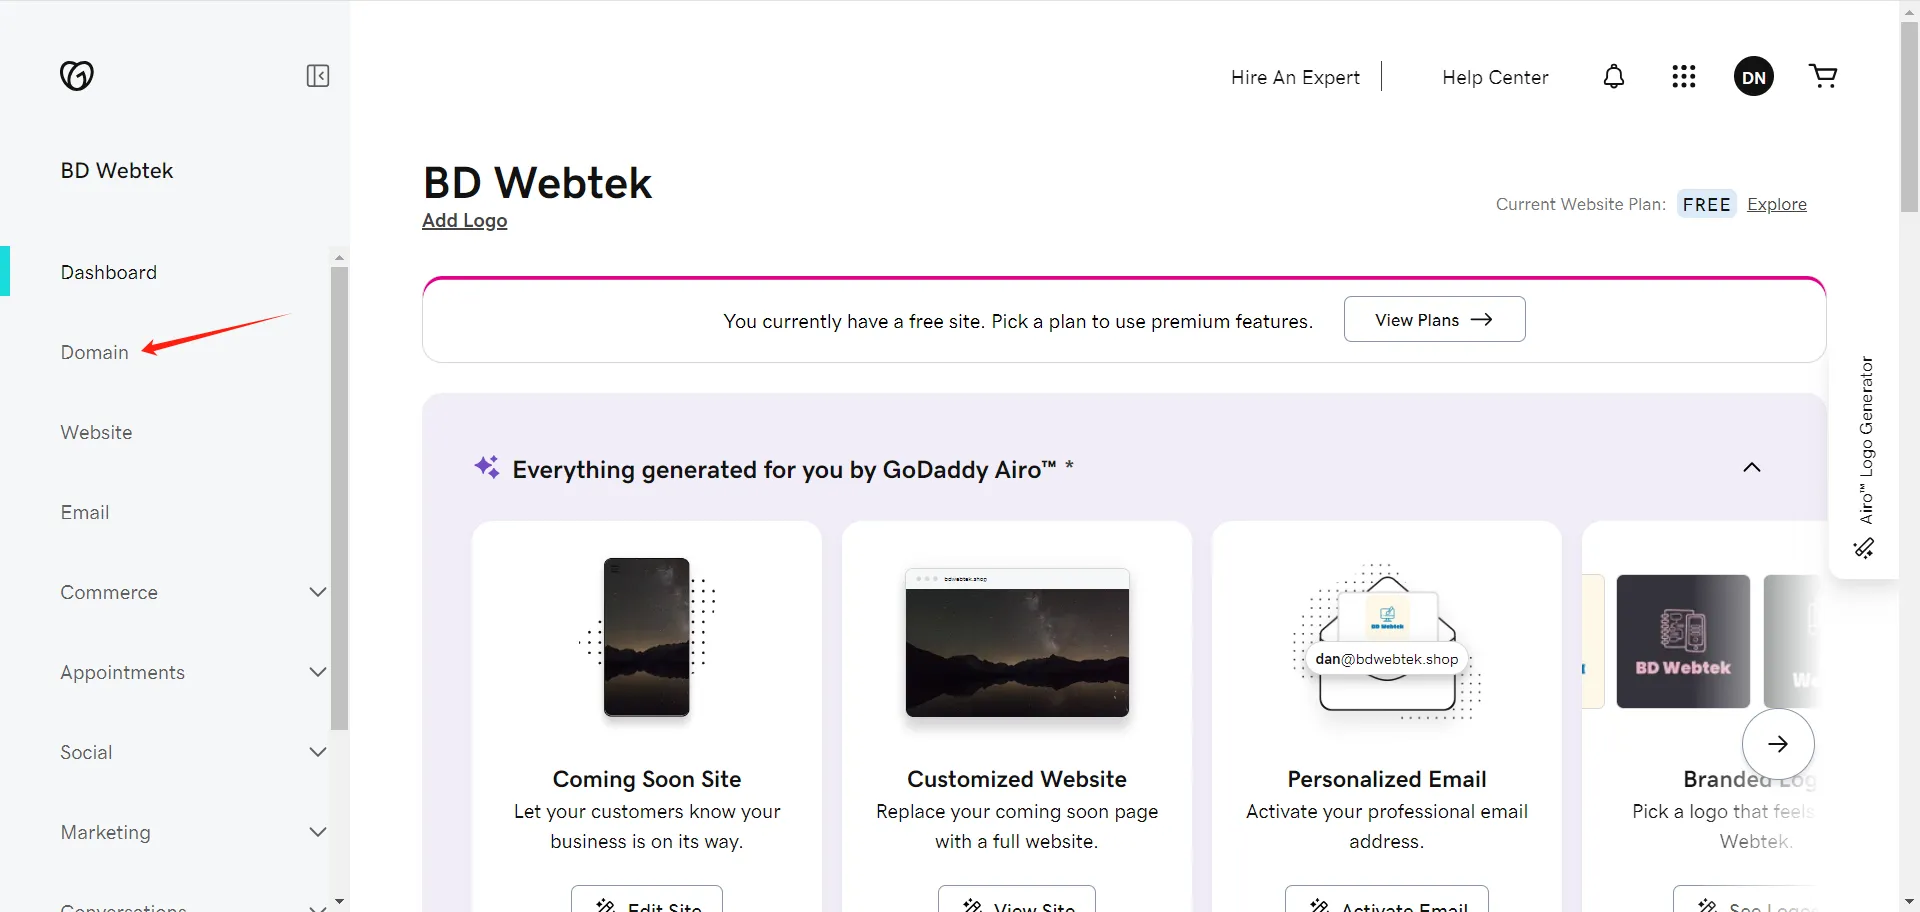
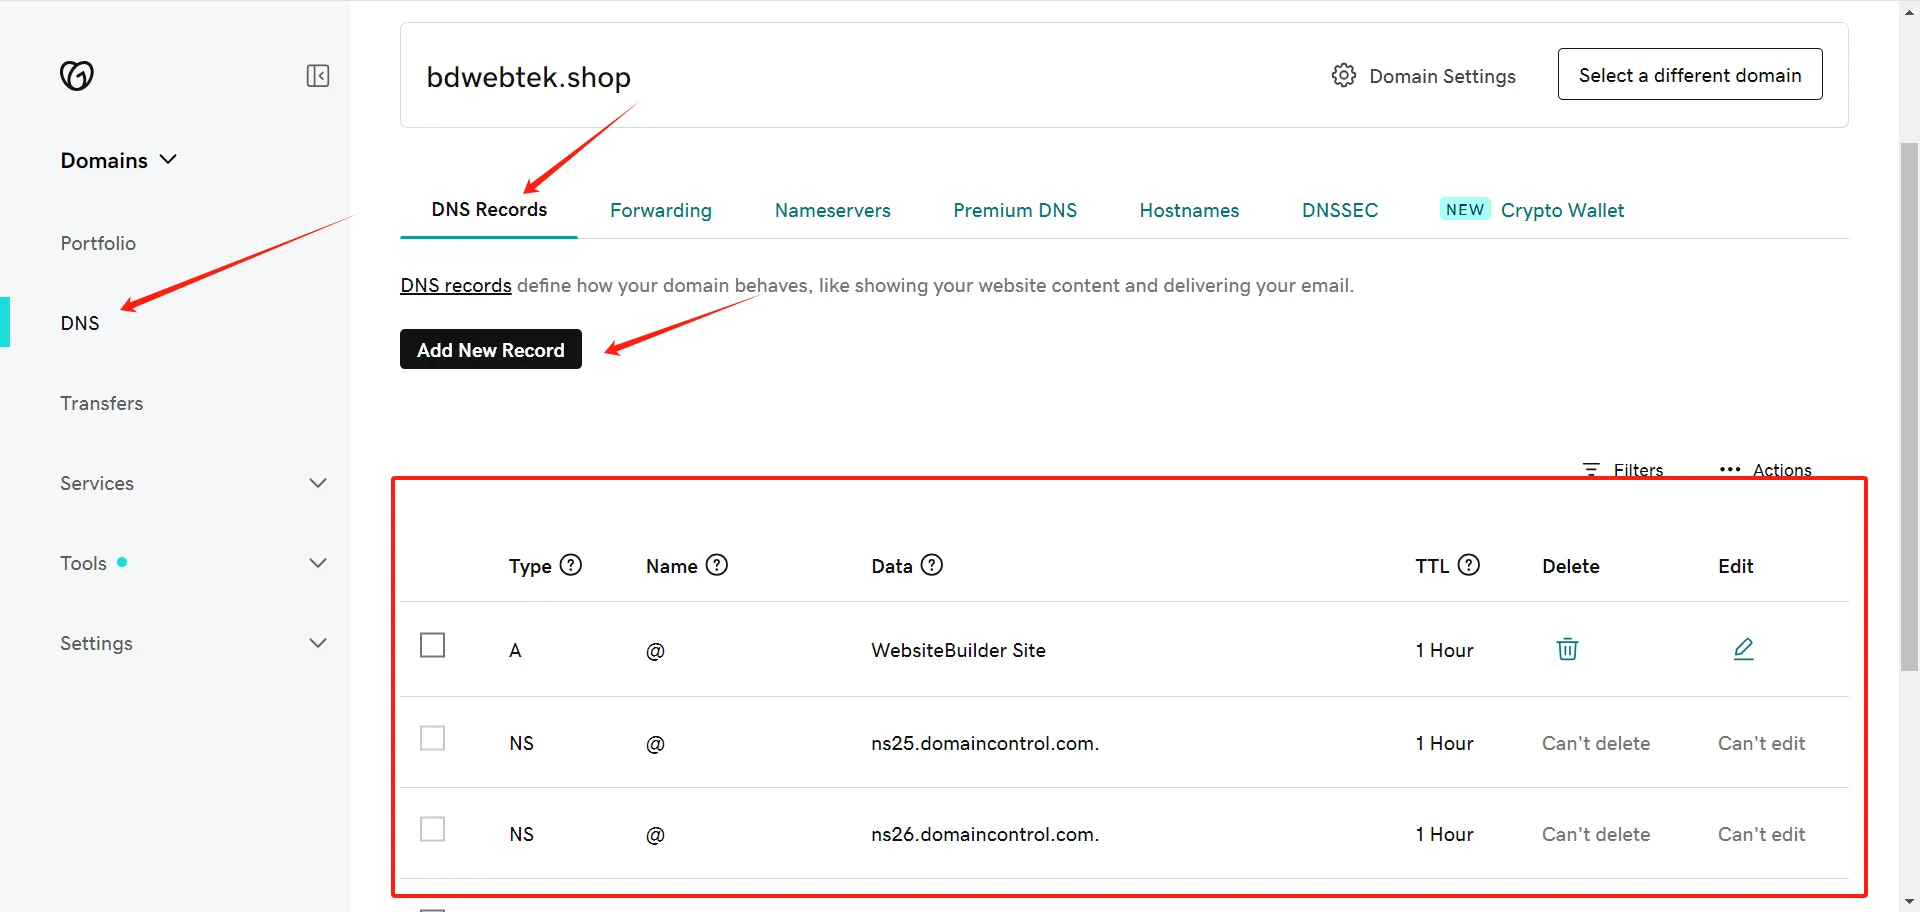
Click Manage DNS.
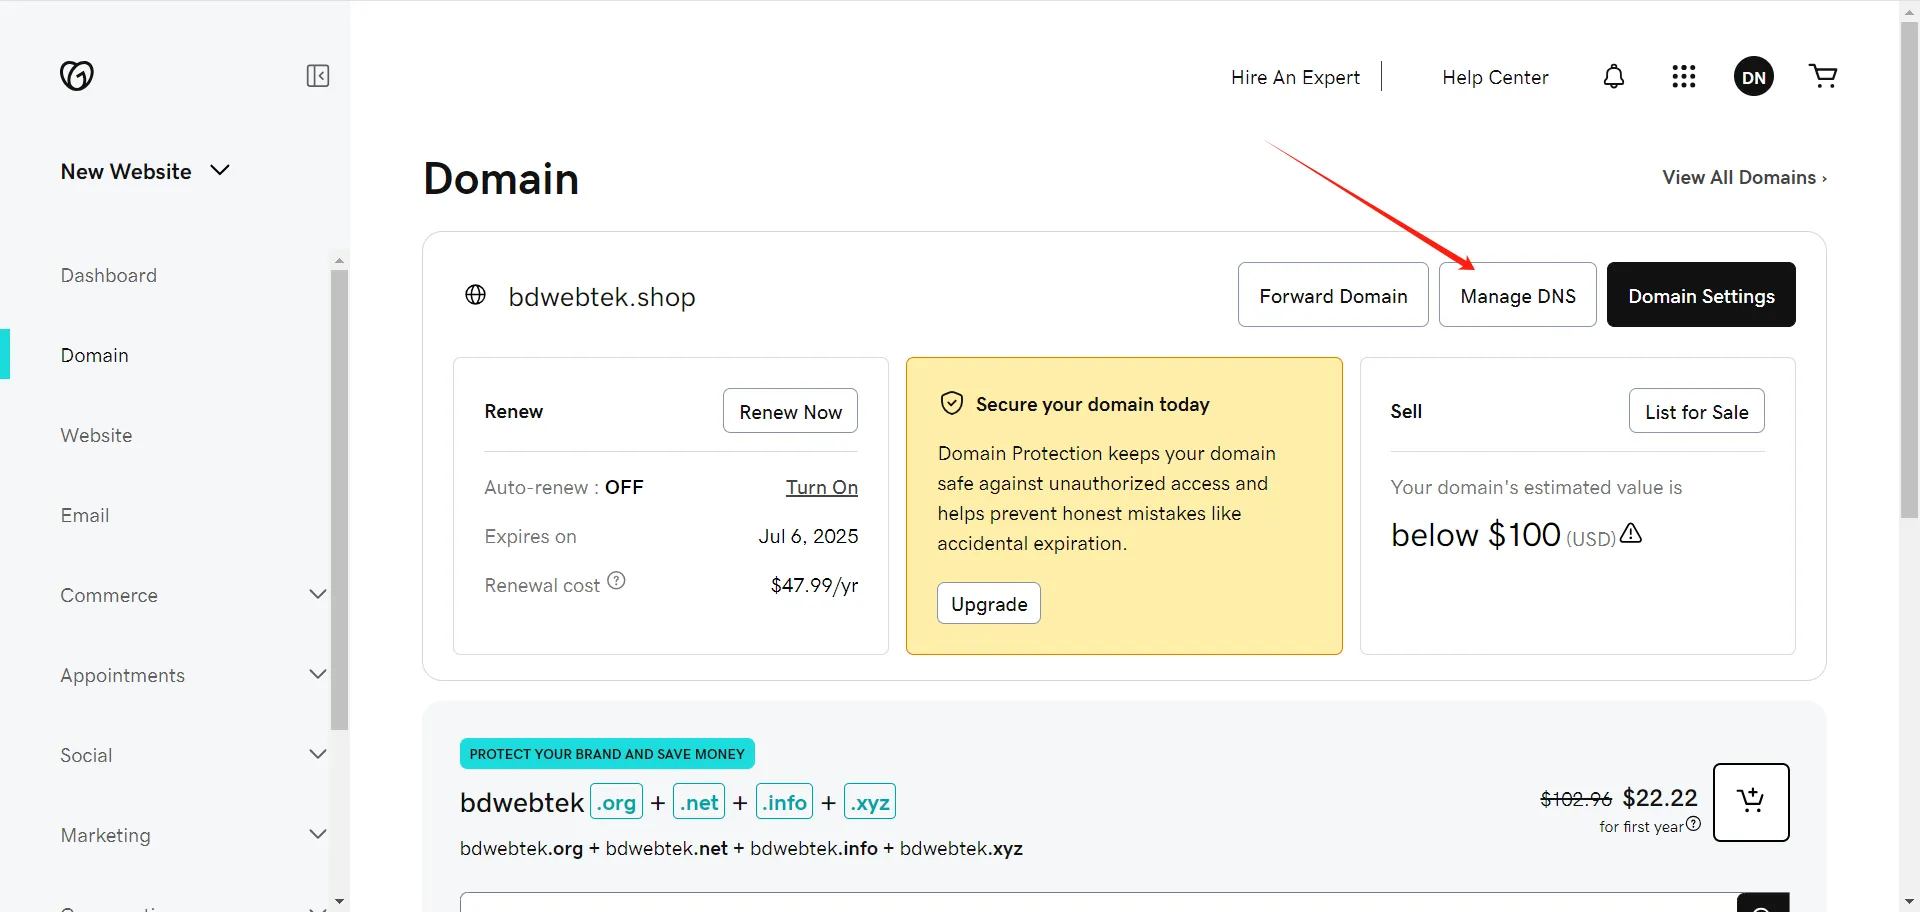
Option A: Add A Records
Click Add New Records and enter the A records your host server provides. If needed, use this guide to find your server’s public IP:
Host: @, type: A, value: 12.34.56.78
Host: www, type: A, value: 12.34.56.78
Option B: Use Custom Nameservers
Click Nameservers and replace the defaults with the NS addresses your host provides. Hostinger users: see how to point your domain to Hostinger.
Quick Comparison: NameSilo vs Namecheap vs GoDaddy
| Feature | NameSilo | Namecheap | GoDaddy |
|---|---|---|---|
| Free WHOIS privacy | Included | Included | Included (most TLDs) |
| DNS management | Full control | Full control | Full control |
| Nameserver change | Quick Setting page | Custom DNS option | Nameservers tab |
| Verification | Complete account info | Email verification | None (automatic) |
| Best for | Low renewal prices | Balanced price and experience | First-year promo pricing |
The registration flow on all three is nearly identical: search → select → pay → verify. DNS setup only differs in where each platform puts the entry point; the underlying logic, adding A records or changing nameservers, is the same. Once you understand these two options, you can configure DNS on any registrar.
DNS changes are not instant. After adding records or changing nameservers, propagation can take up to 48 hours worldwide, but in most cases it completes within 2-4 hours. If the site does not load immediately, wait and retry. It is almost never a misconfiguration, just propagation still in progress.
every Thursday.
Hosting reviews, builder comparisons, performance tips, and plugin picks — curated weekly for WordPress site owners and builders.