
If your website keeps growing—more images, more articles, heavier pages—you will eventually run into a very specific problem:
Your server isn’t slow, but your images are slowing everything down.
This is especially true for WordPress sites. Once the wp-content/uploads directory starts to grow, even a decent server can struggle. Your first paint and LCP are often dragged down hard by images.
In this article, I’ll walk you through a practical setup:
Cloudflare R2 + Worker + CDN long-term caching
By leveraging Cloudflare’s free quotas, we can completely remove image requests from your origin server—and significantly improve site performance.
1. Why Images Are the Real Performance Bottleneck
On most content-heavy websites:
- HTML: tens of KB
- CSS / JS: compressible and mergeable
- Images: hundreds of KB to several MB, and lots of them
In WordPress, images are typically served from paths like: /wp-content/uploads/year/month/xxx.webp
The real problems are:
- Every image request still hits your server
- Under high concurrency, server I/O gets overwhelmed by image requests
- Even with page caching enabled, images are still fetched as separate requests
So the only truly effective optimization is this:
Make sure images never hit your server at all.
2. What Is Cloudflare R2, and Why It’s “Free Enough”
In short, R2 is Cloudflare’s object storage, designed specifically for CDN-based delivery.
It’s similar to Amazon S3, but with one critical difference:
R2 has no egress bandwidth fees.
That means:
- Images are stored in R2
- Users fetch them from Cloudflare’s CDN
- You don’t pay for traffic
On top of that, Cloudflare provides:
- Free storage (starting at 10 GB)
- Free Workers request quotas
For small to medium websites, blogs, and company sites, this is more than sufficient.
3. What the Final Architecture Looks Like
Before touching any settings, it’s important to be clear about the target architecture:
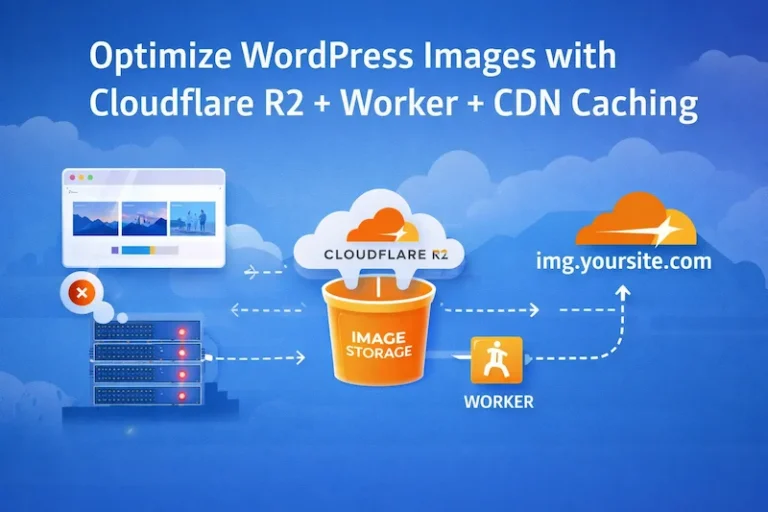
					User Browser
      ↓
img.yoursite.com (Cloudflare CDN)
      ↓
Cloudflare Worker
      ↓
Cloudflare R2
      (first request only)
Key points:
- Images are served from a dedicated subdomain (e.g.
img.example.com) - The Worker only handles object retrieval and cache headers
- CDN caches images aggressively for 1 year with no origin fallback
4. Prerequisites
Before you start, make sure all of the following are true:
(1) Your domain is already on Cloudflare
The free plan is enough. Just point your nameservers to Cloudflare—no Pro plan required.
(2) Your image URLs are stable
That means:
- No tokens
- No signatures
- Content doesn’t change frequently
A good example: /images/wp/2024/04/example.webp
(3) Images can be cached long-term
You do not plan to:
- Replace the same image file every day
- Serve different content under the same URL
(4) Images are public assets
They are not user-specific and do not require permission checks.
5. Setup Guide
Step 1: Create an R2 Bucket
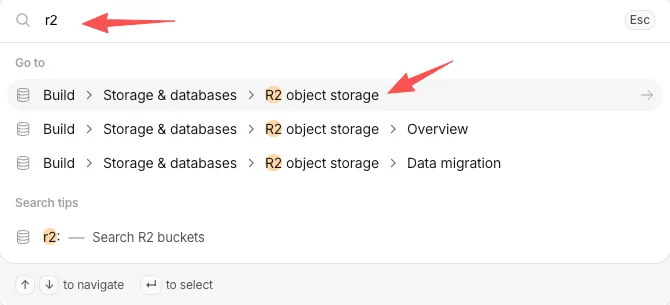
Log in to the Cloudflare Dashboard. Use the left sidebar search and look for R2, then open R2 Object Storage.
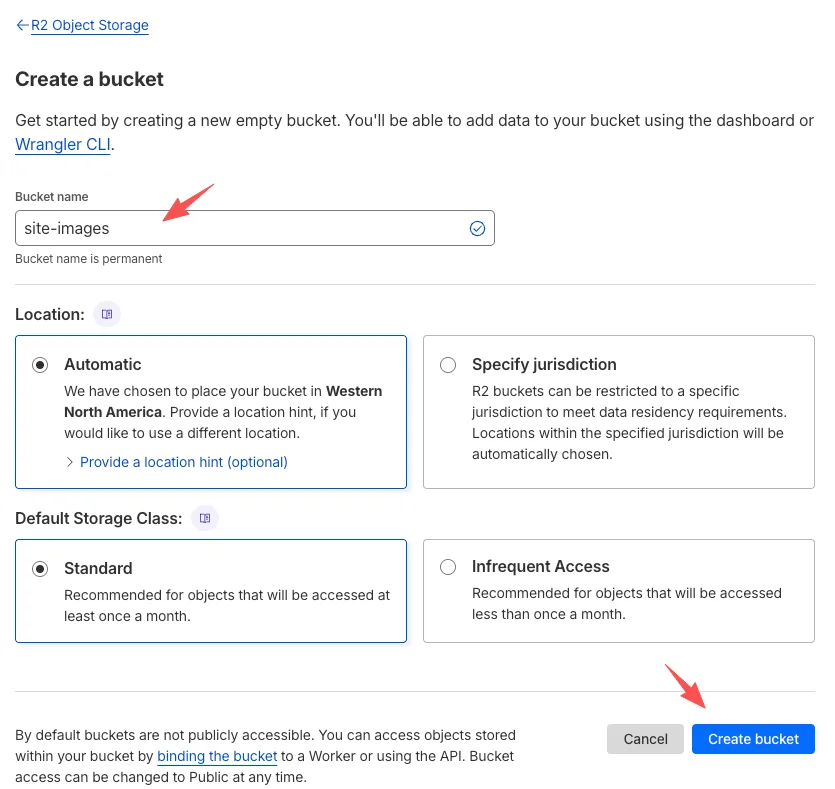
Create a new bucket and give it a name, for example: site-images.
**Note: Cloudflare requires a payment method (e.g. a credit card) before you can create a bucket. R2 includes 10 GB of free storage, which is enough for most small and medium sites. Any usage beyond that is billed according to Cloudflare’s published pricing.
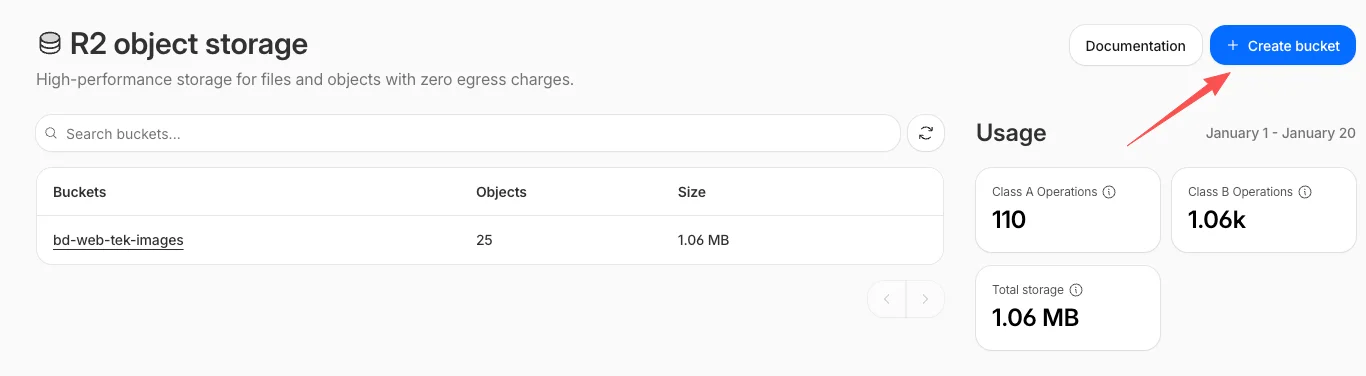
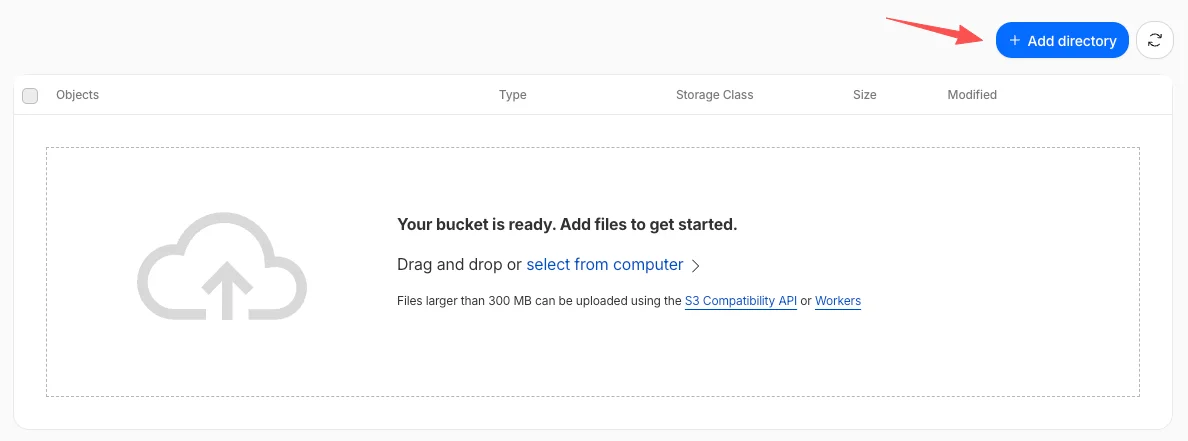
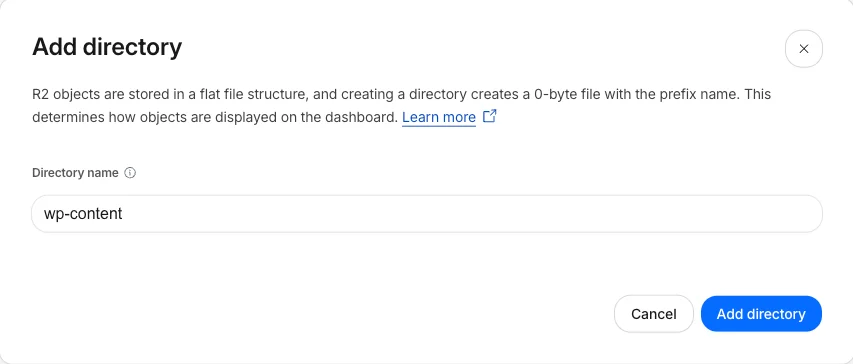
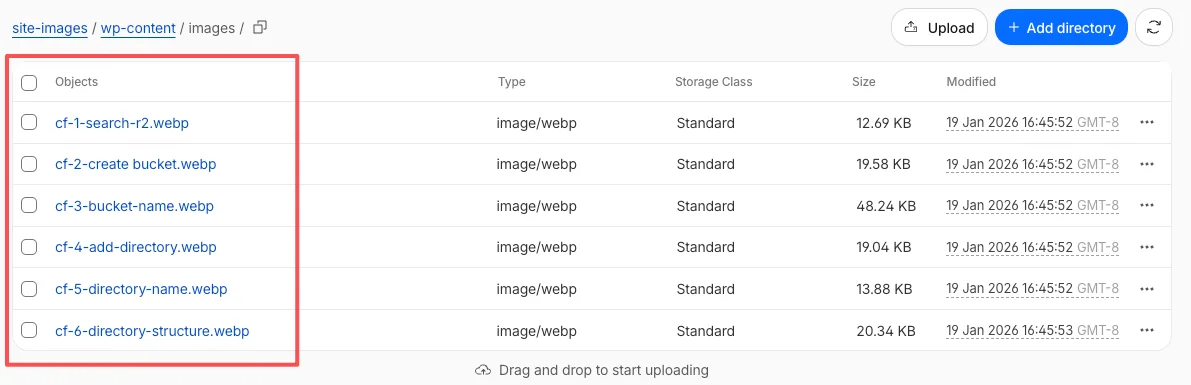
Create directories and upload images. For example, you might use a structure like: wp-content/images/xxxxxx.webp
**Important:
Image filenames should not contain Chinese characters or spaces. Use only English letters, numbers, and hyphens.
Step 2: Create a Cloudflare Worker
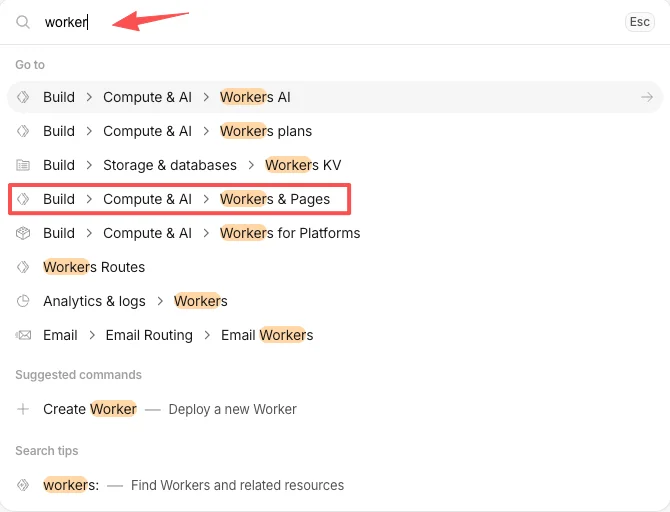
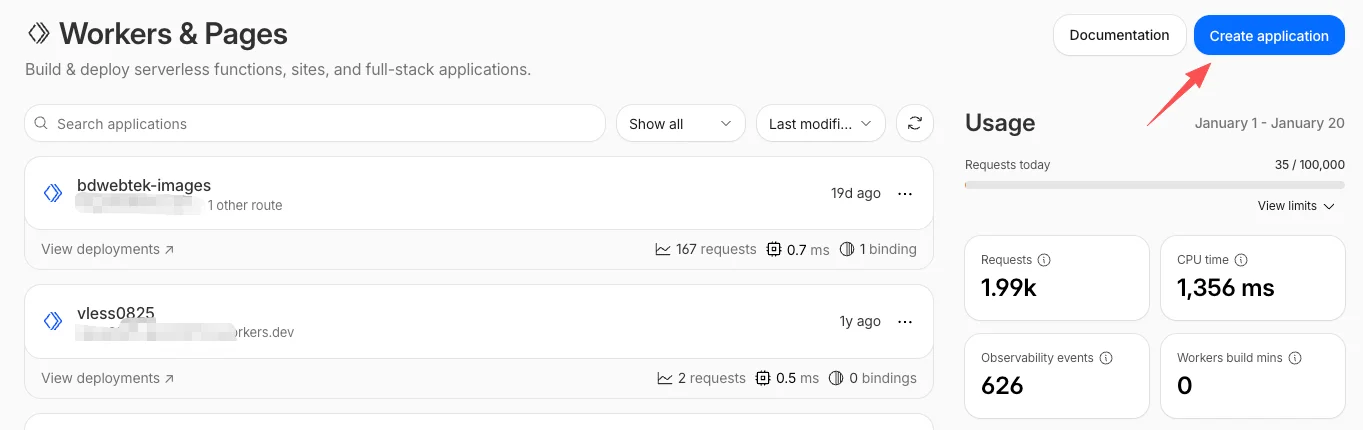
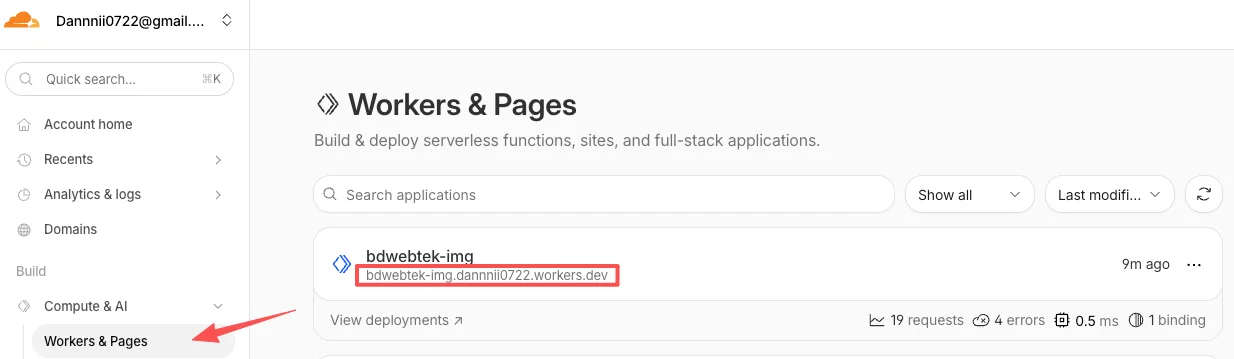
In the Cloudflare Dashboard, search for Workers, then open Workers & Pages and click Create Application.
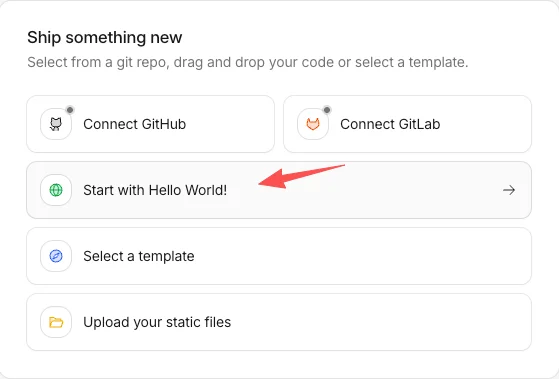
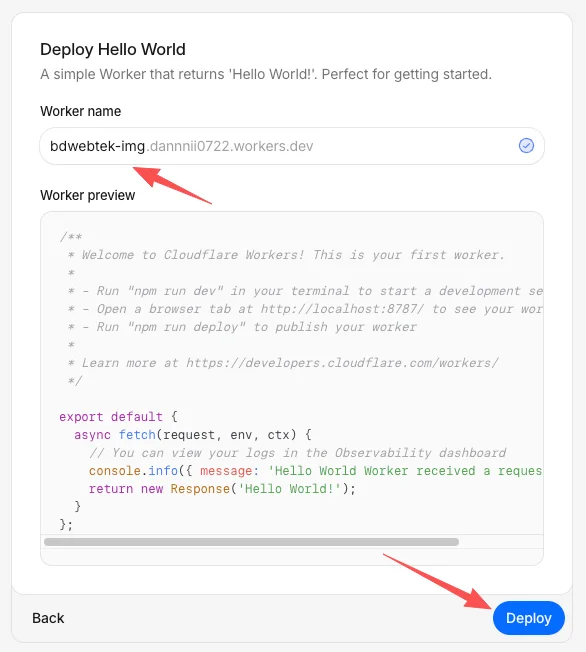
Choose Start with Hello World, give the Worker a name, and deploy it.
Step 3: Bind the R2 Bucket to the Worker
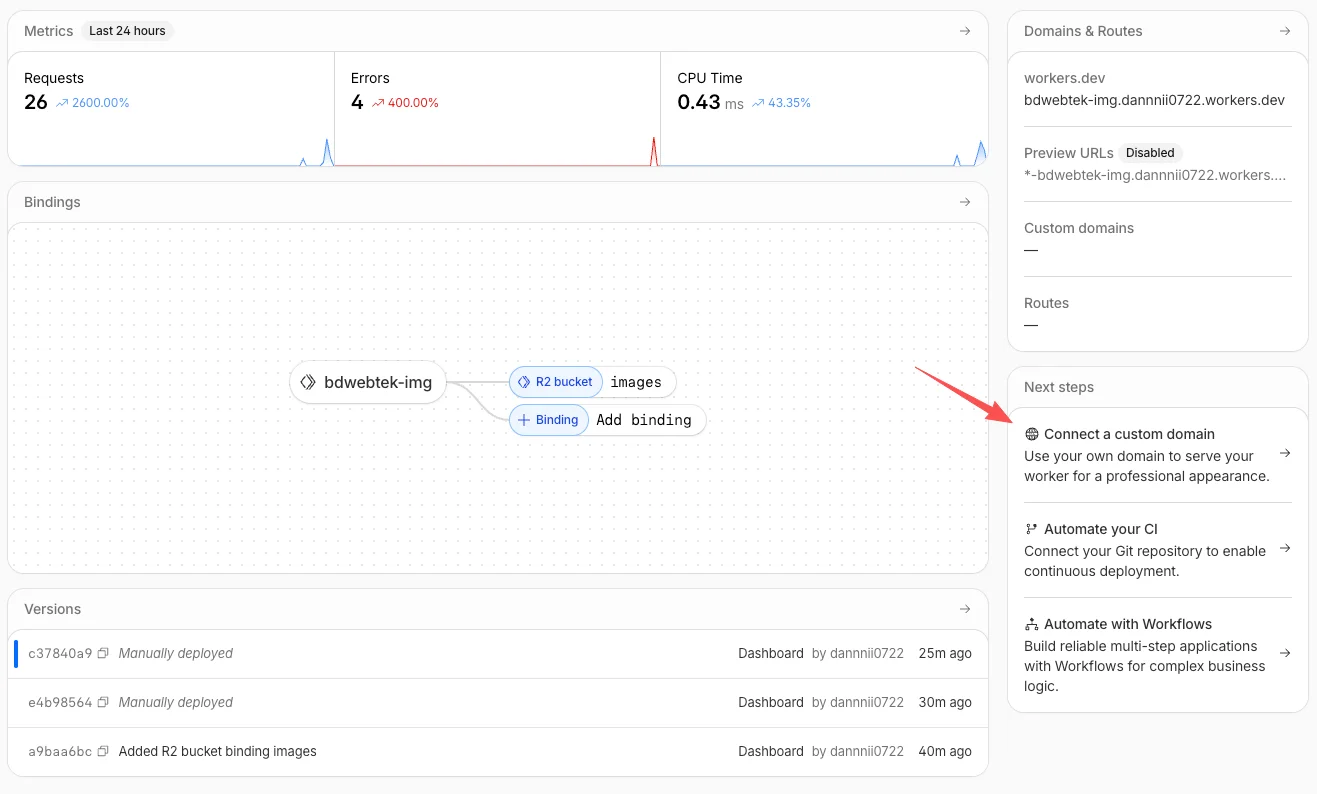
Click Add binding, choose R2 bucket, and click Add binding.
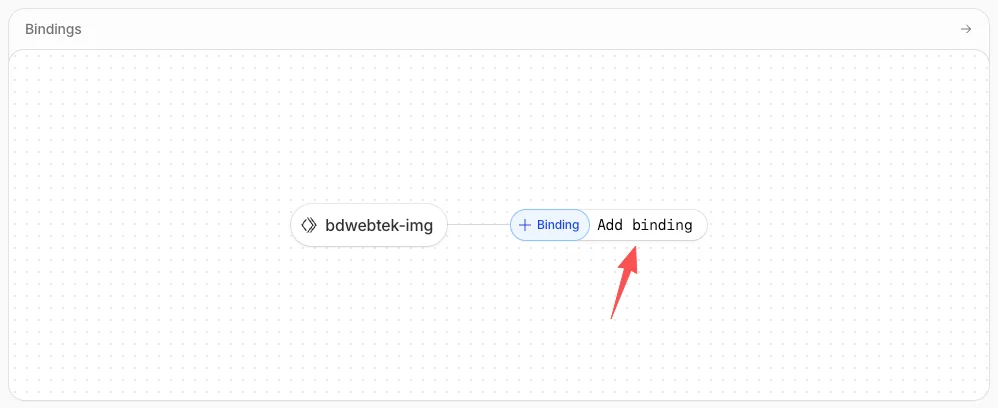
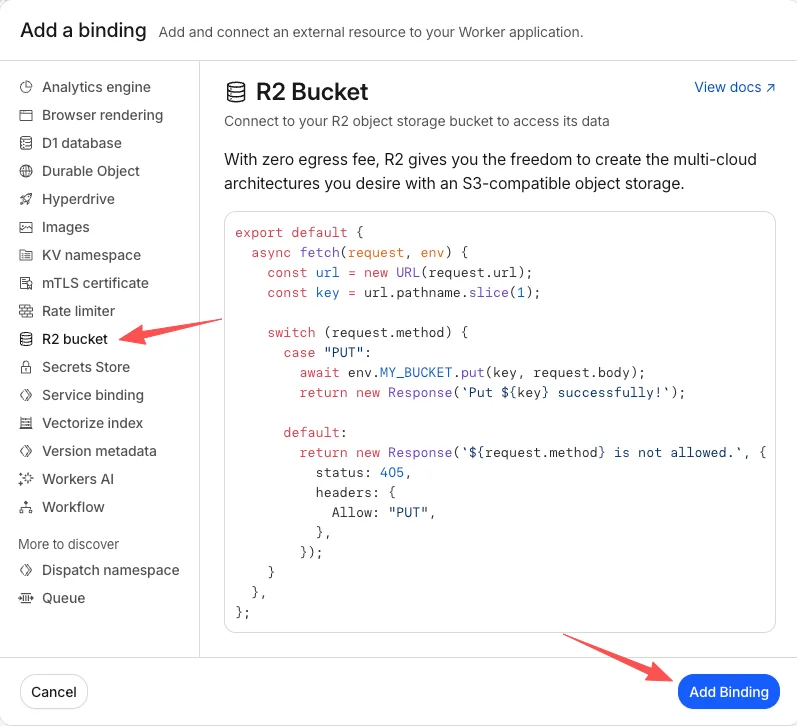
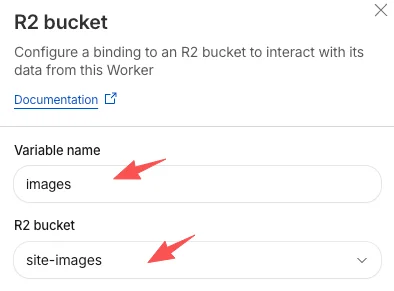
In the side panel:
- Set a Variable name (for example: images)
- Select the R2 bucket you created earlier
- Click Deploy
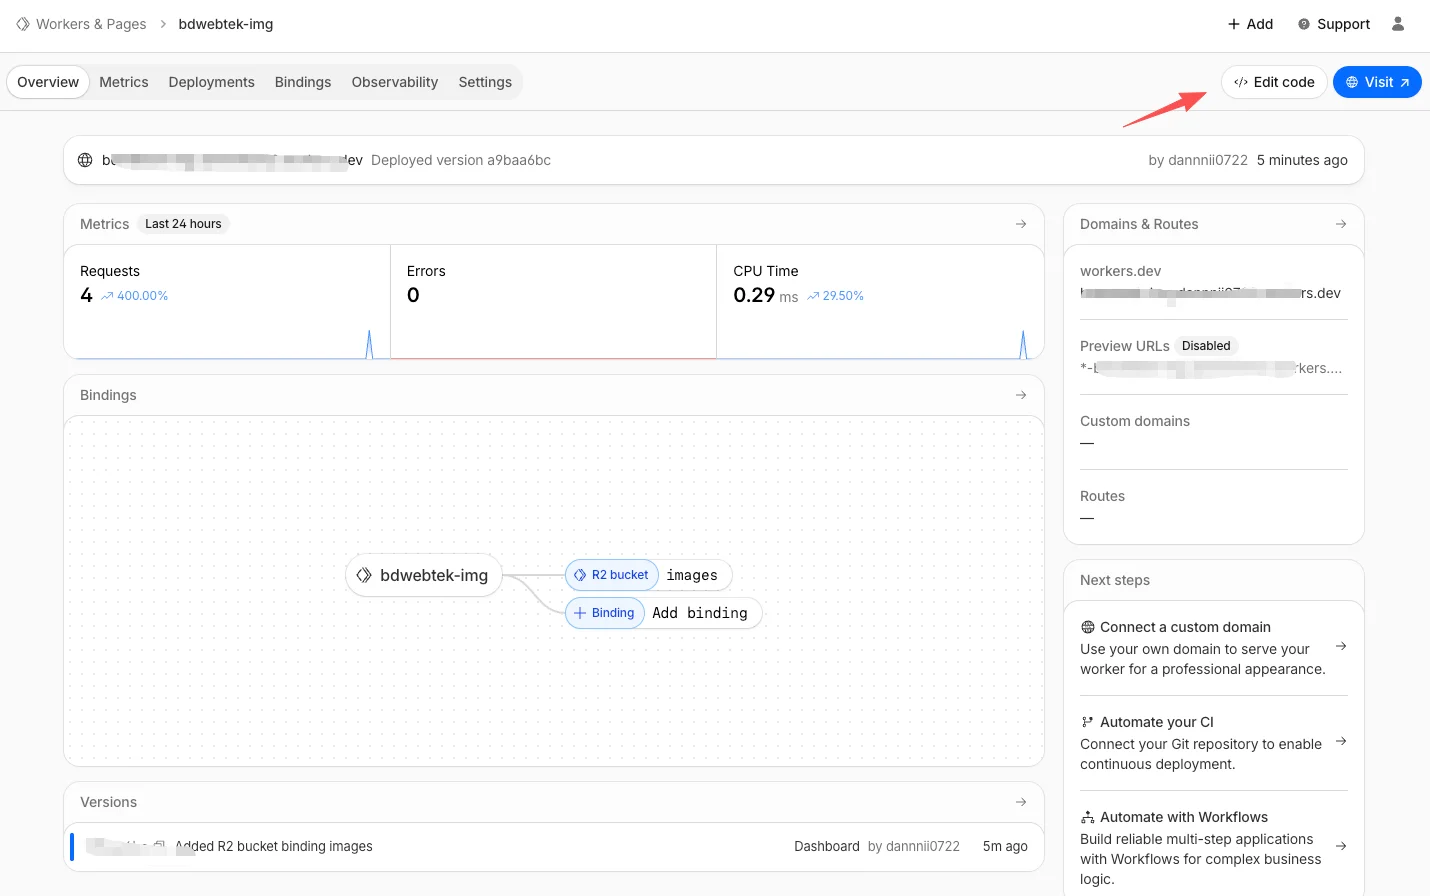
Click Edit code in the top-right corner.
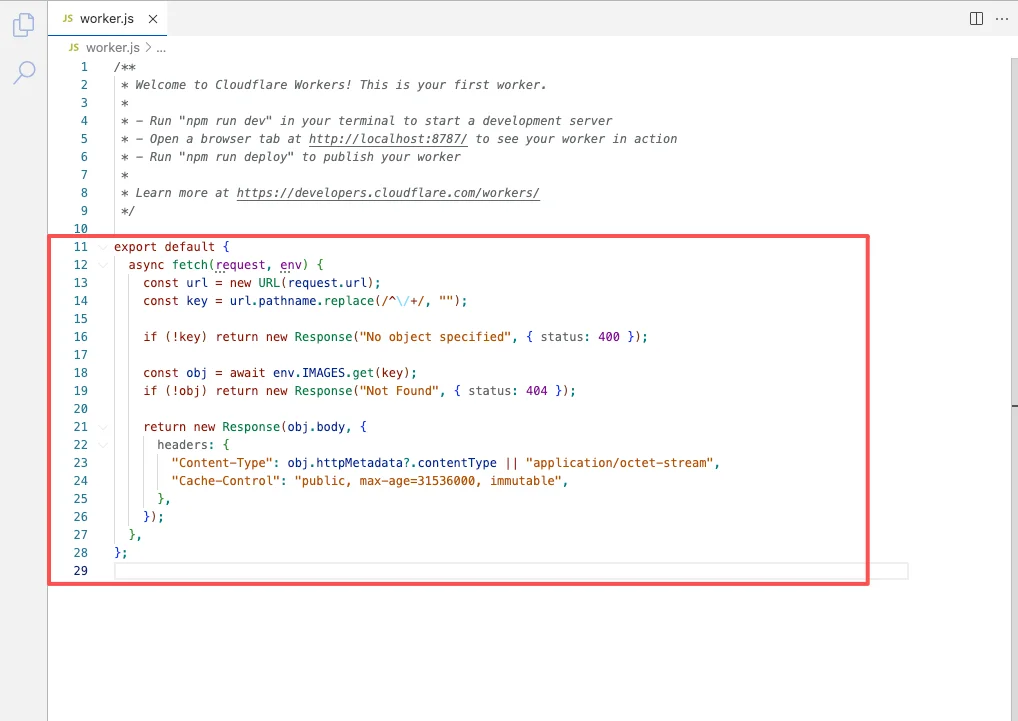
Replace the code with the following:
					export default {
  async fetch(request, env) {
    const url = new URL(request.url);
    const key = url.pathname.replace(/^\/+/, "");

    if (!key) return new Response("No object specified", { status: 400 });

    const obj = await env.images.get(key);
    if (!obj) return new Response("Not Found", { status: 404 });

    return new Response(obj.body, {
      headers: {
        "Content-Type": obj.httpMetadata?.contentType || "application/octet-stream",
        "Cache-Control": "public, max-age=31536000, immutable",
      },
    });
  },
};
Test the setup:
- Go to Workers & Pages and copy your Worker URL
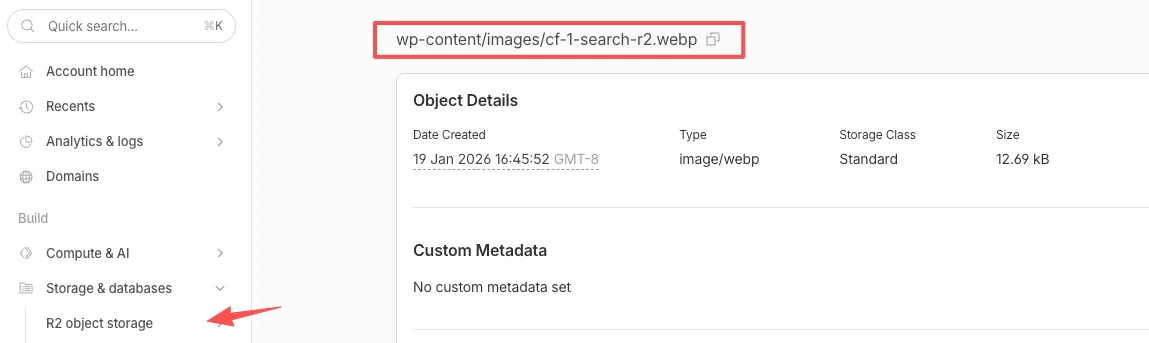
- Go to R2 Object Storage → Overview, pick any image, and copy its path
- Combine them, for example: https://bdwebtek-img.dannnii0722.workers.dev/wp-content/images/cf-1-search-r2.webp
If the image loads in your browser, the setup is working.
Step 4: Bind a Custom Subdomain
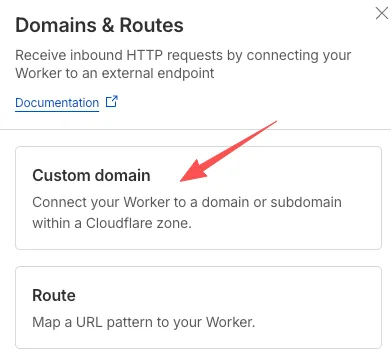
Open your Worker and click Connect a custom domain on the right.
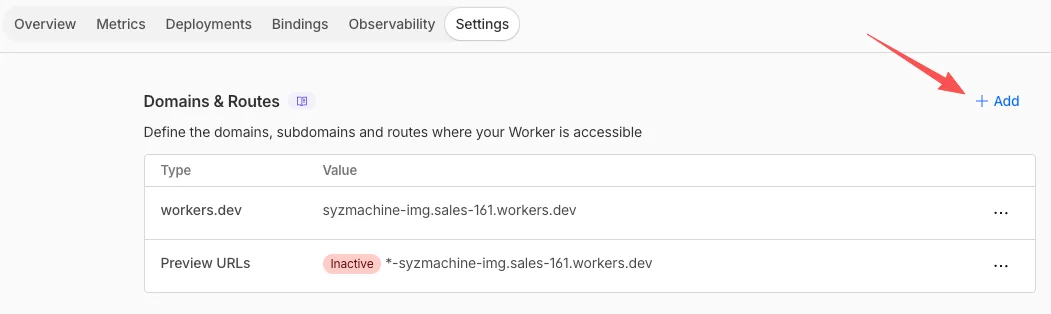
- Click Add → Custom domain
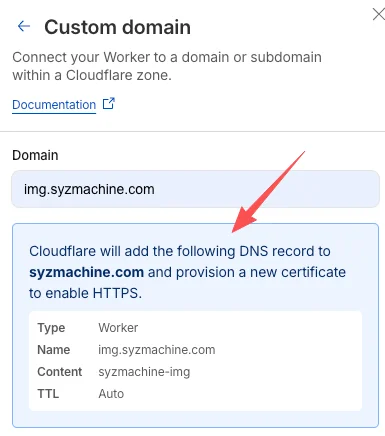
- Enter a subdomain such as: img.yourdomain.com
- When Cloudflare shows the confirmation prompt, click Add domain. Cloudflare will automatically issue and manage the HTTPS certificate.
Use the Image URLs on Your Site:
- In R2 Object Storage, locate the image path, for example: images/wp/cf-1-search-r2.webp
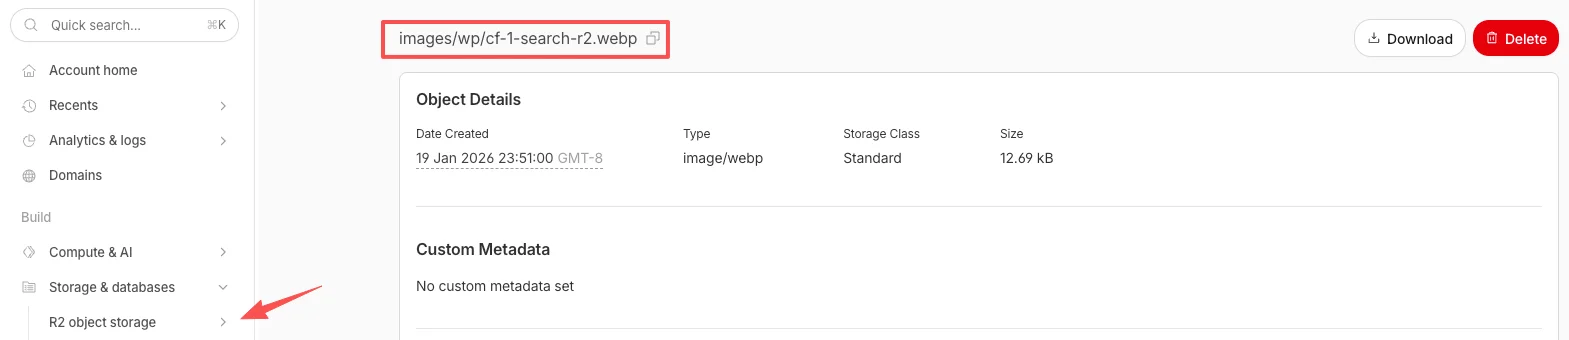
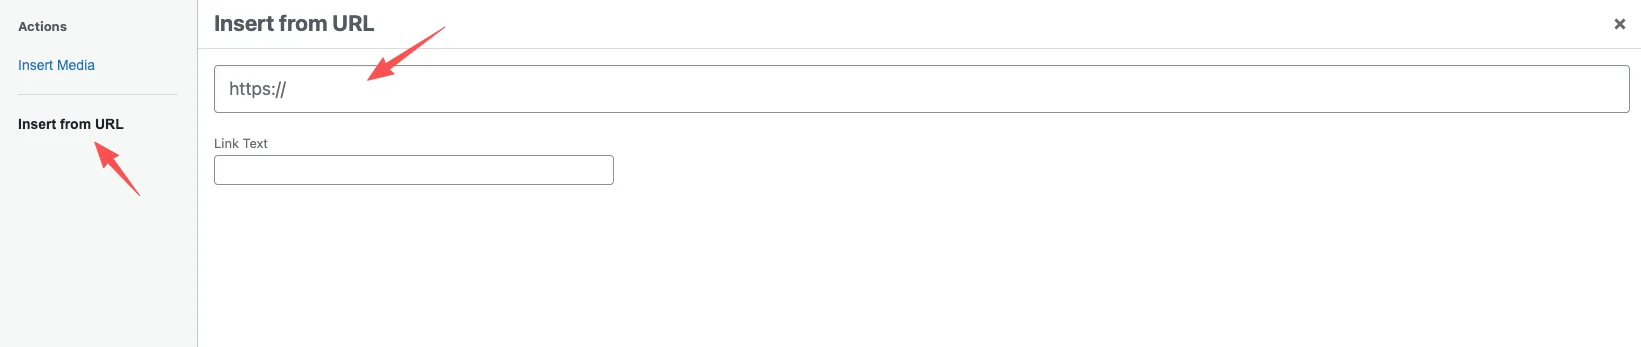
- Prepend your custom subdomain. Use this full URL directly in your website content, for example: https://img.yourdomain.com/images/wp/cf-1-search-r2.webp
6. Conclusion
With Cloudflare R2 + Worker + CDN long-term caching in place:
- Image requests no longer hit your server
- Page caching and image caching are fully decoupled
- Server load does not grow linearly with traffic
- LCP and first-screen bottlenecks are removed
More importantly, this isn’t a WordPress plugin trick or a platform-specific hack.
It’s a general architectural approach.
For small and medium websites, Cloudflare’s free quotas are already enough to fully control image-related performance issues.
If your site is still growing and content keeps increasing, the earlier you separate images from your origin server, the fewer problems you’ll face down the road.
7. Some Practical Recommendations
1. For established sites with existing SEO traction, avoid large-scale image migration all at once
If your website already has stable search traffic—and especially if your images themselves contribute to rankings (Google Images, Discover, or long-tail queries)—replacing a large number of image URLs in one go is effectively a resource structure rebuild from a search engine’s perspective.
Even if your page content stays the same, search engines still need to re-crawl and re-interpret the relationships between image assets. In the short term, this can introduce SEO fluctuations.
A safer, more controlled approach is to:
- Use R2-hosted images for new articles and new pages first
- Gradually migrate images in older content instead of doing a “big bang” switch
- Prioritize large, high-traffic images that create the most performance pressure
2. New websites can adopt this setup from day one without hesitation
If your site is still in its early stage—few pages, limited indexing history, and a flexible URL structure—starting directly with R2 + Worker + CDN caching is actually the cleanest long-term option.
From day one, you avoid:
- Image requests slowing down your origin server
- Painful image migrations later on
- Performance degradation as image volume grows
From a long-term maintenance perspective, this is a one-time, future-proof setup.
3. You don’t have to move every image into R2
The goal of this approach is to remove real performance bottlenecks—not to chase technical perfection for its own sake.
In practice, selective use makes the most sense:
- Article images, product images, and display visuals → Excellent candidates for R2
- Frequently changing or temporary backend uploads → Often not worth migrating
- Small, low-traffic images → Performance gains may be negligible
Whether an image should be migrated depends on:
- Operational cost
- Maintenance complexity
- Actual traffic volume
- Whether the performance gain is meaningful
The value of a technical solution is never about whether it can be done, but about whether it’s worth doing.