Most WordPress sites get hacked because default settings expose too many attack surfaces, not because WordPress itself is insecure. This guide walks through six lightweight hardening steps: hiding the login URL, disabling dashboard file editing, setting up four Cloudflare Security Rules, enabling 2FA, cleaning up the default admin account, and keeping automatic backups.
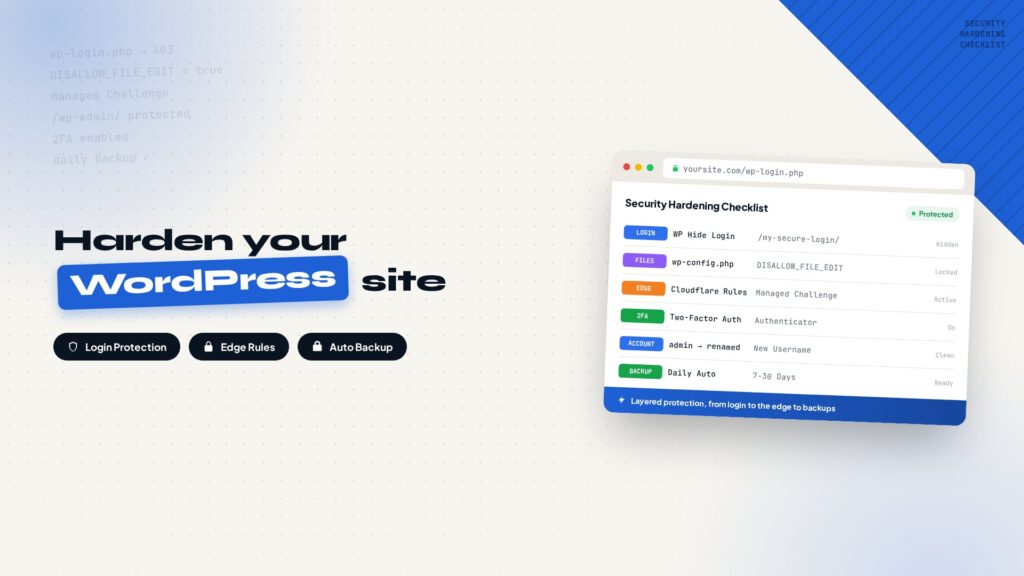
WordPress is one of the most popular website systems in the world, which also makes it a favorite target for attackers.
Most sites get compromised not because WordPress itself is insecure, but because the default configuration exposes too many attack surfaces, for example:
- The default login URL is public
- Admin passwords are easy to brute-force
- The dashboard allows direct PHP file editing
- No edge protection in front of the server
- No backup and restore mechanism
For corporate sites, B2B sites, and content blogs, you do not need a pile of heavyweight security plugins. Shrinking the attack surface, limiting dashboard capabilities, and adding Cloudflare edge protection will get you a dramatically more secure site.
1. Change the WordPress login URL
The default WordPress login entry is /wp-login.php, and attack bots scan this path in bulk to try username and password combinations. WP Hide Login lets you move the login page to your own path, hiding the default entry and reducing the odds of automated attacks.
In the WordPress dashboard, go to Plugins → Add New Plugin, search for WP Hide Login, install and activate it. Then open Settings → General and change the Login URL to your own address, for example /my-secure-login/.
After the change, attackers scanning /wp-login.php can no longer reach the login page.
WARNING
Changing the login URL is not the only protection you need. Combine it with Cloudflare, a strong password, and 2FA. Hiding the login page on its own only reduces automated scanning; it will not stop a determined attacker.
2. Disable file editing via wp-config.php
If an attacker gets admin access, they can write malicious PHP directly through the theme editor or the plugin editor. Two lines in wp-config.php close both entries. The steps below use Hostinger’s hPanel as an example; other hosts work the same way.
- Log in to Hostinger hPanel.
- Open the file manager using this path:
→
Files
→
File Manager
→
public_html
→
wp-config.php
- Open the site directory public_html, find wp-config.php, and right-click to choose Edit.
- Find this line in the file:
/* That's all, stop editing! Happy publishing. */ - Add the two lines below right before it and save:
/* Security hardening (add here) */
define('DISALLOW_FILE_EDIT', true);
define('DISALLOW_FILE_MODS', true);The two lines do different jobs. DISALLOW_FILE_EDIT turns off the theme and plugin code editors in the dashboard; DISALLOW_FILE_MODS blocks installing, deleting, and updating plugins and themes from the admin area. For most sites that only need content updates, plugin and theme updates can be handled through the host or FTP, so closing the dashboard install entry does not affect daily work.
Even if the admin account is stolen, the attacker can no longer plant a backdoor directly from the dashboard.
3. Cloudflare Security Rules setup
Cloudflare Security Rules block requests before they reach your server, which is one layer ahead of anything WordPress itself can do. Here is where to create them:
→
Security
→
Security Rules
→
Custom Rules
→
Create Rule
This section sets up four rules, and they must be created in order. The first rule, Skip WAF for WordPress REST API, gets Execution Order set to First; every rule after it uses Custom and specifies which rule it fires after, forming one continuous protection chain.
Rule 1: Skip WAF for WordPress REST API
If your site uses an AI agent, an automated publishing system, or Application Passwords, REST API traffic can be caught by the WAF and blocked by mistake. This rule lets /wp-json/ requests from trusted IPs skip the WAF entirely, so your own automation is never stopped by a Managed Challenge.
Rule Name
Skip WAF for WordPress REST API
When Incoming Requests Match
URI Path contains “/wp-json/”
And
IP Source Address equals your IP 1
Or
IP Source Address equals your IP 2
Then Take Action
Skip
Log Matching Requests: Enable
WAF Components to Skip, check all:
All Remaining Custom Rules, All Rate Limiting Rules, All Managed Rules, All Super Bot Fight Mode Rules, Zone Lockdown, User Agent Blocking, Browser Integrity Check, Hotlink Protection, Security Level, Rate Limiting Rules (Previous Version), Managed Rules (Previous Version)
Execution Order
First
Status
Active
Click Save to save the rule
Rule 2: Protect wp-login
Even after you hide the login page, attackers still hit /wp-login.php because it is the default entry. This rule sends both your custom login URL and the default entry through a Managed Challenge to stop brute force and automated scanning.
Rule Name
Protect wp-login
When Incoming Requests Match
URI Path contains “/my-secure-login/”
(my-secure-login is a demo value, replace it with your real login URL)
Or
URI Path contains “/wp-login.php”
Then Take Action
Managed Challenge
Execution Order
Select Order: Custom
Select Which Rule This Will Fire After: Skip WAF for WordPress REST API
Status
Active
Click Save to save the rule
Rule 3: Unauthorized wp-admin access protection
The admin directory is blocked by default, while logged-in admins and normal plugin requests still get through. Paste the expression below directly:
Rule Name
Unauthorized wp-admin access protection
When Incoming Requests Match
(http.request.uri.path contains "/wp-admin/")
and not (http.request.uri.path contains "/wp-admin/admin-ajax.php")
and not (http.cookie contains "wordpress_logged_in")
and not cf.client.botThe logic: any request to wp-admin goes into a Managed Challenge, except admins with a login cookie, plugin requests to admin-ajax.php, and bots Cloudflare has verified.
Then Take Action
Managed Challenge
Execution Order
Select Order: Custom
Select Which Rule This Will Fire After: Protect wp-login
Status
Active
Click Save to save the rule
Rule 4: Block scanners
Traffic from obvious vulnerability scanners gets blocked outright so it never touches the server. Paste the expression below directly:
Rule Name
Block scanners
When Incoming Requests Match
(http.request.uri.path contains "/wp-content/")
and (
http.user_agent contains "nikto"
or http.user_agent contains "sqlmap"
or http.user_agent contains "fuzz"
)nikto, sqlmap, and fuzz are common vulnerability scanner signatures. Requests to /wp-content/ with these user agents are blocked on the spot.
Then Take Action
Block
Execution Order
Select Order: Custom
Select Which Rule This Will Fire After: Unauthorized wp-admin access protection
Status
Active
Click Save to save the rule
The four rules run in this order: Skip WAF for WordPress REST API → Protect wp-login → Unauthorized wp-admin access protection → Block scanners. They pair well with our security headers guide to complete the Cloudflare edge protection picture.
4. Enable two-factor authentication
Even if the password leaks, the attacker still needs a second code to log in. Install a plugin that supports 2FA, such as Two Factor Authentication, then bind it with an authenticator app like Google Authenticator or Authy.
Once enabled, the risk of an admin account being stolen drops sharply, and a leaked password stops being a fatal problem.
5. Do not use admin as the admin username
Brute-force attackers try admin and administrator first. Go to Users in the WordPress dashboard, create a new admin account to replace the default one, delete the old account, or simply rename the default username.
Now the attacker has to guess both the username and the password, which multiplies the cost of a brute-force attack. When you need to give a collaborator access, use a temporary admin login link instead of exposing the admin account long-term.
6. Keep automatic backups
No security measure is 100% guaranteed, and a backup is your last recovery option.
PRO TIP
Automate a backup every day and keep 7-30 days of history. Back up the database, wp-content, themes, plugins, and uploaded files; a database-only backup is often not enough when you need to restore.
Many hosts include automatic backups out of the box. Hosts like Hostinger let you configure daily backups and one-click restore from the control panel, with no extra plugin required.
When malware, corrupted files, or a bad configuration breaks the site, a backup gets you back to normal quickly.
Summary
A secure WordPress site does not depend on a single plugin; it depends on layered protection. Stack the layers below to cover the full chain from scanning to intrusion to data loss:
| Layer | Action | What it does |
|---|---|---|
| Login protection | WP Hide Login + Cloudflare rules | Reduces brute force and automated scanning |
| Dashboard lockdown | DISALLOW_FILE_EDIT / DISALLOW_FILE_MODS | Prevents backdoors planted from the dashboard |
| Edge protection | Cloudflare Security Rules | Blocks requests before they reach the server |
| Identity verification | 2FA | Second lock even after a password leak |
| Account hygiene | Remove the default admin username | Raises the cost of brute force |
| Data backup | Daily automatic backup | Fast recovery, the last line of defense |
With these in place, you significantly reduce brute force, automated scanning, dashboard intrusion, malware injection, and data loss.
KEY TAKEAWAY
For corporate sites and B2B websites, this is a lightweight, low-maintenance WordPress hardening plan: skip the heavyweight security plugins, close the attack surface, and let Cloudflare plus backups handle the rest.
every Thursday.
Hosting reviews, builder comparisons, performance tips, and plugin picks — curated weekly for WordPress site owners and builders.