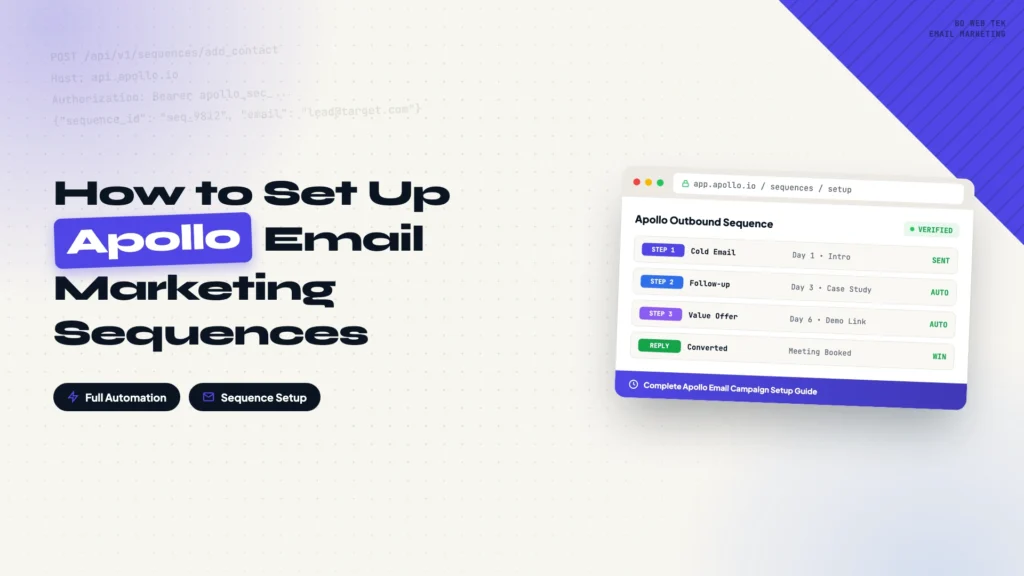
This guide walks through the complete Apollo email marketing setup: registering an account, connecting a sending mailbox, warming it up, verifying domain authentication records, filtering for target prospects, and building a five-step cold email + LinkedIn sequence. Every step includes a screenshot, so you can follow along even on your first attempt. The flow ends by connecting your contact list to the sequence so the whole system runs on its own.
There are plenty of ways to reach new customers: cold calling, trade shows, SEO, paid ads, social media, and email. For most teams, email marketing is the most cost-effective of the bunch, flexible and easy to learn.
I’ve tested a lot of email marketing tools over the years. Most fall short in one of two ways: powerful automation with no real leads, or rich data with rigid workflows. Apollo solved both problems at once.
For a modest monthly subscription, you get verified prospect emails plus automated sequences. The work left to you is designing the email content and using Apollo’s filters to add the right prospects to a sequence.
I spend about an hour a day on lead screening and let the system handle the rest. Sending, follow-ups, and reminders run in the background. On a good day, there’s a reply from a procurement manager waiting in my inbox before I clock out.
Below is the full flow, from registration and mailbox setup to prospect filtering and building the automated sequence, ending with connecting your list to it.
Register
Open Apollo’s website and register with a corporate or personal email address.
Set up your sending mailbox
This stage makes Apollo able to send mail for you. Two steps: fill in your account profile, then connect the sending mailbox.
Setting your profile
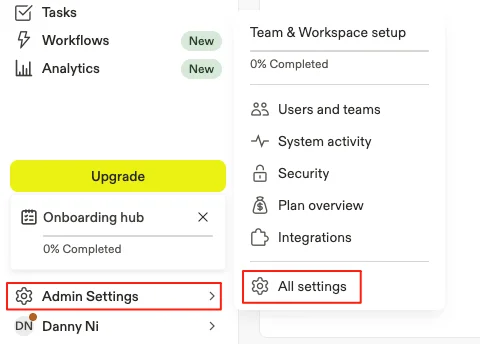
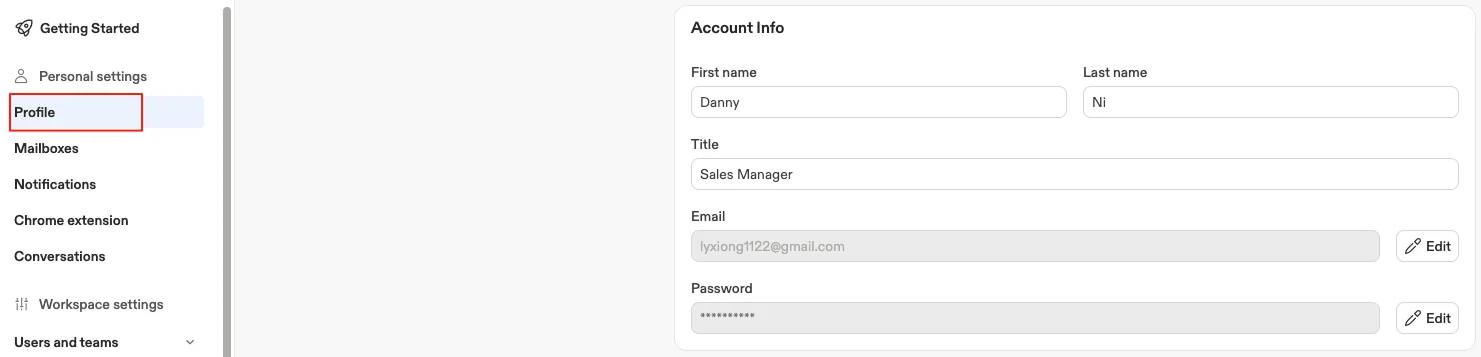
After logging in, open Admin Settings, then All Settings, and fill in your profile completely. Name, title, and email all feed into the sender information used later.
Linking your sending mailbox
Next, connect the mailbox you’ll send from. This step matters: a corporate email address builds more trust with recipients. Start from the Mailboxes page.
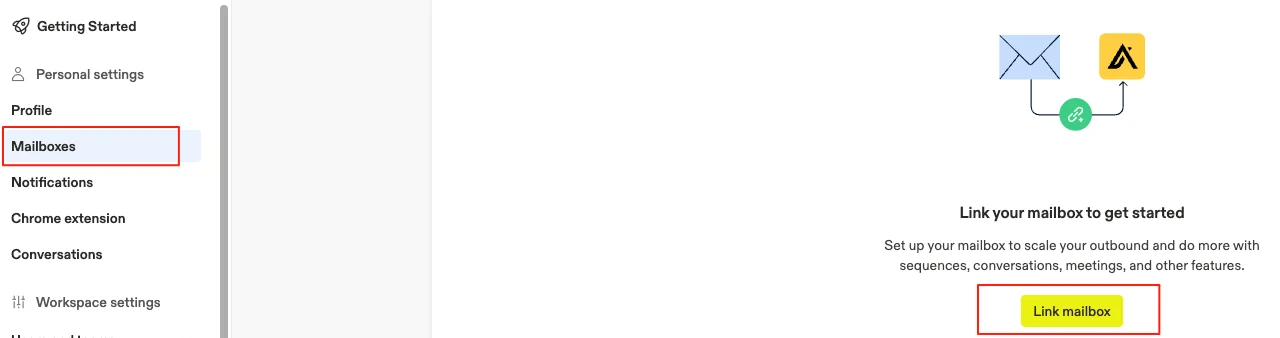
Choose your provider. If you’re not using Google or Outlook, pick Other, but that option is only available to paid users. Start with the monthly Basic plan (one mailbox) for a month; if it fits, switch to annual, which is cheaper overall.
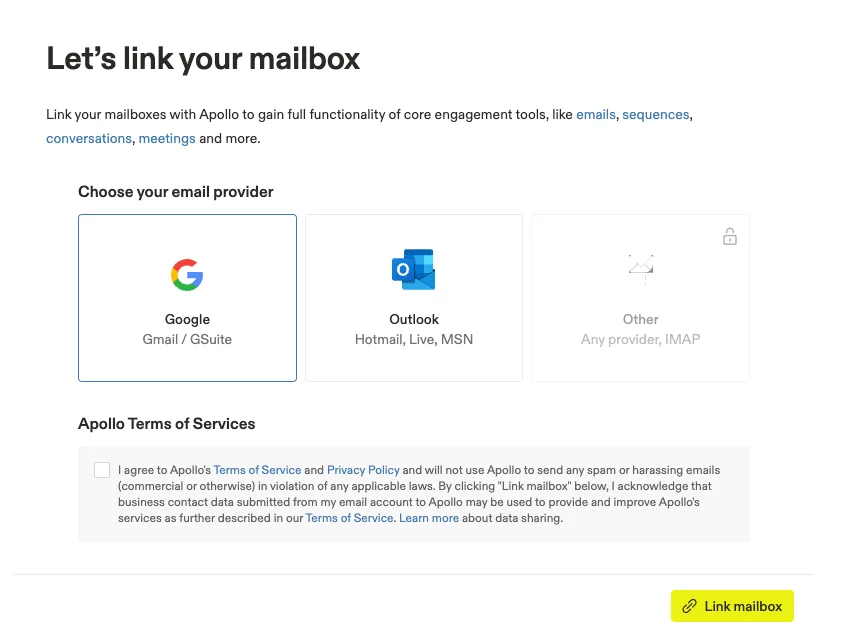
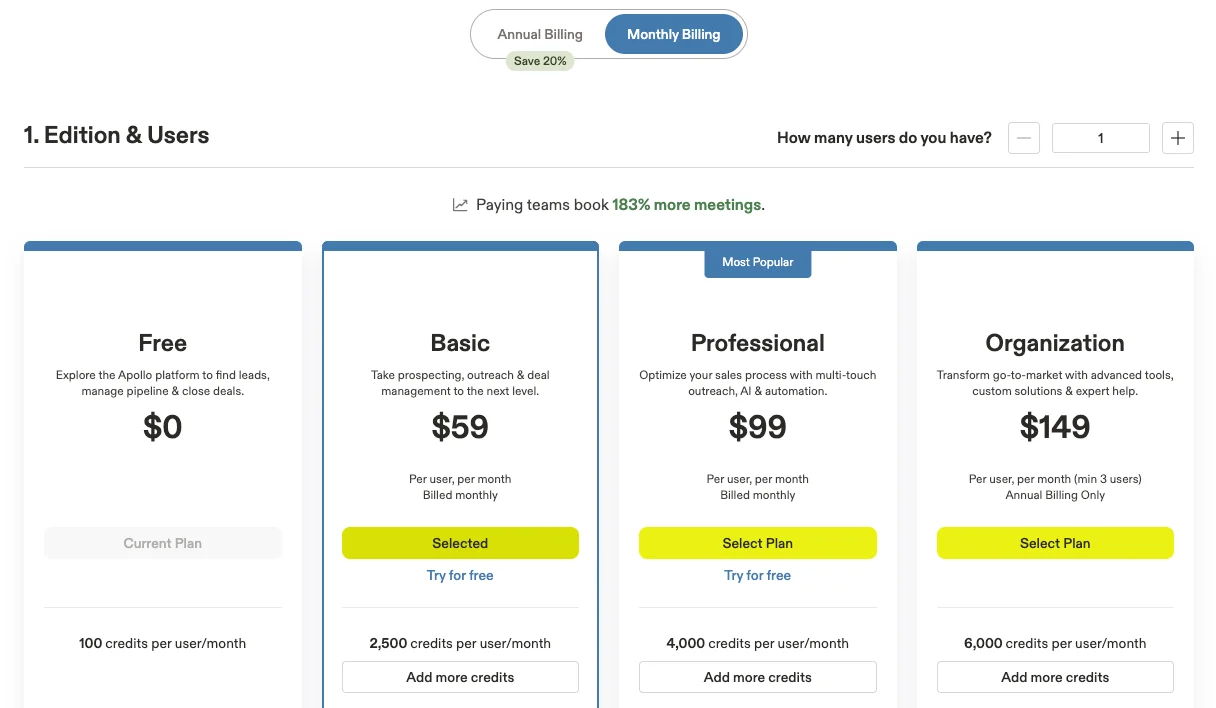
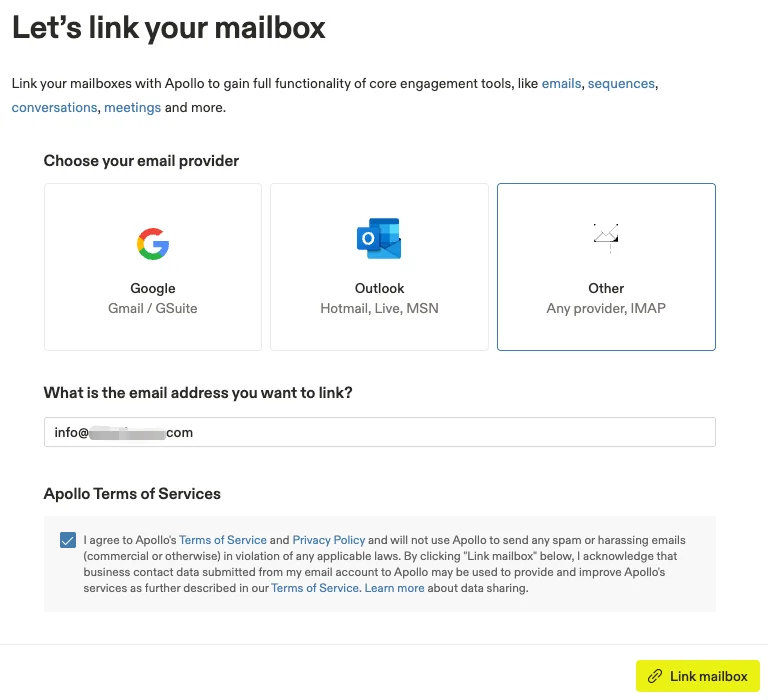
After upgrading, choose Other, enter the mailbox address, agree to the terms, and click Link mailbox.
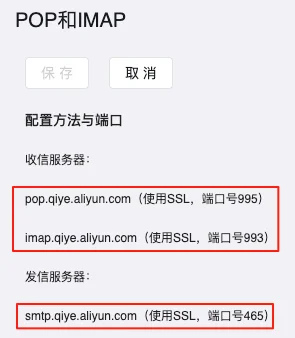
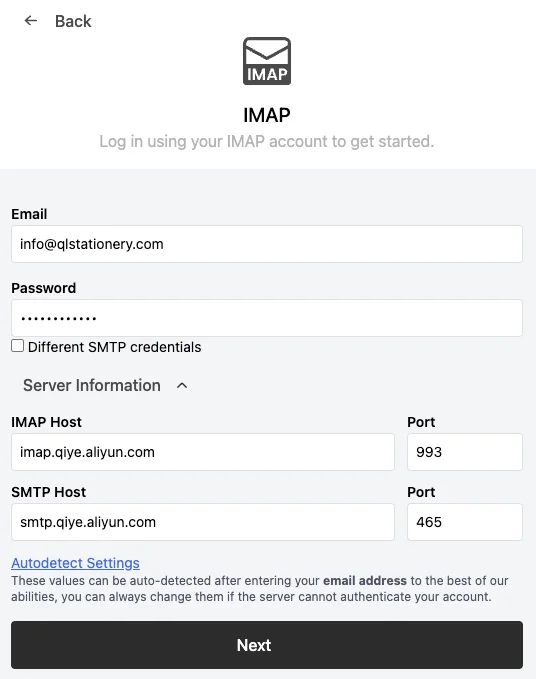
Then enter the mailbox password, IMAP host and port, and SMTP host and port. You’ll find these in your provider’s settings page, and they differ by provider. For the basics, see this guide on IMAP and SMTP.
Below is the Aliyun Enterprise Mail config I use. Fill the same values into Apollo and click Next.
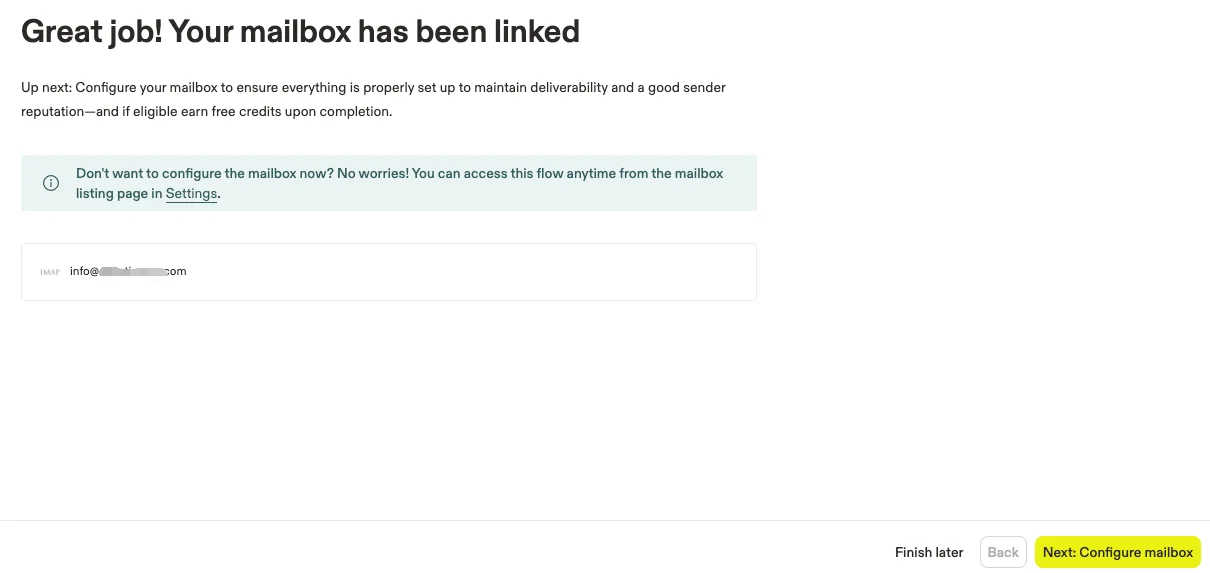
Once you see the linked confirmation screen, click Next to configure the mailbox.
Build sending reputation
The mailbox can send now, but whether those emails land in the inbox is another question. The following settings build up your sending reputation.
Email warm-up
A new mailbox that suddenly sends bulk marketing mail gets flagged fast. Apollo’s Warm Up simulates normal activity: it sends a small number of emails to other mailboxes in its network each day and simulates opens, reads, and replies, ramping up volume on a schedule. By the time you send for real, the mailbox has a history of normal traffic, which lowers the odds of landing in spam.
- Send a set number of emails daily to the warm-up network
- Simulate opens, marking as read, and replies automatically
- Ramp up daily volume gradually based on your settings
If the mailbox is over two months old with steady daily traffic, you could skip this in theory. But since it’s about to carry templated bulk sending, I’d still turn it on. After enabling it, you’ll see mail in the inbox you didn’t write. That’s the warm-up behavior, not a compromised account.
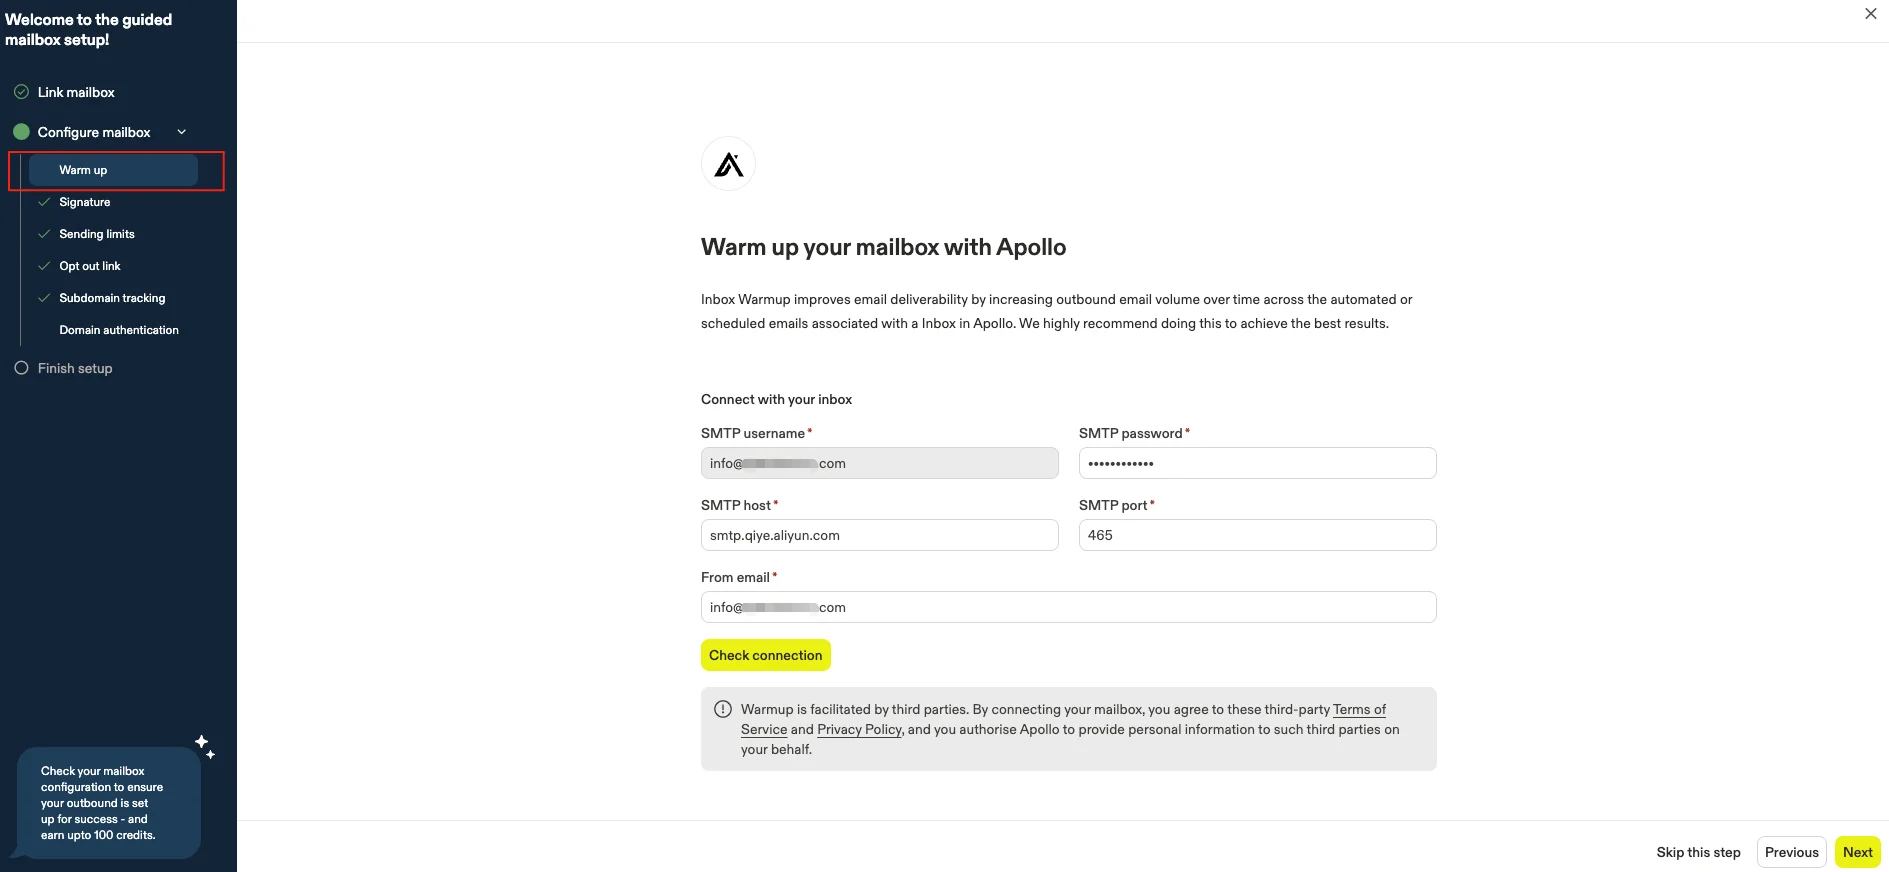
To start, fill in the SMTP password (usually the mailbox password), SMTP host and port, and the From email, then click Check connection.
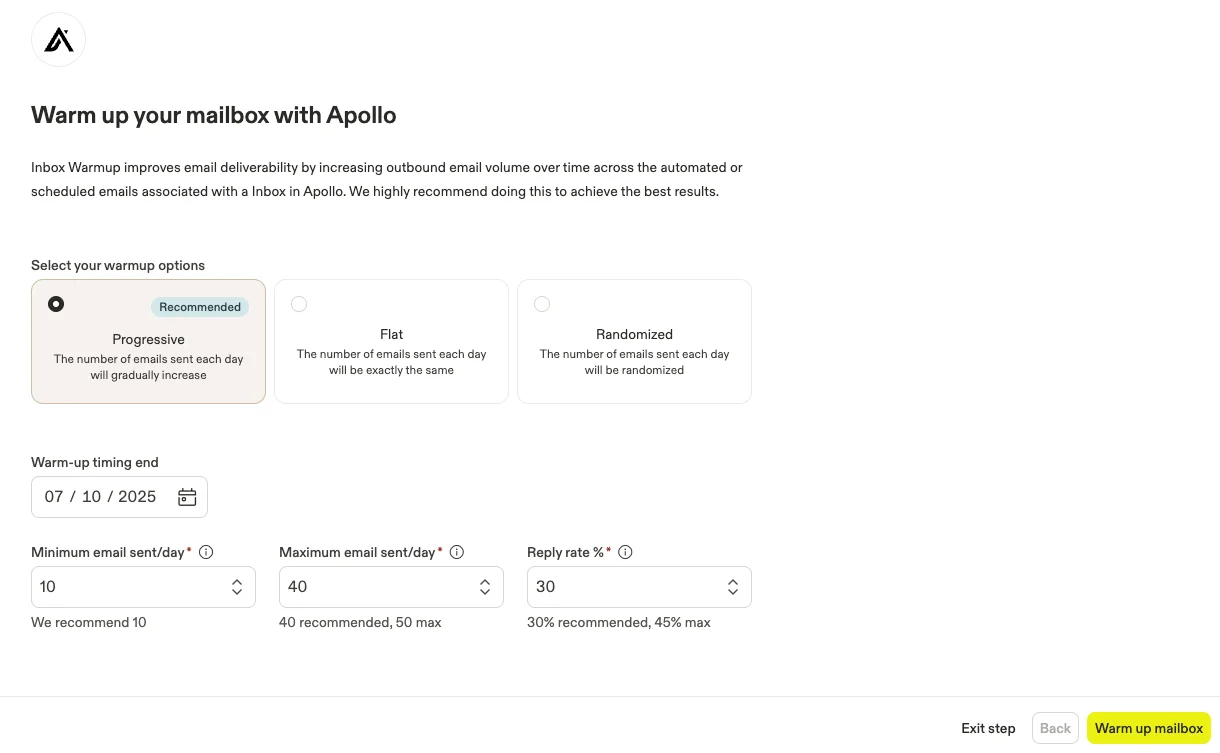
Keep the rule settings at their defaults and click Warm up mailbox.
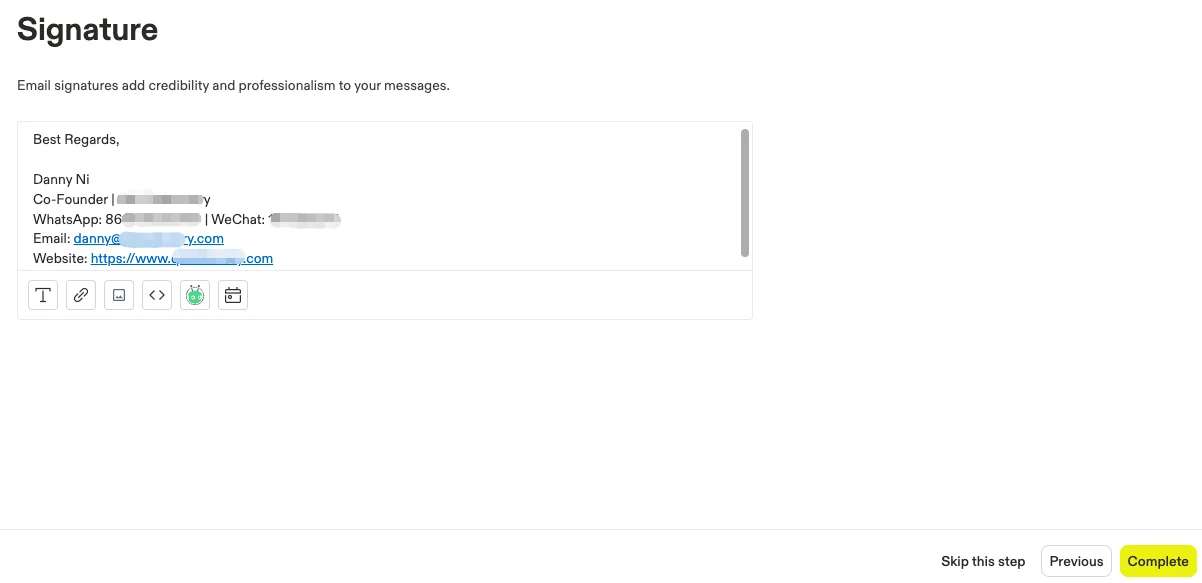
Email signature
Set up your email signature, then click Complete.
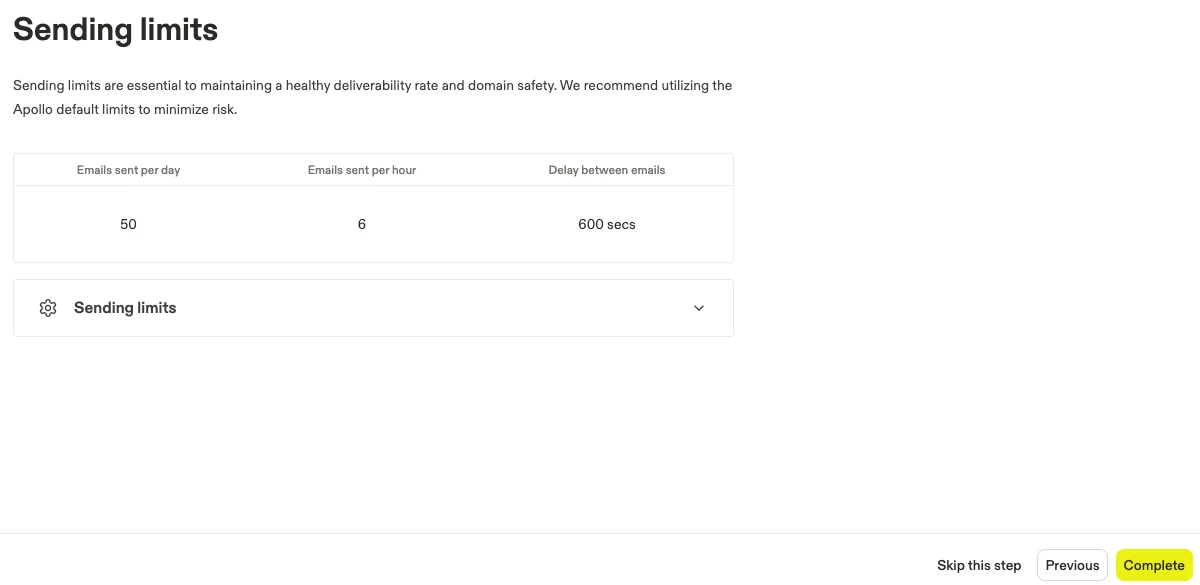
Sending limits
Set the sending limits. Use Apollo’s recommended daily numbers and click Complete.
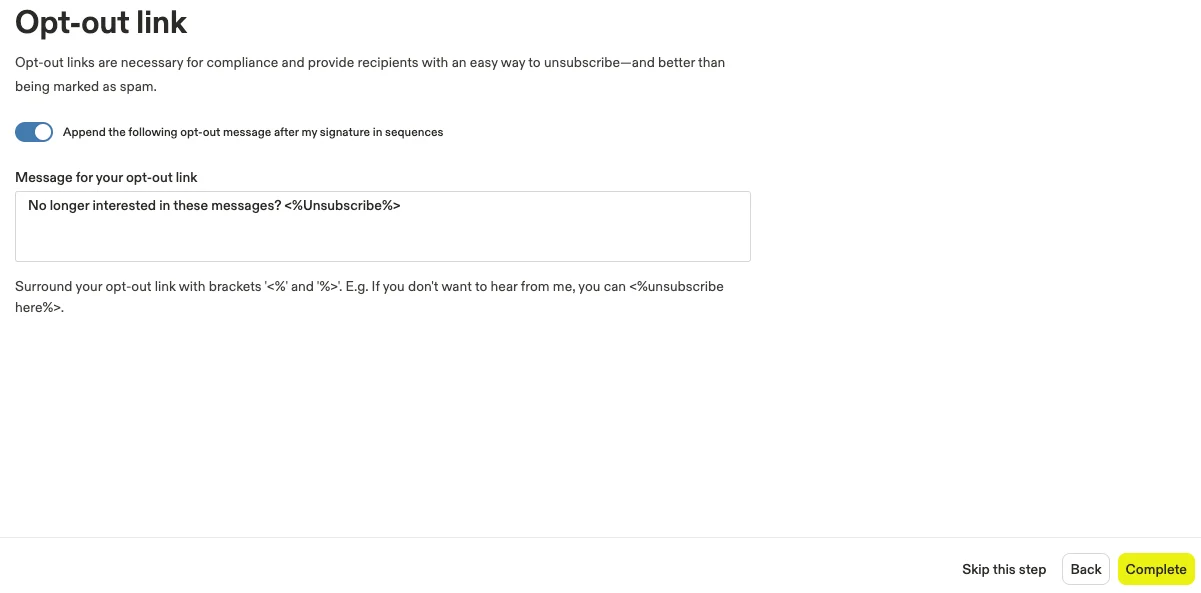
Opt-out link
Set the opt-out link. Cold email needs to stay compliant; the opt-out link reduces spam complaints and protects your sender reputation and long-term deliverability. Click Complete when done.
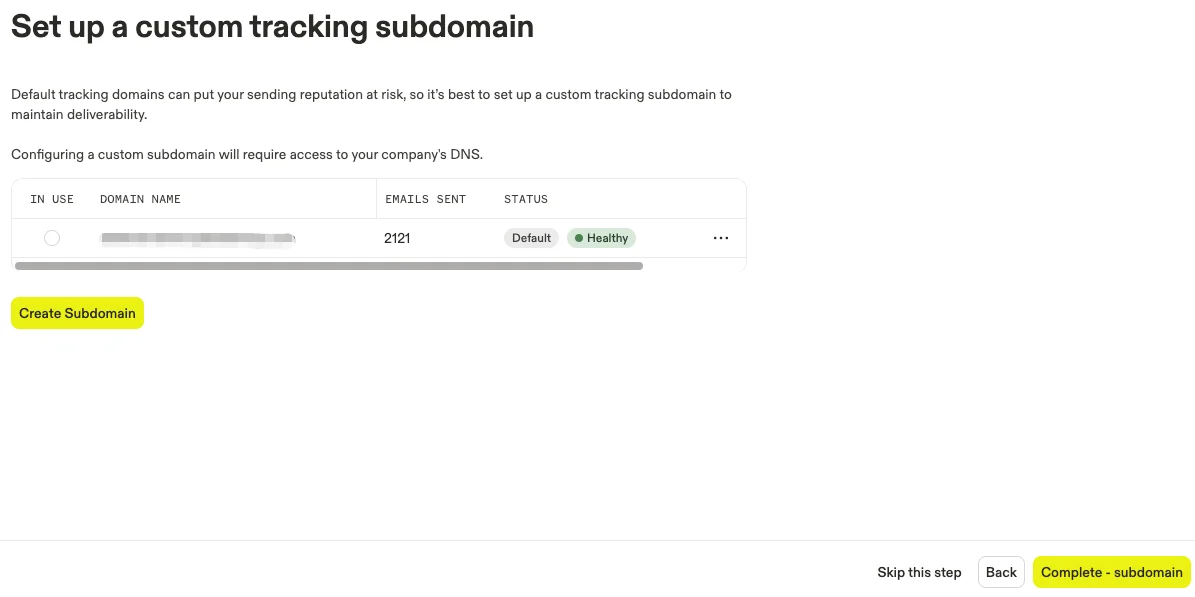
Custom tracking subdomain
A custom tracking subdomain binds the tracking links in your emails to your own domain. That improves deliverability, avoids spam flags, and adds brand credibility. Click Create Subdomain.
Copy the CNAME value shown in the gray box.
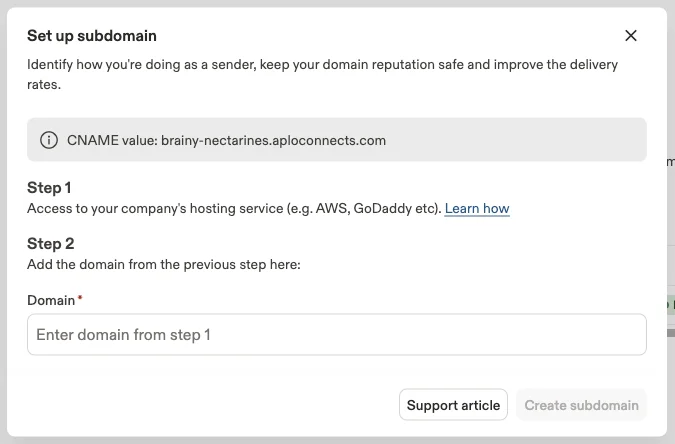
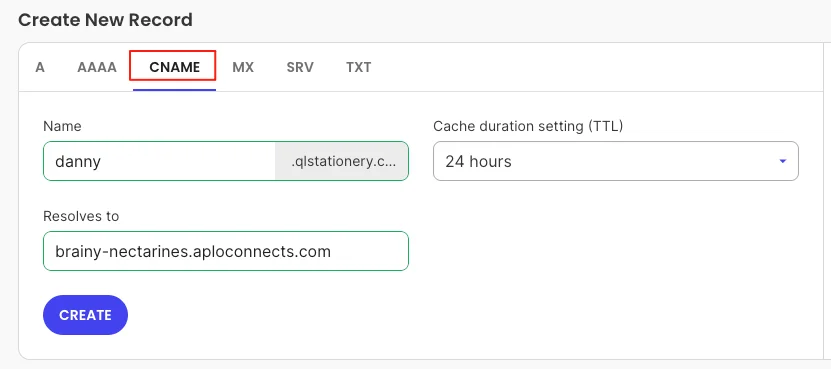
Open your DNS management and add a CNAME record. For the name, avoid spaces, punctuation, and spam-trigger words like tracking or sales, so I used my own name, danny. In Resolves to, paste the CNAME value Apollo gave you.
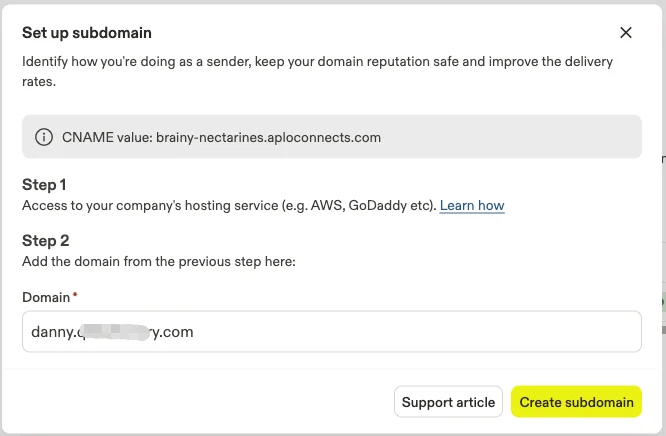
Then enter the subdomain you created back into Apollo and click Create Subdomain.
The status shows In progress and can take up to 24 hours. Let it run.
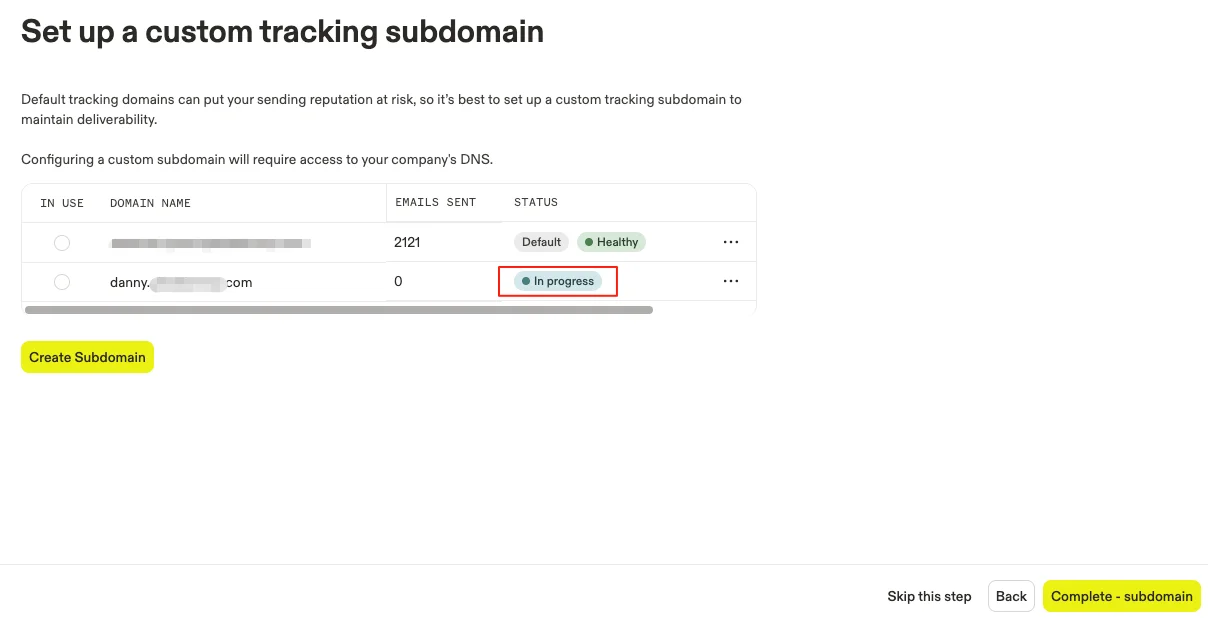
When the status turns Healthy, the subdomain is live. Check the box and click Complete Subdomain.
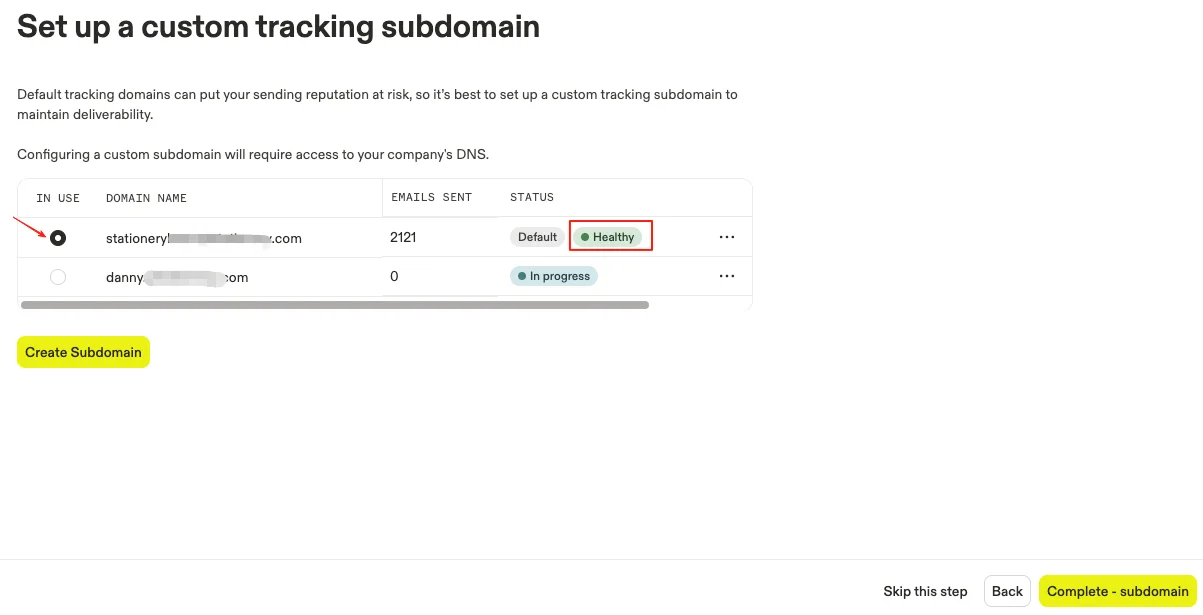
At this point Apollo can send mail normally. One more step: verify the domain to further reduce spam-folder risk.
Domain authentication
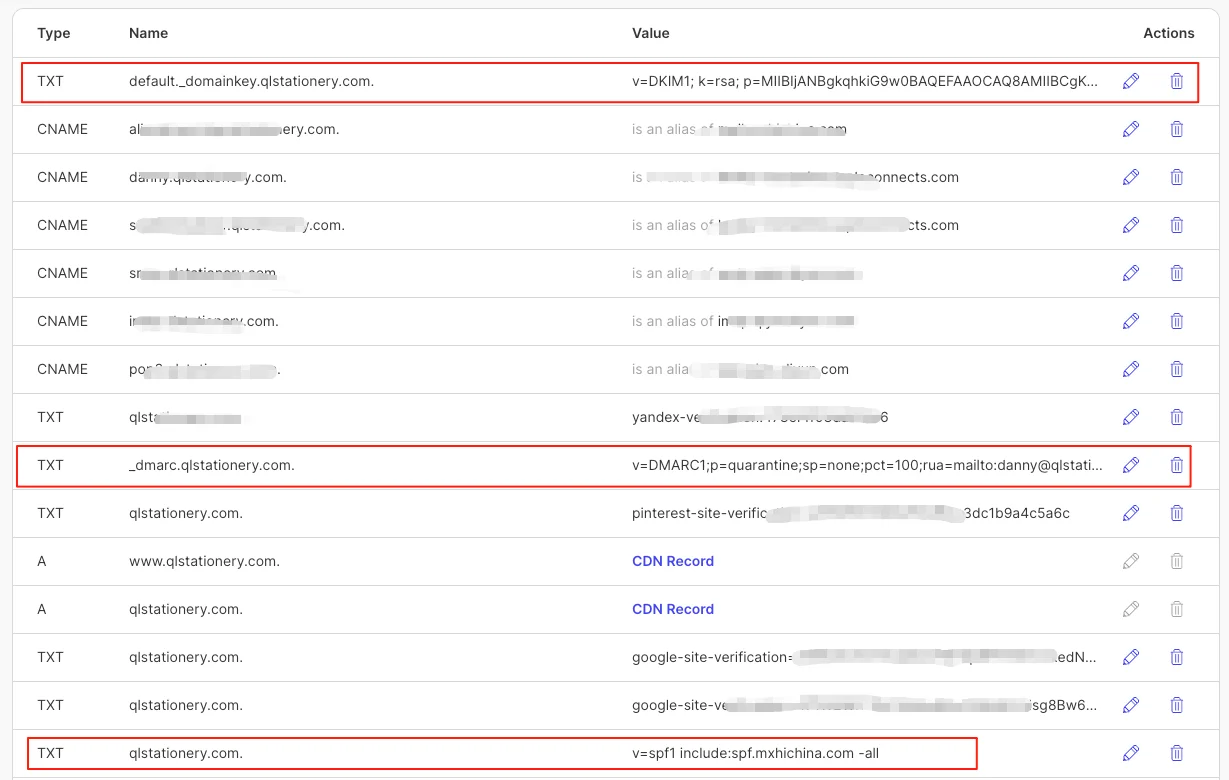
Verify three DNS records: SPF, DMARC, and DKIM. Get SPF and DKIM from your email provider; for DMARC use the value Apollo provides, replacing [email protected] with your linked mailbox.
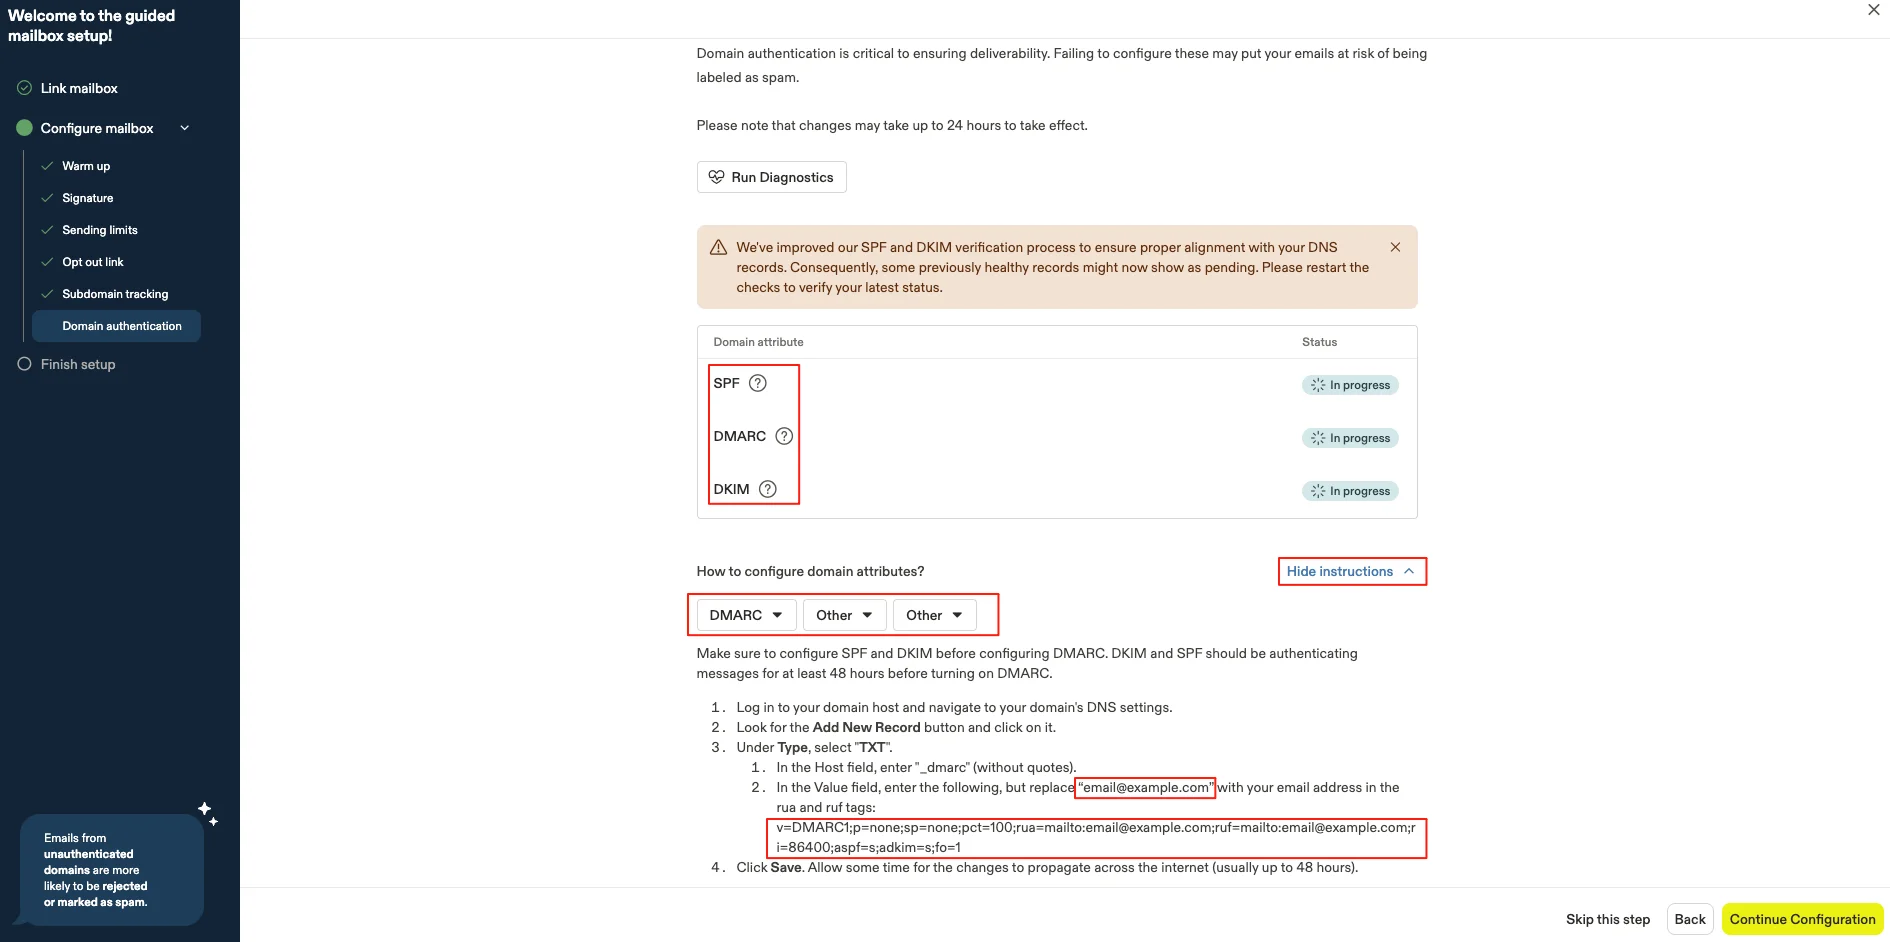
Here are the three TXT records in the DNS panel.
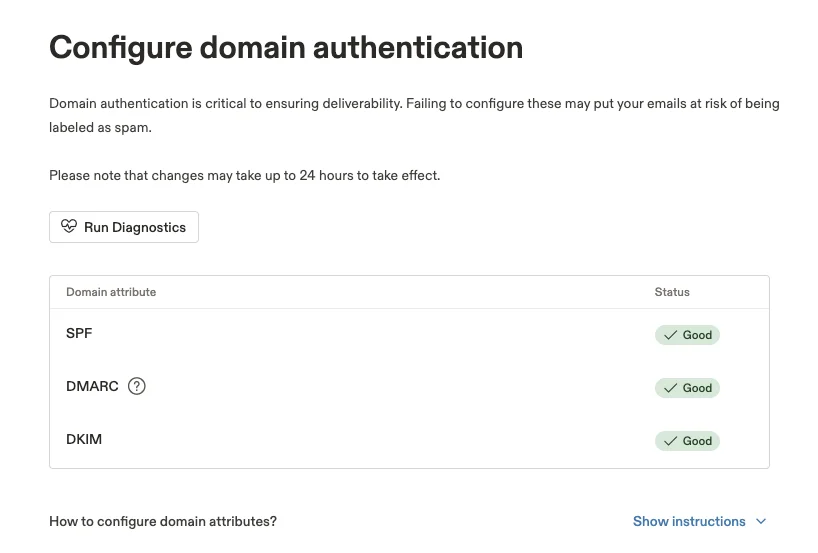
After all three are added, click Run diagnostics and wait. This step doesn’t block sending, but it lowers the spam-folder odds.
Find target prospects
With the sending side configured, the next question is: who do you send to?
Filter criteria
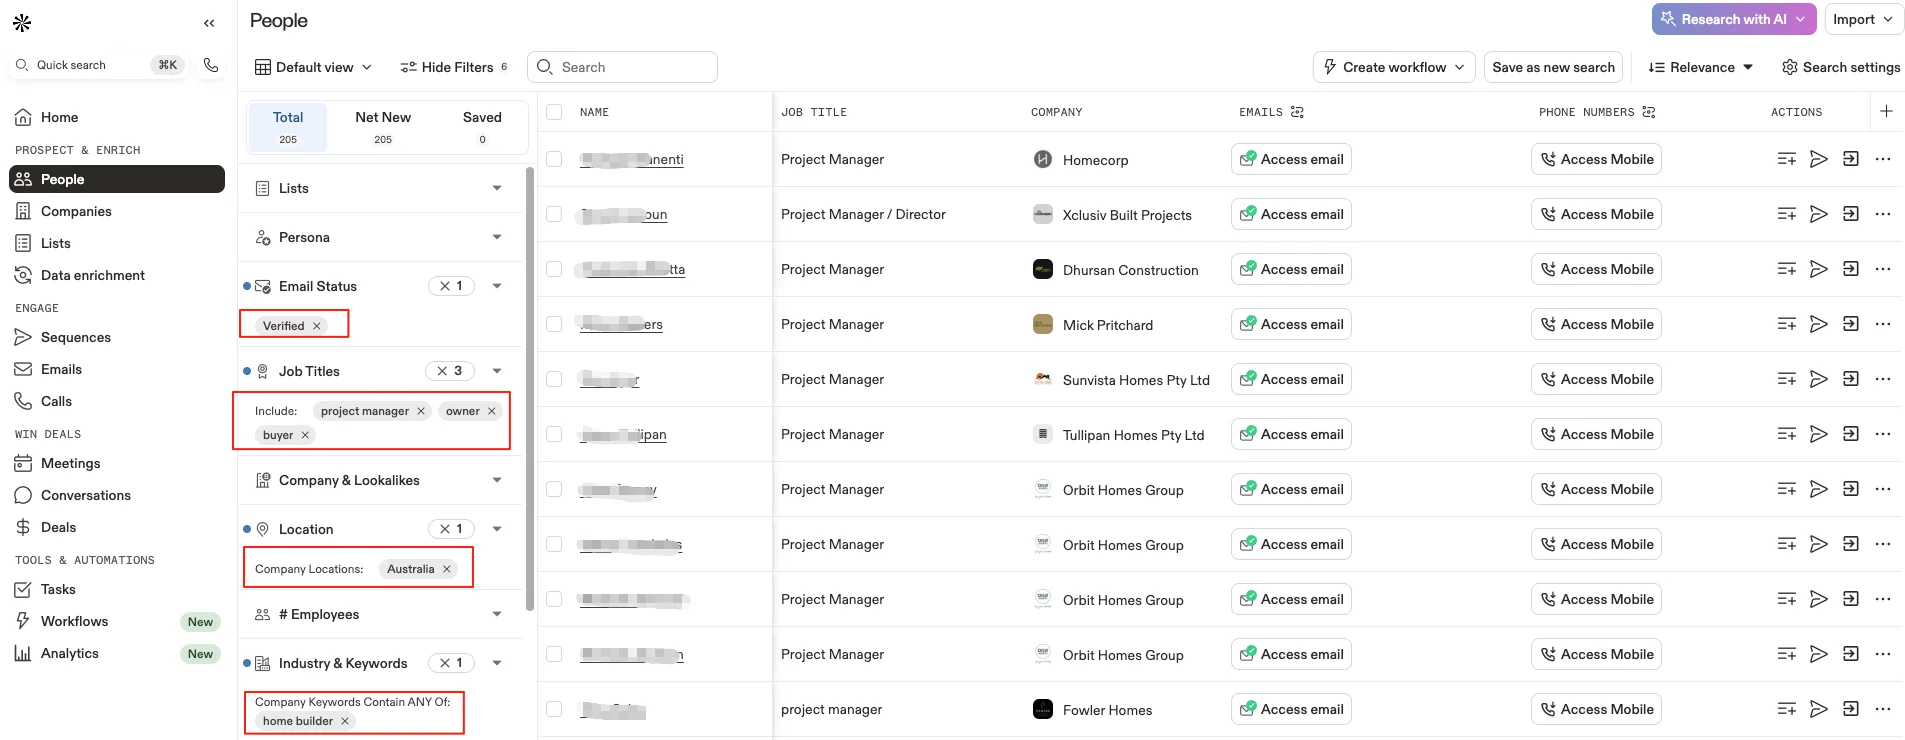
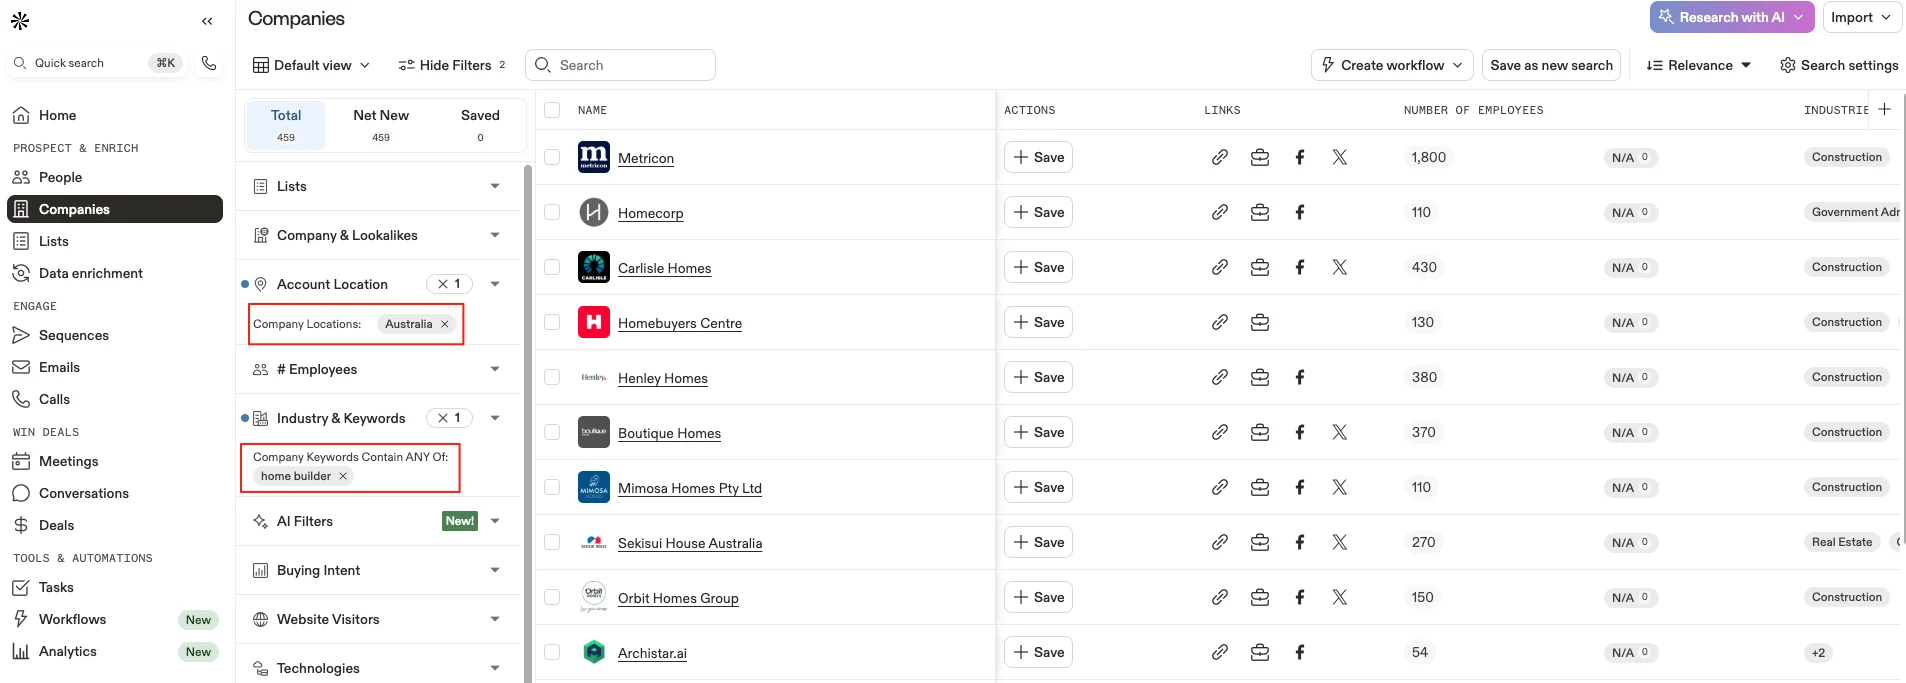
Apollo’s core strength is filtering target recipients by criteria: industry, job title, location, and company keywords, in any combination. In the example below, I was sourcing for an Australian home-building services company, looking for local home builders. The filters looked like this:
- Email Status: Verified, which only selects verified emails. That cuts bounces and protects sender reputation, because high failure and bounce rates hurt it
- Job Titles: Project manager, owner, buyer, adjusted to your buyer persona
- Location: Australia
- Industry and Keywords: Home builder. Without this, you get every construction firm in Australia, including commercial builders that aren’t your targets
Searching People with these filters:
Searching Company the same way:
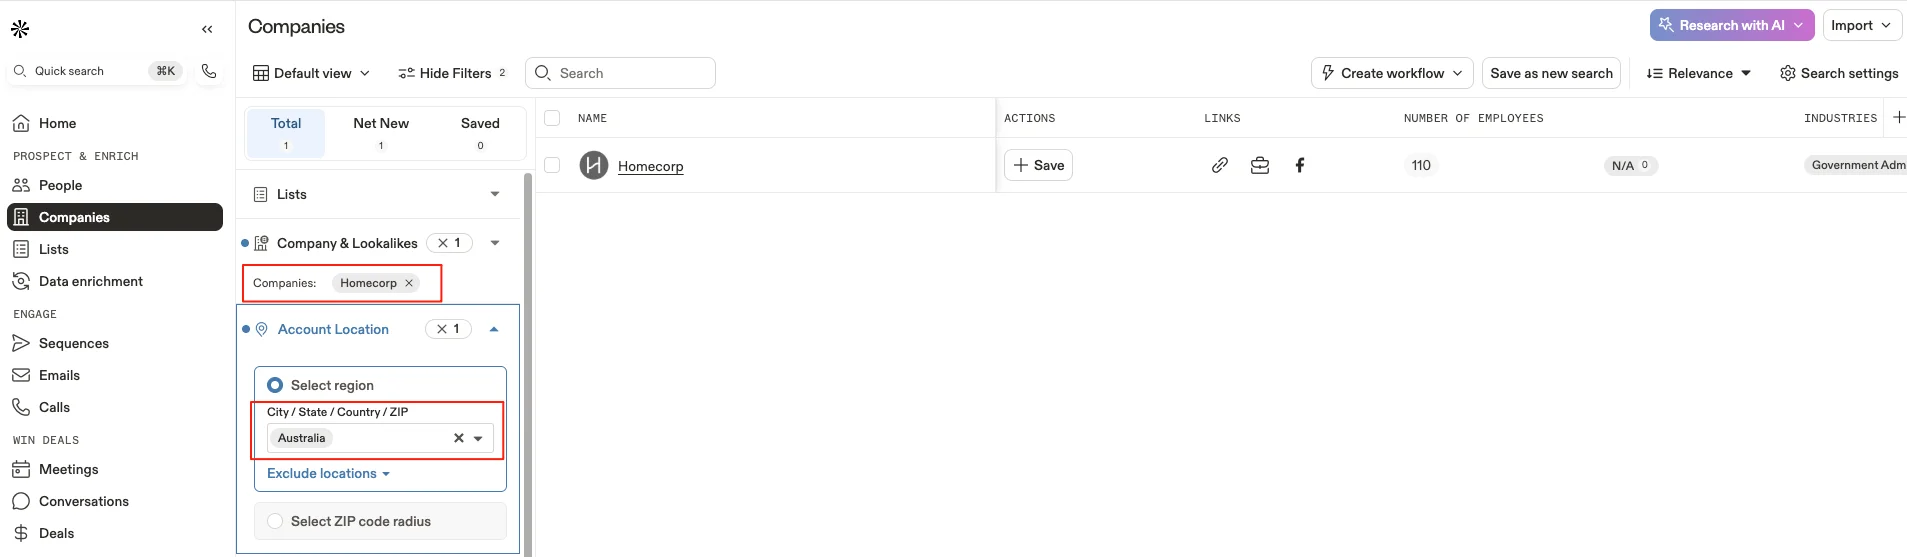
You can also search by company name directly:
Add contacts to a list
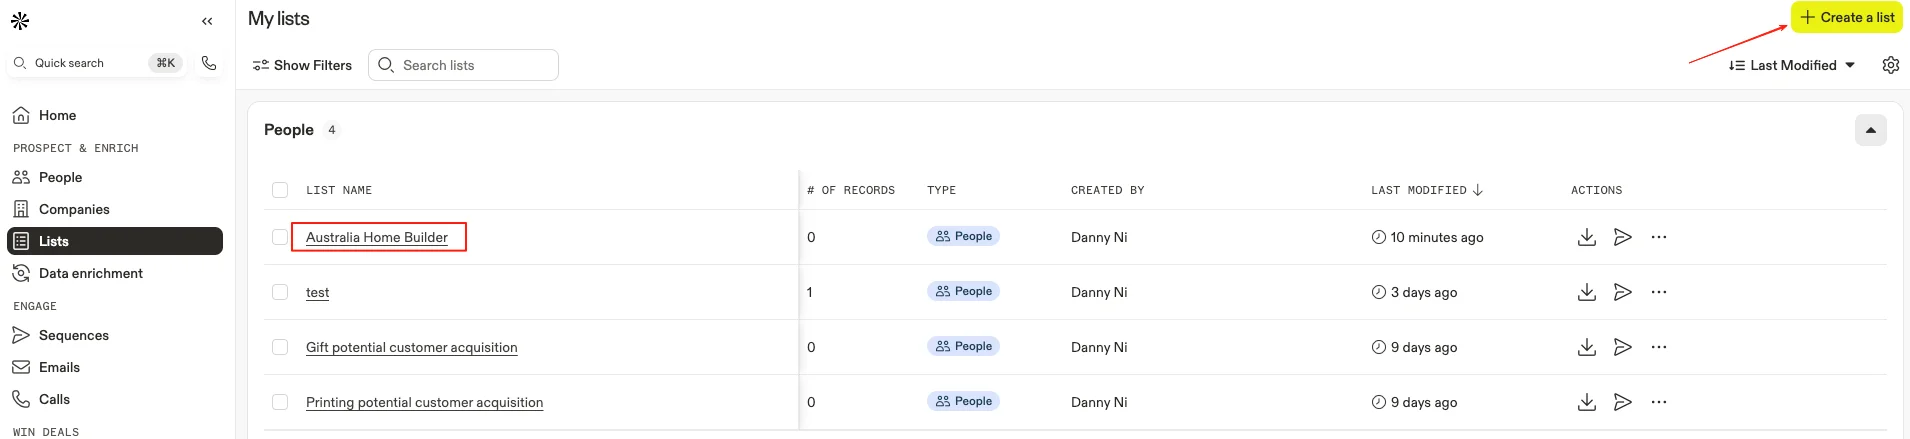
Once you find a target mailbox, click Access email to get the address (costs 1 credit), then click the plus icon on the right to add the contact to a pre-created list. Lists group contacts by use case; mine was called Australia home builder.

Build the automated email workflow
The list is ready. Next, put those contacts into an automated flow.
Create a sequence
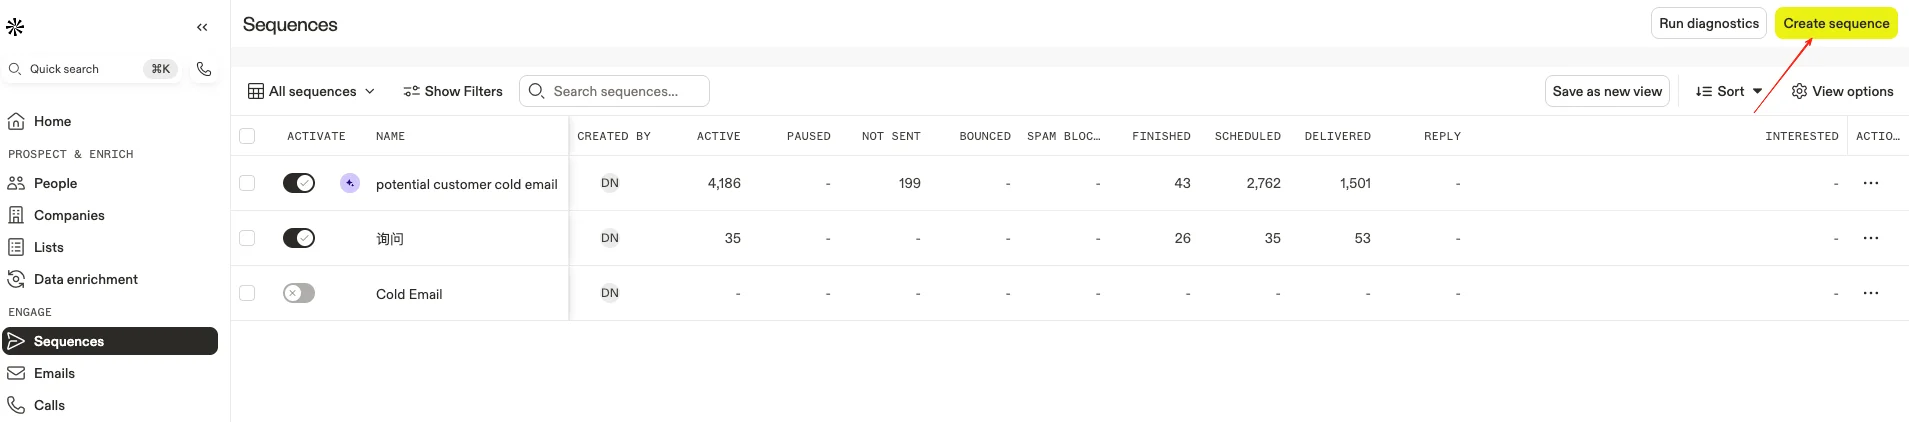
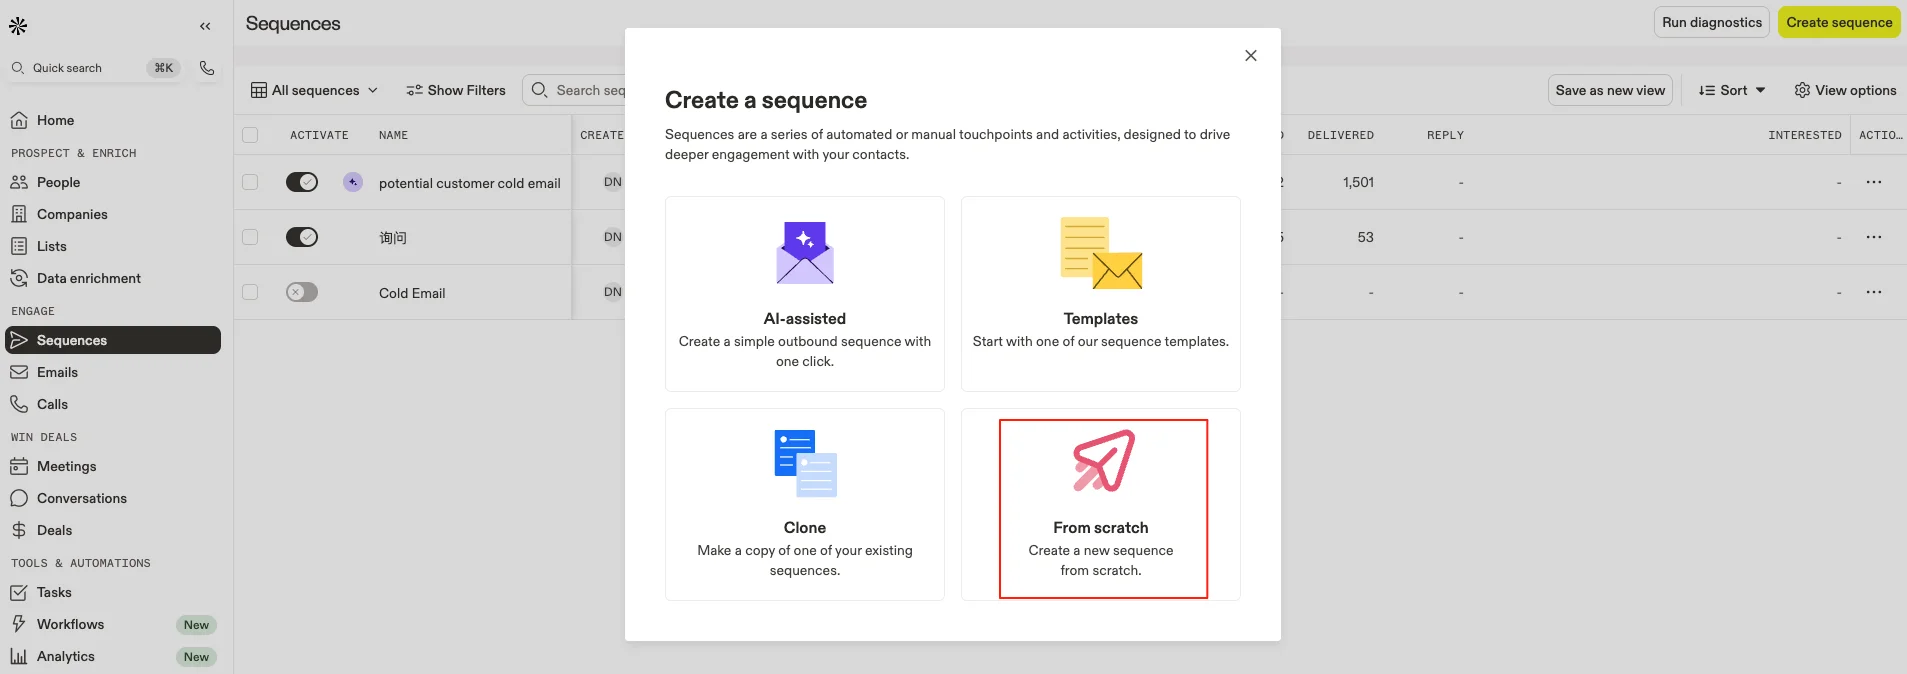
Go to Sequences and click the yellow Create Sequence button in the top right. In the dialog, pick Scratch to start from blank.
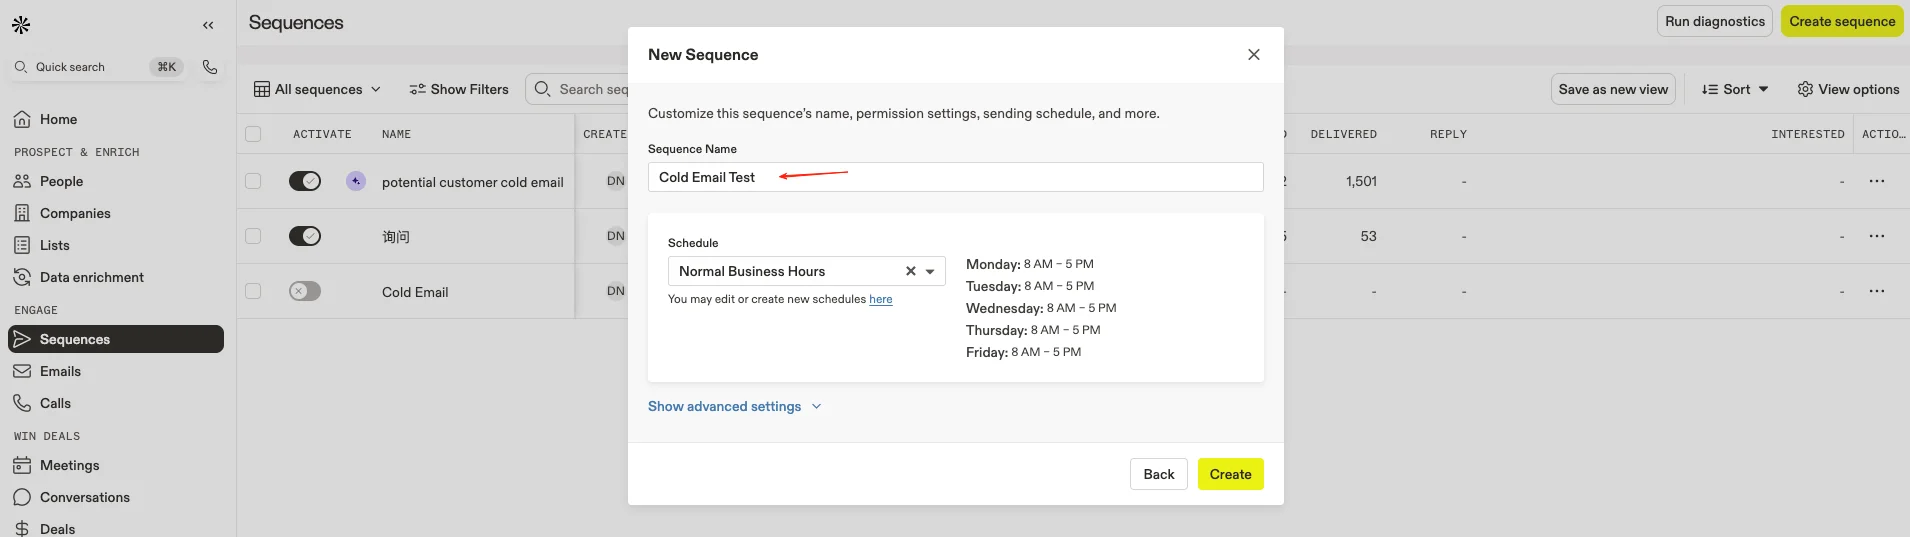
Name the sequence. Keep Schedule at the default normal business hours so you don’t reach people outside working days.
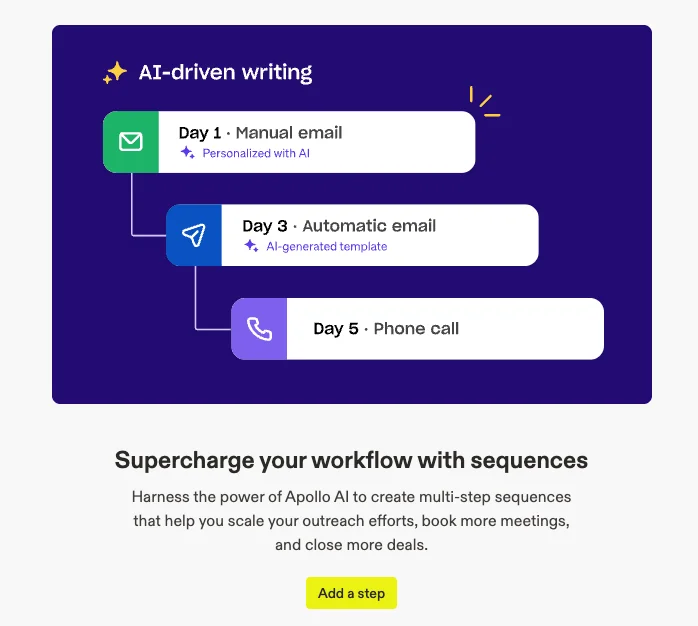
Click to add a step.
Design email and LinkedIn steps
Once the step types appear, decide one thing first: should the first email be Automatic or Manual?
For pure cold email, where every message is the same, start with automatic emails all the way. For warm outreach, say people you’ve already talked to but never closed, write the first email manually and mention what you discussed or where you met, then set the second and third as automatic emails.
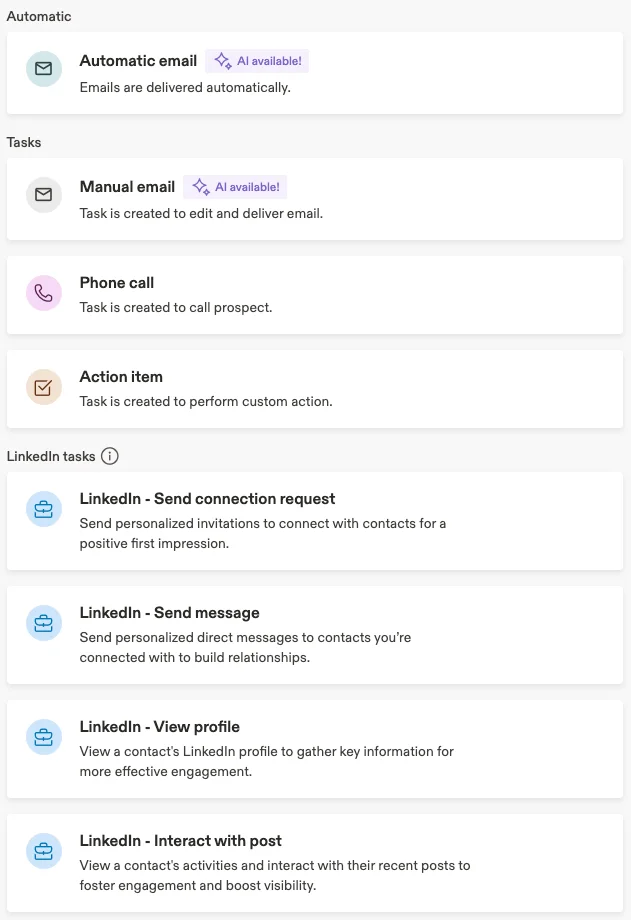
For this example, choose Automatic email and click Continue.
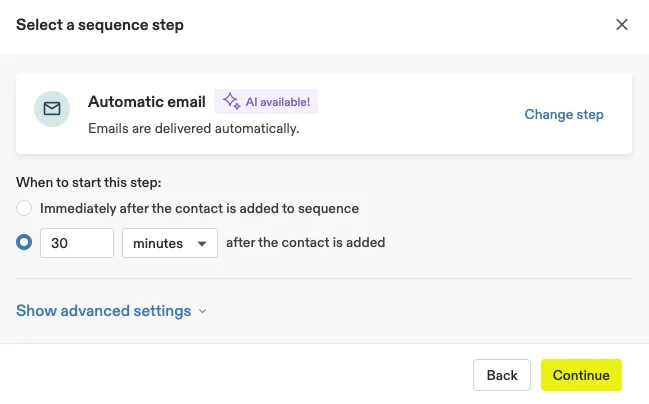
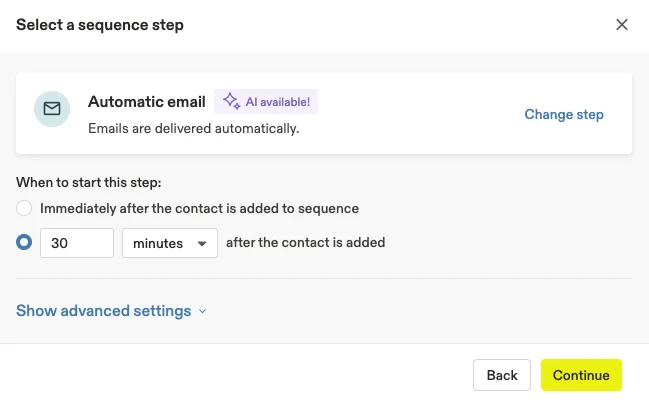
The template editor shows the email content on the left. Write the subject, add a first name dynamic field at the start so the mail carries the recipient’s name, and pick more dynamic content from the {} menu. Check include signature to append your signature automatically, preview on the right, and click Save.
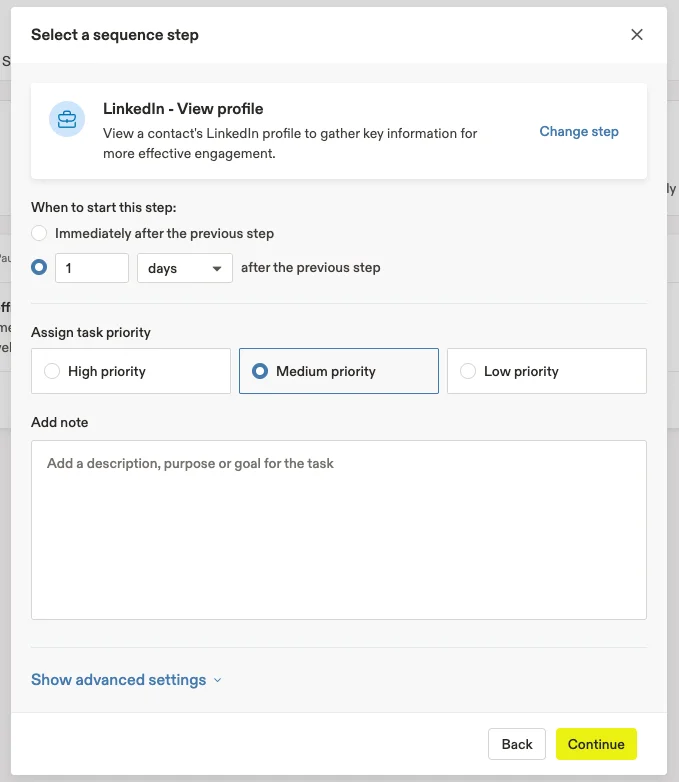
Add another step. Rather than sending the second email right away, add a LinkedIn view profile step. LinkedIn tells people who viewed their page, so a visit one day after the first email builds recognition before the follow-up.
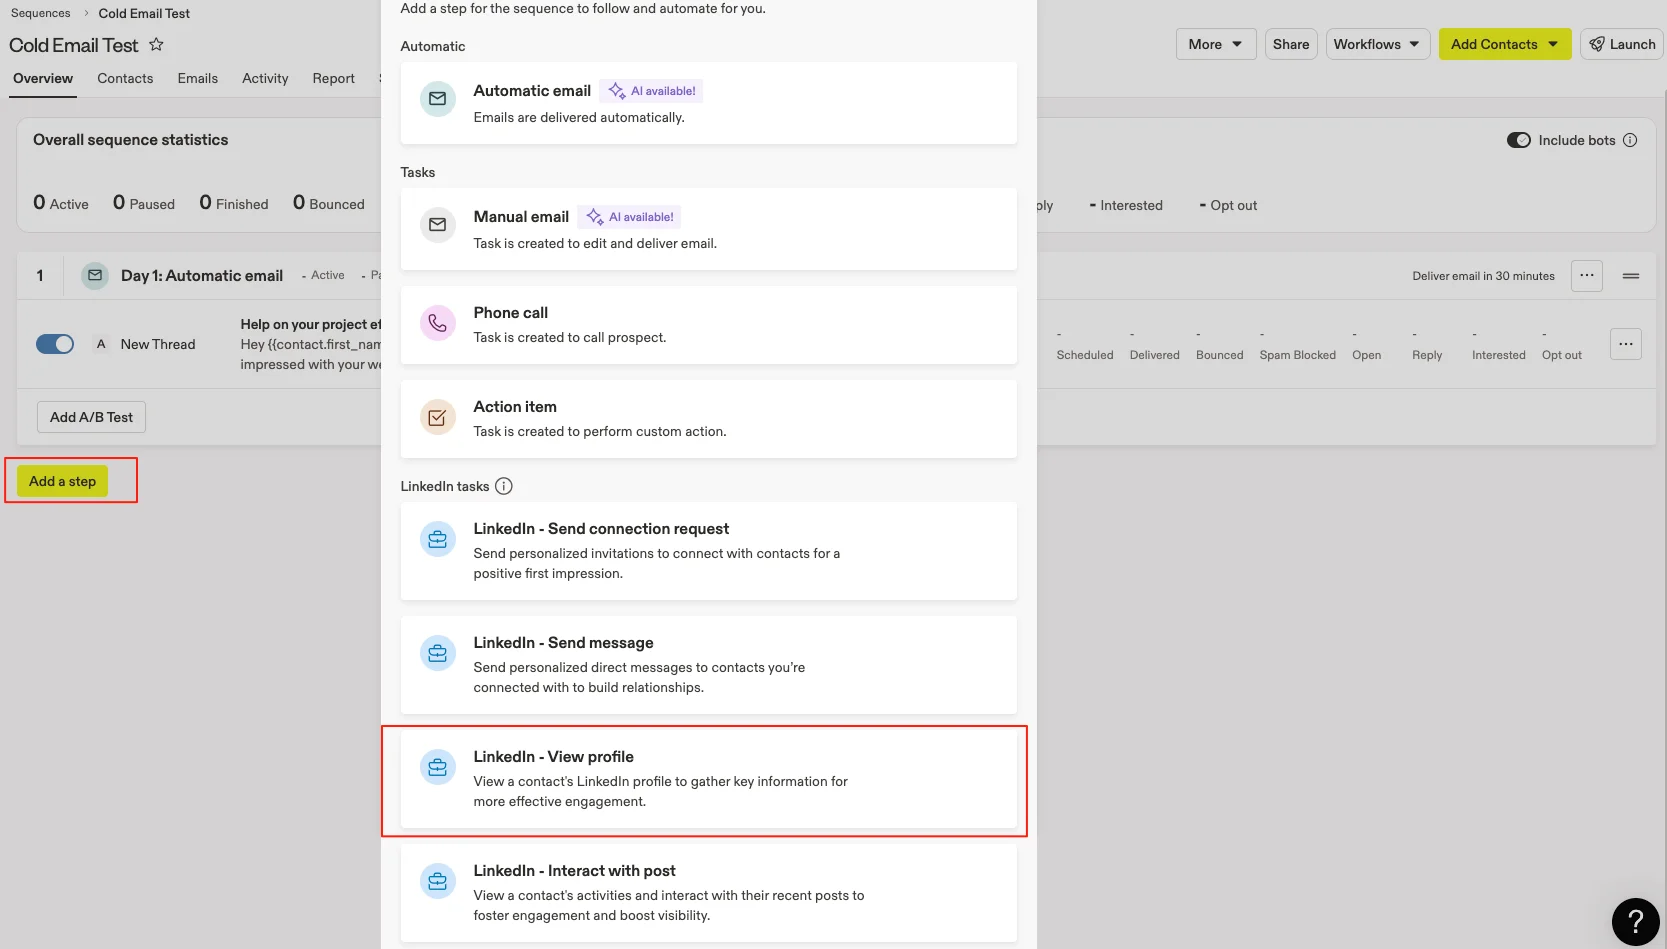
This step isn’t executed by Apollo automatically. It creates a task reminding you to visit the contact’s LinkedIn page.
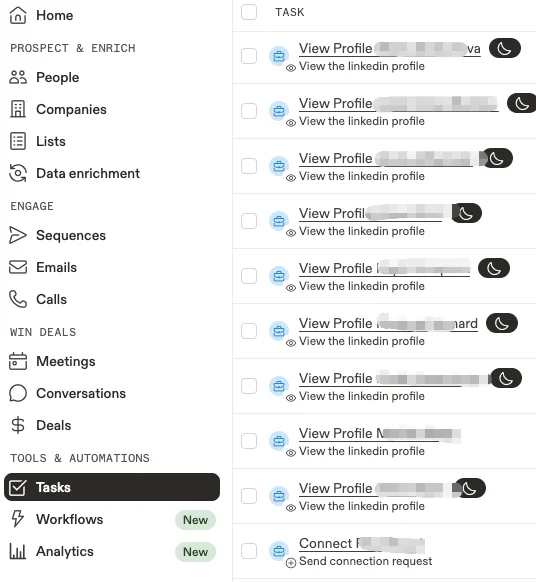
On the scheduled day, Tasks shows all pending view-profile tasks.
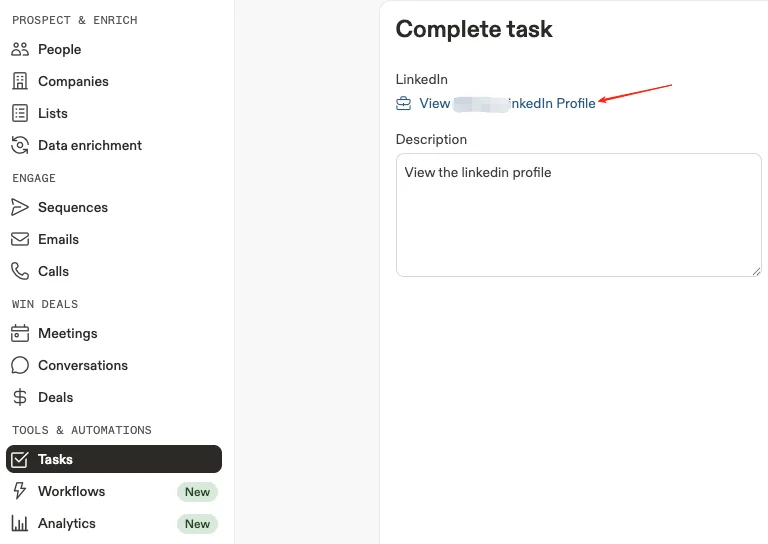
Open a task to see details and a direct link to the contact’s LinkedIn page. This is one of Apollo’s strengths: much of its data comes from LinkedIn, so it hands you the exact profile URL.
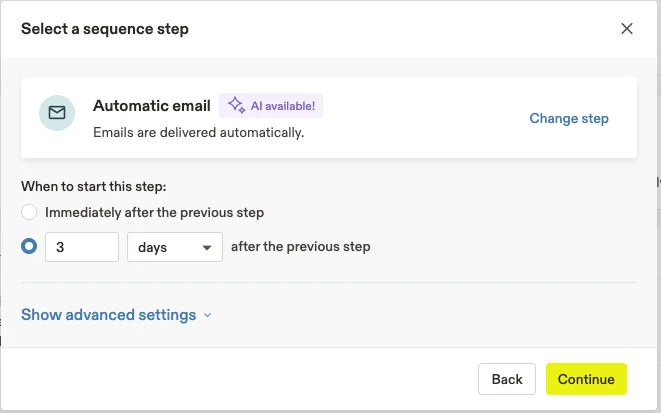
Then add the second automatic email, scheduled for, say, 3 days after the previous step.
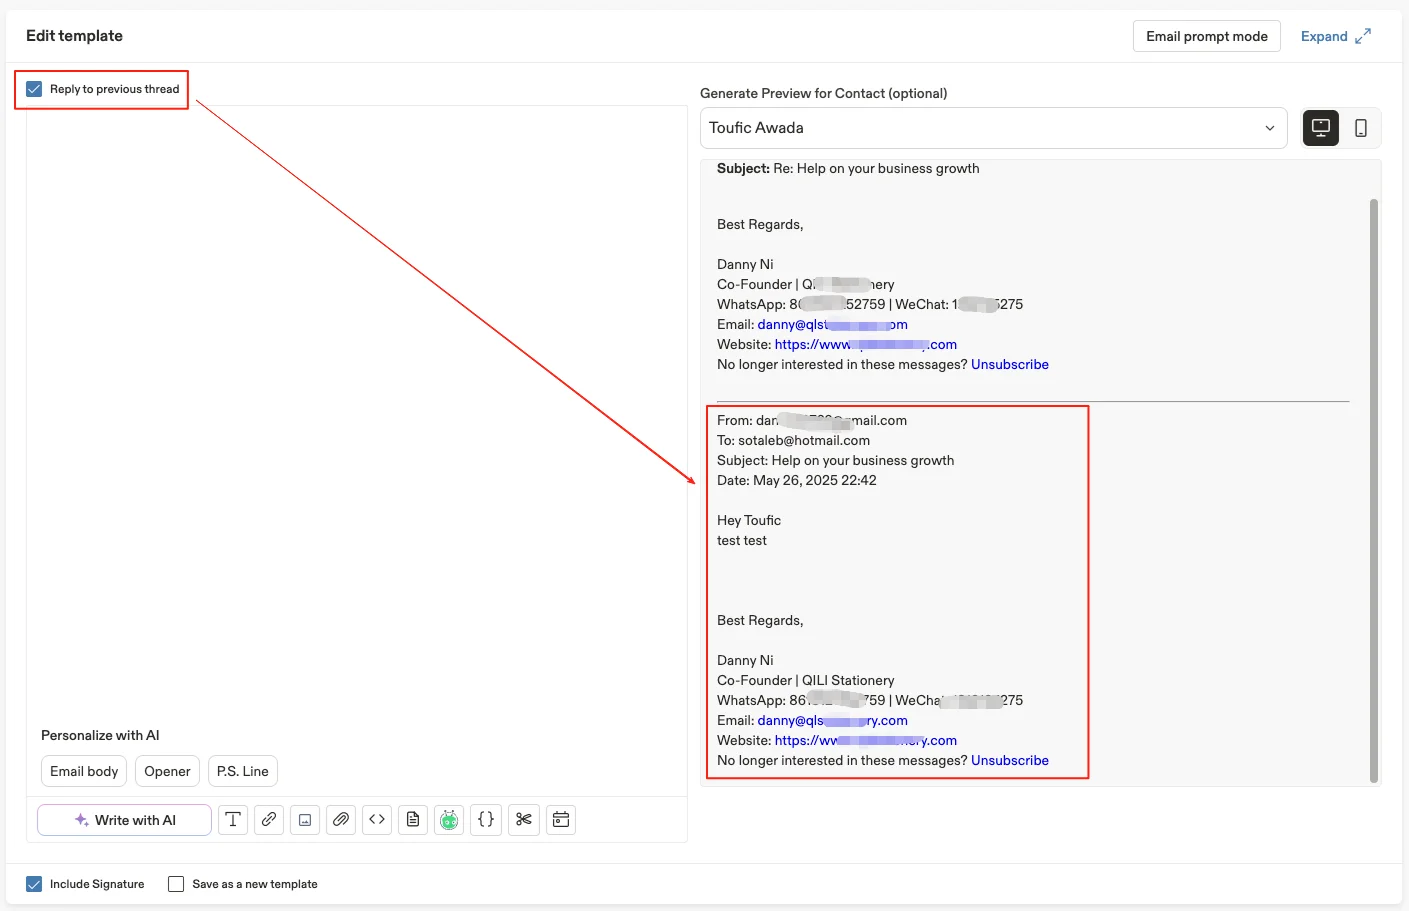
From the second email on, a small tip: include the first email’s content as reference by checking Reply to previous thread.
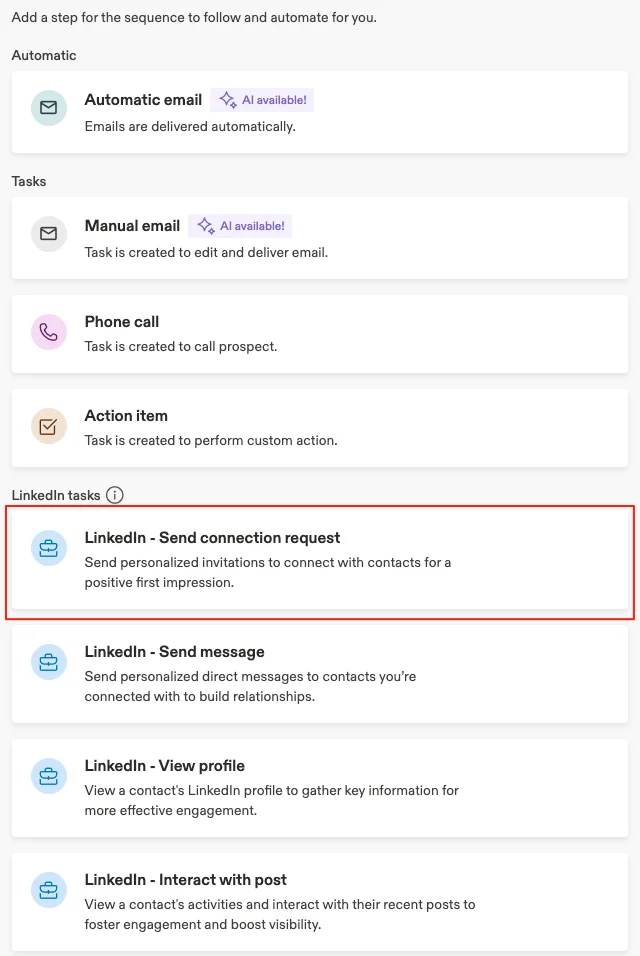
Add another LinkedIn task, like sending a connection invitation. After two emails and a profile visit, the recipient already knows your background and intent, so the invitation won’t feel abrupt.
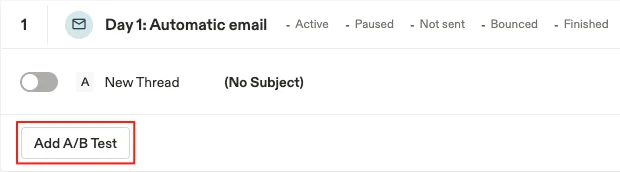
Below that you can add a third email with the same steps. Each email step supports multiple versions for A/B testing; keep the template that performs best.
The result is a 5-step cold email + LinkedIn outreach workflow:
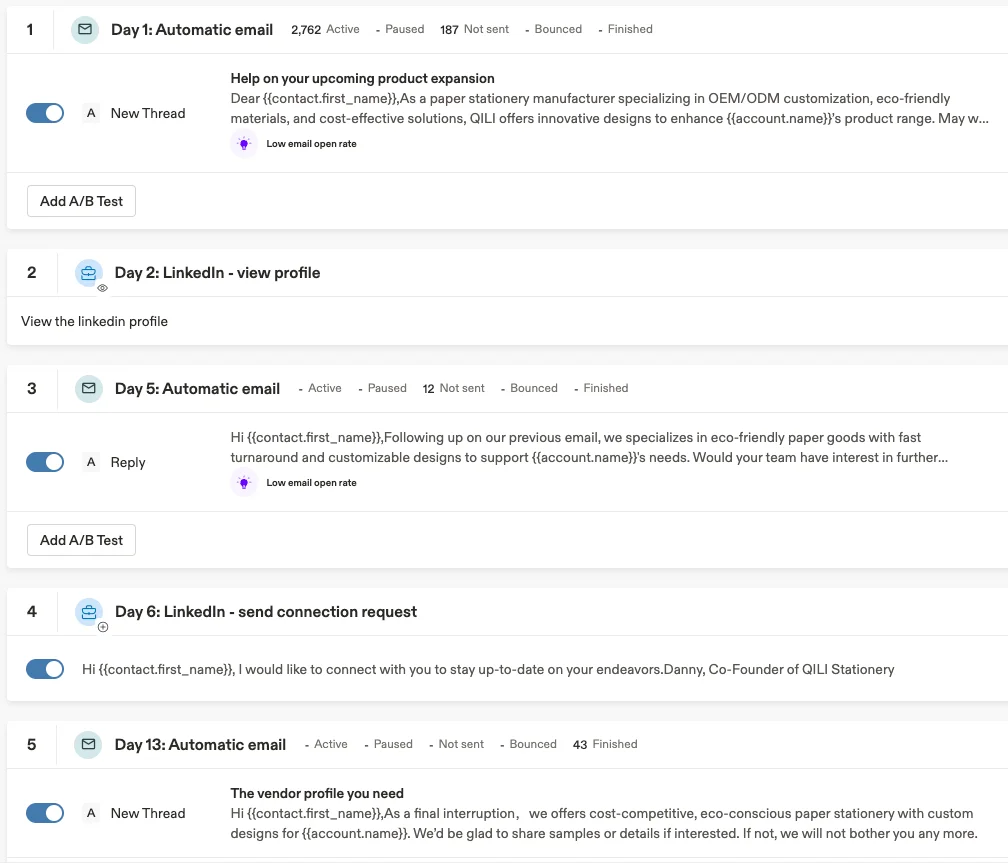
The logic of this flow:
- The first email goes out, letting the prospect know your intent
- You visit the prospect’s LinkedIn profile to build recognition
- The second email goes out, when they may already remember you
- A LinkedIn connection request follows, with a much higher acceptance rate than a totally cold one
- The third email closes the outreach with a final attempt
As long as the prospect doesn’t reply, the whole flow runs to the end; the moment they reply, it stops automatically, because they’ve moved from cold prospect to active lead. There’s no one-size-fits-all workflow; adjust steps and timing to your industry and audience.
Launch: connect the list to the sequence
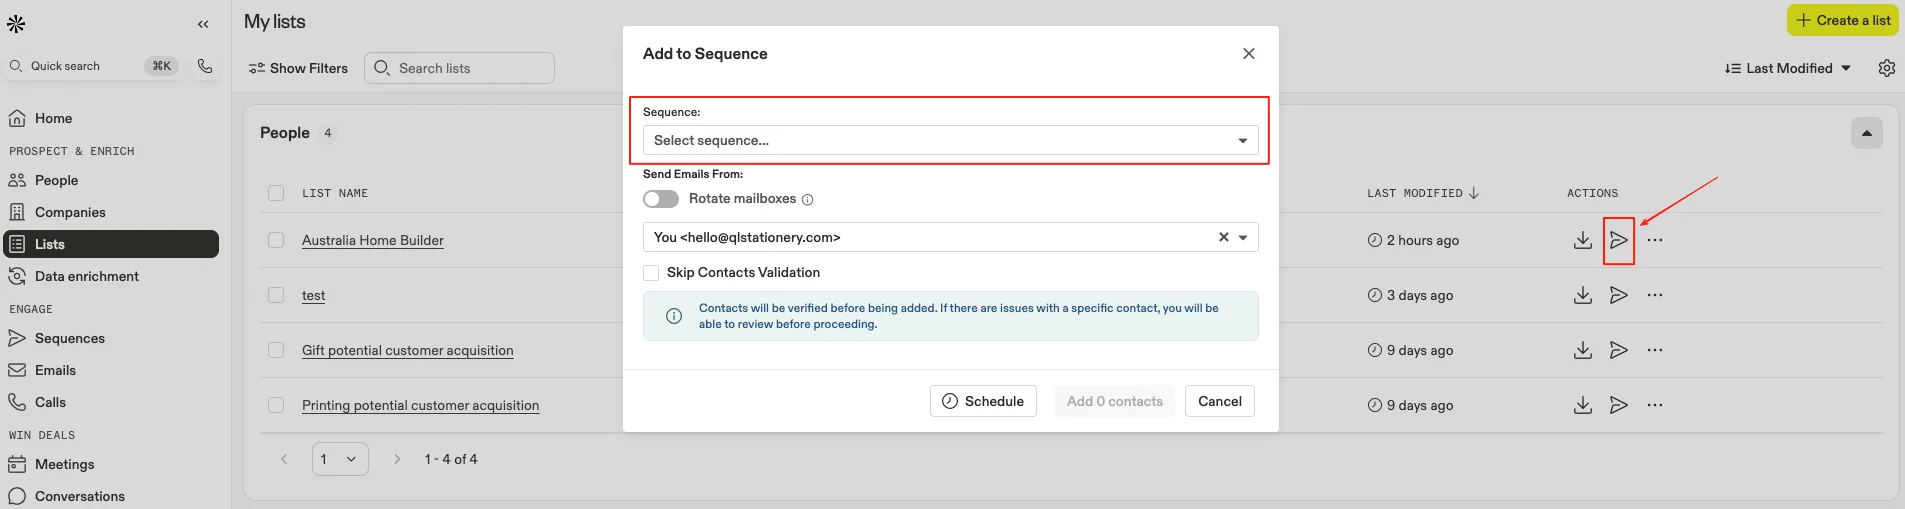
The sequence is built. The last step is connecting the list so it runs on its own. Go back to the list you created earlier and add it to the sequence; the system takes it from there.
Apollo does more than send automated mail. Lead mining, LinkedIn tasks, dialing, CRM sync, and contact scoring cover most of the sales funnel. It’s worth the setup time: start by signing up for an account.
every Thursday.
Hosting reviews, builder comparisons, performance tips, and plugin picks — curated weekly for WordPress site owners and builders.